A broken timing belt on a Lada Largus can cause costly engine repairs due to bending of the valves, which rest against the pistons. Of course, it is under no circumstances worth bringing the equipment to such a state; to do this, you need to regularly service the engine and replace components that have exhausted their service life. The manufacturer usually sets a service life of at least 120,000 km, but this does not mean that all this time you can not look under the hood of your car.
Frequency of checking and replacing the timing belt on them
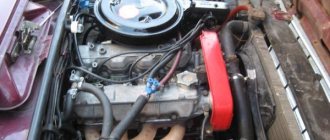
For the Lada Largus there are 3 power plants, one of which is a 16-valve (“Renovsky” K4M unit) and two with 8 valves (VAZ-11189 and K7M from Renault).
All these power plants have already proven themselves well in terms of operation (reliable and unpretentious), but there is one unpleasant moment - they are all, as people say, “plug-in”.
That is, if the timing drive breaks, the pistons collide with the valves. And this already leads to severe damage to the power plant and the need for quite serious and expensive repairs.
To prevent this from happening, it is necessary to promptly check the condition of the drive belt and its tension, as well as after a certain period of operation of the power plant.
It is recommended to check the drive element every 15 thousand km, as well as when replacing spark plugs (it’s simply easier to turn the crankshaft without spark plugs, which needs to be done when assessing the condition of the drive).
As for the frequency of replacement, it depends on the power plant used.
Thus, for Renault engines (K4M and K7M), it is recommended to replace the timing belt every 120 thousand km. But for a VAZ engine, the drive should be changed every 75 thousand km.
But we note that the indicated frequency is recommended by motor manufacturers and this service life is the limit for the drive element.
Therefore, the replacement should be carried out a little earlier (for Renovsky installations it is 80 thousand km, and for VAZ it is 60 thousand km).
Factory replacement schedule
According to the service book issued by AvtoVAZ, the timing belt should be changed every 50,000 km. In this case, adjustments should be made every 0 km.
But since the Largus is equipped with a Renault engine, these data do not coincide with those written in the Renault service manual.
So, who to believe in this case? It is worth referring to the factory manual, which is published in French for the K4M engine that is installed on Largus.
A similar K4m engine is found in Renault Megane and Renault Logan
According to this document, the timing belt must be changed every 60 thousand km, regardless of condition. The adjustment is carried out, it is worth paying attention - no later than 15,000 km. That is, it can be carried out earlier.
When is it better to change according to the experience of the owners
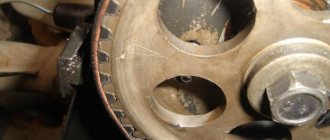
The valve rockers came off because the timing belt broke.
Having considered the information and experience of many owners of this car, we can say that there are quite a lot of cases when the belt fails ahead of schedule. This is due, first of all, to the quality of the spare part. So, a Bosch timing belt will last as long as the original one, or maybe even better.
Of course, it is worth noting that, although we do not always expect that we are buying a high-quality spare part, it lives up to expectations.
8 exhaust and 2 intake valves “bye-bye” as a result of a broken timing belt
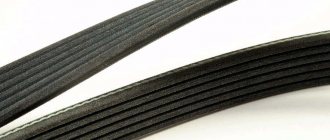
So, a timing belt can fail at 30,000 km, and it’s good if this is discovered during adjustment, and not on the road, because then the owner will incur a large sum of money for repairs. Therefore, it is recommended to monitor the condition of the part regularly, or better yet, every 5,000 km. If cracks occur, replace the belt.
Possibilities for improvement
The only real modification, according to the experience of many motorists, is the installation of a sports-type timing belt and pulley. They have increased strength and resource. They are produced mainly by analogues from France, such as “FRW” and “FranceSport”.
On the domestic spare parts market, these parts are very difficult to obtain, but possible. So, having installed a sports timing belt, you can forget about it for the next 80-90 thousand km. But this does not cancel the adjustments.
Signs of need for replacement
It should be noted that the service life of the drive also depends on the quality of its manufacture, therefore its condition should be checked periodically.
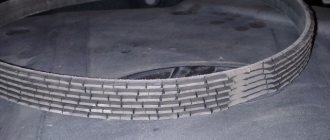
If you notice on the belt:
- Clear signs of wear;
- Cracks;
- Heavy wear;
- Undercuts;
- Delamination;
- Protruding cord threads.
This all indicates that the belt is already damaged and requires urgent replacement, since its residual life is unknown and it can break at any time.
Also, if traces of lubricant are visible on the belt, then it should also be changed, since oil negatively affects the rubber, which leads to delamination.
A timing drive failure on the Lada Largus would not be so terrible if, as a result, the pistons did not collide with the valves.
Moreover, this blow is strong, because of which the valves simply bend, and quite deep marks remain on the pistons.
As a result, to restore the performance of the power plant, it will be necessary to change the CPG and valves, as well as repair the cylinder head.
To avoid this, it is better to check the condition of the belt in a timely manner and replace it at the slightest signs of wear or damage. Financially, it will be much cheaper than repairing the engine.
Which belt should you choose?
When purchasing a belt, it is better to give preference to original components. Finding them on sale is not difficult. And in order to definitely protect yourself from unexpected stops, it is better to also purchase the roller itself as a set. If we talk about analogues, then it is worth choosing products from well-known companies, for example, Bosch or Dayco. As practice shows, they are not inferior in quality to AvtoVAZ products and are also capable of operating for at least 100,000 km without replacement. The timing belt is not one of the problem areas of the Lada Largus, and nevertheless, monitoring its condition is the responsibility of the car owner. As we have already written, the manufacturer recommends replacing it once every 120,000 km, but depending on your driving style and other seemingly insignificant factors, this period may come earlier. To prevent the car from getting stuck on the road and then requiring major engine repairs, it is better to check the condition of the belt every 15 thousand kilometers. This will save you from serious expenses and wasted time.
Design features of engines
The complexity of replacement work largely depends on the design features of the power plant.
The 16-valve engine is considered more modern and has better technical performance, but it is more difficult to maintain and repair.
This is especially true for the gas distribution mechanism, the design of which includes two camshafts. And they are both installed in the block head, which significantly increases the complexity of the design.
Because of this, maintenance work is also complicated, since during this work it is necessary to correctly set the position of the shafts.
In 8-valve engines, replacing the drive is much simpler, since there is only one camshaft, which means it is easier to do the necessary installation work.
In general, replacing the timing belt on a Lada Largus with any type of engine is not a very difficult operation, and even a novice car enthusiast can do it.
Motor line of the Largus model
Over the years, 8 and 16 valve French and domestic engines were installed on the Lada heel. Although today engineers prefer to use only Russian units, there are still many Largus with Renault engines driving on the country's roads. So, during the entire production period, four types of internal combustion engines were used in the model:
- 8-valve Renault-Nissan K7M with 84 hp. With. A heel with such a motor could be ordered in “standard” and “norm” versions.
- 16-valve Renault-Nissan K4M with a total power of 105 hp. With. Installed in the “Luxury” package.
- The 8-valve VAZ 11189 replaced the K7M in 2015.
- 16-valve VAZ 21129. For the first time, it began to be installed instead of the Renault K4M on models produced from 2022.
Each of these engine types has its own characteristics that affect the belt replacement process. We will dwell on these nuances in detail below, but for now we will only note that it will be a little easier for owners of the 8-valve version to complete the necessary work.
Tool
To carry out work on a 16-valve engine you will need:
- A set of wrenches (open-end and ring spanners of the most common sizes - 10, 13, 14, 16, 18);
- A set of heads with rods and a knob (same sizes);
- Torx type bits;
- Set of hexagons;
- Screwdrivers (flat, Phillips);
- Long power flathead screwdriver or pry bar;
- Wooden beam;
- Rags.
To perform the operation, you should stock up on a new belt, as well as tension and support (parasitic) rollers assemblies, since these elements also need to be replaced.
Replacing the timing belt on the K4M engine
Next, let's look at how to replace the timing belt on a Lada Largus equipped with a 16-valve K4M power unit.
Let us immediately note that there are two ways to carry out the operation - one of them is “official”, and the second is “folk”.
If you plan to perform the replacement using the “official” method, then you will need additional devices - fixing plates and pins.
You will also need new plugs installed at the end of the cylinder head and covering the camshaft end switches.
AVTOVAZ recommendations
It is immediately worth noting that on the official LADA website in the maintenance calculator (it is only up to 90 thousand km) nothing is said about replacing the timing belt and rollers. However, information about this is in the service book of some LADA models.
Lada Priora:
No information available.
- The 2015 service book indicated that for the 8-valve engine, replacement is provided at a mileage of 75,000 km.
- The 2022 service book states that the timing belt, tensioner and support roller (if equipped) should be replaced at a mileage of 180 thousand km.
- From June 2022, the timing belt must be replaced at 90,000 km.
- Engine Renault K4M (1.6 16V). The timing belt and rollers should be replaced at 120 thousand km or 6 years.
- Engine VAZ 11189 (1.6 8V). The timing belt and rollers should be replaced at 160 thousand km or 8 years. It is noteworthy that the Lada Vesta service book (until 2022) indicated that on the VAZ-11189 engine, replacement is provided at a mileage of 180,000 km (until 06.2021) or 90,000 km (from 06.2021).
- Engine VAZ-21129 (1.6l., 16kl.). The timing belt along with the rollers should be replaced at a mileage of 180,000 km (until 06/2021) or 90,000 km (from 06/2021).
- Engine VAZ-21179 (1.8l., 16kl.). The timing belt along with the rollers should be replaced at a mileage of 180,000 km (until 06/2021) or 90,000 km (from 06/2021).
- AVTOVAZ periodically changes the regulations for replacing timing belts and rollers.
- From June 2022, according to the regulations, the timing belt must be replaced at a mileage of 90,000 km.
Preparatory stage
The initial stage of work is the same for both methods and boils down to providing access to the drive belt.
For this:
- We place the car on the inspection hole, immobilize and de-energize the on-board network by removing the “negative” terminal from the battery;
- For the convenience of work, remove the right front wheel from the car (in the direction of travel), dismantle the protective elements of the engine compartment - the lower one and the mudguard;
- Remove the accessory drive belt. To do this, using a spanner wrench, press the belt tension roller, remove the drive element, and then completely remove it from the equipment pulleys;
- We unscrew the spark plugs and cover their mounting holes with a rag;
- We remove the load from the upper right support of the power plant. To do this, install a pry bar between the subframe and the pan, squeeze the motor up a little and fix it in this position with a block;
- Let's move on to the engine compartment. There, first we pull out the fuel lines from the holders located on the support and take them to the side;
- We disconnect the support bracket from the top cover of the timing drive, for which we unscrew the three fastening bolts (these fasteners are different in length, so you should mark which one was located);
- We unscrew the two bolts that secure the support to the car body and remove it;
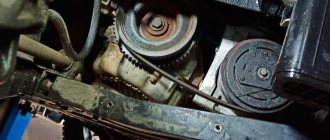
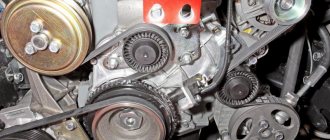
- We unscrew all the fasteners of the top drive cover (3 bolts and 2 nuts), after which we remove the cover. Please note that if you check the condition and tension of the belt, there is no need to disassemble anything further. After removing the cover, the belt will be clearly visible, so to assess its condition, all that remains is to turn the crankshaft a few turns and inspect the drive element. To adjust the tension, there is a special hatch on the bottom cover through which access to the tension roller is provided.
If the belt is replaced, then we continue to disassemble the power plant further; - We unscrew the bolt securing the auxiliary units pulley. To do this, ask an assistant to engage 5th gear in the gearbox and depress the brake pedal to block the crankshaft. If this is not enough to remove the bolt, then proceed as follows: remove the crankshaft position sensor from the flywheel housing.
We insert the pry bar into the resulting hole so that it fits between the teeth of the flywheel ring (starter ring).
The teeth that are used by the crankshaft position sensor (they are larger) must not be used as a stop; they must not be damaged under any circumstances. Thus, resting the pry bar against the flywheel housing, stop the crankshaft from turning and unscrew the bolt, and then remove the pulley; - We install the pulley bolt back, but first you should put a small bushing (a piece of pipe) or a pair of larger nuts on it;
- We dismantle the bottom cover of the drive by unscrewing its 4 fasteners.
Answers (2)
The timing belt and rollers in engines of this model are replaced at 120 thousand km (after 6 years of operation). However, we recommend that you inspect the condition of the timing belt and rollers once a year, because during operation, oil or dirt may get on the belt, in which case the belt must be urgently replaced.
They write differently, who to believe, the answers vary from 120,000 in the service book to 60,000 they say at the Renault service station, I changed it at 75,664 km at the Renault service station, my removed belt was like new, no cracks or stripes anywhere, but what kind of videos? In general, reluctantly from the money spent, I changed it because... There were long routes ahead, and a new one is a new one.
Not so long ago, the Largus station wagon from the Tolyatti company Lada, which appeared on the Russian market, managed to acquire high demand, so many owners of this model are interested in the question of how and when to change the timing belt.
Replacement in the “official” way
At this point, the preparatory work is completed, and then it is necessary to correctly install the crankshaft and camshafts. In this case, the sequence of actions depends on the chosen replacement method.
If the “official” method is used, then everything is done like this:
- Remove the air supply system resonator;
- 2. We look for two plugs at the end of the head on the flywheel side that need to be removed. To do this, simply punch them in the center with a screwdriver and pull them out;
- Next we install the shafts. To do this, turn the crankshaft by the bolt as it rotates (without spark plugs this will not be difficult) until the grooves made on the ends of the camshafts become horizontal (in one line), and the position line of these grooves should be below the axis of the shafts. This will mean that TDC has been installed in cylinders 1 and 4;
- We install the prepared locking plate in the grooves to fix the shafts and prevent them from turning;
- We fix the crankshaft. To do this, we find a plug on the block, unscrew it, and in its place screw in a fixing pin (instead, you can use a regular bolt of the required diameter and length of 75 mm).
After screwing in the pin, it will rest against the cheek of the crankshaft, preventing it from turning. It is important to ensure that the pin is completely inserted into the hole until its head stops in the cylinder block; - We remove the belt. To do this, loosen the fixing nut of the tension roller (key 13), turn it counterclockwise, loosening the tension of the drive element. Then we remove the belt from the roller, then from the pump, crankshaft, camshafts;
- We change the remaining elements. Unscrew the nut securing the tension roller and remove it.
Then use a Torx head (T-50) to unscrew the support roller mounting bolt. We put a new one in place of the old supporting element and begin assembly work; - The new belt is positioned with arrows marked on it in the direction of rotation. We first put it on the crankshaft, then the pump and camshafts. Next, we start it by the support roller, the last one will be the tension roller. This roller fits into place with the belt. That is, we put the belt behind the roller, and only after that the tension element is installed on its fastening axis.
- We tension the belt.
And then everything comes back together. It is important to remember to pull out the crankshaft locking pin.
After removing the fasteners, turn the crankshaft a few turns to make sure everything is done correctly.
Next, we reinstall the drive covers, crankshaft pulley, camshaft plugs, engine mount, spark plugs, etc. After assembly work, we check the performance of the power plant.
How to install a new belt?
But the replacement of the timing belt on the Largus (16 valves) is not completed; new parts still need to be installed:
Be sure to replace the rollers, you just need to unscrew the bolts that secure them
New parts need to be put in their place. Please note that there is a small protrusion on the tension roller housing. It must be aligned with the groove on the car engine block. Carefully install the new drive belt, first it is put on the crankshaft pulley, then on the pump
And lastly, it needs to be put on the camshafts. Pay attention to the arrows that are painted on the outside of the drive belt. Adjust the tension using a special wrench.
After this, you can safely remove the clamps installed on the crankshaft and camshaft.
This completes the replacement of the timing belt. Be sure to install new plugs in the cylinder head cover instead of the old ones. Don't forget about them, otherwise oil leakage will occur.
"Folk" way
If the “folk” replacement method is chosen, then after the preparatory stage we do the following:
- We take two thin long rods and install them in the spark plug holes of cylinders 1 and 4 (an assistant must hold them strictly vertically);
- We turn the crankshaft, while looking at the (diamonds) marked on the camshaft pulleys. We rotate the crankshaft until these icons become a certain way, namely: the left pulley icon should be at the top, and the right one at the bottom;
- At the same time, the assistant should note that the pistons have become at TDC (the rods no longer rise and further rotation of the crankshaft leads to their lowering);
- To do everything correctly, you should put marks on the camshafts, marking their position, as well as on the flywheel and its crankcase;
- After applying the marks, you can remove the belt. This is done exactly as described above, but it is important to do everything carefully so as not to accidentally turn the crankshaft;
- After removing the belt, the camshafts will turn a little (due to the action of the valve springs), but this will not greatly affect the replacement process;
- After removing the belt and replacing the required elements, before installing a new drive, we check whether the crankshaft has moved. If necessary, we install it according to the applied marks;
- The belt should be put on starting from the crankshaft, then it goes over the pump. Before planting it on the camshaft pulleys, you need to install them according to the marks. To do this, an assistant, using two wrenches, turns the camshafts by the pulley bolts, overcoming the force of the springs, until the previously applied marks align. Next, the shafts are held in this position, and a belt is put on them;
- After that, the tension roller is put in place and the drive is tensioned.
After installing the drive element, turn the crankshaft 2 turns and check whether the applied marks match. If there is a displacement somewhere, we remove and reinstall the belt.
If everything is normal and the marks match, we install all the removed elements on the engine.
Note that both described methods can be somewhat combined, namely, when using the “folk” method, use a locking pin to block the crankshaft and prevent it from accidentally turning.
How to make the replacement yourself?
Having experience in repair work on a Lada Largus with a 16-valve engine, having studied the replacement instructions and watched the video, you can completely cope with the replacement yourself. You can invite an assistant, preferably with experience in auto repair.
Required Tools
To successfully carry out work on the Lada Largus 16 valve, you should be properly prepared. You need to prepare the following tools:
- set of keys and sockets;
- extension;
- screwdriver;
- crankshaft mandrel;
- camshaft mandrel.
You should buy new products only from trusted manufacturers and preferably originals, otherwise they may not last as long as they should. By saving on cost, you can end up with expensive repairs in the event of a break or replacement of components ahead of schedule.
Stages of work
It is most convenient to carry out the replacement procedure on a lift, overpass or inspection pit. The sequence of work on the Lad Largus 16 valve consists of the following steps:
- First, turn off the power to the car by disconnecting the negative terminal from the battery.
Tension check
Belt tension is of great importance for the normal operation of the timing belt. If the belt is loose, it can slip and cause valve timing problems. In addition, slippage can cause increased friction and the material will heat up, which can cause the strap to break. High tension accelerates wear on the crankshaft bearings and auxiliary mechanisms.
Checking the belt tension is possible using indicators on the tension roller. Normal tension implies complete coincidence of the movable pointer with the stationary pointer of the tensioner. If the moving pointer moves slightly counterclockwise, the strap should be tightened.
In this case, you need to loosen the tensioner mounting bolt and turn the tension roller clockwise until the indicators align. Having fixed the tensioner in this position, it is necessary to tighten the fastening bolt. Then use the auxiliary pulley mounting bolt to turn the crankshaft two turns. Now you need to check the tension again. Adjustments should be made until the desired tension level is achieved.
Replacing the timing belt on the K7M engine
Let's move on to 8-valve power plants. Replacing the timing belt with them is actually easier, and fewer tools are required.
To carry out the work you will need:
- A set of keys (open-end, end standard sizes);
- Set of heads with knob and rods;
- Special key for belt tensioning;
- Rags.
Naturally, a new drive belt and tension pulley will be required.
This tool kit is suitable for both the Renova K7M engine and the VAZ engine.
But first, let's look at the sequence of actions on the Renault power plant, since replacement on it is somewhat more complicated than on a VAZ.
So, we replace the timing belt on the K7M like this:
- We put the car on the inspection hole, immobilize it;
- We jack up the right front wheel, remove it, and also dismantle the protective lining of the wheel arch;
- We remove the candles;
- Remove the accessory belt;
- Unscrew the bolts securing the upper timing cover and remove it;
- We dismantle the crankshaft pulley (to do this, we lock the crankshaft by engaging the 5th gear of the gearbox and depressing the brake pedal, or we use a pry bar inserted between the teeth of the flywheel);
- Remove the lower timing cover;
- We set the TDC on the first cylinder according to the marks. To do this, rotate the crankshaft until the mark on the camshaft pulley is located at the highest point. Some engines have markings on the top of the head. In this case, the mark must be aligned with the letter “D” (“Dachia”). In this case, you should also look at the crankshaft gear, since it also has a mark and it should be located at the lowest point. The photo shows all this more clearly;
- Loosen the tension roller nut, removing the belt tension. Next, we remove the drive element itself - first we remove it from under the roller, then we pull it off the crankshaft gear, then we remove it from the pump and finally from the camshaft pulley;
- We change the tension roller, but do not fix it (do not tighten the nut completely);
- We install a new belt (the arrows on it should point in the direction of rotation). First we put it on the crankshaft, then we put it behind the pump, then we put it on the pulley. The last one will be the tension roller. After winding the belt, we tighten it, for which you need a special key;
- After installing the belt, turn the crankshaft 2 turns and check the position of the marks. If they are as they should be, we put the engine back together.
Some manufacturers of belts for the K7M engine put additional installation marks on them, which makes the replacement process easier.
Two marks are applied to the belt and when putting on the drive element, they should be aligned with the marks on the camshaft pulley and the crankshaft gear (for orientation, the mark on the belt located near the arrows is intended to align with the mark on the camshaft pulley).
Markings on the drive element also make it easier to check for correct installation. If after two revolutions of the crankshaft everything is aligned, then the replacement was done correctly.
Installation of a new belt on Lada Largus
- First, we put the new component on the crankshaft pulley.
- Now we hang (pulling by hand) the timing belt on the toothed pulley of the cooling circuit pump.
- Next, we move to the camshaft and hang the timing belt on the pulley in the same way.
- We wrap the remaining section along with the slack behind the tension roller.
Now you need to tension the belt drive.
- To do this, turn the roller itself in a counterclockwise direction and fix it with a bolt.
- We fix the indicated bolt of the generator pulley in place. We rotate the crankshaft until the marks on it and the camshaft coincide.
After making sure that the installation procedure is correct, we install the protective casing.
Features of replacement on a VAZ engine
Replacing the timing belt on an 8-valve VAZ engine, which is also included in the Lada Largus package, is performed in almost the same way as on the K7M, but there are some features, namely:
- Engine disassembly is easier because only one cover is used;
- Setting the TDC is also easier, since the marks are everywhere. To set TDC, rotate the crankshaft until the mark on the camshaft pulley aligns with the protrusion on the rear cover. In this case, the mark on the crankshaft gear must coincide with the groove on the cylinder block, as well as the mark on the flywheel with the mark on the crankcase.
And then everything is exactly the same as on the K7M - we loosen the tension roller, remove the belt, replace the tensioner with a new one, install the drive element and tension it.
Then we check that the marks match by turning the crankshaft 2 turns and put everything back together.
Owner reviews
How long does a timing belt last in practice? Belt breakage does happen, but rarely. Here are a few examples when the timing belt broke at low mileage:
The Za Rulem magazine, which has LADA models in its editorial fleet, encountered the problem twice:
- Datsun. Timing belt teeth cut off on an 8-valve VAZ engine at a mileage of 67,695 km.
- Lada Granta. Breakage due to poor quality of the belt at 97,000 km.
Recommendations
. The reasons for a broken timing belt can be different. For example, due to the low quality of the rubber product itself or due to the pump jamming. To avoid costly repairs, it is recommended to regularly (every maintenance) check the condition of the timing belt, especially if the mileage is more than 60,000 km.
How often do you recommend changing the timing belt and rollers? Take part in the survey and leave your feedback in the comments.
Where can I buy
: Timing belt kits at low prices are available in our online store (Timing belt category).
Source
Checking and tensioning the belt
A few words about the process of belt tensioning. On a 16-valve engine, tension is checked by inspecting the tensioner.
There are indicators on it that must be aligned during normal tension of the drive element.
If the upper pointer moves to the side, this indicates a loose or overtightened belt.
To adjust the tension, you need to loosen the roller nut and use a hexagon to turn the roller so that the pointers align.
In 8-valve units, tension is checked by hand. To do this, we take the belt with our fingers in the middle of the area between the camshaft pulley and the pump (K7M) or the crankshaft gear (VAZ) and try to rotate it around the axis.
For a normally tensioned belt, the rotation angle should not exceed 90 degrees. Below is shown using the example of a VAZ 2110.
If the angle of rotation is too small or large, we tighten it by loosening the nut of the tension roller and turning the roller itself with a special wrench.
