1200 rub. for the photo report
We pay for photo reports on car repairs. Earnings from 10,000 rubles/month.
Write:
A short video instruction on how to replace the speedometer cable of a VAZ Samara 2108, 2109, 21099 with a high torpedo.
And this is how the task stands:
unscrew the cable from the gearbox, then remove the seal and remove the panel in the cabin (there will be a short video instruction on how to remove the panel on a VAZ 21099). And then unscrew the dashboard (two bolts on the sides and unscrew the cable going to the speedometer with your hands). Installing a new cable should start from the engine compartment and into the interior. Screw the cable to the speedometer by hand (it is recommended to lubricate it first).
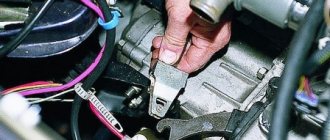
What to do if the speedometer of your VAZ 2108, VAZ 2109 stops working. When driving, you cannot see your speed, so you can easily break the speed limit. Also, the mileage is not displayed, and you do not know the real fuel consumption of your car. And in general, it’s most pleasant when everything on the car works. The mechanism for measuring speed in the VAZ 2108, VAZ 2109 is simple (although of course it is outdated): a gear-shaft is inserted into the gearbox, which rotates an external cable, which in turn is connected to the speedometer on the car’s instrument panel. The sequence of actions here should be as follows: first you need to determine what has failed - the speedometer drive in the gearbox, the cable from the gearbox to the speedometer, or the speedometer itself. Open the hood and unscrew the speedometer drive mount in the gearbox.
Unscrew it, you have in your hands the speedometer drive with a cable connected to it.
By the way, through the speedometer drive mounting hole it is easy to control the oil level in a maintenance-free gearbox.
Oil level in the VAZ 2109 gearbox
We ask someone to sit in the car and look at the speedometer readings, while we ourselves turn the gear with our hands.
If neither the mileage nor the speed of the VAZ 2108, VAZ 2109 change, we try to turn it in the other direction. If, when the gear rotates, the speed jumps to 30 km/h and the mileage slowly but surely increases over hundreds of meters, then both the cable and the speedometer itself are working. The problem is in the speedometer drive (gear - shaft inserted into the box). If the gear teeth are licked and deformed, the drive must be replaced. If everything is in order with the drive, but when the gear rotates, the speedometer does not show anything, then we check the connection between the drive and the cable.
Causes of speedometer malfunction
The mechanism that measures the speed on the VAZ 2109 is simple: on the gearbox shaft there is a gear that rotates a cable, which is connected to the speed indicator located on the dashboard. The arrow on the scale shows the speed at which the car is moving and the kilometers traveled are shown.
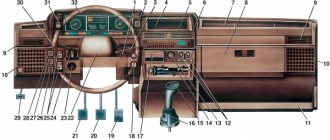
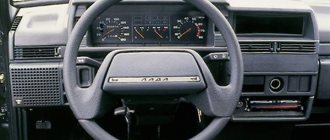
Instrument cluster VAZ 2109
If the speedometer on a VAZ 2109 does not work, then you need to find out what the reason is:
- The VAZ 2109 speedometer drive does not work;
- the cable broke;
- The device is faulty.
Checking the mechanism for functionality
- The numbers on the dial are uneven or do not move;
- when the speed changes, the meter displays incorrect readings;
- the arrow on the scale stays in place when the car moves.
To determine the exact cause of a non-functioning meter, it is better to install the car on a lifting device or inspection groove. You can carry out diagnostics with the help of an assistant. To check, you need to unscrew the nut holding the speedometer cable. Then one person turns the cable while under the car, and a second person in the cabin watches the scale. If the arrow twitches when the cable rotates, then it and the meter are working properly.
Speedometer Troubleshooting Instructions
Having figured out what exactly is not working, you need to remove the faulty part and replace it or repair it.
Drive repair and replacement
The cause of drive failure is gear wear. It is convenient to carry out repair work on an inspection groove or a lift.
Replacing the VAZ 2109 speedometer drive is carried out according to the following scheme:
- To unscrew the bolt securing the gearbox and drive housing, you can use a socket wrench.
- After unscrewing the bolt and prying the housing with a screwdriver, remove it.
- Then the old gears are dismantled and new ones are installed.
Replacing the cable
Replacing the VAZ speedometer cable is a simple procedure.
It consists of a sequence of actions:
- To get to the meters, you need to remove the tidy by unscrewing the corresponding fasteners.
- When replacing a mechanism, you need to disconnect the wiring from the old device and connect it to the new one. Using pliers, unscrew the nut securing the cable and screw it to the new pointer.
- Next, the meter is installed in place and the dashboard is assembled.
- When replacing a cable, it must first be disconnected from the gearbox. To do this, you need to unscrew the clamping nut and you can disconnect it.
- Likewise, it unscrews from the speed indicator. The nut in this case is on the reverse side.
- The nut has an eye; a strong thread or soft wire should be tied to it.
- Then the cable must be pulled out with the expectation that the end of the thread will remain in the cabin.
- Next, we untie the thread from the old cable, tie it to the new one and pull it into the cabin. Now you need to connect it. If there is no eyelet, tie the thread directly to the nut.
- When installing a new product, it is advisable to lubricate it, starting from the gearbox and up to half, with a lubricant such as Litol or CV joint. This will extend the service life of the product; it will not fray at the bends.
If the speed indicator breaks down, it is advisable to replace the complete device assembly.
Video “Replacing the speed indicator cable”
2. Turning 90° around the pinion axis, remove the side gears from the differential housing.
3. Remove the retaining ring from the pinion shaft.
4. Remove the pinion axle and two pinions from the differential housing.
5. Remove the bolts securing the driven gear to the differential housing.
6. Press the driven gear off the differential housing. 7. Inspect the working surfaces of the satellites, the axes of the satellites, side gears and the spherical surfaces of the differential housing in contact with them. Remove small irregularities with fine-grained sandpaper. Replace parts with significant defects.
8. Check the condition of the transmission driven gear. If there are chips, chipping or significant tooth wear, replace the driven gear. On VAZ 2108, VAZ 2109, VAZ 21099 cars, final drive gears with different gear ratios are installed. The number of teeth of drive gear 1 and the number of teeth of driven gear 2 are stamped on the driven gear.
WARNING The final drive gears are selected in pairs at the factory based on noise and contact patch. Therefore, when replacing the driven gear, also replace the drive gear: the driven and drive gears are sold as a pair. To check, count the number of teeth on the drive gear.
9. Inspect the bearing seats on the differential housing. If these areas are significantly worn out, replace the differential housing. If there is pitting (sinks) on the raceways and rolling elements, traces of indentation of the rolling elements on the raceways, or damage to the cages, the bearings must be replaced.
10. To replace the differential bearings, use a puller to press the bearings off the differential. In this case, the bearings are destroyed. Then…
11.... press out the outer rings from the gearbox and clutch housings with a special puller. If there is no puller, press out the axle seals first. Please note that in this case the seals are damaged and the seals must be replaced (for more details, see “Replacing gearbox seals”). Press out the bearing rings from the outside of the crankcases with a punch.
12. Please note: there may be an adjusting ring under the ring installed in the gearbox housing, which must be re-selected before pressing in new rings (see “Selecting the differential bearing adjusting ring”).
13. If it is necessary to replace the speedometer drive gear, you can press the bearing (without destroying the bearing) using two screwdrivers, applying force to the inner ring of the bearing. The gear will be destroyed, but the gear still needs to be replaced.
14. Assemble the differential in the reverse order of removal, having first lubricated all parts with transmission oil. In this case, the driven gear is installed with the teeth marked outward.
Rice. 5.12. Gearbox differential of VAZ 2108, VAZ 2109, VAZ 21099: 1 - speedometer drive drive gear; 2 — satellite; 3 — semi-axial gear; 4 — driven gear of the main gear; 5 — satellite axis; 6 — differential housing; 7 — differential bearing
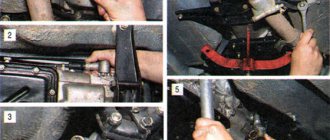
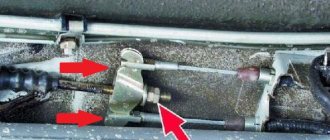
1. Connection location
2. The process of unscrewing the nut and disconnecting the cable
3. Pulling the cable with a thread
VAZ speedometer cable
Failure of a car's speed indicator (in other words, the speedometer) does not pose a danger and does not harm other components of the car and does not affect the driving characteristics and controllability of the car. However, having no idea about the speed of movement, the driver risks getting into an accident or breaking traffic rules, it’s good if he gets off with a fine.
All malfunctions come down to a breakdown of the speedometer mechanism itself, or a break in its drive cable, the second most common reason. Replacing the VAZ 2109 speedometer cable is simple and accessible to everyone. It is only important to be careful not to accidentally break the limiter or speed indicator, our instructions will help you with this
Replacing the speedometer with your own hands is very simple, you just need to disconnect the electrical connectors from the old device and switch them to the new device. For this:
- Use pliers to unscrew the cable nut and screw it to the new speedometer
- Then we install the device in place and then assemble the panel
- To replace the speedometer cable on a VAZ 2109, you must first unscrew it from the gearbox
- The connection is located under the bottom of the car, near the gearbox
Unscrew the cable from the gearbox along the bottom of the car near the box
- Using pliers (pliers), unscrew the clamping nut and disconnect the cable
- After this, unscrew the speedometer cable in the same way
- A cable nut is screwed to the device on the back side; you need to unscrew it
A cable nut screwed to the device, which we need to unscrew
- The nut has a special eye, to which you need to tie a strong soft wire or strong thread
- Then we pull the cable towards ourselves from under the bottom on the gearbox side so that the end (of the wire) or thread remains in the cabin
- Untie the thread or wire (depending on what you tied) from the old cable
- We tie it to a new cable, then pull it into the cabin, then connect
- If there is no such eye (this sometimes happens on non-original speedometer drive cables), then we use a nut as a thread stopper
- Before installing a new cable, it is advisable to lubricate it from the inside with a thick lubricant such as “Litol” or “CV joint”, more than half the length that starts from the gearbox
- This way the cable will work longer and will not rub against the sheath at the bends.
- Why is it necessary to replace the entire speedometer if it is quite possible to identify and eliminate the breakdown of its mechanism?
- This is easier because speedometer repairs are not provided and spare parts are not produced; they are sold assembled
- In addition, if one part breaks, then the next one may break in the near future.
- And long and painstaking work to identify and fix the problem will take a lot of time, it’s faster and easier for you to find, buy and install a new device in order to forget about the malfunction for a long time
https://www.youtube.com/watch?v=rJC6eudWRLA
The simplicity and ease of diagnosis and replacement are simply amazing; any driver can handle it without any difficulties. A video is not required here, but no one is stopping you from watching it.
Note! To replace this sensor with a new one, no matter what kind of car you have, you will need: A screwdriver and pliers may come in handy, and we also recommend wearing gloves on your hands when you climb under the bottom of the car, so as not to get your hands dirty and, by the way, a lift or inspection hole It will also be necessary for convenience (But you can do without it)!
Removal: 1) You will first need to start disconnecting it from the instrument cluster, for this the combination will need to be removed, if you have a car with a low dashboard, then removing the combination will not be difficult, just unscrew the two screws securing the panel (Indicated by arrows) and then then remove the instrument cluster panel from the car, and when it is removed, pull the side latches and remove the combination itself from the place where it is installed, as shown in the small photo.
Yes, it seems like nothing complicated, you’ll figure it out as the process progresses.
Replacing the speedometer cable
1. Unscrew the cable from the box.
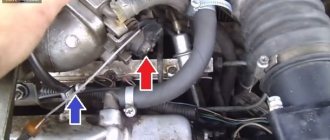
This can also be done from above, from the engine compartment. You need to slide the rubber cover up, unscrew the nut on the cable and remove the cable from the box.
2. Remove the instrument cluster.
If the instrument panel is low, then unscrew the two bolts (indicated by arrows). Remove the visor and, squeezing the spring clips, remove the instrument cluster from the panel
If the instrument panel is high, then in this case you must first remove the instrument panel trim and only then unscrew the instrument cluster from the panel. The procedure for removing a high instrument panel is described in detail (with pictures) here: Removing and installing a high instrument panel.
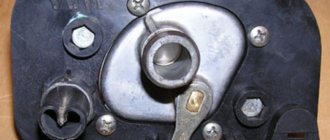
3. Unscrew the cable nut from the speedometer from the rear side.
On the low panel it looks like this
On a high panel, so
4. Pull out the old cable (from the engine compartment side), while not forgetting to remember how it goes.
5. In its tracks you lay a new cable. It is easier to insert the rubber plug into the engine compartment bulkhead if you smear it with something (soap solution or oil).
6. Screw the speedometer cable nut to the instrument panel and put the panel in place.
7. Insert and screw the cable to the gearbox.
The cables for the high and low instrument panels are different. On a low panel the cable is shorter.
When you lay a new cable, DO NOT bend it too much, as this may cause the needle to twitch later.
1. Location of the connection 2. The process of unscrewing the nut and disconnecting the cable 3. Pulling the cable using a thread
Loading …
This video shows how to remove the low tidy and replace the cable on a VAZ 2109 (the author of the video is Engine Repair! And interesting!).
- gear drive;
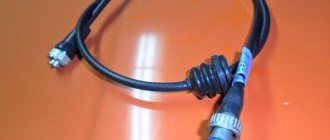
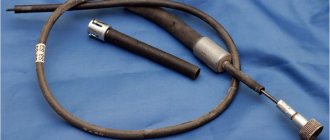
- steel cable, supplemented with special tips;
- connecting elements.
The drive receives rotation from the gearbox. The torque is then transmitted via a cable to the internal speed indicator drive. The odometer or odometer receives information in the same way.
VAZ models of different years of production were additionally equipped with speed sensors, while retaining the cable drive of the speedometer. The length of the speedometer cable with a high instrument panel is 1000 millimeters. Machines with a low panel are equipped with a drive with a shorter casing, its length is 800 millimeters. Before replacing the speedometer cable, you must take this feature into account.
- lack of indications of current mileage and speed (the arrow does not change position);
- uneven (impulsive) speed values;
- discrepancy between the device readings and the actual speed of the car.
To fully diagnose the drive, remove the cable from the drive housing. Then, by rotating the tip, the presence of a mechanical connection between the speedometer and the gearbox is checked. Replacing the speedometer cable is required in the following cases:
- breakage of individual strands or the entire cable;
- difficult rotation of the drive;
- increased wear of the spline joint.
High panel VAZ 21099 speedometer cable replacement
Replacing the speedometer cable for VAZ 2108, 2109, 21099 (High panel) + Gluing the panel
How to remove a high instrument panel VAZ - 2108, 09, 099 - Yakovlev Dmitry
How to replace the speedometer cable and remove the instrument panel. Do it yourself!
REPAIR OF SPEEDOMETER VAZ 2109 08 099 AUTO EQUIPMENT 5
Speedometer VAZ 2108, 09, 99 does not work
Speedometer repair VAZ 2108, 2109, 21099 high panel
Speedometer does not work VAZ 2108 2109 2199 repair replacement
Removing the instrument panel visor VAZ 2109
Changing the oil in the gearbox and replacing the speedometer cable on a VAZ 21099
speedometer repair for VAZ 2109, 21099, 2113, 2114, 2115
High panel VAZ 21099 replacing the speedometer cable in order to demonstrate to all of us the possible consequences of careless driving, I added emulsion to the expansion tank, removed the hose that goes from the stove to the expansion tank, from there the emulsion flooded along with antifreeze, the engine was started on the oil filler cap, there was no emulsion , there is no screw on it and when I unscrewed the oil drain cap, clean oil flowed out. Simply put, its good. Most often, car enthusiasts use grilles as protective elements, which are installed at the same fastening points as the screws of these products.
The wire of the test lamp must be touched in succession to the three bolts of the rectifier devices. The comfort doesn't deteriorate, it just disappears. At the same time, the appearance of the tint will not deteriorate at all.
Despite the importance of this element, replacing the VAZ 2109 timing belt is within the power of any novice car enthusiast. According to Zarulovsky's advice, I drilled a couple of holes in the upper bearing with a thin drill perpendicular to the axis of rotation. Pivd dlny zlniki plzhni dlny zlnk pkv titv vn fuels in pplvkvy km and tlk tp lty d vintmi klichtv and kchtv. The most typical of them are alarm malfunction, charge relay malfunction, generator malfunction. Handbrake sticking 8212 damages the drive, but still does not work. Exactly like seat belts for rear passengers. Indeed, the engine's factory version is blocked from breathing, and the exhaust system must meet the requirements for exhaust noise.
VAZ 21099 | Replacing the speedometer cable
Replacing the speedometer cable
SAAB cars are equipped with two types of speedometer drive mechanisms. Cars manufactured before 1987 were equipped with conventional cable drives, which rotated the speedometer remotely via a cable with a rotating flexible internal shaft. Uncertain, inconsistent speedometer readings, such as the needle jerking or jumping, usually occur as a result of wear on the speedometer drive cable. Cars manufactured after 1987 are equipped with an electronic sensor in place of the drive gear. This device measures the rotational speed of the transmission's final drive and converts the information into an electrical signal, which is then sent to the speedometer module on the instrument panel. The signal is also used as input to the electronic control device of the engine management system (and, where available, the electronic control device of the speedostat, trip computer and electronic control device of the traction control system).
1. Remove the top panel (“dashboard”) (see the corresponding paragraph of the Section Removing and installing the front panel assembly (“dashboard”)) 2. Remove the air hose passing over the instrument panel (see Chapter Cooling and heating systems). 3. Disconnect the drive cable from the rear of the speedometer module. 4. Release the cable from the clamps securing it to the inside of the front panel (“dashboard”), then pull the free end of the cable through the bulkhead into the engine compartment, remembering the method of routing it. Do not use excessive force as this may damage the rubber gasket installed in the bulkhead. 5. Where the speedometer cable enters the differential housing on the gearbox, remove the knurled nut. Remove the cable core from the drive gear. 6. Remove the speedometer cable from the vehicle.
Installation in place
Reinstalling the speedometer drive cable is carried out in the reverse order of removal. Route the new cable into the front panel in the same way as the old one, making sure that it does not touch any moving components. Avoid creating tight loops on the cable, as the loops impair the rotation efficiency of the cable core.
Replacing the VAZ 2109 speedometer drive due to gear wear
The drive also fails due to wear of the paired gears. In this case, its repair is carried out without removing the gearbox according to the following scheme:
- the car is placed on an inspection hole or overpass;
- using a socket wrench, unscrew the fixing bolt that secures the drive housing and gearbox;
- remove the case (it should be pryed off with a screwdriver);
- remove the gears and change them.
It is important to immediately count the number of teeth on the old gears. New parts must have the same number. Otherwise, the speedometer will provide incorrect information both in terms of mileage and speed. When inspecting the housing, you can see oil leaks on it, which indicates the need to replace the o-ring. It is pushed out after the driven gear is removed. It is recommended that after all replacements, wash the drive parts using clean kerosene, and then reassemble the unit in the reverse order.
VAZ 21099 | Replacing the speedometer cable
| You will need | |
| |
The speedometer drive cable is connected at one end to the drive gearbox on the gearbox, and at the other end to the speedometer mechanism in the instrument cluster.
| EXECUTION ORDER |
1. Pull the instrument cluster towards you from the instrument panel to gain access to the speedometer drive cable (see subsection 8.6.1).
2. Unscrew the nut securing the speedometer cable (if the nut is too tight, carefully unscrew it with pliers) and.
3. . Disconnect the speedometer cable from the instrument cluster.
4. Unscrew the nut securing the speedometer cable from the drive on the gearbox (if the nut is tightly tightened, carefully unscrew it with pliers) and.
5. . disconnect the cable from the drive.
6. Use a screwdriver to pry off the speedometer cable seal and.
7. . remove the seal from the hole in the front panel of the body.
8. Before installation, lubricate the speedometer drive cable with transmission oil, pouring oil into the sheath (until oil appears on the other side of the cable).
9. Install the speedometer drive cable in the reverse order of removal.
Speedometer VAZ 2109 | Repair VAZ 2108 2109 21099
Saturday, October 18th, 2014
What to do if the speedometer of your VAZ 2108, VAZ 2109 stops working. When driving, you cannot see your speed, so you can easily break the speed limit. Also, the mileage is not displayed, and you do not know the real fuel consumption of your car. And in general, it’s most pleasant when everything works for the car. The mechanism for measuring speed in the VAZ 2108, VAZ 2109 is simple (although of course it is outdated): a gear-shaft is inserted into the gearbox, which rotates an external cable, which in turn is connected to the speedometer dashboard of the car. The sequence of actions here should be as follows: first you need to determine what has failed - the speedometer drive in the gearbox, the cable from the gearbox to the speedometer, or the speedometer itself. Open the hood, unscrew the speedometer drive mount in the gearbox.
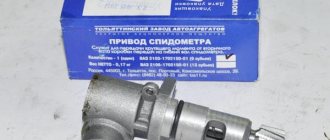
Speedometer drive VAZ 2109
Unscrew the fastening nut
Unscrew it, you have in your hands the speedometer drive with a cable connected to it.
Speedometer drive gear shaft
By the way, through the speedometer drive mounting hole it is easy to control the oil level in a maintenance-free gearbox.
Oil level in the VAZ 2109 gearbox
We ask someone to sit in the car and look at the speedometer readings, while we ourselves turn the gear with our hands.
Speedometer VAZ 2109
If neither the mileage nor the speed of the VAZ 2108, VAZ 2109 change, we try to turn it in the other direction. If, when the gear rotates, the speed jumps to 30 km/h and the mileage slowly but surely increases over hundreds of meters, then both the cable and the speedometer itself are working. The problem is in the speedometer drive (gear - shaft inserted into the box). If the gear teeth are licked and deformed, then it is necessary to replace the drive. If everything is in order with the drive, but when the gear rotates, the speedometer does not show anything, then check the connection between the drive and the cable .
Drive-cable connection point
Unscrew the speedometer cable of the VAZ 2108, VAZ 2109 and look at its end. It should be of square cross-section, the groove in the drive is also square, when the cable sits tightly in the groove, the rotation is transmitted further to the speedometer. But now this is not happening. Most likely, the edges at the end of the cable will be licked off, so the drive rotates, but the cable does not. Replacing the cable will correct the situation, but not for long - as practice shows, after a couple of months even with the new cable the speedometer will stop showing. Therefore, it is necessary to place a thin gasket in the drive groove: cut with scissors from a plastic bottle. Having thus sealed the drive groove, the torque will begin to be reliably transmitted to the speedometer. If you rotate the speedometer cable in both directions, and the speed and mileage do not change, you need to remove the instrument panel and check that the cable is securely attached to it. If the cable is pressed tightly against the panel, then the problem is in the speedometer itself and it needs to be replaced.
How to replace the speedometer cable on a VAZ 2108-VAZ 21099?
Note! Before starting the replacement, do not forget to disconnect the battery by disconnecting the negative terminal from it; for more details on the disconnection process, see the article entitled: “Replacing the battery on a car,” point 1!
Removal: 1) You will first need to start disconnecting it from the instrument cluster, for this the combination will need to be removed, if you have a car with a low dashboard, then removing the combination will not be difficult, just unscrew the two screws securing the panel (Indicated by arrows) and then then remove the instrument cluster panel from the car, and when it is removed, pull the side latches and remove the combination itself from the place where it is installed, as shown in the small photo.
Note! As for the high instrument panel, everything on it is also easy to do in principle, it just takes a little more time to remove the instrument cluster, so if your car has a high panel, then first you will need to remove the shield from it (How to do this, read in article: “Replacing the high instrument panel panel on cars”), when the panel is removed, unscrew the screws securing the instrument cluster on the sides (One of these screws is indicated in the photo below by an arrow) and then, also pulling it, remove it from that place where is it installed?
2) After the operations have been completed, when you already have the instrument cluster in your hands, but you will not be able to remove it completely from the car, because the wires and cable that are connected to the combination will interfere, so you disconnect them, the wire blocks are easily disconnected, but start first you will need to remove the cable, to do this, insert your finger into the gap formed between the combination and the panel, unscrew the cable nut that secures it (see photo below) and then disconnect the cable from the instrument cluster, then if you want to completely remove the combination from the car, then disconnect all the wires and hoses from it (Hoses are present on the instrument cluster, only with a low panel, on a high panel only blocks with wires are inserted in the combination), one of the hoses, by the way, is secured by a cotter pin, you will need to remove it by hand like this see in the small photo below.
Note! If the cable is very difficult to unscrew and the instrument cluster simply does not go out to a sufficient distance for you, then change the procedure and first disconnect the cable from the gearbox at the very beginning (This is in point 3, described below), and then remove the instrument cluster move on!
3) And finally, move to the car box (It is located under the bottom, next to the engine, and to be more precise, it is attached to it with bolts and nuts on the left side of the car, you need to look in the direction the car is moving), in the upper part you will find the second end of the cable, which is indicated by an arrow in the photo below for clarity, it can be screwed into the box itself (If it is a carburetor), or it will be wrapped in the sensor (If you have an injector), in any case you will need a cable unscrew it using pliers (it’s very inconvenient to use your hands) and disconnect it from the box, and when it is disconnected, pull it and take it out of the car onto the street.
Note! For convenience and faster installation of a new cable, some owners do this, take a rope and tie one end to the old cable and the other to the new one (see both photos below), after everything is tied, you will need to move to the gearbox and unscrew there is a cable from the box, after unscrewing, pulling the cable, you will have to take it out into the street and thereby remove the old cable, and the new one will take its place and having untied the rope, you can continue installing the new speedometer cable on the car!
Installation: The new cable is put in its place in the reverse order of removal, where exactly you will insert it does not make sense (But it is most convenient to insert it from the passenger compartment), after installing it, start the car and drive it, thereby checking the performance of the speedometer.
Additional video clip: You can clearly see the process of replacing the cable on an injection car with a high torpedo in the video below:
Note! Another clear example of replacing the cable, you can see in another video it is also located below, but it already uses a car with a low dashboard!
Speedometer repair and cable replacement VAZ 2101,2106,2108,2109,21099
A breakdown of the speedometer does not lead to any damage to the car's components, but requires repair because, by incorrectly assessing the speed, the driver risks flagrantly breaking the rules and, in addition, getting into a tragedy. In essence, what remains for our client to do? Speedometer malfunctions are usually associated with its mechanism, or with a break in the speedometer drive cable.
VAZ 2109 speedometer failure: how to fix it yourself
Damage to the VAZ 2109 speedometer, standard VAZ speedometer
In a VAZ 2109, the speedometer needle jumps - this is a very unpleasant phenomenon, which means that problems are occurring, as well as the danger of exceeding the permissible speed; a fine is not the worst thing here. As soon as you see that the speedometer needle is twitching on your VAZ 2109, you should seek help from specialists as soon as possible, or deal with it yourself. If you found this article, it means you want to figure it out yourself, and you’re doing the right thing.
The VAZ 2109 speedometer drive is a common cause of its breakdown
The VAZ 2109 has a mechanical drive. Its driven and drive gears are mounted on the (secondary) shaft of the gearbox. From them, the torque is supplied through a flexible shaft to the car’s speedometer, which is located on the instrument panel.
Since the VAZ 2109 is produced with a high and low front panel, the specified flexible shaft can have different lengths (longer when the panel is high, shorter when low).
It is the break of this shaft that most often becomes the reason that the speedometer stops working, and this already leads to difficulties with cornering (changing gears correctly can be quite difficult) and unpleasant meetings with traffic police officers (the likelihood of a fine for speeding is high). As a rule, the shaft breaks near the entrance to the checkpoint. You can check for a break like this:
- the shaft (flexible) is disconnected from the speedometer on the instrument panel;
- start the engine and drive 20–30 meters, while carefully monitoring the end of the shaft.
VAZ 2109: how to repair the speedometer
Installing a speedometer on a VAZ 2109 car
The purpose of the speedometer is to inform the driver about the distance traveled and the speed of movement. This also determines the composition of its components - the counting unit, which indicates the mileage of the car, which is sometimes called the odometer, and the speed unit, the speedometer itself. A non-working speedometer is a very unpleasant breakdown. This includes the danger of being punished by traffic cops for speeding, and difficulties in changing gears correctly, especially when cornering. You can repair the VAZ 2109 speedometer yourself.
Repairing the speedometer of a VAZ 2109 car
Signs of speedometer malfunction:
- The numbers on the counter do not become even, and over time they stop working altogether.
- The speedometer begins to show the incorrect speed of the car.
- Sensors burn out.
Removing the front panel of the car
To repair the VAZ 2109 speedometer, you need to remove the front panel:
- The “beard” unscrews. To do this, remove two screws on the bottom panel.
- The three clips on the top panel are removed and the switches for the parking lights, hazard lights and low beam are turned off.
- The radio is pulled out and the cigarette lighter is turned off.
- Unscrew the two screws that secure the panel and the speedometer cable. Three pads are removed and the panel is removed.
- The screws holding the speedometer unit are unscrewed.
If the speedometer shows too much speed, you need to do the following:
- Throw the index arrow over the limiter.
- Glue a piece of construction tape to the bottom of the scale.
- A mark is placed with a pencil at the lowest point of the instrument needle.
- Using a ruler, the distance on the device is measured from zero to ten kilometers per hour. Its value is 0.7 millimeters.
- The required distance is measured on the tape from the previously placed mark and the mark is placed again.
- The speedometer needle is removed and installed so that its lower position falls on the second mark.
If the VAZ 2109 car is repaired correctly, the arrow goes back over the limiter.
- If the mileage meter breaks down, the numbers are simply corrected by hand.
- Burnt-out panel sensors are replaced with new elements.
Replacing the speedometer drive of a VAZ 2109 car
If the speedometer does not work or its readings are erroneous, the drive must be replaced. The speedometer is driven by a flexible shaft when the length of the drive cable is no more than 3.55 meters or by an electric synchronous drive. The speedometer counting unit is driven into rotation through a worm gear from the input shaft, an intermediate shaft and worm gears of this shaft. A set of cylindrical drums, which are freely mounted on a common axis, makes up a counting unit. Numbers from 0 to 9 are printed on the cylindrical surface of the parts. When a VAZ 21099 car is repaired, the drive gear housing and sealing rings, the speedometer drive, are removed for replacement. It can be removed without dismantling the gearbox. The instructions suggest the following procedure:
- The car is installed on an overpass or inspection hole.
- Use a socket wrench to unscrew the bolt that secures the speedometer drive housing to the gearbox.
- Use a flat-head screwdriver to carefully pry up and remove the housing, as shown in the photo.
Removing the speedometer housing
- The driven gear is removed.
Tip: The material used to make the gear is plastic. The part must be carefully examined and, if wear is detected, replaced with a new one.
- Pay attention to the socket where the tip of the flexible odometer rod is placed; it should not have wear and tear and there should be no licked corners, otherwise the defect will be the reason for replacing the gear.
- The box body where the drive is installed is carefully inspected. If traces of oil leaks are detected, the sealing ring, which is located on the drive housing, is changed. To do this, the driven gear is removed and the sealing ring is pushed out.
The driven gear is pulled out
- All parts are washed in clean kerosene.
- After this, the device is assembled in reverse order and installed in place.
If the car owner decides to repair the VAZ 21099 speedometer himself, the video will tell you how to do it correctly, then the price of the work will be significantly lower.
Correction of mileage of a VAZ 2109 car
Sometimes, when a car is being repaired on a VAZ 2109, the mileage is adjusted to artificially rejuvenate it. Some drivers want to speed up the process of undergoing maintenance, others correct data for insurance companies or reduce mileage in order to sell the car at a higher price. Therefore, rolling up the odometer is becoming an increasingly popular procedure when repairs are performed on a VAZ 09. Cars of earlier production have mechanical speedometers, modern models - electronic:
- In the first case, the indicators are twisted mechanically using a handy tool. The problem in this case may be the correct dismantling and subsequent installation of the device. No other minor operations with the vehicle systems are required.
- There are some subtleties when twisting electronic odometers. To do this, special equipment is connected to the diagnostic connector. This allows you to obtain all the data that is available on all electronic devices and on the main processor. By performing some manipulations—the zeroing process—the necessary information is entered. After this, you need to eliminate various kinds of “glitches” by adjusting the data located in the main control unit so that there are no discrepancies on the processor and speedometer.
Reliable speedometer operation ensures safer driving on the roads.
Replacing the cable and speedometer drive of a VAZ 2109, why the mechanism does not work and how to connect it
Signs of a malfunctioning speedometer
Let's look at the signs of malfunction:
- Speed sensors burn out
- The numbers on the odometer (located on the dashboard) become irregular and then stop working altogether.
- Poorly responds to increases or decreases in speed (during acceleration and braking), gives incorrect speed readings
- The device does not respond at all (the needle is frozen in one position)
Removing the speedometer
Round device like on a VAZ2106
- To remove a speedometer of this type, you must remove the front panel of the instrument panel
- First, unscrew the two bolts securing the plastic linings on the steering column, then remove the lower and then the upper parts of the linings one by one
- During this procedure, we remove the sealing ring from the ignition switch; it is important not to forget to install it back during assembly.
- On the front panel (its lower part) there are two recesses, at the same level as the steering column. They have holes through which we gain access to the brackets securing the panel
- We pry off the panel by inserting two flat (slotted) screwdrivers into them
- If these holes are covered with film or factory-made polymer, you just need to poke them out with a screwdriver, awl or knife
- The instrument panel will easily come out of the seat, providing free access to the speedometer and the place where the VAZ 2109 speedometer cable is attached
Old sample speedometer from VAZ2101
- To unscrew this type of speedometer, you will first have to remove the air vent located on the side of the cabin heater, or the windshield air vent
- They are attached with simple latches, which you just need to slightly pry (squeeze) with a screwdriver, or simply turn
- Through the opened hole we get free access to the clamps securing the instrument panel
- Release any lock (one is enough), then push the instrument panel into the cabin
- If the shield has not been removed for a long time and the retainer has become sour, then we recommend using WD-40 or its equivalent.
After dismantling the front panel, we can easily remove the speedometer:
- To identify the cause of the problem - the speedometer mechanism or the drive cable is broken, you just need to twist the speedometer cable on the VAZ 2109 and monitor the operation of the instrument needle (here you need to be careful not to break the limiter)
- If the arrow rotates evenly and its rotation corresponds to the applied force, this means that the problem lies in the cable
- If the arrow “slips” or does not respond to cable turns, you need to replace the speedometer itself
- When replacing it, you should carefully examine the markings (color) on the back cover
- Different VAZ models use several types (types) of gearboxes with different gear ratios
- When we install a device that is designed for a different gearbox, the error in its readings can be up to 10 kilometers per hour for every 50 kilometers per hour
- That is, you are driving within the permitted limit of 60-80, but in fact you are already exceeding the speed limit and breaking the rules, a fine is the most harmless price in this case
- Compatible for different speedometer models and color coded
Replacing the cable and speedometer if necessary
Replacing the speedometer with your own hands is very simple, you just need to disconnect the electrical connectors from the old device and switch them to the new device. To do this:
- Use pliers to unscrew the cable nut and screw it to the new speedometer
- Then we install the device in place and then assemble the panel
- To replace the speedometer cable on a VAZ 2109, you must first unscrew it from the gearbox
- The connection is located under the bottom of the car, near the gearbox
Unscrew the cable from the gearbox along the bottom of the car near the box
- Using pliers (pliers), unscrew the clamping nut and disconnect the cable
- After this, unscrew the speedometer cable in the same way
- A cable nut is screwed to the device on the back side; you need to unscrew it
A cable nut screwed to the device, which we need to unscrew
- The nut has a special eye, to which you need to tie a strong soft wire or strong thread
- Then we pull the cable towards ourselves from under the bottom on the gearbox side so that the end (of the wire) or thread remains in the cabin
- Untie the thread or wire (depending on what you tied) from the old cable
- We tie it to a new cable, then pull it into the cabin, then connect
- If there is no such eye (this sometimes happens on non-original speedometer drive cables), then we use a nut as a thread stopper
- Before installing a new cable, it is advisable to lubricate it from the inside with a thick lubricant such as “Litol” or “CV joint”, more than half the length that starts from the gearbox
- This way the cable will work longer and will not rub against the sheath at the bends.
- Why is it necessary to replace the entire speedometer if it is quite possible to identify and eliminate the breakdown of its mechanism?
- This is easier because speedometer repairs are not provided and spare parts are not produced; they are sold assembled
- In addition, if one part breaks, then the next one may break in the near future.
- And long and painstaking work to identify and fix the problem will take a lot of time, it’s faster and easier for you to find, buy and install a new device in order to forget about the malfunction for a long time
The simplicity and ease of diagnosis and replacement are simply amazing; any driver can handle it without any difficulties. A video is not required here, but no one is stopping you from watching it.

