Repair process
VAZ 2110 rear right fender
- Raise the car on a jack.
- Press out the wing.
- You need to level the surface using a heavy tool (this could be a hammer). Take a nozzle with a sharp flat end and apply it to the other side of the dent.
After this, hit the flat surface of the nozzle with a hammer. A slight leveling will be noticeable.
The outside needs to be straightened with a flat object.
Note: it is better to straighten using an iron tool, since aluminum will not work. All actions must be performed quickly.
However, you should not hit too hard. This can cause the metal to stretch, causing the wing to expand slightly.
The edges need to be knocked out very carefully, along one line.
Complete rear fender replacement
VAZ 2110 right rear fender
In some cases, it is necessary to completely replace the rear fender. For example, if it is damaged to such an extent that there is no point in even trying to repair it.
Usually it is changed if:
- It was significantly deformed upon impact.
- It has small tears.
- Penetrating corrosion is observed.
VAZ 2110 rear right wing
Replacing a wing is a rather labor-intensive process, but it can be done at home by following the instructions:
- You need to completely empty the trunk, remove the bumper, headlights (see Replacing headlights on a VAZ 2110: we do it ourselves), the fuel tank, and also the trunk mat.
- Remove the rear fender.
Note: You can use a thin chisel for this. Using careful movements, you need to slightly squeeze out the rear wing, but try not to damage the car body.
- It is necessary to drill points at the junction of the wing with the transverse rear window frame. Now you can remove the rear wing.
- Carefully remove any strips of metal that remain on the wing. Nippers and a chisel will help with this. The edges need to be straightened and sanded.
Rear right wing of VAZ 2110
- If there is dirt under the wing, it needs to be removed. This surface must be thoroughly degreased.
- Attach the new wing by welding.
VAZ 2110 rear wing replacement
,rear
panels. Painting will be done later. Sorry for the long video.
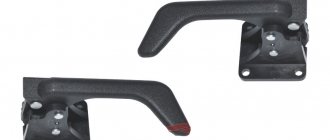
How to fix a broken car door handle
As a rule, car door handles break where the lever meets the rod or cable. It is plastic, so it can easily crack if you apply a lot of force. There is no point in repairing such a malfunction, since there is a high risk that very soon you will again have to think about how to open the door if the handle is broken. It’s better to immediately install a new part and forget about this problem.
Another group of elements that often fail are connecting clips of rods with handles and locks, which are also made of plastic. They become loose, burst, after which they can no longer hold traction and transmit force. Therefore, if it is not the handle itself that is broken, but the plastic corners of the rods, it is enough to change only them. On sale there are both similar parts for a specific model, as well as universal clips for lock rods. You can select suitable ones from among them by first measuring with a caliper the dimensions of the original plastics and the diameter of the rod.
Required tools and materials
Before removing the front wing on a VAZ 2110, it is necessary to carry out preparatory work and prepare tools. During the factory assembly of the body, the wings were welded to the cross members and struts at points. If a non-original wing is being removed, you should check how the part is installed. If there are welding points, they must be drilled out and then cut out. Tools for work:
- chisel with a sharp and wide edge;
- semi-automatic welding;
- key for 8 and 13;
- Phillips and flat screwdriver;
- grinder and circles for stripping metal;
- sandpaper R-80;
- automotive primer;
- end cutters;
- putty, rubber spatula;
- auto enamel;
- anticorrosive based on bitumen or rubber-bitumen.
Before dismantling the part, it is necessary to prepare the car:
- Place the Lada on a flat surface with the handbrake.
- Drain the fuel as welding is involved in the repair.
- Disconnect or remove the battery.
Mounted body parts, sidelights, etc. are dismantled during the work. If you need to replace the original part after an accident, it is recommended to buy a replica from the manufacturer and take measurements. In half of the cases, spare parts from the manufacturer require additional adjustment.
Removing the door trim
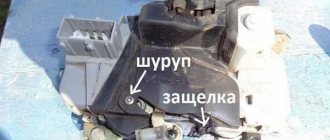
First, remove handle ; to do this, you need to remove the plastic stopper located under the washer of the handle lever. By carefully prying the latch with a screwdriver and moving it to the side, the stopper is removed from the slot. After this, you can remove the handle itself, it happens that it sits very tightly on the slots, you can help with two screwdrivers, using them to hook the seat.
Next, remove the armrest handle; there are two plugs at the top and bottom that cover the screws. Using a flathead screwdriver, open the plugs, then unscrew the screws with a Phillips screwdriver. Carefully pry up the lining of the inner door handle and remove it. It will be more convenient to do this by pulling the handle itself towards you.
READ Replacing the Lancer 9 air filter
If the front door is dismantled, the adjusting handle of the outside rear view mirror and its trim are unscrewed, and then the triangular plastic plug is removed. Then unscrew the door lock button.
The plastic upholstery is secured using eight plastic holders (pistons) located around the perimeter of the panel. During the dismantling process, these pistons very often break, so it would be a good idea to stock up on new holders in advance. So, using a flat-head screwdriver, starting from any bottom edge, carefully release the pistons.
Thus, we remove the plastic door trim assembly with the radio speaker and a pocket for small items.
Download PDF
For that? To understand how to remove the window regulator of a VAZ 2110, it is not at all necessary to contact a car service center. This is a fairly simple procedure that does not require any special knowledge or skills; all you need is a wide flat-head and Phillips screwdrivers, 8- and 10-point socket heads (in principle, a regular open-end wrench will do, but heads are much more convenient).
Let's look at how to remove the VAZ 2110 window regulator sequentially and in detail:
Replacing the hood cable on a VAZ 2110
Most often, the mechanism jams after a collision with the front part of a personal vehicle. In worst cases, you have to completely dismantle the front end.
Replacing the hood proceeds as follows:
- Two supporting telescopic tripods located on both sides of the hood are removed;
- The hinged fasteners are unscrewed;
- Move the metal blade in any convenient direction and remove the hood with slow, light movements;
- After replacing the new metal sheet, all parts should be returned in the reverse order.
The cable fragments are removed using the most convenient and accessible method. You should start with the handle in the cabin and end with the engine compartment; Having asked a handy person to hold the fixation spring located near the lock, remove the rubber plugs from the spring
Important! Along with this step, feel this place, as there may still be fragments of the cable; Pull the cable from the engine side and secure it in the passenger compartment. The correct state of the spring is slightly bent.
The instruction manual for the VAZ 2110 describes in detail how to properly secure and check the mechanism so that there are no unexpected breakdowns in the future.
Auto magazine AutoCool
Quite often a situation arises when suddenly the window handle of a VAZ-2109 car breaks down. Therefore, you should know how to remove window lifter handle in this car yourself, and then replace it with a new one, so as not to contact a car service about this, and not to pay money for such work.
If such a situation occurs, the old handle should be removed by inserting a screwdriver between the window handle washer and the latch. Then, using a screwdriver, you need to pry and press the latch of this handle, after which it should be pulled towards you and removed from the machine body.
Next, you should take out the washer on the handle body. After this, you need to take a new handle and perform all the above movements in reverse order. You must first install the washer, which is usually included with the new handle. Then, slightly holding the washer with your hand, you should place the handle on the entire window lift mechanism and rotate the handle several times so that it can engage the gears of the window lift mechanism. Next, you should install the latch and check whether the glass goes down and up.
If this happens heavily, then the problem is most likely not in the handle, but in the window lift and it should be replaced. To do this, you need to remove the handle again, and then the armrest handle, unscrewing all the screws that secure it using a Phillips screwdriver. You should also unscrew the screws holding the door pocket, and then the door lock button. After this, you need to remove the upholstery, which is secured with eight pistons.
Next, you should unscrew the two bolts securing the glass with a “10” head and remove it by pulling it up with your hands. Using the same key, you will then need to unscrew the nuts securing the window lift mechanism and remove it through the door window. After this, you need to install a new window regulator and do all the work in reverse order.
Installation and recommendations
Before installing a new wing, it is necessary to clean all dirt and rust from the cavity, and it is also recommended to wash the area and blow it with compressed air. Apply primer to the seats to which the new wing will be attached. Craftsmen recommend using GF-073 class primer.
It is better to weld a new metal wing using spot or electric arc welding in pre-designated, stitched areas. The process of installing a new element step by step:
- Make holes with a diameter of 5 mm along the edge of the vertical flange below the headlight housing on the front panel.
- In the new wing, perforate holes in increments of 5-6 cm along the perimeter of the rack amplifier, the gutter, and the edges of the connection.
- Use clamps to secure the fender to the seats, install the doors and hood cover.
- Check the width of the gaps and the geometry of the outer part for distortion.
- Tack the wing by spot welding or soldering using L63 brass at the following points: three clamps to the frame
- windshield, front upper cross member, panel, strut reinforcement, sill.
- Check the quality of the gaps and the geometry of the mating parts.
- Weld using electric welding.
- Process welding seams, clean, prime. Treat with protection and paint at the final stage.
Remember this
Removing the hood and the hood release cable is quite simple if you know what to unscrew and where. Check the parts and mechanisms for serviceability, and regularly, then a breakdown will not take you by surprise.
Frequently refer to the instructions for your car, there are many practical tips and solutions to problems. If you doubt your ability to disassemble the unit or dismantle the part yourself, take the car to a service station. Of course, the service is not free, but there is a guarantee that the breakdown will be fixed.
1. Disconnect the wire from the “–” terminal of the battery. 2. Remove the radiator trim (see here).
3. Mark the position of the washers relative to the body. This will make it easier to further adjust the lock position. 4. Unscrew the two bolts securing the lock; spring washers are installed under them. 5. Having removed the lock from under the bracket, straighten the end of the lock drive rod. Pull the end of the rod out of the metal sleeve and disconnect the rod from the lock lever. Remove the metal bushing from the rod.
6. Slide the tip of the rod sheath and remove the cable from the slot in the lock body. 7
Please note that shims may be installed on the tip of the rod shell. 8
Remove the end of the rod sheath.
9. Unscrew the nut securing the metal cable sheath holder and remove the holder from the stud and then from the rod sheath. 10. Carefully push the plastic rod shell holder inward and remove it from the rod shell. 11. Tie a soft wire or rope no shorter than the length of the rod to the end of the rod. This will make the job easier when installing a new rod.
12. From inside the cabin, fold back the cover of the mounting block (for ease of operation, the mounting block can be removed), press the hood opening handle all the way and... 13. ...lifting the tip of the shell up, remove the cable from the bracket slot (for clarity, the instrument panel has been removed in the photo). 14. Disconnect the cable end from the handle. To do this, slide the cable in the L-shaped slot of the handle until it stops and bring it out (for clarity, the instrument panel and the hood opening handle have been removed in the photo). 15. Pull the cable inside the cabin so that the rope remains in place of the cable. Untie the rope from the cable. 16. Install the hood lock drive cable in the reverse order of removal, except that the cable sheath holders must be attached last, after installing the lock. Please note that the end of the cable on the lever must be bent with the end of the cable sheath installed in the lock body.
Body and its parts Malfunctions and defects of the body Geometry and body sections Removing the front bumper Removing the rear bumper Removing the radiator trim Removing the front fender liner Removing the front fender Replacing the gas stops of the hood Removing the hood Replacing and adjusting the hood lock Replacing the hood lock cable Removing the air intake grille Removing the trunk lid Replacing the trunk lid lock Trunk lid lock 2111 and 2112 Removing the door trim (front, rear) Replacement of door glassReplacement of window lifter mechanismRemoval of outer door handlesRemoval of inner door handleReplacement of front door lockReplacement of door lock cylinderReplacement of rear door lockRemoval of doorsRemoval of front seatsRemoval of rear seat on 2111 and 2112Removal of central tunnel liningReplacement of front seat beltsReplacement of rear seat beltsReplacement of exterior mirrorRemoval of interior mirrorRemoval of instrument panelDisassembly of instrument panelReplacement heater radiatorRemoving the heater ( stoves) Body painting Anti-corrosive, anti-noise, body sealing Body polishing
Replacing the internal door handle of a VAZ 2110 Lada
1. Remove the trim from the rear door.
2. Remove the plastic film from the back door. 3. Disconnect the outer handle rod from the lock lever.
4. Using a 10 mm socket wrench with an extension, through the holes in the inner door panel, unscrew the two nuts securing the outer door handle.
5. Remove the outer door handle along with the rod.
Principle of operation
The door lock of the VAZ 2110 car consists of two parts - mechanical and electronic (not in all trim levels). The mechanical part includes three types of working schemes:
The main task of the locking mechanism circuit is to secure the door. The design uses a locking pawl and a turning latch. When the driver's door is closed, the turn signal latch moves behind the lock holder bracket. The pawl has two recesses - the main one and the additional one. With their help, the locking pawl holds the position of the rotary latch.
When the door is completely closed, the pawl lever falls into the main recess. If the door is not closed completely, when the door is slammed, the rotary pawl falls into an additional recess and the door still remains closed, but a larger opening is visually visible. An additional recess is made for the safety of the driver and passengers.
The lever mechanism ensures the door opens. The force from the door handles is transmitted through the corresponding rods to the lever mechanism. It acts on the locking pawl. The rotary latch is released, rotated, and the mechanism opens. After the door is opened, the locking mechanism returns to its original position due to the action of the return spring of the lever mechanism.
Working with ready-made kits
Do-it-yourself upholstery is good, cheap, and the interior will be a source of pride for you, since you decorated it with your own hands.
But still, not every car owner is well versed in fabrics, knows how to sew, or has mastered all the nuances of a pattern. So the result does not always live up to expectations.
Therefore, we advise you to pay attention to ready-made kits. Factory VAZ panels Lux 2 are in great demand, they create an excellent appearance of the interior
An important advantage of Lux 2 type kits is the presence of an additional sound insulation effect, which is very important and useful for the VAZ 2110. It is not necessary to contact specialists, since the installation can be done by yourself
It is not necessary to contact specialists, since the installation can be done by yourself.
- The kit often includes only panels - 4 units. But the grids for the speakers, pistons and other elements will have to be purchased separately.
- You should not trust sellers who claim that Lux 2 fits perfectly on the doors of the domestic top ten. Some of the pistons probably won’t want to be installed where they are supposed to be. This is because they slightly do not match the car model.
- Fastening from below must be done using long self-tapping screws.
- If your doors do not have power windows, then you will have to slightly change the configuration of the panels yourself by cutting holes in them for the “oars”.
- The problem of the gap that is formed as a result of installing Euro panels on a model with manual windows can be solved by masking it with some object. Although the best solution is to re-equip the car by installing electric windows.
Example of a finished banner
Price issue
Finally, we invite you to familiarize yourself with the current prices for ready-made upholstery kits. This is a set consisting of 4 panels. Clips and podiums will have to be purchased separately.
Breakage Prevention
To avoid damage to the hood cable, you should adhere to the following preventive recommendations:
- A problem with damage to the hood opening mechanism can arise due to insufficient care or simply after the service life has expired. If your car is several years old, check all parts every six months to avoid sudden breakdowns.
- To replace it, it is worth buying a multi-core cable, since it has a greater strength margin, wears out more slowly and practically does not stretch.
- The cable outlets and attachment points should be lubricated from time to time with lithol, this will help avoid rapid wear from friction.
- Even after light frontal collisions of the car with any obstacle, check all components and parts of the front part of the car. Short circuits, jamming and damage often occur, which can lead to very serious consequences. If you do not have experience with such checks, it is better to contact the service for professional help.
How to open the back door if it is locked
How can you remove the rear door trim if its fastenings are at the bottom and the door does not open?
If the back door is locked, you can open it from the passenger compartment in the same way as the front door. You need to remove the card and get to the lock itself, its rods or cables in order to influence them and unlock the mechanism.
Removing the rear door trim is both easier and more difficult than if the front lock or handle is broken. The main difficulty is created by the rear sofa; it often prevents access to fasteners. To make it easier, you often need to recline, move back the rear seat or remove it.
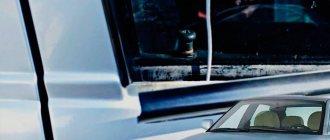
Opening the rear door through the glass
If the back door is locked (for example, the child protection checkbox is turned on) and you can’t open it, you can get to the rods by lowering the window. This method works on cars in which the rear window can be lowered completely, for example, many BMWs (but not only). The procedure is simple:
How to open a locked rear door on a BMW
- We lower the glass to the limit.
- We shine a flashlight inside to detect the cable or pull of the outer handle. Externally, since the internal one is blocked by the child protection mechanism.
- We press/pry the cable or rod of the outer handle with a thin oblong object.
- We open the back door.
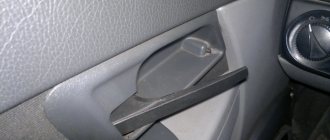
Rear door opening with child lock
If the back door does not open because the outer door handle is broken, and it is not clear how to open it because the inner door is locked with a child lock, you can try to open it by prying the lock flag. To do this you need:
- Take a thin oblong object.
- Push it out of the cabin between the door and the arch in the area of the flag.
- Pry the flag and move it to the “open” position, pressing it in the desired direction.
The method only works on models in which the lock is made in the form of a movable flag. If a rotary cylinder is used, this option is not suitable.
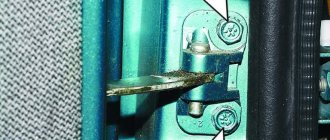
Opening the lock by acting on the locking mechanism
If you have the most advanced case, for example, the rod is torn off, the lock itself is broken, etc., then even removing the card will not help if the back door is locked. Here you can try to influence the locking element directly. To do this you need:
- Remove the door card (not necessary on all cars).
- Pull off the interior door seal.
- Get to the area where the locking mechanism is located that engages with the bracket in the arch.
- Use a thin oblong object to press the locking mechanism tab to open it.
Opening a lock using the Lada Granta as an example. Suitable for other car models if the lock is locked. Moreover, on many cars it is not even necessary to remove the door trim: just fold back the seat and remove the rubber seal near the lock.
A similar way to open a lock if the handle is broken is on the Opel Astra and many other GM cars.
How to open the hood of a VAZ 2110 from the outside?
I. For cases when the hood lock simply jams:
- To open the hood of a VAZ 2110, you need to ask an assistant to press down the hood. You can sit on the front of the hood, which is just above the lock. If this does not help, then you need to loosen the hood with intermittent movements (press and release).
- The driver pulls the hood lift cable.
- When the hood is opened, you need to thoroughly lubricate the lock.
Material on the topic: What is the real fuel consumption of the Lada Kalina?
II. Instructions for cases when there is an electric lock on the hood and the battery is dead:
- To open the hood of a VAZ 2110, we disassemble the light located above the driver or passenger seat.
- We light + and – from another car.
- We start our car and open the hood to take out the dead battery and charge it.
* Experienced drivers, in order to open the hood of a VAZ 2110 from the outside, provide for this case a hidden wire that goes to the battery. If the battery is low, you can connect the wiring to the charger and charge the battery.
Related material: VAZ 2109 cooling fan does not turn on
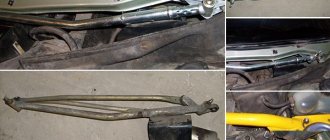
III. For cases where the hood opening cable is broken:
- To open the hood of the VAZ 2110, we put our hand into the air intake (between the bumper and the heat exchanger).
- We are trying to feel the lock tongue, which should be pulled by a cable (pictured).
- We grab the tongue with pliers and pull it down until the lock strap opens.
*Some experts claim that they have come across a hidden cable that helps open the hood on a VAZ 2110. To find it, you need to jack up the front of the car on the driver’s side. It can be securely hidden behind a protective cover in the area of the front wheel. You need to pull the cable down sharply and the hood will open.
I hope the tips helped you cope with this breakdown yourself.
For clarity, here is a video on how to open the hood of a dozen in the field:
How to open a locked door if the card cannot be removed (there is no access to the screws)
Removing the card with difficult access to the bottom screws
Often, access to the lower or side fastenings to remove the door trim is prevented by a threshold or seat. This applies to cars where the door card is additionally held on by several screws from below, near the threshold.
If access to them from the passenger compartment is maintained, you can get there by moving the seat back and forth and unscrewing the screws with the shortest screwdriver. If the rear door handle is broken and the sofa overlaps several fastening elements of the card, it will have to be folded back or removed. It may also be necessary to bend or remove the seal.
Partial card removal to access the lock
On some cars, the lower fastening screws of the door card, when closed, are blocked by the threshold and cannot be reached, even if you remove the door seal from the passenger compartment. Then you need to try to tear it off the door at least partially.
If you cannot remove the card completely, you will have to act extremely carefully, trying to bend the casing only from the side of the lock. You need:
- Unscrew all accessible fasteners on top of the card and unclip the clips.
- Move the door card from above to create a gap between it and the door.
- Penetrate (with your hand or a foreign object) into the gap to the cables/rods and act on the unlocking rod, cable or tongue.
After the lock opens, it will be possible to normally disassemble everything completely without the risk of breaking it and gain access to the internal parts of the door for repair or replacement.
Removing the lock striker
How to open a locked front door on a Chinese car
In most cases, the reciprocal U-shaped lock bracket is installed on the rack in the direction of travel with the upper part (“shelf” of the letter U forward). But on some models this bracket is perpendicular (the “shelf” looks out to the side) and its mountings can be accessed from the passenger compartment by removing the B-pillar trim. If your car is one of these, you can:
- Remove the upholstery of the rack on which the bracket is installed.
- Through the hole in the rack, get to the screws that secure the bracket.
- Drill out the screws or force them out, for example using a broken bolt extractor.
- Once the screws are no longer holding the bracket, the door will open and you can gain access for normal repairs.
The disadvantage of this method is that it is suitable for a very small number of car models. If the bracket is installed longitudinally in the direction of travel, then even if there is a hole in the rack, you will have to somehow saw off or knock down with a chisel the cage nuts that hold the screws.
How to open the hood of a VAZ 2110
To install the front shock absorber spacers, you need to remove the front strut and, using a screwdriver and pliers, remove the standard studs of the upper shock absorber support. Having installed longer studs, it is necessary to install the front shock absorber spacers on the upper support and, using a “13” wrench and nuts, tighten the upper support and spacers. In this simple way, you can raise the front of the car and thereby increase ground clearance.
Replacing the outer CV joint boot of a VAZ 2110. Which is cheaper? Should I change the CV boot or change the CV joint itself? Replacing the boot of the outer CV joint on a VAZ 2110 is not difficult and requires a minimal set of tools and about 30-40 minutes of time.
Detailed instructions for replacing the outer CV joint boot of a VAZ 2110 are shown in the video. Enjoy watching everyone and don't break down.
Installation of silent locks
There are two ways to install a silent locking block - by first removing the door card and without dismantling the cladding.
Work to install a silent lock on the front door of a car without dismantling the door card is carried out as follows:
- Using a powerful power screwdriver with a socket head and a corresponding key used as a lever, unscrew the top screw securing the lock.
- Screw in a long pin of the same diameter instead. It will act as a holder for the internal lock so that it does not fall down.
- Unscrew the lower self-tapping screw securing the door lock.
- Remove the external lock.
- Place a silent lock on the hairpin.
- Tighten the bottom mounting screw.
- Unscrew the pin and screw in the top mounting screw instead.
- Using a reinforced screwdriver and a key, unscrew and install the standard lock latch pin.
- Insert a new plastic-coated locking pin.
- Wrap it as tightly as possible.
Now all that remains is to check how silently the new mechanism works. To do this, slam the door several times, opening and closing it.
Reasons for failure of the hood cable on the VAZ 2110
The hood lock of a VAZ 2110 car is jammed due to a broken cable. The problem is identified when inspecting the car. Vehicle owners may panic because they cannot open the hood the old fashioned way. However, panic will not help here. The first thought that comes to the driver is to go to a car service center for help, but this is very expensive and takes a lot of time. Are there ways to troubleshoot problems ourselves? Of course there is, but before you start to act, you should understand where the problem occurred.
First you should look for a strip in the interior. There is a lever under the dashboard that has a cable attached to it. The owner of a VAZ 2110 will be lucky if the cable breaks on the inside of the car, then you can get to the broken part with pliers. Having felt the rest of the cable, you need to grab it with a tool and pull it out, but smoothly, not sharply. It is recommended to grab the middle of the cable, not the beginning, as it may slip out. Next, you need to make a small loop so that the tool can be used to tighten the piece into the interior. The main thing is to do everything smoothly, without sudden movements, otherwise the cable will break in another place. If all manipulations are done correctly, the hood will open.
Typical faults and solutions
Most often, VAZ 2110 owners encounter the following problems with the locking mechanism:
- It is impossible to close the door or a lot of force must be applied. Reasons: the latch is too moved inside the passenger compartment or the lock drives are incorrectly adjusted. Remedy: Move the lock outward slightly or adjust the drives.
- The door does not close completely and remains closed only in the first (emergency) position. Reason: The locking mechanism has failed. Remedy: repair or replace the locking mechanism.
- The door lock does not work. Causes: the locking mechanism has been adjusted incorrectly. Remedy: adjust the locking mechanism.
If the car has been converted to an electric lock, then it is necessary to diagnose the operation of the electrical signal from the key fob to the catchers, check the connection diagram and only then disassemble the door panel. The rear door lock is checked in the same way after diagnosing the central system.
Ways to open the hood
In different situations, different methods are used to cope with the described malfunction. Among the most common cases are the following:
Discuss
Select it and press Ctrl + Enter
A prototype of the new Volkswagen Polo for Russia was noticed in Moscow, after which the first pictures of the model appeared on the Internet. Although the car was tightly covered with camouflage, some of its features were revealed before the expected premiere.
Until the last moment, Volkswagen kept the details and technical data regarding the new Polo for Russia strictly secret, but photo spies noticed a prototype of the sedan on the streets of Moscow, after which they published photographs on the Internet.
The profile of the vehicle, as experts note, will remind motorists of the “old-fashioned” Skoda Rapid sedan, and from the front it will look like the Volkswagen Jetta, which should arrive on the Russian market in the second half of this year. In addition, the new car will borrow LED taillights from the Czech car, and the shape of the roof and bumpers from the current generation.
Under the hood there will be a naturally-aspirated engine with a volume of 1.6 liters and a power of 90 or 110 hp; a turbocharged TSI with a power of 125 hp is expected. volume 1.4 liters. In the first two versions, the pair will offer an automatic or manual transmission with 6 speeds, and for the turbo - a 7-speed DSG robot.
The show of the new Volkswagen Polo for Russia is planned for the second half of this year, but the exact date has not yet been announced by the developer.
Smoking is an unpleasant habit that causes quite a lot of inconvenience to those people who are nearby and forced to inhale tobacco smoke against their own will.
What you will need to complete the work
To carry out work on changing handles, you need to stock up on a standard set of tools. The changeover procedure is not particularly difficult, but it will take a lot of time. After all, in order to carry out the replacement work, you will need to remove the door trim, and after that begin the dismantling process.
In addition to the standard set of tools, you will also need to purchase new mechanisms and cylinders to replace the front door locking device. Let’s take a closer look at what the procedure for removing and installing them on the “seven” is.
Changing the external handle on a VAZ 2107
Removing the external door handle on the “seven” is carried out by performing the following manipulations:
- First, you need to dismantle the door trim from the door on which you need to change the mechanism.
- Once access to the inside of the door is gained, you will need to disconnect all the rods and drives of the mechanism inside.
- Now you need to unscrew the two nuts with a 10mm wrench, which secure the device from the inside.
- After the nuts are unscrewed, you can dismantle the device. In a similar way, both the front and rear mechanisms for opening doors on the VAZ 2107 are removed.
- After the door handles on the outside are removed, new ones can be installed. Installation is carried out in the reverse order of removal, so there will be no problems.
When installing new products, we also recommend changing the rubber seal, which should be supplied with the new devices. This seal prevents water from penetrating inside the door.
Features of replacing the internal handle on the seven
Now let’s pay attention to the issue of replacing the interior handle on a VAZ 2107. We replace the inside door handle on the “seven” in cases where it jams and does not work to open, but more often than not it just breaks
The removal process looks like this:
- Initially, the upholstery is dismantled.
- To remove the product located inside, you need to use a Phillips screwdriver to unscrew the two mounting screws.
- After unscrewing the bolts, the product should be taken inside.
- A rod is attached to the product, which can be removed only after the handle is removed from the inside of the door.
- After removing the rod, you must put it on the new device in the same way. For this purpose there is a special fixing rubber insert.
- A new product with a fixed rod is inserted from the inside, after which it is fixed with the same two screws.
- Finally, you should install the casing in place and enjoy the work done.
Replacing the larva
There is another important element in the front door, which is called the lock cylinder. This is a device through which it is possible to lock the door from the outside with a key, which prevents it from being opened by third parties. The cylinder requires replacement only when it fails or gets stuck when opening, and it is not possible to lock the car.
The new cylinder is sold along with the keys, which is something you need to pay attention to. We recommend changing all three cylinders at once: two in the doors, and one on the trunk lid
This will make the further operation of the car easier (all locks will be opened with a single key).
On the VAZ 2106 and VAZ 2109 car models, the cylinders are built into the handles themselves, while on the “seven” this product is located below the door opening mechanism, so its replacement is carried out separately.
To dismantle and change the larva, you will need to perform the following manipulations:
- The upholstery and other elements from inside the car door are removed.
- It is necessary to disconnect the rod from the cylinder, through which the lock is blocked when the key is turned.
- Using pliers you need to remove the locking bracket.
- The mechanism itself is removed, together with the seal ring.
Installation of a new device is carried out in the reverse order of removal. All VAZ-2107 handles are changed in a similar way, and after the change process it is necessary to check their performance.
The serviceability of the devices in question on a VAZ 2107 car is very important. If the products are faulty, it is quite problematic to get into or out of the car (if the mechanism is jammed from the inside). Many owners know how unreliable the mechanisms in question are in domestic cars. At the first sign of a malfunction, it is necessary to immediately carry out diagnostics and, if necessary, lubricate or replace the part. Often it is not possible to repair (both internal and external) the device, so it is better to immediately buy new ones. As an option, you can install euro handles.
General principles of lock operation and reasons for blocking doors
Since the handles are located at a great distance from the lock, they are connected to it using rigid wire rods or cables. The parts to which these pull rods or cables fit are often made of plastic, so they break or wear out easily. Accordingly, if the handle itself breaks, to open the door in an emergency, you need to use a cable or rod to operate the lock. If the tongue on the side of the lock breaks off, you need to move what is left of it.
Design of a standard car door lock
The second reason why the door is locked is that the lock is faulty. It could be:
- jamming of elements in the lock;
- wedge of the flag (soldier) locking the lock;
- central locking system failure.
Most often, drivers become hostages of the door locking function to prevent children from accidentally opening them. When the latch is moved, it slams shut and to open it, you need a working outer handle, which is broken...
Opening a door with a broken lock is much more difficult than when the inside and outside door handles are broken at the same time. However, this does not happen often and in any of these cases it is necessary to remove the door card for further work with the mechanism. Therefore, first we will look at how you can open the door or how to remove the trim when the door is closed, and then how to unlock the lock.
How to open the hood of a VAZ 2110 - 2112 when the cable breaks
Do-it-yourself car repair - Video
A fairly common and unexpected breakdown for most owners of “iron” horses is a broken hood cable, and many do not know how to open the hood of their vehicle in this case. This training video will help you find the answer to this question, in which the author of the video will clearly show how to find a way out of this unpleasant situation.
In order to open the hood of a VAZ 2110 - 2112 car, you just need to have pliers on hand and put in a little effort. Well, best of all, watch the video to the end and you will learn all the secrets of this procedure.
Unlocking the lock
If the lock is blocked due to water ingress in winter, there are several ways to solve the problem:
- Use a lock defroster. The substance is otherwise called “liquid key”. The product is available in the form of a spray.
- Take matches and a lighter. Heat the key a little in the fire and insert it into the lock. Shake slightly to the sides. The main thing is not to overdo it, so as not to break the VAZ lock.
- Spray the keyhole with alcohol or an alcohol-containing substance. For example, cologne or eau de toilette. Pure alcohol actively generates heat and dissolves ice.
- Make a heating pad from a bottle of warm water or a bag of hot sand. Place the makeshift heater against the lock. Keep the heating pad on for a couple of minutes.
- Pour some windshield washer fluid inside the lock. Remember, the washer contains isopropyl alcohol, which has an aggressive effect on metal.
- Take a cocktail straw and insert it into the lock hole. Breathe inside. Warm air can melt ice.
- Try applying silicone grease around the perimeter of the rubber seal. In some cases, the car door freezes in this very place.
- Direct the hose containing the exhaust gas from the pipe of another vehicle into the lock.
Replacing the cable and hood
Often the opening mechanism can jam after a frontal collision. Due to damage, the entire front end of the vehicle may have to be replaced. Replacing the hood, for example, is done in this way:
- Remove the two persistent telescopic struts on the sides of the hood.
- Next, unscrew the hinged fasteners on both sides.
- We move the metal sheet to the side and carefully remove the hood.
- Installing the new one is done in reverse order.
We replace the cable in the following sequence:
- We need to extract the cable cuttings using any available method. We start with the handle in the cabin, then move on to the engine compartment.
- It is advisable to take with you one assistant who will hold the locking spring near the lock.
- There are rubber plugs inside the spring that need to be pulled out. Along the way, feel this place; there could be pieces of the cable left there.
- We stretch the new cable from the engine side, then fasten it in the cabin. The spring should be bent.
The instructions for the VAZ-2110 will tell you how to secure the mechanism and check its functionality. Don't make the tension too tight, otherwise it will break again!
Replacement of external door lock
The work can be done without removing the door trim. There is no need to adjust the lock after replacing it.
Using an impact screwdriver with a Phillips head No. 3, loosen the two screws securing the lock.
Having unscrewed the lower screw securing the lock, screw in its place an M8 pin 70-80 mm long
Turn out the top screw.
We remove the outer lock, while the pin prevents the inner lock from falling
We install a new external lock and secure it.
We tighten the screws with an impact screwdriver
Removing the door trim
Using a Phillips screwdriver, unscrew one self-tapping screw in the upper part of the lining and three in the lower part.
Using a screwdriver, press out the lock of the window handle.
Remove the window handle.
Using a screwdriver, remove the armrest handle cap.
Using a Phillips screwdriver, unscrew the two screws securing the armrest handle.
We remove the handle, carefully removing the inner door handle from it.
Use a Phillips screwdriver to unscrew the lock release button.
Use a screwdriver to pry up the upholstery (secured with eight pistons) and remove it
Door parts according to the catalog
Removing the door glass and window lift mechanism
Remove the door trim.
Using a screwdriver, remove the inner seal of the sliding window from the door.
We lower the glass a little down.
Cliff from the castle
It is much more difficult to open the hood if the cable breaks somewhere on the side of the lock. In this case, we also arm ourselves with a tool: pliers. It is advisable to have a pit, overpass or structure that can imitate it.
- We wait for the engine to cool down and only after that we begin work. We fix the car with a jack.
- We place ourselves under the bottom of the car, remove the crankcase protection and the tin boot. To do this you will need tools: a screwdriver and a ratchet.
- We put our hand between the engine compartment and the radiator. You need to reach the hood lock.
- Under the hood lock there is a retaining ring to which the cable is attached. Pull the ring toward you or to the side.
- If it doesn’t budge after the first time, call an assistant; you may need to press on the hood from above for the mechanism to work.
The second option involves using a thin wire to open the locking mechanism. This is very difficult and not always possible to do, so focus on the first and third points.
Required tools and materials
Before removing the front wing on a VAZ 2110, it is necessary to carry out preparatory work and prepare tools. During the factory assembly of the body, the wings were welded to the cross members and struts at points. If a non-original wing is being removed, you should check how the part is installed. If there are welding points, they must be drilled out and then cut out. Tools for work:
- chisel with a sharp and wide edge;
- semi-automatic welding;
- key for 8 and 13;
- Phillips and flat screwdriver;
- grinder and circles for stripping metal;
- sandpaper R-80;
- automotive primer;
- end cutters;
- putty, rubber spatula;
- auto enamel;
- anticorrosive based on bitumen or rubber-bitumen.
Before dismantling the part, it is necessary to prepare the car:
- Place the Lada on a flat surface with the handbrake.
- Drain the fuel as welding is involved in the repair.
- Disconnect or remove the battery.
Mounted body parts, sidelights, etc. are dismantled during the work. If you need to replace the original part after an accident, it is recommended to buy a replica from the manufacturer and take measurements. In half of the cases, spare parts from the manufacturer require additional adjustment.
Removing the power windows
As mentioned above, the design of the front, rear, right, and left window lifters is different, but the operating principle is similar.
To dismantle, you need to arm yourself with two screwdrivers: a Phillips and a flathead, as well as two keys, 8 and 10.
- First of all, we remove the window lifter handle, for which you will first have to pull out the stopper located under the lever washer of this very handle. Using a screwdriver, move the latch to the side, removing the stopper from the plate. Now you can remove the handle. If the handle is too tightly seated in the seat, you can help it with two screwdrivers, hooking it onto the base.
- Remove the armrest handle. Using a flat-head screwdriver, we unscrew the plugs that hide the two screws that hold the handle, and with a cross-head screwdriver, we unscrew the screws themselves.
- The handle of the exterior rear view mirror is removed, as well as the handle trim.
- Carefully, slowly, the door trim is removed, along with the compartment for things.
Drives
As in many other cars, in the case of the VAZ 2110 there are two types of drives.
- Electric. A rather complex set of elements, which consists of a drive drum or gear, as well as an electric motor with a worm gearbox built into it. This design allows you to raise and lower the glass at the touch of a button.
- Mechanical. The most simplified design, which includes several parts, gears and handles. To raise the glass in a VAZ 2110 using a power window lifter, you need to turn the handle clockwise. The drive roller takes on the required physical effort, so lifting is not difficult.
READ Replacing the oil pump VAZ 2109
There are two types of drive:
- Mechanical - consists of a simple set of parts, a pair of gears and a handle. In order to set the glass sheet in motion, you need to turn the handle clockwise (if you need to raise the glass) or counterclockwise (if you need to lower it). Physical forces are transferred to the drive roller, that’s the whole principle of operation of the mechanical device.
- Electrical is a more complex set of parts. An electric window regulator consists of a drive drum or gear and an electric motor with a built-in worm-type gearbox.
According to the lifting mechanism, window lifters are divided into several types. Moreover, in AvtoVAZ cars there are different design options for window lifters.
So, the well-known seven is equipped with a rack-and-pinion type device; by the way, the “ten” also has rack-and-pinion window lifters.
This option is good because it is easy to repair and easy to operate, but a serious disadvantage of the design is its unreliability. In addition, the rack-and-pinion type of device requires lubrication.
A more advanced design is the cable type, presented in the tenth VAZ model.
The positive point here is the fact that the possibility of glass distortion is completely eliminated. But, like rack and pinion mechanisms, cable mechanisms are also unreliable.
Although. and Metprom devices costing 300 rubles.
A standard cable window lift costs less, 250 rubles.
The new generation of mechanisms are lever ones that operate using hinges.
Their advantage is the absolute absence of noise, but this type of device only works in conjunction with an electric motor, while the first two can also be presented in a mechanical version.
The tenth model is equipped with two types of window lifters: simpler modifications of previous years come with mechanics, and modifications of later years of production come with electric windows.
But since owners of the old ten are more common among motorists, then we will next talk about how to replace a mechanical window regulator yourself, but first we will understand the most common faults of window regulators characteristic of the VAZ-2110.
By the way, the electric window lifter changes in exactly the same way; all the grooves and fastenings are similar and will fit easily.
- What most often happens in the top ten is the grinding of the lift gear, which makes the device inoperative.
- The second reason is a cable break, which disrupts the entire system.
Problems can be solved by dismantling the device and replacing defective parts, or by completely replacing the window regulator, which would be a more correct and simpler option. Now let's get to work.
Lifting mechanisms
As for lifting mechanisms, there are several of them. For the VAZ 2110, various options are available.
It was installed on the VAZ 2107, then switched to the VAZ 2110. The advantages of such a mechanism are its simple repair and operation. But the design is not particularly reliable; for effective operation, the rack and pinion device must be lubricated. Design flaws forced the developers to abandon it
A more advanced system that eliminates the possibility of glass distortions. But the reliability is not the highest. The most attractive option for a cable mechanism is a structure made of galvanized metal. They are also worth paying attention to Metprom devices. Their current Standard VAZ cable lifts will cost 250 rubles
These are the most advanced mechanisms available for the VAZ 2110. Their operation is based on the use of hinges. The design ensures silent operation. However, the mechanism is only available on electric windows
Rack and cable mechanisms are offered complete with electric and mechanical drives, while lever mechanisms are available only with an electric motor.
Sources:
https://autopower2015.ru/raznoe/kak-snyat-ruchku-steklopodemnika-vaz-kak-snyat-ruchku-steklopodemnika-vaza-kak-snyat-ruchku-steklopodemnika-vaz-2107.html https://autoflit.ru /130-kak-snyat-steklopodemnik-na-vaz-2110-poshagovaya-instrukciya.html https://avto-idea.ru/remont/zamena-steklopodyomnika-na-vaz-2110-foto-i-video/