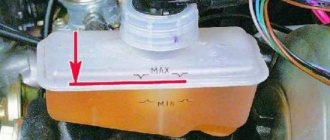
Don't believe those who say that the brakes were invented by cowards. They were invented by very smart and long-lived people, and the vacuum brake booster was also invented by very lazy people. In order to check the need for VUT on your car, try stopping it by pressing the brake pedal with the engine off at low speed. Most likely, to come to a complete stop, you will have to press the brake pedal so hard that you will even need to sit up a little in your seat. Can you imagine if such a surprise awaits you during heavy traffic in a stream of cars, and even on a descent? Therefore, this issue simply needs to be taken seriously and with full responsibility for your own and others’ safety. So, let’s figure out how to repair a VUT and replace its components.
When to repair and when to replace?
- The VUT will have to be changed if the diaphragm, return spring or one of the valves is damaged. Then the car owner will simply be forced to remove the VUT and replace it. Moreover, this will need to be done as quickly as possible. Replacement in this case is the most reasonable solution, since it is not always possible to find individual spare parts for VUT on sale (this is especially true for diaphragms).
- It is advisable to carry out repairs in case of damage to external hoses. The hose may crack, the clamp on it may become loose, which leads to a loss of tightness, etc. All these problems can be eliminated without replacing the VUT. A leak in the system is, of course, bad, but it is not a critical failure (unless the driver is annoyed by the hissing in the cabin).
The brakes stopped working
In the worst case scenario, the brake booster control valve fails completely, resulting in complete inoperability of the brake system. Fortunately, such an outcome is unlikely. But if suddenly it does occur, carefully stop the car, tow it home and contact a qualified specialist in the diagnosis and repair of brake systems. Depending on the severity of the case, the matter may be limited to only replacing the valve, but serious repairs of the entire brake system may be required.
The brake booster control valve is an important element of the braking system, ensuring driving safety. That is why the presence of the described symptoms should not be ignored or postponed “for later”. Contact a qualified mechanic who can professionally diagnose and repair your vehicle's brake system.
Repair and repair
To repair a vacuum pump, you must first stop its operation, then lift it to the surface and inspect it. There can be many reasons for malfunctions; we need to look at them in more detail. What to do if the pump is working, but water is not pumping from the well, there is no rise? In this case, you need to do the following:
Diagram of a vibration pump.
- The pump rises to the surface already turned off, after which you should check whether there are any leaks in the equipment pipelines and whether the check valve is working correctly. After this, all joints of the device are inspected, since the cause of the malfunction is usually the entry of foreign objects into the housing. This applies to sand, small particles of clay and debris, leaves and other things. It is quite possible that the spring and the check valve itself have failed due to clogging.
- It is necessary to check the pipeline located between the well and the pump; there should always be water in it. The pump should not work if there is no water. If there is no liquid, then it is necessary to fill the pipeline through a special filling hole provided in the housing.
- The cause of the malfunction may also be that the well or well is simply dry; this situation is not anything exceptional. In this case, it is recommended to lower the pipeline or suction pump hose deeper. It is possible that the water level has dropped, but it may also be completely absent. This needs to be checked immediately. It must be remembered that the distance from the water surface to the pump should not exceed the maximum specified by the manufacturer. The water level must be carefully monitored.
- The cause of the breakdown may be the formation of a hole between the impeller and the housing; this phenomenon is caused by the increased abrasiveness of the water in the well.
To avoid this breakdown, experts advise immediately taking this possibility into account at the equipment design stage and conducting water tests. It is enough to immediately install filters and special means to reduce abrasiveness. Often the cause of development is ordinary sand, which can be found at the bottom of any well or borehole. In this case, the equipment begins to work on its own; you should not expect performance from the pump. The repair is simple; it is enough to replace the housing and impeller, if they are commercially available. Diagram of the device of a vacuum liquid ring pump. - There is another reason why such a breakdown occurred and the vacuum pump does not work. The network supplying the equipment is experiencing low voltage or constant surges. You should call an electrician or use special equipment to maintain the required voltage in the network.
Modification of VUT VAZ 2110
The difference between the brake pedals of a foreign car and a VAZ 2110 is immediately noticeable. On foreign cars the brake pedal is softer than on Russian cars. What will be the benefit of modifying the vacuum brake booster ? What positive and negative aspects will it bring? Tuning the VAZ 2110 brakes is a hot topic that touches on the topic of installing rear disc brakes, but in this article we’ll see what modifications to the VUT (vacuum brake booster) will bring.
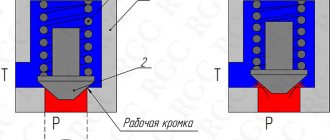
The entire modernization of the VUT tens consists of installing a washer. How the washer affects the braking process can be traced to the operating principle of the VUT: When you press the brake pedal, the rod 18 rests against the rod 3 through the washer 23. Due to the design features, the bypass valves begin to work a little later than the rod begins to press on the GTZ. In this regard, resistance appears on the pedal, and after installing the washer, this process changes in the opposite direction. That is, initially (or simultaneously with the movement of the rod) after the movement of the rod 18, the valves open/close, which is why the VUT begins to work, while the force is significantly reduced at rated loads.
That is, installing the washer in the VUT gives:
- When braking smoothly (when the pads are just being applied), the pedal will be lighter.
- During heavy braking, the pedal response remains the same as before installing the washer.
Installing a washer in VUT VAZ 2110
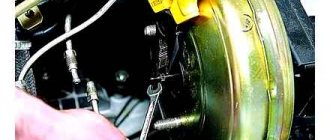
We remove the frill and sound insulation of the engine shield.
We unscrew the GTZ and move it to the side, the tubes remain screwed on.
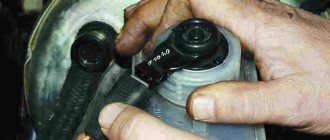
We take out the rod with the oil seal from the VUT and reduce its length by screwing in the tip by the thickness of the ring (1mm). It will be more convenient to clamp head 4 in a vice and turn rod 3 with a small pipe wrench.
Using tweezers, pull out rubber washer 23 (to do this, an assistant should press the brake pedal). We place the prepared ring under it, and on top washer 23 and a shortened rod with an oil seal. In other words, we install the ring between positions 22 and 23, increasing the stroke of the rod 18 by 1 mm.
Washer dimensions D1=25xD2=15xh=1. The thickness should be no more than 1mm, because the information content of the brake pedal will be completely lost. The thinner the washer, the less effect it has. The washer can be either metal or rubber.
There is no point in increasing the washer, since the efficiency of the vacuum unit does not change, but its characteristics change. Also, with an increase in the thickness of the washer, it may happen that at maximum pressure, the rod 18 will not reach the rod 3, and accordingly, the force will be transmitted through the washer (membrane 24), which can damage it.
We assemble everything in reverse order.
What happened after finalizing the VUT? Roughly speaking, the washer selects “free” pedal travel. But it cannot be called a free stroke either, because this is the stroke of the minimum pressure in the system. Now, with a small pedal force, the car will brake harder than before.
Adjusting the rod of the vacuum brake booster UAZ
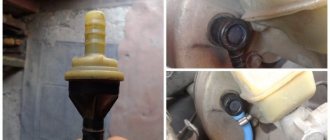
Often, after replacing the VUT, problems appear, and the car no longer brakes as well as it did before with a working “vacuum system” - the brake pedal takes off at the very end, or the system does not fully release the brakes. The whole point here is the rod that presses on the GTZ piston - it may not be adjusted from the factory. This rod has an adjusting screw, which is secured with a locknut. On UAZ cars (we don’t take the “Patriot” model into account), we check the rod adjustment as follows:
- push the rod all the way back;
- take a metal ruler or feeler gauge to adjust the valves and lay it along the body;
- We measure the protrusion above the body with a caliper - the rod should extend approximately 7.8-8.0 mm;
- if this distance does not correspond to the norm, loosen the lock nut and use the adjusting screw to increase or decrease the length of the rod;
- Having established the desired size, fix the screw with a lock nut.
Even on the UAZ Hunter, the pedal can “take” at the very end, and it has a large free play
It is necessary to pay attention to the position of the pedal - if it is too low from the floor in the cabin, it needs to be adjusted:
- unscrew the brake light mounting nuts on the brake pedal;
- disconnect the wires from the brake light sensor;
- Use two 19 mm nuts to raise the pedal, press the brake to check the free play, and if the pedal is adjusted normally, tighten the nuts.
https://youtube.com/watch?v=iTMZDTj0ats
Source
How to adjust the brake system on a VAZ 2110
In theory, the parking system should be able to hold the VAZ 2110 when the surface is tilted up to 25%. If it can’t cope, don’t rush to a car repair shop, where you’ll have to shell out a hefty sum - you can provide first aid to your car yourself:
- The tensioner locknut must be loosened.
- Then we tighten the cable.
- We check the full stroke of the lever (it should be 2-4 teeth per sector).
- Tighten the locknut more tightly.
- To be on the safe side, we perform several brakes, checking at the same time whether the stroke of the lever has changed.
In this simple way you can check how well the vacuum brake booster works on a VAZ 2110.
The wheels should rotate without effort, with the lever fully lowered.
Do-it-yourself design and adjustment of the brake system of VAZ 2110, VAZ 2111, VAZ 2112
Adjusting the brake system of VAZ 2110, VAZ 2111, VAZ 2112
Personal experience of car owners.
“I am a driver with little experience, so it was very difficult for me to independently determine the cause of the pedal hardness. I couldn’t even figure out how to remove this or that part in order to diagnose specific problems. In the end, I took my Audi A6 to a service station. The craftsmen working there determined the nature of the damage without even removing the units. Correct diagnostics helped me significantly save on repairs.”
“When the amplifier of my VAZ 2114 broke down, I verified that it was faulty in a simple way. To do this, the hose is removed and the amplifier is turned off. The presence of a vacuum when starting the engine indicates that the “vacuum valve” is faulty.”
“The vacuum booster and cylinders are very difficult to diagnose. The best vehicle diagnostics can be provided only by those car services that have pressure gauges.”
What is it, why, how does it work
VUT for VAZs is a device that is responsible for braking the car. Due to the vacuum, it helps create additional force on the brake pedal. Thus, it simplifies the operation of the braking system - the car wears out less, stops faster, and the driver needs to put in less effort behind the wheel.
But it's not that simple. On VAZ 2110 cars, brake boosters affect engine performance,
Therefore, you need to listen to their serviceability and look much more closely than to the “jamming” of other parts. At idle, the injection on this car is equal to 3-4.5 milliseconds from 7 to 12 kg of air. At the slightest violation of the mixture ratio (air, fuel and evaporation), the engine will stop working evenly and begin to stall. There will be leaks in the cylinders, due to which the spark plugs may fail, the wear rate will increase, which, in turn, will increase fuel consumption and the cash costs of maintaining the machine. And all these problems are caused by air leaks from a faulty vacuum brake booster of the VAZ 2110.
Reasons for checking the performance of the vacuum brake booster
The car's braking system will not completely fail, even if the booster breaks down, but the driver will have to make much more effort to slow down the car. A clear sign of VUT failure is that the pedal becomes “hard” and braking efficiency drops sharply. This leads to a dangerous situation on the road.
In addition, other signs appear:
- free play increases to half;
- the operation of the power unit becomes unstable, this is especially noticeable at idle;
- the brakes “stick”, that is, the car continues to slow down even when the brake pedal has already been released.
Important. The VUT check must be carried out only when the car engine is running, since the amplifier can operate correctly only when vacuum is supplied from the engine.
Consider the reasons why the above damage to the vacuum booster may occur:
Consider the reasons why the above damage to the vacuum booster may occur:
- the connection of the vacuum hose is loose, or air is leaking through damage in the hose;
- loss of tightness due to wear of the diaphragm;
- air valve failure;
- depressurization of the housing;
- decrease in spring elasticity.
You can seal the connection and replace the pipe yourself, just don’t forget to check the “vacuum seal” for functionality. However, if the check shows that the amplifier is broken, then the entire mechanism will probably have to be replaced.
Efficiency of use
The VAZ 2109 model was one of the first domestic cars to receive such a unit as standard equipment (before that, not all cars were equipped with an amplifier). This innovation has significantly improved the efficiency of driving and reduced its braking distance, regardless of the road surface.
Braking efficiency with this unit increases on average by 30-40%, depending on the specific model and road conditions.
On video of the VAZ 2109 vacuum brake booster:
Adjustment and repair of the unit after checking the vacuum brake booster
In general, adjusting the VUT comes down to adjusting the free play of the brake pedal. To set it correctly, you need to adjust the length of the rod. The adjustment bolt controls the gap/protrusion. Correctly adjusting the position of the bolt itself will allow you to set the ideal timing of the valves.
When the leak test is completed, do not forget to adjust the free play of the brake pedal. Adjusting the rod length creates a gap that determines the amount of pressure on the brake cylinder
Therefore, it is very important to set the rod length correctly and set the appropriate gap. The free play of the pedal when the engine is not running should be from five to fourteen millimeters
This gap is controlled by a bolt located above the plane of the vacuum brake booster. A small gap leads to jamming of the working cylinder, resulting in rapid wear of the pads and increased fuel consumption of the car. In addition, the car begins to slow down randomly, as if you were driving with a handbrake. A large gap, on the contrary, leads to an increase in pedal travel, which indicates a violation of the tightness in the assembly
The free play of the pedal when the engine is not running should be from five to fourteen millimeters. This gap is controlled by a bolt located above the plane of the vacuum brake booster. A small gap leads to jamming of the working cylinder, resulting in rapid wear of the pads and increased fuel consumption of the car. In addition, the car begins to slow down randomly, as if you were driving with a handbrake. A large gap, on the contrary, leads to an increase in pedal travel, which indicates a violation of the tightness in the assembly.
Above we described how to check the operation of the brake vacuum device and adjust its operation if necessary. Now let's say a few words about its repair.
To ensure your own safety if your amplifier breaks down, take immediate action to repair or replace it. And if you can replace vacuum hoses in gasoline cars or pumps in diesel cars yourself, without resorting to the services of a car service, then it is recommended to entrust more serious work to professionals.
Of course, it costs some money, but when your own safety is at stake, it is better not to skimp. Contact the specialists. They will not only carry out the inspection competently, but also perform all the necessary work efficiently and with a guarantee.
It should be noted that after repair, it is important to synchronize the wheels when braking and check the ABS/ESP system. This requires a diagnostic stand and specialized equipment.
There are times when it is more expensive to repair a vacuum cleaner than to purchase a used amplifier that is in good condition. Therefore, it is recommended to look for the device at a disassembly site if necessary.
If you feel confident in your own abilities and, after checking, decide to repair the faulty vacuum booster yourself, then proceed as follows.
To begin, remove all the upholstery in the engine compartment and remove the windshield trim. Do not remove the tubes leading to the GTZ. This may allow air to enter the system.
Next, unscrew the cylinder from the vacuum booster and carefully tilt it forward to prevent deformation of the brake pipes. Before doing this, the vacuum transfer hose must be removed from the amplifier fitting
Carefully study the recommendations given by the manufacturer and proceed to dismantling the amplifier. Unscrew the mounting bolts and disconnect the terminal of the wire going to the brake light.
Only then remove the pedal using a special tool. If you are well versed in the design of the car, you can cope with checking and repairing the VUT. However, it is better to first go online and find instructions with an amplifier circuit. This will significantly speed up the implementation of the task and increase your chances of success.
Repair or replacement
Having discovered a faulty vacuum brake booster, you can go in two ways: replace it with a new one or try to repair it. It should be noted here that a new VUT without a master brake cylinder will cost approximately 2000–2500 rubles. If you don’t want to spend that much money and are determined to repair the unit yourself, purchase a repair kit for the old “vacuum unit.” It costs no more than 500 rubles and includes those parts that most often fail: cuff, shank cap, rubber gaskets, valve flanges, etc. Repairing an amplifier itself is not a very complicated process, but it is time-consuming. It involves removing the device from the car, disassembling, troubleshooting, replacing faulty elements, as well as adjustment.
Change the vacuum booster or repair it, the choice is yours. We will consider both processes, and start with replacement.
Replacing VUT with VAZ 2106
- thin slotted screwdriver;
- spanner set to “13”;
- socket wrench set to "13".
- Place the car on a flat surface and put it in gear.
- In the interior, we bend the carpet under the pedal bracket. We find there the junction of the brake pedal and the booster pusher.
- Using a slotted screwdriver, remove the spring retainer from the pedal mounting pin and the pusher shank.
After replacing the device, do not rush to install the master brake cylinder, since before this it is necessary to check and, if necessary, adjust the protrusion of the rod, which we will talk about after considering the VUT repair process.
Video: replacing VUT
Repair of the VAZ 2106 vacuum cleaner
- vice;
- slotted screwdriver;
- small hammer;
- pliers.
- We fix the vacuum booster in a vice in any convenient way, but only so as not to damage it.
- Using a slotted screwdriver and pliers, we flare the halves of the device body.
Operating mode
The pump pumps water from the well, but does not turn off. Breakdowns can be different, the reasons are usually the following:
Diagram of the pressure switch device.
- The relay needs to be adjusted. For this, two small springs are used. Using a large spring, you need to adjust the lower and upper limits for turning on/off, and using a small spring, you need to adjust the pressure difference when changing such limits. Sometimes it happens that during long-term operation, wear develops and the operating pressure changes. That is why the settings already need adjustment, they differ from the factory ones. It is necessary to reduce the tension of the springs by turning them in the “-” direction clockwise. But it is not recommended to overuse this method, since the settings can be completely lost and you will have to call a technician for repairs.
- Salts with poor quality of supplied water can cause the inlet of the control relay to become clogged. In this case, the sensor stops monitoring the readings and the pump does not turn off even when the desired readings are achieved. It is necessary to stop the equipment manually, and then clean this hole.
Examination
Typically, a vacuum booster is checked for serviceability as follows:
- Without starting the engine, you need to press the brake several times (as when pumping);
- After the 5th – 6th press, lock the pedal in the pressed position, start the engine;
- As soon as the engine starts, the pedal moves forward slightly on its own. This is if the vacuum booster is working properly.
If a vacuum is not created, then the first thing you need to do is check the connections and the hose itself for leaks, as well as the check valve of the VAZ 2110 vacuum tank. Often the reason is a malfunction (ruptures, cracks) of rubber parts that require replacement.
In this case, repairs will help, namely replacing faulty parts with serviceable ones.
An internal part, such as the diaphragm, may require repair; over time, a hole may appear in it.
The diaphragm is sold as part of a repair kit. The price of the VUT VAZ 2110 repair kit fluctuates around 250-400 rubles.
Why do you hear a hissing sound when you press the brake pedal? Let's look at possible reasons"
Why do you hear a hissing sound when you press the brake pedal? Let's look at possible reasons
Brakes are one of the main components of any car. And if, when you press the brake pedal, you hear hissing, creaking, the structure itself fails or, on the contrary, is too hard, you need to urgently correct the situation, do not delay or shelve possible repairs. Or at least diagnose the causes of trouble. Knowledge and understanding of the problem leads to its fastest resolution, and timely correction can save you from unforeseen situations on the road.
Why do you hear a hissing sound when you press the brake pedal?
This kind of mistake can happen on many cars when trying to stop. Moreover, this happens regardless of the year of manufacture of the car, model, domestic or imported production. As they say, it happens to everyone. What are the reasons? Let's try to take a closer look in this article.
This suspicious thorn
Some drivers are almost maniacally suspicious of all kinds of noise and hissing, tapping and rattling. Even if they are the quietest and are completely allowed (by the manufacturers themselves or expert craftsmen) according to the staffing schedule. It's the same story with the brake pedal. When you press it, in many cases you will hear a very slight hiss heard in the cabin, almost from under the pedal itself.
Let’s immediately make a reservation that the experiment must be carried out with the engine running (idling), with the windows rolled down and the doors closed, additional electrical appliances and the media system with speakers turned off. And there is nothing military in this quiet sound! For example, one of the experienced car enthusiasts claims: throughout his entire driving experience (from a “penny” to a Honda Accord), this faint thorn was always heard.
This is understandable - the vacuum must be released. After all, the structure of its design planned by the manufacturers includes two chambers, between which different pressures arise when the brakes are pressed.
Roughly speaking, the more actively you press, the more effective it is. And when the corresponding pedal is released, the pressure is equalized, and the diaphragm returns to its original position. Therefore, due to the principle of operation of the device, there should always be a light spike! But we repeat, it should be small enough and practically imperceptible, and not in any way affect the normal operation of your car’s engine. Only then is it considered normal.
Brake vacuum is the most common cause
It's another matter if the texture of the sound differs significantly from the ear. That is, the hissing turns out to be quite loud and, as it were, choking. At the same time, when pressing on the brake pedal when it is cold, we feel its movement being excessively stiff. And also - the buoyancy of the engine speed (and sometimes it can stall).
In such cases, you should pay close attention to the vacuum booster as a possible cause of the problem. Well, a tight pedal, of course, could also be due to frost, for example, until the main one warms up. But the revs and a fairly strong hiss are already direct indicators that you need to look under the hood!
But the revs and a fairly strong hiss are already direct indicators that you need to look under the hood!
How to check it?
The car's braking system is subjected to constant loads, and with the so-called sporty style of city driving, it is also subject to overloads. This happens regularly even with a measured and leisurely rhythm - there is no escape from this problem. Therefore, this unit must be regularly tested to ensure maximum driving safety for the driver and passengers. So it is with the brake vacuum story.
As a rule, problems with its operation occur due to the failure of a special diaphragm located inside the device. It bursts, cracks, and ceases to perform its duties—to create a vacuum. Sometimes the exhaust valve also malfunctions. Checking the functionality of the vacuum on their own, available to every driver, is carried out in the following way.
We start the engine and let it idle for a while until it reaches ;
We turn off the engine;
Press the brake;
The first press will be no different from the normal one when the unit is running. The pedal must be pressed as much as possible: at the same time, the diaphragm in the amplifier is extended and a vacuum is created;
Release the pedal and press it again. If there is something wrong with the system, then during the second approach a vacuum will not be able to be created, and you will tactilely observe an uncharacteristic small stroke of the pedal itself. These changes indicate a breakdown in the brake booster.
conclusions
Replacing the vacuum brake booster on a VAZ-2110 car with your own hands will not be difficult, having our instructions and the necessary tools at hand.
On average, the process takes 30-40 minutes, and there is no need to bleed the brake system.
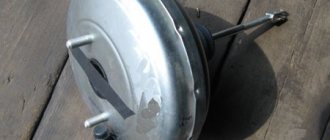
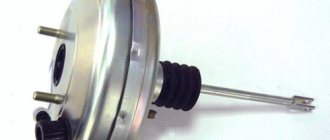
A vacuum brake booster (VUT) is a device responsible for simplifying the travel of the brake pedal. The unit creates additional force, making the pedal easy to press. Getting to the device is quite easy, so replacement can be done by yourself. To work, you will need a standard set of tools: wrenches and screwdrivers.
Features of repair of UAZ vacuum amplifiers
Unlike the vacuum amplifiers of VAZ cars, the VUT housing on UAZ cars is very durable, and it is not at all easy to halve it. You can bend the protrusions using a pry bar and a hammer, but this way the work is done in violation of the technology - according to the instructions, you need to rotate one half relative to the other. The biggest problem during disassembly is the “halving” of the body - sometimes these parts boil so much that it is impossible to disassemble the assembly. Car owners are advised not to press one body into another under any circumstances - then turning will definitely not work.
Another problem in repairing “vacuum units” is the low quality of spare parts in the repair kit; sometimes the installed parts are not enough for six months. Motorists advise not to do repairs, but to buy a new spare part, although there is another disadvantage - VUT for cars like UAZ-469 or UAZ-452 is not cheap, about 3 thousand rubles. As an option, you can pick up a “vacuum” from a foreign car at a car disassembly shop, whose mountings fit the main brake cylinder, and install it on the car by fitting it. The result is cheaper and more reliable - imported parts, even in used condition, last for several years without any complaints.
Choice
We will give some recommendations regarding the choice of a new vacuum amplifier.
Selection criterion
Required parameters
The cost of a good vacuum cleaner is now about 2.5 thousand rubles. These are not the most expensive, but not the cheapest Chinese options. Optimal for VAZ 2109
This packaging, used by a genuine manufacturer, is made of corrugated cardboard
The label should be clearly legible - the production batch number, the production date of the part and the name of the manufacturer itself
You should not buy from market traders. There are many good, trusted spare parts stores in any city. Don’t be shy to ask for certificates, documents for parts
Choosing wisely
Now there are a lot of fakes on the market. Such parts cost the same as the originals, but last much less.
Signs of problems at work
Malfunctions of the vacuum amplifier and the components that ensure its operation are sure to manifest themselves, and quite clearly.
If the vacuum reservoir does not function, this will be accompanied by a “stiffness” in squeezing the pedal.
If this element completely fails, it is very difficult to press the brake pedal (to verify this, it is enough to press the pedal 4-5 times with the engine not running; on the last squeeze, the resistance will be very high).
Since the vacuum is taken from the intake manifold, the loss of tightness of the vacuum booster may be accompanied by a change in engine operation during braking (although this should not happen).
Moreover, in some cases, the speed of the power plant may drop when you press the brake pedal (even to the point of stopping the unit), while in others, the speed increases.
Everything is simple here - if there is a leak in the vacuum seal, air will leak into the manifold, which affects the proportions of the air-fuel mixture, hence the change in engine operating mode.
Another obvious sign is the appearance of hissing when the pedal is depressed. The appearance of such a sound indicates the appearance of air leaks.
As for vacuum pumps, mechanical ones can make knocking noises, and constantly (the drive rod is usually to blame for this), while in electric ones the operation noise increases, and strong heating is also possible when the motor is running (here the fault usually lies in the drive motor).
Bleeding the system
After carrying out any work related to the replacement or repair of brake system parts, the brakes should be bled. This will remove air from the line and equalize the pressure.
Tools and tools:
- jack and wheel wrench;
- key to "8";
- rubber or silicone hose with a diameter of 6 mm;
- a small, clean, dry container (preferably transparent);
- brake fluid (to top up).
In addition to all this, you will definitely need an assistant to bleed the system.
- Place the car on a horizontally flat surface. Loosen the nuts securing the front right wheel.
- Raise the car body with a jack. Unscrew the nuts completely and remove the wheel.
- Remove the cap from the fitting of the working brake cylinder.
Video: bleeding the brakes
At first glance, the process of replacing or repairing a vacuum brake booster may seem somewhat complicated. In fact, you just have to understand everything in detail, and you won’t need the services of specialists.
The effectiveness of your car's brakes is important - if the brake system does not work effectively, an accident may occur. To ensure precise brakes, a booster is installed on all modern cars; it ensures that the vehicle stops instantly when you press the pedal.
Repair of the vacuum brake booster is necessary if the brakes become “wobbly” and you have to press the pedal with great force to brake.
Master brake cylinder
It is not uncommon to discover problems with the master cylinder when checking the condition of the brake assembly.
GTZ
When changing the vacuum seal, it would be logical to study the current state of the gas turbine engine and, if necessary, replace it.
Many are trying to repair the GTZ. But in practice, this only brings a temporary effect, plus you have to constantly worry whether the node will fail at the most inopportune moment. The best solution is replacement.
The replacement procedure itself is as follows.
- Disconnect the negative terminal from the battery.
- Disconnect the wire block from the fuel oil level sensor. It is located in the tank and is built directly into the lid.
- Use a special wrench for brake pipes to loosen their tension. There is no need to unscrew it completely.
- Unscrew the pair of nuts that secure the GTZ to the vacuum chamber. Only now can the brake pipes be completely unscrewed.
- Remove the cylinder from the studs.
- If necessary, remove the brake fluid reservoir itself at the same time. To do this, you need to carefully rock the tank and remove the leg from the bushing.
- Assess the condition of the removed cylinder. Also be sure to check for any defects on the tank. If there are any, be sure to replace the brake fluid reservoir with a new one.
- Armed with a new GTZ, put it in place and tighten the nuts. Fasteners can be fully tightened immediately.
- Install the reservoir and fill it with brake fluid to the maximum mark.
- Now a very important step is to extract air from the cylinder. To do this, you need to close the holes in the front brake pipes with your fingers. At the same time, your assistant should gently, but not sharply, press the brake pedal. This will create pressure in the system. Continue this manipulation until you feel liquid coming out of the holes.
- As soon as the liquid flows, put on the tubes, install and fix them in place. In this case, the brake pedal cannot be released.
- By analogy, the rear tubes are connected. When they are installed in place, there must be pressure in the system, that is, the brake pedal is pressed to the floor.
After completing the replacement of the turbocharger, do not forget to bleed the brake system according to the rules.
Disassembling the unit with the TJ tank
It is quite possible to change the vacuum seal and cylinder with your own hands. The work will take a few hours, but will save a lot of money on visiting a car service center.
Loading …
Replacement of VUT
First, remember that repairing the vacuum booster is impossible. This unit is removed and replaced with a new one. In theory and in practice, some do. But at your own responsibility.
Now about the replacement itself.
- Disconnect the brake pedal from the booster rod. The units are connected to each other by a pin. Dismantling is carried out in the area of the pedal assembly and here you will need a simple flat-head screwdriver.
- Let's go and open the hood.
- Disconnect the power supply to the brake fluid level sensor.
- Remove the bracket that holds the hydraulic lines to the frame. A 10mm socket is useful, which is used to unscrew the nut.
- Disconnect the brake master cylinder. To do this, unscrew the 2 nuts holding it to the vacuum unit. Assess the condition of the GTZ. If necessary, replace it too.
- It is not necessary to disconnect the hydraulic lines from the brake cylinder (master). The pipes are quite long, so they can easily be moved to the side so that they do not interfere with the work process.
- Disconnect the pipe that connects the vacuum chamber to the intake manifold.
- Remove the spacer from the front struts.
- Unscrew the 4 nuts that hold the vacuum housing to the car body studs.
- Remove the unit from the studs and pull it out through the engine compartment.
- On the drive fork side, there is a seal with a bracket on the return of the amplifier. He secures the assembly to the frame with 4 studs. They need to be removed. To do this, use a 17mm head to remove 2 nuts, after which the iron structure is removed. Just pull it towards you. Be sure to pull the boot off the stem.
- Install the mounting bracket and a new rubber seal onto the new vacuum booster. Now you can begin full reverse assembly.
All reasons for a hard pedal during brake system malfunctions:
1) Vacuum type amplifier limit switch is faulty. Replace!
2) The vacuum booster itself has a check valve. If it malfunctions, the pedal sticks and the valve located in it does not work. Replace!
3) The vacuum filter also becomes clogged, the pedal becomes heavy and you have to press it with great effort. The filter can be changed without any problems at the dealer or in the garage).
4) The structure of the brake system includes a special valve in its design. Its body may get stuck. It will not be possible to do without a complete replacement of the component.
5) The brake booster becomes cracked. Its integrity is damaged.
The most important organ in any car is the brake system. It must be in perfect condition, because our lives depend on it. One of the main indicators of the efficiency of this unit is the pedal, which must always differ in the state of pressing that is familiar to the foot. This rule cannot be neglected and if the slightest changes occur, adjustments or repairs must be made immediately. Below we will look at what needs to be done when the brake pedal becomes hard, does not press at all, or grabs at the very end of its stroke.
We will also pay attention to issues of self-diagnosis and study all the reasons for the failure of this mechanism.
Fault diagnosis
Driving without a brake booster is at least dangerous, since the braking distance is structurally calculated taking into account the operation of this unit. If it malfunctions, this indicator significantly worsens, the driver loses control over the behavior of the car, which in many cases leads to traffic accidents.
Therefore, diagnosing and timely replacement of this unit is the responsibility of every conscientious driver.
Diagnosing a faulty vacuum brake booster is not a complicated procedure.
Even while driving, there is a uniform method for checking functionality:
- If, when moving at any speed, the gas pedal is very tight, there is a clear problem with this particular unit. Failure can be caused either by a design defect in the unit itself (manufacturing defects) or by mechanical damage (failure of operating valves, breakage of one of the diaphragms);
- The deterioration of the braking properties of the car in this case, when the brake booster breaks down, the effect of the brake pedal is necessarily reinforced by a significant deterioration in the braking distance in relation to the working version.
Node examination
The need to replace the vacuum booster on a VAZ 2109 should already be stated in the event of an increase in the force applied to the brake pedal. However, a simple check will help ensure the correctness of the diagnosis:
- turn off the engine;
- press the brake pedal 5-6 times;
- hold down the brake pedal;
- start the engine.
The identifier of a serviceable VUT is an immediate, noticeable movement of the brake lever forward.
An alternative symptom will help diagnose a unit malfunction: when the engine is running, a “hissing” can be heard under the hood in the area where the intake manifold pipeline connects to the VUT check valve fitting. Experienced specialists additionally prefer to check:
- integrity of the suitable pipe; tight fit of the main element on the fitting (hissing may appear as a result of a loose connection).
The initial stage of failure of the vacuum booster is especially clearly identified on “nines” with a carburetor power system. The brake pedal is activated, as expected, with a light force, braking is good and informative, but:
- at idle speed the engine “troits”;
- when you press the brake pedal, the idle speed stabilizes;
- after applying pressure to the accelerator in neutral gear, “dips” occur, regardless of carburetor adjustments.
If the symptoms described above are present, it is advisable to remove the pipe from the “vacuum manifold” fitting with the engine running and plug the hose with a suitable object or finger - the idle speed has returned to normal and, therefore, replacing the vacuum booster on the VAZ 2109 is inevitable. If a malfunction is detected along the way in this way, the movement should be continued with the VUT turned off: the pedal will be hard, but the information content will remain.
Checking status
The corresponding signs may indicate the need to change the vacuum booster or the brake master cylinder.
The primary sign of VUT failure is an increase in the force that must be applied to the pedal to brake.
To be sure of the problem, perform the following check:
- Turn off the engine;
- Press the brake pedal 5-6 times in a row;
- Press the pedal to the floor;
- Start the engine;
- If the VUT is working properly, the pedal will immediately go up.
- Checking the condition
If you have a VAZ 2109 carburetor engine under the hood, you can determine the VUT malfunction a little differently in the initial stages:
- Initially, the pedal will work normally, you will have to apply a little force, braking occurs normally;
- But at the same time the engine stalls at idle;
- When you press the brake pedal, the idle speed calms down;
- By pressing the gas in neutral gear, failures occur in the carburetor;
- If such symptoms are observed, with the engine running, remove the pipe from the VUT fitting and plug it with your finger or other available tool;
- Has the idle speed stabilized? In this case, replacing the vacuum seal cannot be avoided.
If such a malfunction is detected while driving, you can continue driving only if the VUT is turned off.
Wear and other disc defects
There are several types of wear on brake discs that can cause a hum to be heard under the described conditions. The first of them is the so-called furrows. They are clearly visible to the naked eye, sometimes even directly through the rims. They appear there for all sorts of reasons. The most obvious is any abrasive getting between the pads and rotating discs. Coarse dust, sand, dirt, small pebbles. All this can “register” water circles on disks.
The second type of excavation is a protruding edge. This defect usually leads to a hum when you press the brakes when the pads are changed. Very often these parts are purchased the wrong size, which, however, does not interfere with their successful installation. As a result, the pads do not contact the discs correctly, can overheat, wear unevenly and bite each other.
Which of these causes the buzzing doesn't really matter
The next defect is corrosion. It is observed in the form of small pits directly on the working surface of the disks. At a certain degree of severity, it can also cause brake noise. Again, the root cause is overheating under load. Parts overheat, a hum occurs, and braking performance may deteriorate.
The next possible problem with discs is when they are burnt or set on fire. These can be identified by blue or iridescent spots directly on the work surface. They say such “burns” mean that the brakes have been overloaded once or repeatedly. As a result, you should look for inadequate wear or deformation. In any case, this may well be the reason why the brakes are buzzing.
In all of these situations, the “treatment of the disease” is the same. This is a replacement brake discs. It should also be understood that after working together with defective discs, the pads are also very likely to become unusable. There is no point in using them with new disks. It is better to immediately replace with new ones. Fortunately, even if they are of high quality, these consumables do not cost a fortune.
It’s probably worth saying a few words about turning discs, which many car enthusiasts resort to. This repair method is justified, unfortunately, only in 1 case out of 10. And even then, if the groove was entrusted to a competent turner, and they did not try to “align” the disc with a grinder directly on the machine. The latter is strictly not recommended. The brake system is a mechanism that does not forgive inaccuracies. And the grinder and accuracy are antonyms.
Replacement and cost
In any situation when a breakdown is detected, timely replacement of the entire assembly is necessary. It is possible to correct some shortcomings in the form of replacing the valve, but this procedure may not bring a lasting effect, since the part itself in many cases (if we talk about the VAZ 2109 model) must be replaced due to its advanced age. After installing a new part, be sure to make adjustments.
Breakdowns of vacuum amplifiers do not happen so often with this model, however, due to their age (production of the model was discontinued in 2004), the amplifiers gradually wear out and become unusable over time.
On video of a malfunction of the vacuum booster:
There are many suppliers of parts for VAZ cars on the market. The average price (cost) of a new amplifier is about 2000 rubles.
The process of replacing vacuum on a VAZ-2114
Before replacing, you need to prepare the following tools:
- Screwdriver.
- Pliers.
- Socket wrenches for 7 and 13.
- Special wrench for unscrewing brake pipes.
- Additionally, prepare new fittings and plugs.
Step-by-step algorithm for replacing a part:
When dismantling the VUT, you will obviously be in the way of the brake cylinder, which is better to remove from the very beginning or disconnect the fittings from it and move it to the side. The cylinder is not the most important obstacle. The next step is to unscrew the VUT fasteners, which is not entirely easy to do and is also inconvenient. Start with the valve. Remove the hose clamp, remove the support sleeve and pull out the brake pin. Take a 14mm wrench and unscrew the 4 amplifier mounts. After removing the part, prepare to install the new device on the car. First of all, install a special fixation frame on the VUT, which will need to be tightened with a 7 key, and only then install this element on the VAZ. The assembly sequence is quite simple
Please note, from the point of view of convenience, first of all, the brake pedal and booster are connected using a finger, and then the unit is mounted in the car.
As a recommendation, when replacing the vacuum booster, you can also replace the hose. This element is also subject to wear and tear, which sometimes affects the performance of the new device.
Reassembly
If you decide to dismantle and reassemble yourself, be sure to follow several recommendations when installing a new VUT:
- The vacuum rod and the brake pedal are connected to each other immediately after the device is seated on the mounting studs. That is, before they started tightening the nuts.;
- Experienced VAZ 2109 owners recommend applying sealant between the vacuum brake booster and the brake cylinder. This is due to imperfect design;
- The vacuum rod, which acts on the main brake cylinder, may move during transportation of the part. Also, displacement often occurs during the installation process. Therefore, be sure to check this fact and install it correctly if necessary. To do this, press the rod all the way. If the stem is not installed correctly during assembly, the brakes simply will not operate properly. The consequences are hardly worth talking about.
Repair of vacuum brake booster VAZ 2109
The main sign indicating to the driver that the vacuum booster is faulty is difficult movement of the brake pedal, which in turn affects the quality of braking and, as a consequence, the safety of driving. Vacuum amplifiers can only be repaired using special equipment; if you don’t have such equipment, you will have to replace it completely, but before that you need to check the quality of its operation and the operation of the check valve, and only after that make a decision about either replacement or repair.
To check the operation of the vacuum booster, press the brake pedal several times, creating pressure in the system, and the brake pedal should lock in the upper position. Now, without releasing the pedal, start the engine. At the moment of startup, if the amplifier is working properly and the tightness of the connection of the vacuum hoses is not broken, the pedal will go down. If it does not go down, then first of all we check the quality of the connection of the vacuum hose and the tightness of the check valve.
To check the check valve on a VAZ 2109 car, you need to do the following sequence of actions:
First of all, as mentioned above, we check the tightness of the connection of the hoses with the fitting on the inlet pipe and the check valve on the amplifier.
- Next, you can start checking the valve itself, first disconnect the hose from it and pry it off with a flat screwdriver, remove it from the amplifier.
- In the next step, we will need any rubber bulb, the only two conditions: the bulb must be sealed and it must fit the diameter of the valve fitting. A hydrometer is quite suitable for this role.
- Having pulled it onto the fitting, we squeeze the bulb with our hand, thereby releasing air through the valve and releasing it. If the bulb remains compressed, then the valve is working properly, that is, it holds the vacuum. Otherwise, it must be replaced. As an option, you can try to blow out the valve with your mouth, that is, first we blow it out, so the air should come out freely, and then we suck it in and, as a result, the air should not pass through.
This completes the process of checking the vacuum booster and check valve of the VAZ 2109. If the tightness of the hoses is not broken, and the valve itself is working properly, then you will have to change the amplifier.
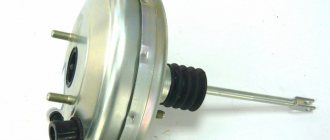
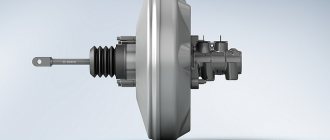
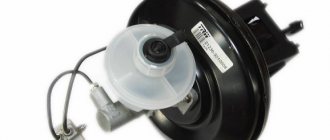
Device and application
The brake booster is made in the form of a single block part (round in shape with two rods). Structurally, this block is divided into two unequal parts, each of which performs a specific function.
One side of the amplifier is directly connected to the master cylinder, while the other faces the driver (connects directly to the brake pedal).
The part that faces the brake pedal and ends in a chamber through the rod, which is connected to the rest of the part. Such a chamber is called atmospheric.
Another chamber in the block body is called vacuum.
Each of the cameras performs its own specific function. The atmospheric valve, when the gas pedal is pressed, comes into contact with the atmosphere and builds up pressure, which is why the gas pedal has an easy move.
On video how to check the vacuum brake booster of a VAZ 2109:
In the released position, the valve is at rest and is connected to another part of the amplifier (vacuum chamber). On the opposite side, the vacuum chamber is connected to the brake cylinder through a rod and, when the brake pedal is pressed, creates pressure in the form of vacuum through the valve.
The vacuum is created by a vacuum region through a valve, which in this case is located close to the intake system (intake manifold). Thus, when you press the gas pedal, both chambers interact through the valves, acting on the master brake cylinder and making it easier to control the car.
Disassembling vacuum booster 2109
It is not difficult to disassemble VUT 2108-2109, but for disassembly it is necessary to fix the device. We disassemble the node in the following order:
- clamp the “vacuum sealer” in a vice;
- using a screwdriver on the body, we bend the grooves with which the two halves are held together;
- when almost all the rivets are straightened, it is necessary to hold the outer part of the body - a spring is installed inside the device, and it can shoot. If the old diaphragm is put back into place, there is no need to push the screwdriver far inward, as the rubber seal may be damaged;
- remove the rubber covers from the fastenings (2 pcs.);
- dismantle the plastic casing together with the diaphragm and pusher assembly;
Typically, the repair kit for the VAZ-2109 vacuum amplifier contains a diaphragm, a cuff, a boot, covers (2 pcs.) and a valve. All parts should be changed so that you don’t have to redo the work later. When assembling a vacuum amplifier, it is better to immediately fix the diaphragm on a plastic casing, this will make it easier to mount the unit.
It doesn’t matter which side the spring is placed on, but when assembling the amplifier, you will have to make an effort to get the holes in the housing onto the studs.
How to make a replacement?
Replacement is carried out using a set of keys and screwdrivers. The vacuum brake booster is located under the hood, so work can be done in the garage or outside. The replacement takes place as follows:
- First you need to disassemble the wall of the VAZ 2110 engine compartment, then remove the frill. This element is attached using a seal and upholstery;
Important! The most unpleasant moment in dismantling the vacuum brake booster is unscrewing the four nuts in the interior. To get to them you will have to remove several elements of the dashboard.
How to troubleshoot
It makes sense to repair the vacuum brake booster system only in the event of partial failure of the booster pipeline, its check valve, or the valve seal. If replacing the listed elements does not produce results, then it is necessary to replace the entire VUT, since its design is non-separable and cannot be repaired.
Replacing a pipeline with mounting clamps makes sense for several reasons:
- low price of materials;
- difficulty in localizing the location of depressurization;
- Difficulty in repairing cracks or other damage in the pipeline.
Replacing the pipeline itself is not difficult, and even a novice car enthusiast can easily handle it. The main thing is to buy a new set of pipes, clamps and appropriate gaskets from the auto store. Next, using plumbing tools, simply change one tube for another.
Repair of auxiliary pumps
As mentioned above, when a mechanical vacuum pump partially fails, some car enthusiasts simply remove their rod, thereby turning them off and eliminating the knocking noise that occurs when the pump operates. In this case, the brake booster will work, but not as effectively, which will result in a harder pedal. Some car enthusiasts get out of the situation by turning the rod 180 degrees. Sometimes this helps because it is only present on one part of them.
As for electric vacuum pumps, these units are usually irreparable; accordingly, they are simply replaced with new ones.
Source