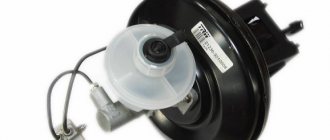
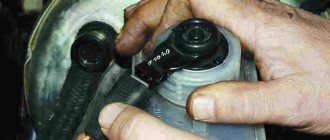
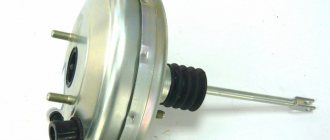
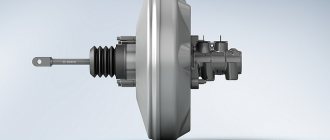
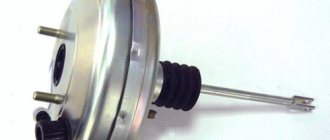
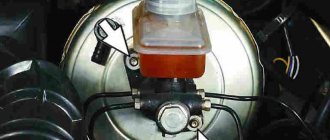
vacuum booster The vacuum booster, which “lightens” the brake pedal, is a toroid divided by a diaphragm into two chambers: one is permanently connected to the intake manifold, the other is connected to the atmosphere when the pedal is pressed. The “assistant” is mounted in the engine compartment behind the main brake cylinder and is connected to the brake pedal through a rod.
Node examination
The need to replace the vacuum booster on a VAZ 2109 should already be stated in the event of an increase in the force applied to the brake pedal. However, a simple check will help ensure the correctness of the diagnosis:
- turn off the engine;
- press the brake pedal 5-6 times;
- hold down the brake pedal;
- start the engine.
The identifier of a serviceable VUT is an immediate, noticeable movement of the brake lever forward.
An alternative symptom will help diagnose a unit malfunction: when the engine is running, a “hissing” can be heard under the hood in the area where the intake manifold pipeline connects to the VUT check valve fitting. Experienced specialists additionally prefer to check:
- integrity of the suitable pipe; tight fit of the main element on the fitting (hissing may appear as a result of a loose connection).
The initial stage of failure of the vacuum booster is especially clearly identified on “nines” with a carburetor power system. The brake pedal is activated, as expected, with a light force, braking is good and informative, but:
- at idle speed the engine “troits”;
- when you press the brake pedal, the idle speed stabilizes;
- after applying pressure to the accelerator in neutral gear, “dips” occur, regardless of carburetor adjustments.
If the symptoms described above are present, it is advisable to remove the pipe from the “vacuum manifold” fitting with the engine running and plug the hose with a suitable object or finger - the idle speed has returned to normal and, therefore, replacing the vacuum booster on the VAZ 2109 is inevitable. If a malfunction is detected along the way in this way, the movement should be continued with the VUT turned off: the pedal will be hard, but the information content will remain.
Examination
Replacing the vacuum brake booster of a VAZ 2109
Vacuum booster repairs are carried out in specialized auto repair shops using equipment designed for this purpose. In the context of garage repairs on a VAZ-2109, the vacuum brake booster is replaced with the installation of a new one. Before making a decision on replacement, it is necessary to check the operation of it itself, as well as the check valve.
VAZ 2109 vacuum brake
To check the operation of the amplifier you need to:
- Press the pedal with your foot, thereby increasing the pressure in the brake system. The pedal remains depressed.
- Keep your foot on the pedal and turn on the engine.
- When you start the engine, the foot with the pedal begins to move towards the floor of the VAZ body, which means that the vacuum booster is working and the entire system is in good working order.
VAZ 2109 vacuum brakes
To check the operation of the check valve:
- inspect the pipe connections;
- feel these places with your hands;
- tighten the clamps at the connections of the pipes;
- on the intake pipe fitting;
- on the non-return valve fitting, on vacuum.
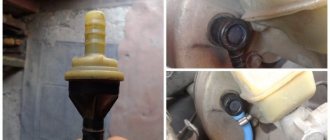
Then check the valve itself. To do this, remove the rubber tube from the vacuum, if necessary, use a flat screwdriver. Since the tube is very difficult to remove. Take a pre-prepared rubber bulb-shaped injector with a suitable diameter for the fitting:
- Paste it;
- Squeeze the syringe;
- Squeeze the air out of it.
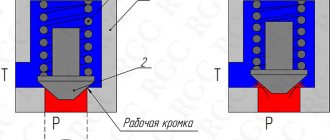
Release your hand if it remains clenched then the valve test is complete. That is, the valve fulfills its design purpose. If the injector is filled with air, then you will have to change the valve. You can also check the operation of the valve with your mouth:
- Blow the air out of your mouth; it should easily pass into the vacuum;
- Then apply suction; the air coming out should not be felt.
This completes the check of the brake system vacuum booster and check valve. If no defects are found in the connected parts and the check valve is working properly, the vacuum is replaced.
The corresponding signs may indicate the need to change the vacuum booster or the brake master cylinder.
The primary sign of VUT failure is an increase in the force that must be applied to the pedal to brake.
To be sure of the problem, perform the following check:
- Turn off the engine;
- Press the brake pedal 5-6 times in a row;
- Press the pedal to the floor;
- Start the engine;
- If the VUT is working properly, the pedal will immediately go up.
- Checking the condition
If you have a VAZ 2109 carburetor engine under the hood, you can determine the VUT malfunction a little differently in the initial stages:
- Initially, the pedal will work normally, you will have to apply a little force, braking occurs normally;
- But at the same time the engine stalls at idle;
- When you press the brake pedal, the idle speed calms down;
- By pressing the gas in neutral gear, failures occur in the carburetor;
- If such symptoms are observed, with the engine running, remove the pipe from the VUT fitting and plug it with your finger or other available tool;
- Has the idle speed stabilized? In this case, replacing the vacuum seal cannot be avoided.
If such a malfunction is detected while driving, you can continue driving only if the VUT is turned off.
If a breakdown occurs on the way, you should continue driving the car with the vacuum booster (VUT) turned on; although the pedal will become stiffer and less flexible, the information content will still remain ideal.
Note! Any person who has at least some experience in car repairs can replace this brake booster, and to replace it, you will need a small, but still rare set of tools, which not all people have, namely: Pliers will be needed, a wrench and sockets for it (If you have an extension cord, then it’s better to stock up on them), if there is no wrench, then take all the wrenches that you have, thanks to the sockets and wrenches, you can also remove it, but it will be very inconvenient!
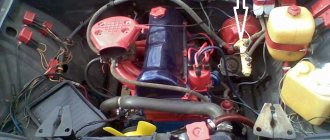
Removal: 1) Before you begin removing the brake booster, check whether the vacuum hose (Indicated by a blue arrow) is connected normally to the check valve (Indicated by a red arrow), be sure to start the car and see if air is leaking from this hose or from the valve ( You just don’t need to disconnect anything, everything is disconnected in the photo, just so you can understand where the valve is located, where the hose is and where this whole system is connected, by the way, the connection location is indicated by a green arrow).
Note! We fully recommend walking along the hose, it is connected to the intake manifold fitting, check everywhere to see if air is leaking from somewhere, otherwise replace the hose or check valve with a new one!
2) After a complete check, proceed to removing the vacuum seal from the car; to do this, first disconnect the wire block indicated by the arrow from the top cover of the brake reservoir and move it to the side.
3) Then, with pliers, move into the car interior and crawl under the place where the pedals are installed, the same pusher that we talked about a little higher will be attached to the brake pedal (or rather, to its bracket), this pusher comes from the vacuum brake booster and when the pedal is squeezed out, the vacuum pump starts working, this pusher will need to be disconnected, to disconnect it, remove the locking bracket with pliers (see photo 1) that secures the finger and then remove the finger from the brake pedal bracket (see photo 2) and you can immediately disconnect pusher
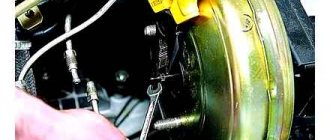
4) After the operations have been completed, you will need to move into the engine compartment again and while there, disconnect the hose that is connected to the check valve (It is attached with a clamp, the check valve is indicated by a blue arrow in the photo) and then unscrew the two nuts (Their approximate location is indicated by red arrows ), which attach the master brake cylinder to the vacuum brake booster and then carefully remove the cylinder from the brake booster, but you don’t need to remove it and the metal brake pipes that are connected to it don’t need to be disconnected either.
5) And finally, unscrew the four nuts that secure the bracket on which the brake booster is located to the engine shield (Two nuts are indicated by arrows), as soon as they are unscrewed, you can slowly remove the booster along with the bracket, if you suddenly want to separate them, then after removal , unscrew the two nuts that secure the bracket to the brake booster and you can separate these two things.
Installation: The new brake booster is installed in the reverse order of removal; if it suddenly turns out that there is no bracket on it, then remove the bracket from the old one by unscrewing the two nuts as we have already said.
How to replace a defective vacuum booster on a VAZ 2109: list of actions
The initial task of repair is to disconnect the pedal from the amplifier rod. Dismantling is carried out in the area of the pedal assembly: it is necessary to disconnect the two units connected to each other by a pinned pin using a flat-head screwdriver.
Further work is carried out in the engine compartment:
- disconnect the power supply connector for the brake fluid level sensor;
- dismantle the bracket that secures the hydraulic lines relative to the car frame (unscrew the nut with a head to “10”);
- disconnect the main brake cylinder by unscrewing the two nuts securing it to the VUT using a 17" wrench.
Note. When changing the brake booster, do not disconnect the hydraulic lines from the master cylinder. The lengths of the pipes make it possible to move the unit outside the working area.
After access to VUT is opened, the plan for replacing the vacuum booster of the VAZ 2109 brake system comes into force, including the following measures:
- disconnect the pipe connecting the amplifier chamber to the intake manifold;
- remove the front strut strut (installed additionally);
- unscrew the four nuts that secure the amplifier housing to the body studs (use a set of wrenches + extension + universal joint + head on “13”);
- remove the assembly from the studs and remove it from the engine compartment.
Having mounted the mounting bracket and rubber seal on the new amplifier, you can begin installing the VUT, which proceeds according to the reverse scenario. When installing, you should pay attention to three facts:
- The vacuum booster rod should be connected to the brake pedal immediately after the unit is seated on the mounting studs (before tightening with nuts);
- experienced owners additionally apply sealant between the brake cylinder and the VUT, indicating the imperfection of the sealing elements;
- the VUT rod acting on the main brake cylinder (located on the front side of the housing) may move during transportation or installation (it is necessary to check and, if necessary, install correctly by pressing until it stops).
For your information. An incorrectly installed actuator rod will result in the brakes not working after assembly.
Source
Rules mandatory for compliance with the installation of a new VUT
When installing a new vacuum mechanism, consider the following rules:
- the VUT rod is connected to the brake pedal after placing the device on the fixing pins;
- to perfect the sealing components, lubricate the space between the brake cylinder and the vacuum device with sealant;
- the VUT rod in the VAZ-2109, which affects the main brake cylinder located on the front side of the frame, can move during transportation or installation. Therefore, to check the condition of the product, press it all the way.
Determining the correct installation of the vacuum brake booster is not difficult - the brake pedal, if the product is installed correctly, works without failure.
Video instructions on how to replace the vacuum brake booster in a VAZ-2109 with your own hands are presented below:
The vacuum brake booster (VUT) makes it easier to operate the brake pedal. This assembly is divided into two chambers - one has a permanent connection with the intake manifold, and the second is connected to the atmosphere when the brake pedal is pressed.
The unit is located under the hood behind the brake master cylinder. Through the rod it is connected to the brake pedal.
Replacing the vacuum brake booster of VAZ 2109.
The vacuum brake booster (VBR) is the heart of your car’s braking system. It is this that creates sufficient force for good braking; the safety of driving a car directly depends on its serviceability.
Today’s article is devoted to the symptoms of a faulty vacuum brake booster, and I will also describe a step-by-step procedure for replacing this part on a VAZ 2109 car.
Choice
We will give some recommendations regarding the choice of a new vacuum amplifier.
Selection criterion
Required parameters
The cost of a good vacuum cleaner is now about 2.5 thousand rubles. These are not the most expensive, but not the cheapest Chinese options. Optimal for VAZ 2109
This packaging, used by a genuine manufacturer, is made of corrugated cardboard
The label should be clearly legible - the production batch number, the production date of the part and the name of the manufacturer itself
You should not buy from market traders. There are many good, trusted spare parts stores in any city. Don’t be shy to ask for certificates, documents for parts
Choosing wisely
Now there are a lot of fakes on the market. Such parts cost the same as the originals, but last much less.
Replacing a VAZ vacuum brake booster on a 2109 car - step-by-step instructions.
The operation of replacing the “vacuum seal” is not very complicated and does not require special tools.
However, there is no need to rush when replacing VUT. Attention and accuracy should be your faithful assistants when performing this operation.
- Disconnect the VUT rod from the pedal.
It is necessary to pull out the cotter pin that connects the VUT rod and the pedal. To prevent the cotter pin from falling out, it is secured with a locking bracket; it can be easily removed using pliers.
- Disconnect the main vacuum hose from the vacuum tube.
It's simple! There is no need to unscrew anything, the hose (indicated by the red arrow) is simply removed from the VUT fitting, with a little force, but it can be removed.
- Disconnect the brake master cylinder (MBC) from the brake booster.
In order to disconnect the GTZ from the “vacuum manifold”, you need to unscrew two nuts (indicated by the red arrow, the second nut is located on the opposite side of the master brake cylinder). After we have unscrewed the main turbocharger, we move it closer to the front of the car, trying not to greatly deform the brake pipes.
There is absolutely no need to create extra work for yourself and unscrew the brake lines from the main circulation pump (indicated by green arrows). By unscrewing the brake lines from the main circulation pump, you will air the brake system and after replacing the vacuum brake booster it will need to be bled. To do this, you need brake fluid and an assistant who will pump the brake fluid with the pedal while you bleed air from the system.
- Disconnect the VUT from the car body.
The amplifier is attached to the car body through a bracket. It, in turn, is attached to the car body with four nuts that you need to unscrew. At this stage you will have to sweat a little. Because access to the bracket mounting nuts is difficult. Have a little patience and everything will work out.
After the nuts are unscrewed, remove the vacuum seal from the engine compartment.
- Disconnect the mounting bracket from the VUT (as in the photo).
The VUT is attached to the bracket using two nuts. Unscrew these nuts and disconnect the part. Fortunately, this is not very difficult to do. Access to the nuts is great.
- Install the mounting bracket onto the new brake booster.
What you did in the previous paragraph must be repeated in reverse order. Install the mounting bracket onto the new vacuum seal.
- Install a new vacuum brake booster on your car.
Install the new part on the machine in the reverse order of disassembly. I pay special attention to the connection between the VUT rod and the brake pedal; many people forget to do this. I would like to draw even more attention to the mandatory installation of a locking bracket on the cotter pin securing the brake pedal to the rod of the vacuum brake booster.
After final assembly, recheck the tightness of all nuts and bolts. Check the installation of the vacuum hose. As you can see, the procedure for replacing the vacuum brake booster on a VAZ 2109 does not require any special skills or complex tools. The most important thing is attention, accuracy and a small set of the simplest keys.
I recommend reading:
Replacement
VAZ 2109 vacuum brake booster
To do this, you need a simple set of keys:
- open-end wrench No. 17;
- head No. 13;
- Phillips and flathead screwdrivers.
The repair is carried out in the garage, where the hood should be raised and a support installed.
Removing the vacuum
Sequence of work:
- remove the negative terminal from the battery;
- disconnect the rubber tube from the brake vacuum, first unscrew the clamp;
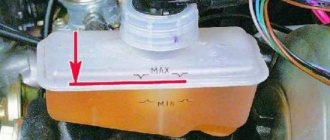
- disconnect the electrical power supply terminal for the level sensor from the brake master cylinder cover;
VAZ 2109 checking the vacuum brake booster
- then, inside the car, move the driver’s seat to the farthest position, as far as the runners will allow;
- lower under the steering column towards the brake pedal.
Note: if necessary due to lack of lighting, use a portable lamp with a safety flashlight.
- Using pliers, remove the locking ring from the sleeve that connects the pedal itself to the vacuum rod connector;
- remove the rod, lower it to the floor of the body.
Note: the rod connector is a U-shaped plate with holes for attaching to the pedal bar.
- return to the set vacuum;
- Now you have to carefully remove the brake master cylinder;
VAZ 21093 vacuum brake booster
- it must be removed together with the corresponding brake system pipes.
Note. This must be done so as not to add additional work of filling the brake fluid and pumping the entire brake system to all four calipers.
- clean the threaded connection on the master cylinder bushings and use a metal brush to carry out this work.
Note. Carefully unscrew the nuts, turning them forward and backward several times, so as not to strip the threads on the screws. Remove the nuts from the screws, and also remove the washers that are in a compressed state.
Vacuum brake booster
To make the work easier, use a flat screwdriver to go along the cylinder body and lightly, as carefully as possible, release them from sticking.
Note: if the nuts cannot be unscrewed, you need to drop a few drops of 70% acetic acid on them, wait 30 minutes, clean the threads with a wire brush and repeat unscrewing.
After removing the washers, you need to begin removing the brake master cylinder. It will be difficult to remove. Therefore, you need to be careful, so as not to break or bend the brake pipes too much, to apply force sharply, but not too much. The brake cylinder must be removed forwards, without deviating to the side. The last final step is removing the vacuum. It is attached to the interior partition on a bracket.
- The bracket is attached to two studs; clean the threads as indicated above.
- Unscrew the nuts and remove the vacuum along with the bracket.
Then after removal, unscrew the two blind bolts from the vacuum. Set it aside. Carefully screw the new vacuum to the bracket. Reassemble in reverse order. The price of a vacuum brake booster is 2,500 rubles. When choosing it, you should pay attention to the packaging. Manufacturer's guaranteed packaging must be made of corrugated cardboard.
The box must have a manufacturer's label that is clearly legible:
- manufacturer's name;
- batch number;
- Date of issue;
- The article number must also be indicated: 2108-3510010TM.
Because there are fakes on the market. Therefore, you need to buy from trusted sellers, in stores that have been able to establish themselves on the positive side. When doing the work yourself, you need to watch the video very carefully. The most important thing will be to remember the order of repair work. For a better understanding, take a photo of the repair site. At home, number them in order in advance. Performing work one by one, move the photos down. Don’t be lazy to do this, since during assembly you can check the sequence of correct execution of the process. It also doesn’t hurt to read the instructions for car repairs to avoid unexpected situations.
How to check the vacuum brake booster of a VAZ 2109?
The vacuum brake booster (VBS) is the main mechanism in the operation of the vehicle braking system. The process of braking the car and the safety of the driver and passengers depend on its performance. VUT requires periodic inspection for malfunctions or defects in its operation.
Causes of VUT malfunction:
- The diaphragm has ruptured;
- There are cracks in the hose that goes to the amplifier or it has broken;
- The spring is broken.
The device can be repaired in technical centers that have the necessary tools and specialists who know their job. If a trip to a service station is beyond your means, you can do it on your own by replacing the device in full accordance with the instructions supplied with it. But before you make a replacement, you should make sure that the cause of the breakdown is in the VUT.
Node examination
The need to replace the vacuum booster on a VAZ 2109 should already be stated in the event of an increase in the force applied to the brake pedal. However, a simple check will help ensure the correctness of the diagnosis:
- turn off the engine;
- press the brake pedal 5-6 times;
- hold down the brake pedal;
- start the engine.
The identifier of a serviceable VUT is an immediate, noticeable movement of the brake lever forward.
An alternative symptom will help diagnose a unit malfunction: when the engine is running, a “hissing” can be heard under the hood in the area where the intake manifold pipeline connects to the VUT check valve fitting. Experienced specialists additionally prefer to check:
- integrity of the suitable pipe; tight fit of the main element on the fitting (hissing may appear as a result of a loose connection).
The initial stage of failure of the vacuum booster is especially clearly identified on “nines” with a carburetor power system. The brake pedal is activated, as expected, with a light force, braking is good and informative, but:
- at idle speed the engine “troits”;
- when you press the brake pedal, the idle speed stabilizes;
- after applying pressure to the accelerator in neutral gear, “dips” occur, regardless of carburetor adjustments.
If the symptoms described above are present, it is advisable to remove the pipe from the “vacuum manifold” fitting with the engine running and plug the hose with a suitable object or finger - the idle speed has returned to normal and, therefore, replacing the vacuum booster on the VAZ 2109 is inevitable. If a malfunction is detected along the way in this way, the movement should be continued with the VUT turned off: the pedal will be hard, but the information content will remain.
Signs of amplifier failure
You will be interested in: TFSI engine: decoding of the designation, features and characteristics
There are several signs that indicate a malfunction of the vacuum brake booster on the VAZ-2109:
- Stopping efficiency is very low. When you press the pedal you don't feel any braking happening. It becomes almost impossible to stop the car. Sometimes there is a strong kickback in the pedal.
- The brake pedal becomes too heavy and difficult to press.
- There is a significant drop in crankshaft rotation speed when the pedal is pressed.
If the first two signs of VUT failure occur, it is necessary to diagnose the element. It is not a fact that it was the amplifier that failed.
If there is a drop in the crankshaft rotation speed when you press the brake pedal, you need to check whether there is air leakage in the engine intake tract. Be sure to inspect all vacuum hoses. When air is not sucked in, we can talk about a breakdown in the design of the amplifier. Later in the article we will talk about replacing the vacuum brake booster on a VAZ-2109.
Before starting work, preparations need to be made. It is best to install the machine on a level area. There should be enough space near the driver's door so that it can open freely. It is also recommended to completely disconnect the battery - it can interfere with dismantling the mechanism.
How to replace a defective vacuum booster on a VAZ 2109: list of actions
The initial task of repair is to disconnect the pedal from the amplifier rod. Dismantling is carried out in the area of the pedal assembly: it is necessary to disconnect the two units connected to each other by a pinned pin using a flat-head screwdriver.
Further work is carried out in the engine compartment:
- disconnect the power supply connector for the brake fluid level sensor;
- dismantle the bracket that secures the hydraulic lines relative to the car frame (unscrew the nut with a head to “10”);
- disconnect the main brake cylinder by unscrewing the two nuts securing it to the VUT using a 17" wrench.
Note. When changing the brake booster, do not disconnect the hydraulic lines from the master cylinder. The lengths of the pipes make it possible to move the unit outside the working area.
After access to VUT is opened, the plan for replacing the vacuum booster of the VAZ 2109 brake system comes into force, including the following measures:
- disconnect the pipe connecting the amplifier chamber to the intake manifold;
- remove the front strut strut (installed additionally);
- unscrew the four nuts that secure the amplifier housing to the body studs (use a set of wrenches + extension + universal joint + head on “13”);
- remove the assembly from the studs and remove it from the engine compartment.
operating principle On the back side of the amplifier (on the drive fork side) a seal is installed and a bracket is attached, through which the unit is connected to four studs on the car frame.
The parts must be dismantled: it is enough to unscrew the two fastening nuts with a “17” head and remove the iron structure by moving it towards you. The boot is easily pulled off the stem. Having mounted the mounting bracket and rubber seal on the new amplifier, you can begin installing the VUT, which proceeds according to the reverse scenario. When installing, you should pay attention to three facts:
- The vacuum booster rod should be connected to the brake pedal immediately after the unit is seated on the mounting studs (before tightening with nuts);
- experienced owners additionally apply sealant between the brake cylinder and the VUT, indicating the imperfection of the sealing elements;
- the VUT rod acting on the main brake cylinder (located on the front side of the housing) may move during transportation or installation (it is necessary to check and, if necessary, install correctly by pressing until it stops).
For your information. An incorrectly installed actuator rod will result in the brakes not working after assembly.
