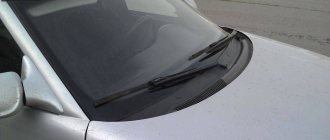
In our short article we will talk about the VAZ-2110 fuel system (injector). Carburetor engines have long gone into oblivion. The manufacturer has not installed such motors since the early 2000s. Most of the “ten” and similar models (2112, 2111) are equipped with engines with a fuel injection system. It is more reliable, works stably, and most importantly, does not require frequent intervention from the driver. The engine will be able to operate without problems, but provided, of course, that all filters are changed in a timely manner. There is also a requirement for fuel - it is not recommended to use low-quality fuel.
Design Features
The fuel system design includes the following components:
- The fuel supply system itself consists of a gas tank, a pump, a pressure regulator, gasoline filters, a ramp and injectors, as well as connecting tubes and hoses. In other words, these are the elements in which gasoline is found.
- The air supply system is those elements that allow oxygen to pass through. This is an air purification filter, a pipe, a throttle assembly, and a flow sensor. It is with the help of these elements that purified air is supplied to the fuel rail to form a mixture.
- And the last system allows you to catch gasoline vapors. This is an adsorber and connecting tubes. With their help, couples are destroyed.
The fuel supply system is needed to ensure the presence of the required amount of mixture in the ramp when operating in any mode.
Important nuances
When replacing the gas tank and the studs on it, we must not forget about several important points:
- Fire safety. Work on the gas tank, as well as on any part of the vehicle’s fuel system, should only be carried out in a well-ventilated area or in the open air. There should be no sources of open fire or flammable materials nearby. And, of course, there should always be a fire extinguisher at hand;
During any work on the VAZ 2110 fuel system, a fire extinguisher must be nearby
When screwing new studs into a VAZ 2110 tank, it is recommended to treat them with THREADLOCKER sealant
Replacing the tank is not a very complicated procedure. Even a novice car enthusiast can do it. To successfully complete this operation, he will need not so much repair skills as physical strength: removing a large tank with remaining gasoline from under the car is quite difficult. And if the car owner cannot boast of a strong physique, then at this stage he cannot do without an assistant.
Differences in power systems
It is worth noting that the power supply systems for the VAZ-2111 and VAZ-2112 engines are slightly different from the VAZ-21114 and VAZ-21124. The last two do not have a return line through which gasoline returns to the tank. The reason is that the fuel pressure regulator is located in the same module as the fuel pump, in the tank. Therefore, it is possible to control the pressure in the system at an early stage, so to speak. And in this case, there is no need to lay a return line.
In addition, in order to connect various components of the line, the VAZ-21114 and VAZ-21124 engines use clamp-type tips, rather than threaded fittings. There are also differences in the shape and design of the ramp; newer injectors are installed on it. And most importantly, the pressure in the system is slightly higher than on earlier engine models.
How to get rid of the smell of gasoline
To understand where the smell of gasoline may be coming from in your car, you should study the car's fuel supply diagram. Let's look at the example of a car of the tenth family:
Osipov Mikhail, VAZ 2112, Toyota Camry, driving experience 11 years.
Hi all! My name is Mikhail, now I’ll tell you a story about how I managed to exchange my two-wheeler for a 2010 Camry. It all started with the fact that I began to be wildly irritated by the breakdowns of the two-wheeler, it seemed like nothing serious was broken, but damn it, there were so many little things that really started to irritate me. This is where the idea arose that it was time to change the car to a foreign car. The choice fell on the melting Camry of the tenth years.
Yes, I had matured morally, but financially I just couldn’t handle it. I’ll say right away that I am against loans and taking a car, especially not a new one, on credit is unreasonable. My salary is 24k a month, so collecting 600-700 thousand is almost impossible for me. I started looking for different ways to make money on the Internet. You can’t imagine how many scams there are, what I haven’t tried: sports betting, network marketing, and even the Vulcan casino, where I successfully lost about 10 thousand ((The only direction in which it seemed to me that I could make money was currency trading on the stock exchange, they call it Forex. But when I started delving into it, I realized that it was very difficult for me. I continued to dig further and came across binary options. The essence is the same as in Forex, but it’s much easier to understand. I started reading forums, studying trading strategies. I tried it on a demo account, then opened a real account. To be honest, I didn’t manage to start earning money right away, until I understood all the mechanics of options, I lost about 3,000 rubles, but as it turned out, it was a precious experience. Now I earn 5-7 thousand rubles a day. I managed to get the car buy after half a year, but in my opinion this is a good result, and it’s not about the car, my life has changed, I naturally quit my job, I have more free time for myself and my family. You’ll laugh, but I work directly on the phone)) If If you want to change your life like me, then here’s what I advise you to do right now: 1. Register 2. Practice on a Demo account (it’s free). 3. As soon as you get something on the Demo account, top up your REAL ACCOUNT and go to REAL MONEY!
I also advise you to download the application to your phone, it’s much more convenient to work from your phone.
Reason #1: Filler pipe (2108-1101080). This is the hose that connects the filler neck and the gas tank. It cracks due to age, the problem is solved by replacing it. Reasons: gasoline leaks when the tank is full and when refueling.
Gasoline vapor recovery system (Separator), on VAZ 2110, 2111, 2112 it is mounted under the left rear fender. We check/blow out the hoses and, if necessary, change/clean them with a spoke and a compressor. By the way, these are not the only pipes that can leak; carefully check the entire fuel line for leaks.
- We remove the separator ventilation hose from the side member (in the arch of the removed wheel).
- We heat the end of the hose in hot water or crush it with pliers.
- We put the purchased valve with a cap on this hose.
- We take our device behind the separator and secure it with clamps.
Reason No. 3: Attaching the fuel pump. The fuel pump is secured using a pressure ring, and an O-ring is installed to prevent gasoline vapors from entering the passenger compartment.
We check the condition of this gasket, the terminal block seal on the fuel pump and whether the clamping ring nuts are tightened sufficiently (removal instructions).
It is not uncommon for fuel tank studs to break and have to be rebuilt. A temporary solution in this case is to seal the gas tank flap with tape.
Our readers recommend!
In order to get rid of constant fines from cameras, many of our readers successfully use Special Nano Film for license plates. A legal and 100% reliable way to protect yourself from fines. Having familiarized ourselves and carefully studied this method, we decided to offer it to you.
Keywords:
- gas tank
- bad smells
- car fuel system
Air intake and throttle valve
The first thing we will consider from the design of the VAZ-2110 fuel system (injector, 8 valves) is the air supply. An air purification filter is installed at the inlet - on the “tens” it is made of paper, flat, and has a large surface area. Due to this, filtration occurs as efficiently as possible. The design of the throttle assembly looks like this:
- The pipe through which liquid from the cooling system is supplied to the housing.
- The pipe through which the crankcase is ventilated during idle operation.
- A pipe through which liquid is drained.
- A sensor that allows you to determine the position of the damper when the engine is running.
- Idle air control (you can’t call it a sensor, since the device doesn’t measure anything). This is a simple stepper electric motor that allows you to change the amount of air supplied to the ramp when idling.
- Fitting – necessary for purging the adsorber.
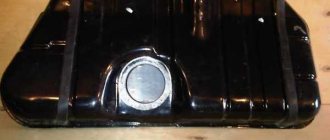
Replacing the fuel tank
Before replacing the tank, it is recommended to protect yourself from possible troubles and remove the wire in the negative terminal of the battery. The work will be completed as quickly and correctly as possible only with the participation of an assistant.
It is recommended to remove the pump immediately after shutting it off to avoid damaging the sensor and fuel lines.
After removing the old gas tank, you will need to perform the following operations to install a new one:
Install a new fuel level sensor gasket and lower the sensor together with it into its place in the tank.
Then lift the tank, first from the rear, then from the front, install it on new clamps, screwing them to the body with new bolts.
Next, connect the fuel hoses, separator and air pipes.
After that, go into the cabin and connect the fuel level sensor and pump to the connectors.
Close the hatch, screw it on and put the seat cushion in place.
After installation, you must make sure that all fuel lines and sensor wires are connected
After replacing the tank, you need to make sure it is working: start the engine, see if there are any problems with the fuel supply or leaks due to poor connections.
Today, you can repair and replace the gas tank on a “ten” at any service station. However, this procedure is not considered difficult to perform independently. Therefore, it is more advisable to remove, repair or change the gas tank yourself.
Throttle design features
The throttle assembly is attached directly to the receiver. With its help, air is dosed, which enters the intake pipe. A throttle assembly is installed between the inlet pipe (with filter) and the ramp. The damper is connected to the gas pedal via a cable. A sensor is installed on the damper itself; it allows the electronic control unit to determine the position of the damper when the engine is running.
It is worth noting that the fuel system of the VAZ-2110 (16 valves) is approximately the same in design as that of an eight-valve engine. In the flow part of the throttle assembly (immediately before the valve and immediately after it) there are holes that allow vacuum to be removed. With their help, the system responsible for ventilation of the adsorber and crankcase operates. If an adsorber is not installed on the car, the fitting required for purging is closed with a rubber plug. On VAZ-21114 and VAZ-211124 engines there is no channel through which air is supplied to bypass the damper. The connecting flange also has a slightly different shape.
Basic moments
The fuel system of the VAZ-2110 (8 valves or 16) includes a fairly large number of elements that affect the operation of the engine. It is also worth mentioning that a mixture of gasoline and air is supplied to the combustion chambers of any engine in a certain proportion (more precisely, 14 parts of air and 1 gasoline).
If this ratio is violated, the engine will start to work incorrectly - the speed will decrease or increase, and interruptions will appear.
Idle speed adjustment
On carburetor engines, cold starting was quite difficult - it was necessary to pull the “choke” cable so that more gasoline and less air entered the combustion chambers. And it was necessary to open the air supply in a timely manner, otherwise the car would “eat” gasoline very greedily. As for adjusting the idle speed on injection engines, a specially designed engine (IAC) is used for this.
When the valve is closed, air enters the fuel rail through a thin channel, bypassing it. This channel is closed by a conical needle, which is mounted on the regulator. The microcontroller control system, depending on the engine operating mode, sends a signal to the electric motor. At the same time, the needle moves, changing the air supply to the ramp. At the same time, a certain engine speed is maintained - specifically, 750 rpm.
General diagram of the injector operation
- there is a so-called group of information sensors, which is carried out exclusively by data collection;
- all information goes to the controller, which is the analytical center of the injection system;
- depending on a number of factors, the controller sends an electrical pulse of a certain length directly to the nozzles themselves, which open for a strictly specified time period;
- The efficiency of the cylinders and, consequently, the engine itself depends on how much fuel and air are supplied from the injectors.
Note. A certain amount of air corresponds to a certain amount of fuel (if this ratio is violated, then the engine power will correspondingly decrease significantly).
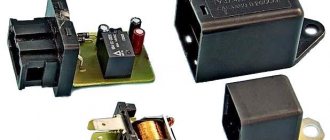
VAZ 2110 injector relay diagram
The price of an injector (see VAZ 2110: flushing the injector on your own) is a flexible concept and depends on a number of components. However, the cost of fixing an injector problem at a car service center is very significant. The DIY repair instructions allow you to fix the problem, but you need to have a good understanding of the injector circuit. Photos and videos - materials in this matter will become the most valuable practical assistant.
Ramps and injectors
The ramp is a hollow bar with nozzles installed on it and a specially designed mixture pressure regulator. The ramp is mounted with two bolts on the intake pipe or directly on the cylinder head. On the left side there is a fitting with which the fuel pressure is monitored (during diagnostics). It is closed with a threaded plug.
The injectors are fixed to the ramp. The injector nozzles are located in the intake manifold openings. But on the VAZ-2112 and VAZ-21124 engine models, the injectors are installed in the holes on the cylinder head. In order to seal the mounting holes of the electromagnetic injectors, rubber rings are installed. An injector is a regular valve with an electromagnet.
When a pulse is received from the microcontroller, the valve opens for a certain time. In this case, the fuel mixture is supplied through a sprayer into the combustion chamber through a valve. The fuel begins to evaporate, comes into contact with hot elements, and in a state of steam ignites in the combustion chamber. Ignition occurs with the help of a spark plug. As soon as the pulse to the injector stops, the valve returns to its original position using a return spring.
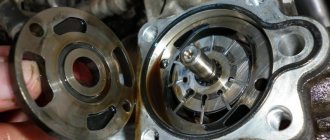
Do-it-yourself replacement of the VAZ 2112 fuel pump mesh
Why do you need to replace the VAZ 2112 fuel pump mesh?
Installing a mesh in the fuel pump VAZ 2112
The heart of the car is the engine. It cannot work without the correct supply of gasoline to it, like the movement of blood through the human body. The main fuel supply unit in a VAZ 2112 car is a gasoline pump, which pumps gasoline through its supply system to the filter, and then into the combustion chamber. Its period of operation depends on how pure gasoline flows into the gas pump. There are situations when the car moves jerkily or even stops. In such a situation, you need to start repairs from the easiest way - the VAZ 2112 fuel pump mesh must be replaced. The mesh can become clogged to such an extent that it surprises even experienced auto mechanics. The main reason for this is the poor quality of gasoline.
When is it necessary to replace the mesh on the fuel pump?
The condition of the unit can be judged by its performance and the pressure developed. To do this, you need to connect a pressure gauge to the fuel system through a special adapter. This diagnosis is done at a service station. It’s easier to diagnose a fuel pump at home like this:
- The ignition is turned on, but the VAZ fuel pump does not work, there is no characteristic hum or makes a loud noise, which entails an overload of the unit and shortens its service life.
- The pump performance decreases, which is clearly visible when driving at third and fourth speeds on a flat road. The car does not respond when the driver presses the gas pedal.
- If a VAZ 2112 car “spontaneously” slows down while driving. This most likely indicates that there is a problem with the fuel supply to the gas tank.
- The reasons may be: clogged coarse or fine filters. The fine filter must be replaced, and the coarse filter (mesh) can be washed. But this will only give a temporary effect; after a short period of time, you will still need to replace the fuel pump grid on the VAZ 2112. Any car owner can purchase it at a car store without any problems. The price of the part is small, the DIY process will take a little time, but the reliability of the gas pump will increase for a long time.
Fuel pressure adjustment
How is pressure maintained in the fuel system of the VAZ-2110? On cars with VAZ-2111 and VAZ-2112 engines, a pressure regulator is installed directly on the fuel rail. With its help, a certain pressure value is maintained inside. Moreover, it allows you to maintain both air pressure in the intake pipe and fuel inside the ramp.
The design of the regulator is not very complicated. Inside it are a valve, a diaphragm and a return spring. When the engine is running, the regulator allows you to maintain pressure in the range of 284-325 kPa. On the one hand, the diaphragm of the device is affected by fuel, and on the other, by low pressure in the intake pipe. As soon as the pressure in the intake manifold decreases, the valve begins to open. In this case, excess fuel is passed into the drain line to the tank. The pressure in the ramp is significantly reduced.
As soon as the pressure in the intake manifold increases (this happens when the damper opens), the valve on the regulator begins to open at a significantly higher pressure of the fuel mixture. At the same time, the fuel pressure inside the ramp increases significantly.
But on VAZ-2114 and VAZ-21124 engines, the pressure regulator is placed inside the module, next to the fuel pump. This is a kind of check valve in the fuel system of the VAZ-2110, which operates at a certain pressure (about 400 kPa). If the pressure exceeds the norm, the drain line opens and excess fuel is returned back to the tank.
1
The above action should be performed in order to detect malfunctions when diagnosing or repairing the fuel system and specifically in the fuel supply system. Next we will talk about how to properly check the pressure in the ramp.
at home.
How the system works
This system is used in a closed loop injection system. It uses the method of vapor capture with a carbon adsorber. It is installed in the engine compartment and connected by pipelines to the fuel tank and throttle pipe. There is an electromagnetic valve on the adsorber cover, which switches the operating modes of the system based on signals from the control unit.
When the engine is not running, the solenoid valve is closed and gasoline vapors from the fuel tank flow through a pipeline to the adsorber, where they are absorbed by granular activated carbon. When the engine is running, the adsorber is purged with air, and the vapors are sucked to the throttle pipe and then into the intake pipe for combustion during the operating process.
Malfunctions of the fuel vapor recovery system lead to unstable idling, engine stalling, increased toxicity of exhaust gases and deterioration of the vehicle's driving performance.
The following system malfunctions are possible:
- malfunction of the purge solenoid valve;
- overflow of the adsorber, which collects more than 60 g of fuel (the weight of the new adsorber is no more than 1.1 kg);
-damaged or incorrectly connected hoses.
Types, design and principle of operation of the injection pump bypass valve
First of all, it should be noted that today there are several types of valves that provide fuel bypass to the injection pump:
- Bypass (reducing) valve in multi-section pumps;
- Bypass (reducing) valve for regulating pressure inside the housing (at the inlet to the pump section of the fuel priming pump) in a distribution-type injection pump;
- Bypass throttling valve in distribution type pumps.
Each of the valves has its own design features and occupies a specific place in the high-pressure fuel pump.
Bypass valve in multi-section fuel injection pumps. This valve is installed in the front wall of the pump housing; it is connected to the fuel supply channels from the fuel priming pump to the discharge sections. Structurally, the valve is very simple: its basis is a body, inside of which there is a spring-loaded shut-off element in the form of a ball or disk. The housing can be of two types:
- Bolt. The valve is made in the form of a bolt, inside of which there is a shut-off element, and two or more holes are made on the walls to drain fuel into the return line. The bolt is screwed into the pump body; it holds the connecting nipple, to which the return line is connected;
- Union. The valve is made in the form of a fitting, inside of which there is a shut-off element. The fitting is screwed into the pump housing, and the return line is connected to the external thread.
This type of bypass valve works as follows. At low pressure in the supply line, the valve is closed due to spring force - fuel is supplied to the discharge sections. When the engine operating mode changes, the operation of the injection pump and the fuel priming pump also changes; at some point, the fuel pressure in the supply line increases, which can complicate the operation of the injection sections. When the threshold pressure is exceeded (which lies at the level of 58-80 kPa), the spring force is overcome and the valve opens - excess fuel is discharged into the tank through the return line. When the pressure drops, the valve closes again.
It should be noted that in multi-section pumps, the pressure reducing valve is mainly responsible for removing excess fuel, and air is removed from the system by a nozzle valve installed on the fine fuel filter.
Let's consider the principle of operation of the gas pump.
Replacing generator bearings on a VAZ 2110 with your own hands, what bearings cost numbers, which ones are better to choose, LuxVAZ
As already mentioned, a mechanical fuel pump is more often used in cars with a carburetor, where the fuel mixture circulates under low pressure. Electric analogues, in turn, are often installed in cars with an injector, where the fuel mixture circulates under high pressure. If the vehicle is equipped with a carburetor, the fuel pump functions as follows. At the moment when it becomes necessary to fill the fuel chamber with the mixture, the diaphragm shifts to the lower part. The return mechanism moves the diaphragm to the reverse position, which leads to the supply of fuel to the carburetor. The principle of operation of an electric fuel pump on cars equipped with an injector is in many ways similar to its mechanical counterpart. The central part of the device is drawn into the electromagnetic pulse valve until the contact group opens, which stops the current supply.
Before you begin diagnosing or replacing the fuel pump, you need to familiarize yourself with its location. To do this, you must resort to the manufacturer's instructions. The standard location of the element on a VAZ 2110 car is under the rear seat of the car.
Fuel system design
How to check fuel rail pressure yourself
This procedure will require a pressure gauge, the maximum value of which is 7-10 atmospheres. It is not recommended to use a more powerful pressure gauge, since the error when measuring a small pressure will be too large.
Homemade device for measuring pressure in the fuel rail
You also need to have a hose with an internal diameter of 9 millimeters and tow used for plumbing work (it can be used to ensure a tight connection). After this, all joints should be strengthened with special clamps. If possible, you can facilitate and speed up this process by using a ready-made device for measuring pressure in the ramp
Replacing the fuel tank
Before replacing the tank, it is recommended to protect yourself from possible troubles and remove the wire in the negative terminal of the battery. The work will be completed as quickly and correctly as possible only with the participation of an assistant.
It is recommended to remove the pump immediately after shutting it off to avoid damaging the sensor and fuel lines.
After removing the old gas tank, you will need to perform the following operations to install a new one:
Install a new fuel level sensor gasket and lower the sensor together with it into its place in the tank. Then lift the tank, first from the rear, then from the front, install it on new clamps, screwing them to the body with new bolts. Next, connect the fuel hoses, separator and air pipes. After that, go into the cabin and connect the fuel level sensor and pump to the connectors. Close the hatch, screw it on and put the seat cushion in place.
After installation, you must make sure that all fuel lines and sensor wires are connected
After replacing the tank, you need to make sure it is working: start the engine, see if there are any problems with the fuel supply or leaks due to poor connections.
Today, you can repair and replace the gas tank on a “ten” at any service station. However, this procedure is not considered difficult to perform independently. Therefore, it is more advisable to remove, repair or change the gas tank yourself.
The main reason why you have to remove the gas tank on VAZ 2110, 2111 and 2112 cars is its damage, after which further operation is impossible. If the tank is leaking, then the leak can be eliminated only by completely removing it, soldering the fuel passage areas, or replacing the gas tank assembly.
In order to perform this procedure, you will need the following tool:
- Head for 10, 8 and 13 mm
- Screwdrivers with both flat and Phillips blades
- Key 17 (for old-style cars with a 1.5 liter engine)
- Penetrating lubricant
- Ratchet handles or cranks
- Extension Cords
Repair of engine power supply system VAZ 2110 2111 2112
| We check the pressure in the fuel rail with a regular pressure gauge (for example, from a tire pump). Disconnect the negative cable from the battery. We put an oil and petrol resistant hose (with an internal diameter of 12 mm) onto the threaded fitting of the pressure gauge and secure it with a clamp. We unscrew the plastic cap of the fitting on the fuel line. Using the wheel valve cap, unscrew the spool valve from the fuel rail fitting. |
| For clarity, we show this operation once again on a dismantled VAZ-2111 engine ramp. Gradually releasing the fuel pressure, remove the spool. We put the pressure gauge hose on the ramp fitting and secure it with a clamp. |
| We start the engine and while it is idling, check the fuel pressure, which should be 2.8-3.2 bar (2.8-3.2 atm). Remove the vacuum hose from the fuel pressure regulator. |
| If the regulator is working properly, the fuel pressure should increase by 0.2-0.7 bar (0.2-0.7 atm) |
Reduced pressure in the power system
Warning
When the engine is running, the pressure in the power system is maintained at 284–325 kPa (2.9–3.3 kg/cm2), therefore, before carrying out work related to disconnecting any fuel pipes and hoses, it is necessary to reduce the pressure in the power system.
| 1. Brake the car with the parking brake and put the gear in neutral. | |
| 2. Remove the rear seat cushion. | |
| 3. Unscrew the two fastening screws and remove the hatch cover above the fuel tank. | |
| 4. Disconnect the block with the fuel pump wires from the wiring harness by pressing the plastic latch. | |
| 5. Start the engine and let it run until it stalls because the fuel line runs out of gasoline. Then turn on the starter for about 3 seconds. After this, you can disconnect the fuel lines. Upon completion of work, do not forget to connect the block with the fuel pump wires to the wiring harness. | |
Signs of fuel pump wear
A faulty fuel pump either works intermittently, that is, incorrectly, or does not function at all. Problems may occur due to severe wear or failure of other system elements.
Signs of a fuel pump malfunction that require checking its functionality are:
- engine failure to start;
- uneven operation of the power unit, it stalls and loses power;
- extraneous noises in the operation of the fuel pump or their complete absence.
Without diagnostics, it will not be possible to determine the nature of the malfunction, and during the test you must always move from the simplest to the most complex.
Be careful!
Before checking the pressure of the fuel system, you need to make sure that it is intact and there is no depressurization, otherwise the measurements will be inaccurate. First of all, you need to open the hood, then turn off the ignition.
- Find the injector fuel rail.
- Remove the fuel pressure fitting plug and unscrew the nipple using a spool valve.
- Using rags and containers, remove any remaining fuel. Be careful to avoid contact with eyes.
- Connect the device hose to the fitting and secure it using the same clamp.
Fuel filter BAZ 2110
The main task of a car fuel filter is to clean the supplied fuel from dirt, dust, condensate and fuel resins. To ensure smooth operation of the engine and reduce the likelihood of its failure, it is recommended to change the VAZ 2110 fuel filter every 15-20 thousand. km run. However, the specific timing of replacement is determined by the quality of the fuel used, the conditions of use of the car, as well as its total mileage.
The formation of dust and dirt entering the fuel filter is explained by the interaction of gasoline with metal and air in the process of various chemical compounds. If you do not replace it in a timely manner, then this element will gradually become clogged with harmful impurities and dirt, resulting in an increased load on the engine and lower reducing its power. Also, various chemical impurities, dirt and dust will begin to enter the engine, which will inevitably lead to problems with its operation, and in the future, failure.
What is a fuel injection pump bypass valve
The injection pump bypass valve (reducing valve) is a high-pressure fuel pump assembly of diesel engine power supply systems, an adjustable valve (hydraulic throttle) for draining excess fuel and maintaining the required fuel pressure in the pump.
The bypass valve performs several functions:
- Draining excess fuel from the pump;
- Removing air trapped in the fuel system;
- Maintaining constant fuel pressure inside the pump (in the channels of the pump sections of multi-section high-pressure fuel pumps and in the housing of the distribution high-pressure fuel pumps).
Recommendations
Every car enthusiast can do a lot to extend the life cycle of all elements of the unit in question. To ensure that your car's power system works flawlessly, use the following recommendations:
- Refuel only at approved gas stations.
- Replace fuel and air filters in a timely manner.
- Use cleaning additives with caution.
- Try not to drive on a half-empty gas tank, especially in winter.
If you find an error, please select a piece of text and press Ctrl+Enter.
The pressure that should be in the fuel system:
- at the moment the ignition is turned on - at least 3 atmospheres;
- with idle speed - about 2.5 atmospheres;
- with the fuel pressure regulator tube removed, approximately 3.3 atmospheres;
- when adding gas, the pressure should increase to 3 atmospheres and drop to 2.5.
- After fuel enters the systems, turn off the ignition and monitor the pressure gauge readings. If the ramp is working properly, the pressure should be about 0.7 bar, and then stabilize at this mark.
- If the pressure drops to zero, this is a sign of a faulty fuel pressure regulator (FPR). It will be necessary to remove and replace it or install a new check valve for the fuel pump motor.
- Raise the rpm to 3000, watching the pressure gauge needle. If the arrow goes down, there is a problem with the fuel pump.
- If the fuel pump does not provide the required pressure, the strainer is probably clogged, and maybe the fuel filter of the pump is clogged.
- If the above signs are not confirmed, it is necessary to check the TPS, IAC, mass air flow sensor, and engine cylinder compression.
Frequent breakdowns
A fuel pump malfunction can be caused by: poor quality fuel, clogged fuel filter, simple emptying of the gas tank, or how intensively the vehicle is used. Mechanical damage to internal components due to wear or poor quality of workmanship and materials cannot be ruled out.
Helping the fuel pump last longer is within the capabilities of any car enthusiast who follows a number of rules:
- refuel with high-quality fuel at proven gas stations;
- change the fuel filter in a timely manner;
- periodically clean the gas tank from accumulated impurities;
- Make sure that the fuel level in the tank is sufficient for the system to operate.
The last point is due to the fact that running the pump idle will lead to overheating and failure.
Signs of a malfunctioning fuel pressure regulator. Everything you need to know
If you want a “painless” ride, remember the signs of a malfunctioning fuel pressure regulator by heart. The smooth operation of the engine depends on it. The meaning of the device is that fuel presses on the valve diaphragm on one side, and the intake manifold spring presses on the other side. And timely equalization of mutual processes ensures the normal functioning of the engine. A breakdown of the regulator leads to a drop in pressure, the motor begins to operate unstably and unsteadily. At the very least, it makes driving difficult. Interruptions in engine operation can also affect acceleration speed and other parameters. If you ignore the warning signs, expect lengthy and expensive repairs. After all, the situation can worsen at any moment. Of course, pressure depends not only on the regulator. First of all, the integrity of the fuel lines and the condition of the fuel pump are usually checked. The regulator follows them in line, as one of the main possible reasons for the disruption of oil exchange and high-quality lubrication of the unit. Signs of a malfunction of the fuel pressure regulator can be determined by ear (some). Others manifest themselves in changes in the behavior of the machine. Naturally, such changes are by no means for the better. Therefore, as soon as they arise, you must immediately take appropriate action. What should we pay attention to? First of all, it’s time to inquire about the “health” of the fuel pressure regulator if the following symptoms attract your attention:
- The engine is extremely unstable. And it doesn’t “trouble”, as with problems with candles; the sound of the engine is uneven - not rumbling, but like a train rumbles at the junctions;
- At idle speed the engine may even stall. It is clear that this symptom is characteristic of many diseases: improper installation of the drive belt, flooded spark plugs, clogged carburetor... So if this is the only one present, you will most likely have to check many components;
- When driving, the engine runs jerkily and “sinks” are observed;
- abnormal consumption of gasoline (or diesel fuel). Again, a symptom can indicate different problems, so it is advisable to “make a diagnosis” based on the totality of symptoms;
- the level of carbon monoxide in the exhaust gases is exceeded (which is checked with an appropriate device or simply “by smell”);
- When switching to a higher gear, acceleration is weak and slow. The car loses its characteristic throttle response;
- the response to the gas pedal is delayed and weak (if this is not a characteristic feature of your car - for some VAZs and Chinese cars this behavior is quite normal).
If several of the described symptoms are detected, and the remaining components of the fuel system are normal, you will have to check the regulator itself. We check the RDTV of the old days, driving exclusively in VAZs and GAZs, folk craftsmen came up with a universal “knee-high” method for independent testing, which does not require any equipment. Elementary actions: the bypass valve was turned off/clamped and the outgoing stream was visually observed. With the spread of injectors and carburetors becoming a thing of the past, the method became ineffective. (see “Differences between an injector and a carburetor”) Nowadays you will need a pressure gauge to check. However, a tire one, which almost every car owner has, is quite suitable. The vacuum hose is removed, a pressure gauge is connected between the fuel hose and the fitting, the engine starts and idles. During the measurement, the pressure in the fuel system should rise from 0.3 bar to 0.7. If this does not happen, the vacuum hose is changed and the measurements are repeated. This “knight’s move” did not help either - the problem is definitely in the fuel pressure regulator. It cannot be repaired, so we go to the spare parts store for a new one. Changing the RTD
- Those who are unsure of themselves can drive up to a service station with a new part, but believe me, nothing complicated will be required of you. Take a 24mm wrench and a five-point hexagon and begin the repair work;
- The fitting plug at the end is unscrewed. There is an o-ring there. If it is torn, cracked or stretched, replace the seal or the entire plug;
- The spool is unscrewed from the fitting. It is similar to the tire one, so you will recognize it;
- The vacuum pump is removed from the regulator;
- The nut is twisted - fastening the fuel drain pipe;
- The bolts are removed - 2 pieces - with which the RTD is fixed to the fuel rail;
- The regulator fitting is pulled out of the ramp hole, and the regulator itself is removed from the drain tube. It happens that the sealing ring gets stuck in the ramp. You need to carefully get it out of there; if intact, put it on a new RTD; if torn or cracked, replace it with a new one.
Installation of the purchased spare part is carried out in the reverse order. Having completed the installation, you should start and listen to the engine to make sure that all problems are solved. Finally, we note: you should not raise the alarm and look for signs of a malfunction of the fuel pressure regulator as soon as the engine sneezed. RTD is a fairly reliable thing and does not “fly” very often. And if this happens, you will quickly understand what’s going on. AutoFlit.ru
- VAZ 2112 power steering
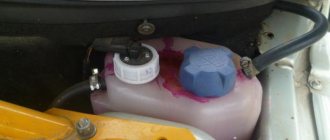
- Coolant reservoir VAZ 2114
Where is the coolant drain plug located on the VAZ 2112? The reason for the coolant boiling on the VAZ 2114
- High signal level of the coolant temperature sensor VAZ 2114
- How many liters of coolant in a VAZ 2110
- How to change coolant on a VAZ 2114
- Coolant indicator temperature sensor VAZ 2115
- Where is the VAZ 2115 coolant temperature sensor located?
Adsorber: device, principle of operation and malfunctions
What is an adsorber, what task does it perform, what problems can arise, we’ll talk about this and much more in today’s article.
Many car owners have no idea, let alone the structure of the system, and sometimes even its existence. Therefore, the goal of this article is to “put everything into perspective,” including finding out how the device works, as well as where it is located.
In the photo: adsorber - black plastic tank under the hood of a Chevrolet Niva
Why do you need an adsorber?
It was originally created as a tribute to environmental standards, more precisely under EURO2. By and large, the motor can be configured so that it can do without it. But, taking into account modern standards, vapor leaks are unacceptable. Plus, the adsorber does not allow fuel vapors to enter the cabin, which, as you understand, is also unpleasant. If on old cars, still of the carburetor type, such a system did not exist, in principle, on all modern injectors, it is mandatory.
What is the adsorber and where is it located?
The adsorber is structurally a cylinder, a hollow one, inside of which there is a so-called filter component. The adsorber also consists of a number of additional modules, for example:
• The first is the container in which the filter is placed.
• The filter element is often simple granular activated carbon.
• Separator, a device that receives and sends retained fuel vapors back to the tank.
• Magnetic valve responsible for changing operating modes.
• The gravity valve prevents fuel overflow if the vehicle rolls over.
• Various connecting hoses and tubes.
Adsorber device
Perhaps one of the main elements of the entire adsorbing system is the magnetic valve. The mode of operation and the change of modes depend on it. That is, it is responsible for the timely switching of the accumulation mode, when vapors accumulate in the tank, to the mode of transferring vapors back to the tank.
Depending on the car and even models from the same manufacturer, the location may vary. Here you need to find out specifically by model and even year of manufacture. An excellent example is the Audi A4 B5, where in different years the systems were located under the front and rear fender liner, under the spare wheel, directly on the tank. Therefore, study the operating instructions; it usually indicates where the adsorber may be located. On domestic Ladas, on almost all models, the adsorber is located in the right corner, when viewed in the direction of travel of the car, next to the headlight.
In the photo: adsorber under the hood of a VAZ 2112
How does the adsorber work?
There is nothing difficult about the work. The algorithm is as follows: vapors, let's say gasoline, form in the tank, rise and fall into the so-called separator. Here they condense, turning into liquid. The formed liquid goes back into the tank, and the remaining unconverted vapors go directly into the adsorber. In the adsorber, vapors are absorbed by an activated carbon filter; it copes with this task most effectively. Remember that the accumulation of vapors in the adsorber occurs only when the engine is turned off.
Operating principle of the adsorber
After the engine starts, the ECU sends a signal according to the available operating modes and a magnetic valve opens, connecting the adsorber to the throttle or intake manifold. Next, purging occurs when the vapors are driven through the system and connected with air through the throttle. “Passing” is carried out due to the vacuum created in the intake manifold. Then they enter the cylinders, where they ignite along with the main “portion” of fuel.
In principle, it is clear that while the car is not running, the evaporating fuel in the form of vapor settles on the separator, then some in the form of condensate returns to the tank, and the other part in the form of vapor through the adsorber enters the throttle and further through the system. There is nothing complicated, everyone can figure it out.
Malfunctions and symptoms
Remember that the signs listed below may not always indicate problems with the filter system. So:
• Loss of power while driving.
• The readings from the fuel level sensor constantly vary, sometimes it shows an empty tank, and after a while it shows full.
• Floating speed, but with the caveat that this can only happen on a warm engine, after about 10 minutes of driving.
• At idle, when you put a little pressure on the gas, it feels like the car is about to stall, as if the gas has run out.
• When opening the tank lid, a whistle is heard.
• Magnetic valve knocking, often confused with valve knocking.
• Increased fuel consumption.
In the photo: VAZ 2114 adsorber
As for malfunctions, let's return to the section about the design of the system, what does it consist of and what can fail?
1. Hoses, tubes. It is clear that everything does not last forever, each manufacturer may have its own resource; as a rule, owners begin to experience loss of tightness, cracking of hoses, somewhere after 130,000 km. average.
2. Clogged adsorber channels, hoses. Subsequently, all kinds of debris accumulates, including destroyed container membranes or activated carbon itself.
3. Inoperative valve. Stuck in one position is a fairly common problem, and to be honest, in most cases it is the magnetic valve that is faced with problems. There are two options: replace it with a new one (a very expensive business) or look for craftsmen and repair it, you can, of course, do it yourself, but your hands must be from the right place.
4. The voltage on the magnetic valve has disappeared. Check the wiring, perhaps some relay is “buggy” or even a failure in the ECU (rare, but it happens). After all, opening/closing signals come from the “brains”.
5. Separator, what’s the problem with it? It may crack, because they are often plastic, so there is a loss of tightness, as a result, the vapors are not converted into liquid, etc. Soldering this container is extremely difficult, the plastic has such a property that it is very difficult to melt.
6. Out of coal. The problem is rare, we immediately note, most likely associated with some other malfunction, for example, depressurization of the system, as an option.
Conclusion
What I would like to emphasize in the article is, firstly, that you can do without an adsorber, just turn it off, it’s a matter of minutes (unless, of course, you don’t care about the atmosphere and your own health), secondly, during normal operation of the device, the car feels behaves quite adequately, moreover, it saves fuel.
Therefore, if such a problem occurs, try to identify the true cause, and then decide whether you are ready to spend a tidy sum on new spare parts (as a rule, a new adsorber will cost 5,000 - 6,000 rubles) or not.
Gasoline pump and purification
Using a two-stage electric drive, the fuel pump pumps gasoline into the line. The pump is of a rotary type, it is not dismountable, and is installed directly in the gas tank. This reduces the possibility of a vapor lock occurring, since gasoline is injected under high pressure and not under vacuum. The pressure value is about 284 kPa on VAZ-2111 and VAZ-2112 engines, and also over 364 kPa on VAZ-21114 and VAZ-21124 engine models.
The gasoline filter is built into the supply line directly between the ramp and the electric pump. It is located under the body, directly next to the fuel tank. The filter is a non-separable element; the housing is made of steel. Inside there is a paper type filter element. For rough cleaning of fuel, a so-called diaper is used, which is installed in the lower part of the pump.
Replacing the fuel tank
Before replacing the tank, it is recommended to protect yourself from possible troubles and remove the wire in the negative terminal of the battery. The work will be completed as quickly and correctly as possible only with the participation of an assistant.
It is recommended to remove the pump immediately after shutting it off to avoid damaging the sensor and fuel lines.
After removing the old gas tank, you will need to perform the following operations to install a new one:
Install a new fuel level sensor gasket and lower the sensor together with it into its place in the tank. Then lift the tank, first from the rear, then from the front, install it on new clamps, screwing them to the body with new bolts. Next, connect the fuel hoses, separator and air pipes. After that, go into the cabin and connect the fuel level sensor and pump to the connectors. Close the hatch, screw it on and put the seat cushion in place.
After installation, you must make sure that all fuel lines and sensor wires are connected
After replacing the tank, you need to make sure it is working: start the engine, see if there are any problems with the fuel supply or leaks due to poor connections.
Today, you can repair and replace the gas tank on a “ten” at any service station. However, this procedure is not considered difficult to perform independently. Therefore, it is more advisable to remove, repair or change the gas tank yourself.
The main reason why you have to remove the gas tank on VAZ 2110, 2111 and 2112 cars is its damage, after which further operation is impossible. If the tank is leaking, then the leak can be eliminated only by completely removing it, soldering the fuel passage areas, or replacing the gas tank assembly.
In order to perform this procedure, you will need the following tool:
- Head for 10, 8 and 13 mm
- Screwdrivers with both flat and Phillips blades
- Key 17 (for old-style cars with a 1.5 liter engine)
- Penetrating lubricant
- Ratchet handles or cranks
- Extension Cords
Replacing the fuel pump with “Pekar” — Lada 2107, 1.6 l., 1997 on DRIVE2
The old pump was tired... the car did not develop full power... it took a long time to accelerate and all the issues related to the faulty fuel pump. I got tired of this whole thing, I climbed onto the World Wide Web, and, after reading about gas pumps, I decided to settle on “Pekar”, it has a double plunger.
1) Using a spanner or a regular open-end wrench for thirteen, unscrew the two nuts securing the fuel pump to the cylinder block and remove it from the studs. 2) Following the fuel pump, remove the sealing gasket, it must be intact and at least 0.3 mm thick, if necessary, replace it with a new one.3) Next, remove the heat-insulating spacer and after it another sealing gasket. If necessary, replace the second gasket if it is damaged.
Now that the fuel pump is removed from the car, replace it with a new one or make some other repairs. Before installing a new pump, it is necessary to check the minimum protrusion of the pusher, this is especially true if the car has already driven more than 90 thousand. km. The operation of the diaphragm unit will depend on the amount of protrusion of the pusher, namely, it becomes possible to reduce the fuel supply by the fuel pump and, as a result, a diaphragm rupture may occur.
The amount of protrusion of the pusher should be 0.8-1.3 mm. Adjustment of the protrusion is carried out by adding shims between the heat-insulating spacer and the cylinder block, the shims are either added or replaced with a new thinner one. Before measuring the amount of protrusion of the pusher, it is also necessary to take into account that the amount of protrusion will be influenced by the gasket between the spacer and the fuel pump body, therefore, in order to carry out a more accurate measurement, install both gaskets between the cylinder block and the spacer. As an opening of the old pump showed, the diaphragm was torn, That's why the car was struggling.