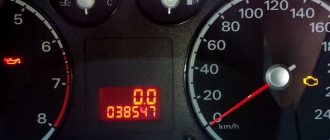
12/04/2018 Replacing the crankshaft oil seal: everyone will have to go through this Are you tired of the Internet yet? Of course not, we understand that today this powerful source of information is almost the only source of knowledge... However, everyone is tired of this chaos in advice and instructions! On one resource they say that you first need to remove the cylinder head, and on another they say that there is no point in this, and so on. There are many opinions and everyone wants to push their own methodology.
We are convinced that despite the diversity of opinions, there is one correct solution that should be used. That is why we decided to write this article, which contains certified methods of licensed mechanics who worked at reputable official service stations.
We'll consider:
- replacement and purpose of crankshaft seals in most engines;
- replacing crankshaft seals on the popular Opel Astra;
- replacing oil seals on Renault Logan;
- replacement of oil seals on one of the most popular cars in the CIS countries - VAZ 2107.
Go.
Instructions for replacing crankshaft oil seals on most engines
If oil oozes from under the crankshaft, this always indicates one thing - the special seal has begun to wear out. An oil leak can cause a lot of problems for the car owner, but there is only one solution to this problem - the crankshaft seals should be replaced. At a service station, the cost of work is far from low, especially if the rear oil seal is leaking. Let's see how to perform the replacement operation yourself. This will help you save significantly and improve the car owner’s repair skills.
Purpose of the oil seal
For efficient engine operation, constant lubrication is required. To solve this problem, engineers introduced a lubrication system into the power unit, in which oil circulates under pressure. Lubricant is supplied to various components and parts inside the motor. The oil literally sprays out under pressure. Sometimes lubrication is carried out by gravity. Most often, engines operate on a hybrid system: part is distributed under pressure, part by gravity.
The main task is to reduce friction as much as possible, remove wear products, and protect the insides of the precious engine from damage and overheating. In this case, you need to select the crankshaft. It comes out of the power unit housing, and to prevent oil from leaking out, the hole in which the crankshaft rotates must be sealed.
Crankshaft and oil seal
The crankshaft oil seal is used as a seal. Another name for it is the root seal. There are two such seals:
- front: located on the crankshaft pulley side;
- rear: flywheel side.
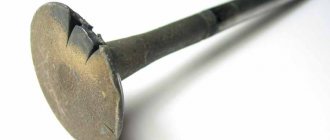
What it looks like and where it is installed
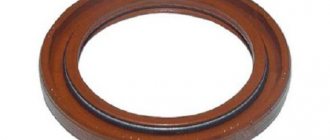
These sealing elements are made of silicone or fluorine rubber. These materials were not chosen by chance - they are resistant to high temperatures, as well as to the effects of lubricating fluids. This completely avoids the risk of damage to the part due to overheating. Overheating is no joke; at high speeds, the temperatures in the engine can be simply incredible, which is why some parts increase in size. In fact, the part is a ring. The size is equal to the diameter of the engine crankshaft.
The seal is installed on the engine block where the crankshaft comes out. On different cars and powertrain models, the crankshaft exit location may be different. So, on classic rear-wheel drive VAZs, where the engine is located longitudinally and the timing chain drive is chain driven, the oil seal is installed in the crankshaft shield behind the support bearing. On front-wheel drive cars, the engine is located transversely, and the gas distribution mechanism is most often belt driven. The oil seal in such engines is installed in the cylinder block due to the fact that there are no crankshaft shields on such internal combustion engines.
That is why the advice on which nut to unscrew first is basically meaningless, since it depends on the type of motor.
Malfunctions
Even taking into account the fact that the crankshaft seal can withstand high temperatures, the material is wear-resistant and has a limited service life. It is at rest, but the crankshaft, which is “in conjunction” with it, constantly rotates and “rubs” the seal.
To understand when it is necessary to replace the crankshaft oil seal, it should be borne in mind that high-quality original parts last no more than 200 thousand kilometers. It must be said that an element may fail a little earlier for a number of reasons.
Oil seeps through the oil seal
Among the reasons are untimely oil and filter changes, as well as engine overheating. Oil that has not been changed for a long time contains dirt, dust, and wear products of engine parts. The seal is in constant contact with the oil. Dirty oil causes scratches and burrs to form on the surface of the seal. Then, over time, the scratches increase, and the edge of the oil seal at the point of contact with the crankshaft begins to leak lubricant.
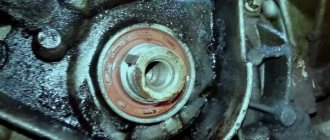
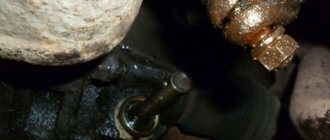
Removing the oil seal
As for overheating, the oil seal is designed to operate at high temperatures, but it also has a limit. Due to severe overheating, the product is deformed, elasticity is lost, and it can no longer provide sufficient tightness. In this case, an oil leak will inevitably form. In this case, an urgent replacement of the crankshaft oil seal is necessary, otherwise all the oil will leak out.
Replacement and subtleties
Obviously, the main reason for replacement is an engine oil leak. In this case, the leakage can be either intense or insignificant. In both the first and second cases, it is better to replace the worn part. It is not recommended to operate a car with a “sweating” oil seal. Firstly, it greatly affects oil consumption, and secondly, it is unsafe.
The oil seal is ready for installation
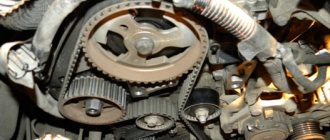
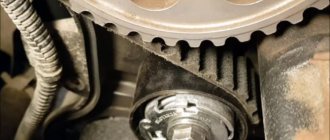
As we have already noted, there are two types of seals in the engine: rear and front. If you are replacing the front crankshaft oil seal, it is also advisable to replace the rear one. However, if there is a choice, then remember - the front one is especially important. The fact is that it is located near the timing belt - if oil gets on the belt, then there is a serious risk of the belt slipping a tooth or several. Also, the belt material may lose its characteristics and breakage is possible.
Interesting isn't it? It turns out that such a “childish” problem as oil leakage from the oil seal can lead to the belt slipping, and therefore to the wedge.
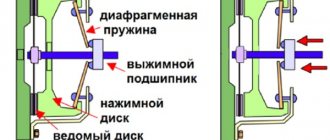
The rear oil seal is installed at the junction of the engine and gearbox. If oil leaks here, this will lead to a decrease in the lubricant level, as well as dirt in the lower part of the engine. Oil can get on the clutch and it will slip. And again, an amazing fact - problems with the oil seal can lead to failures in the gear and clutch system.
Procedure for replacing the front oil seal
Let's see how to replace the front crankshaft oil seal. Remember - the procedure is labor-intensive. It won't be easy or simple.
Removing the oil seal in a Volvo car
The first step is to dismantle the pulleys. Then remove the protective cover, under which the timing belt is located. Next, remove the belt. After this, it is customary to remove the crankshaft timing pulley. Finally, the front oil seal is removed and a new part is installed in its place.
Rear oil seal
To replace the rear crankshaft oil seal, you must remove the gearbox, then remove the clutch. Next, dismantle the damaged seal and clean the seat. After this, a new seal is installed. Then all the nodes are assembled in the reverse order. It would seem that everything is simple? However, you need to be very, very careful when assembling/disassembling.
Purpose
Reinforced rubber cuffs (oil seals) are designed to seal joints and also serve as protection against the penetration of dust and dirt into the assembly.
In most cases, they operate in air and come into contact with various process fluids: lubricant, fuel, emulsions or water. Oil seals are capable of operating in a wide temperature range from -60℃ to +170℃ depending on the technical characteristics of the material. The working pressure of the rubber cuffs is 0.05 MPa.
Replacing oil seals on an Opel Astra
Let's see how to replace the crankshaft oil seal on an Opel Astra. In general terms, the procedure is clear, but there are subtleties and features. You can diagnose a rear oil seal leak by looking at an oily clutch disc. To replace, you need to remove the gearbox, clutch, and note the position of the flywheel relative to the crankshaft. After this, you need to unscrew the flywheel mounting bolts - there are only five of them. To prevent the flywheel from turning, hold it with a screwdriver. Next, unscrew and unscrew the sixth flywheel bolt and remove it.
Flywheel mounting bolt
Then dismantle the exhaust pipe, drain the oil from the engine, and remove the oil level sensor block. After this, remove the bolts that secure the engine crankcase to the clutch. They also unscrew the crankcase bolts that are screwed to the cylinder block and remove the oil pan. Then unscrew the screws holding the crankshaft position sensor (crankshaft position sensor) and remove it. Next, unscrew the main bearing cover bolts, remove the cover, and remove the rear oil seal from its cage.
A little oil is applied to the edge of the new oil seal (to make it easier to enter), and installation is carried out using a special mandrel. Then all dismantled elements are installed in the reverse order. On Opel, replacing the front crankshaft oil seal is carried out according to the same scheme.
Replacing oil seals on rear-wheel drive cars
Below we will look in more detail at replacing oil seals for VAZ cars, but now we consider it necessary to say a few words. To replace it, you need to disassemble many elements. So, in the case of the VAZ-2107, you will need to remove the front cover. To do this, you will need to remove the generator belt, the cooling casing along with the fan, and unscrew the crankshaft pulley bolt. Then you need to remove the pulley itself. Then unscrew the pan lid. It is removed along with the gasket. When the front cover is removed, replacing the VAZ crankshaft oil seals is not difficult.
The new part is installed in place of the old one in the cover. The working edge should be directed inwards. The part is pressed into place with a hammer. Then everything is put back together in reverse order.
Installed oil seal
To get to the rear oil seal, you need to disassemble even more - the procedure will require enormous effort and a lot of time. Here it is also necessary to remove the gearbox, driveshaft, flywheel, starter, as well as all elements that may interfere with removing the gearbox. After this, dismantle the clutch. Only then can you gain access to the oil seal. Replacing the crankshaft oil seal with your own hands in this case is a very long and difficult process, so you need to be patient. Don’t try to speed up the procedure or somehow circumvent it.
Tools and materials
To work you will need:
- A set of keys;
- Large flat screwdrivers;
- Massive hammer;
- Jack;
- Wheel locks;
- Mandrel for pressing the drive oil seal.
In addition, of course, you need an axle shaft seal 2101 (or 2123). You may also need an axle bearing. But let’s not rush, if the axle shaft itself has significant runout (more than 0.7 mm) - it also needs to be changed, otherwise it will break both bearings, and the one in the bridge is much more difficult to change. Then it is better to have the axle shaft assembled. Removing the bearing from the axle shaft and then installing a new one is a more complex procedure than replacing the drive seal, but it is better to do the entire described complex once. Defects on the axle shaft can only be done after removal, more on that below.
Step-by-step instructions for replacing the rear crankshaft oil seal
Just when the rear crankshaft oil seal leaks, then all the troubles begin: the engine begins to get dirty in oil at a rapid pace, and all the dust from the road then very actively sticks to it. One has only to look at such a motor and already there is a desire to pull it out and throw it away. Moreover, the oil will also corrode rubber parts and drip onto the clutch disc, after which it risks losing its frictional properties. Everything starts to creak, slip, rub against each other... In general, because of the small seal, the whole car seems to have gone crazy.
All the oil, of course, most likely will not leak out (however, do not be sure of this), but such a nuisance can add serious problems to you. If there is a leak from the rear oil seal, it must be replaced. There is no other solution to the problems and there simply cannot be.
As we have already noted, this oil seal was invented to neutralize lubricant leaks from the engine through the hole from which the crankshaft emerges. The rear crankshaft oil seal for most car models measures approximately 99 millimeters.
After dismantling the oil seal
Manufacturers apply special marks and inscriptions on the outside of the oil seal. They can be used to determine which direction the crankshaft rotates. Using this information, errors are eliminated during the process of replacing the rear crankshaft oil seals.
This sealing element is installed in the area of the cylinder block where the crankshaft comes out. In ordinary cars, where the engine is located longitudinally and the gas distribution process is carried out using a chain drive, the oil seal is installed in front of the support bearing in the crankshaft shield. In the case of front-wheel drive cars, where the engine is located transversely and a belt is used in the gas distribution mechanism, the element is located in the cylinder block, since there is no shield in the engine design.
Inside the engine crankcase, the lubricant is under a certain pressure. Due to this pressure, the seal is constantly pressed against the parts that it is supposed to seal. This way the engine is reliably protected from oil leaks.
Even with the slightest, slightest displacement of the part, the lubricant will flow. But how can you determine when it’s time to install a new seal? The first sign is oil leaks in the place where the power unit crankcase connects to the gearbox.
If lubricant leaks, it can get into the clutch housing, settle in a thick layer on the walls and stain the clutch disc. All this will lead to clutch slipping. Oil consumption will also increase significantly.
The most surprising thing is that even new oil seals can leak and the reason will not be due to poor installation. In stores you can buy a fake rear crankshaft oil seal for a VAZ. Its cost is low, and car enthusiasts do not notice that they are buying a fake. Poor quality of a part will definitely affect how it performs in the future.
An example of an incorrect oil seal installation
Another reason is a violation of installation rules. Often the seal is placed in a convenient position and carefully hammered into place with a hammer. But manufacturers do not recommend using a hammer or applying significant force when installing the part.
Leakage of poor-quality oil seal
If certain changes occur in the operation, as a result of which the gas pressure in the crankcase increases, then these gases are undoubtedly capable of squeezing out the oil seal. As a result, the contact with the crankshaft will not be tight enough, and the lubricant will leak out through the resulting gap.
Is it possible to confuse the oil seal with something else? Yes, you can. Very often, many experienced motorists confuse an oil filter leak with an oil seal leak. Sometimes a completely normal part is replaced with a new one, and it was just necessary to replace the oil filter.
You should not purchase these sealing parts in dubious stores or markets. There is no need to buy cheap products from unknown brands. This way, you can not only purchase an oil seal, the replacement of which will cause certain problems, but also get more serious malfunctions. Imagine that after buying a cheap oil seal and saving $5, oil will get on the timing belt and damage the entire cylinder block at a cost of $1000, if not more! Saving on oil seals is a real absurdity.
The most popular are the following manufacturers:
- Viuctor Reinz;
- Elring;
- Goetze.
They make quality products. Products of these brands are found not only in car stores, but also at numerous showdowns.
Why should you contact a car service?
If you decide to change the oil seal on the engine yourself or contact a garage technician, you should weigh the pros and cons. Incorrect installation or damage to a part during the process not only reduces its service life by half, but can also cause side effects in engine operation. Most often, the spare part is damaged during the installation process when, instead of special equipment, auxiliary tools are used to fit the seal into the socket. In the latter case, it is important to have experience and correctly calculate the effort.
Also, during amateur repairs, the edge of the sealing ring often bends when placed in the seat. The engine continues to leak and the new part must be replaced again.
Contacting the service will save you from the risk of misdiagnosing the problem and additional expenses. An oil seal leak is often confused with a failure of the oil filter, oil pressure sensor, or worn oil pump gasket. The car owner changes the oil seal, but the problem does not go away - because the cause is determined incorrectly. Only an experienced technician can quickly determine the real cause of the breakdown.
An article about how to choose oil seals for a car: what oil seals are needed for, materials, selection criteria. At the end of the article there is a video on how to replace the crankshaft oil seal.
Sooner or later, every car owner is faced with the need to replace certain car parts. That is why it is extremely important to have at least a minimum amount of information about the structure of the car, its main elements and, of course, consumable components.
Consequences of oil seal leakage
We in no way want to scare anyone, but we consider it necessary to draw the attention of motorists to this problem.
Above, we briefly examined what a leak in the crankshaft rear oil seal can lead to. Now let's look at it in more detail. Most likely, there will not be any catastrophic consequences, but lubricant leaks themselves are a significant problem.
Oil seal leakage
To solve the problem, you will have to dismantle the gearbox, remove the clutch - disc and basket, and remove the flywheel. All this is necessary to get to the crankshaft and its oil seal.
This problem is determined very simply and easily. Even beginners can diagnose it. If there are drops of fresh oil hanging between the clutch housing and the power unit, then it’s time to change the oil seal.
Leading manufacturers
Of course, if you purchase an original oil seal for your vehicle from an official dealer, then the car manufacturer itself (for example, Volkswagen, Toyota or Renault) will most likely be indicated on the product packaging, although it has nothing to do with its manufacture. If you want to purchase a good quality analogue, then in terms of money you should not save too much. And one more piece of advice: product manufacturers must be time-tested and have good recommendations. It is worth paying attention to seals from such companies as:
- German VAG, Corteco, Elring, Victor Reinz, Goetze, SM and AE;
- French Payen;
- Italian Glaser, MSG and Emmetec;
- Japanese Koyo and NOK;
- Swedish SKF;
- Taiwanese TCS and NAK;
- South Korean KOS.
Many of the above manufacturers are official suppliers of sealing products for leading car assembly concerns, which clearly indicates the high quality of the oil seals they produce. Using reference catalogs, you can easily select an analogue that is not inferior to the original in terms of performance characteristics.
The process of replacing the oil seal on a VAZ
To replace it you will have to work hard, since the required part is hidden behind the clutch mechanism. And it is in such a famous vehicle as the VAZ 2107 that this nuance is most clearly observed. To carry out this event, it is better to ask someone to help. Seriously, you can do it alone, but you will waste more nerves than you can imagine. It is better if the assistant has experience in such work.
We begin to unscrew the flywheel
First of all, unscrew the engine flywheel and remove the clutch. The rear oil seal is located in a bolted housing. There are eight of them. Unscrew the bolts and the body will be in your hands. The oil seal can be removed and a new part pressed into the body instead.
The size of the rear crankshaft oil seal is quite large, and the shape is simple, so there should be no problems when pressing in and out.
Replacement using the example of Renault Logan
Using the Renault Logan car as an example, let's see how to change the rear oil seal. The first step is to remove the transmission or gearbox mechanism. The car is hung on a lift. Next, you should remove the battery. Then unscrew the bolt holding the gearbox rocker. After this, remove the bolt holding the clutch cylinder. Then remove all the bolts holding the gearbox.
Next, remove the wheels, unscrew the CV joint nuts, disconnect the ball joints from the steering knuckles, drain the oil from the gearbox and dismantle the axle shafts. A support is placed under the engine pan and the upper transmission mounts are removed, and then the entire gearbox housing.
Yes, to replace the oil seal you need to disassemble the floor of the car. But, alas, there is no other way to cope.
Flywheel removed
Remove the flywheel, basket and driven disk. In this case, it is necessary to remember the position of the flywheel relative to the crankshaft. After this, unscrew the flywheel bolts and remove the Renault Logan crankshaft rear oil seal. The oil seal is replaced with a new one in the reverse order. This completes the procedure. After a successful replacement, you can put everything back together.
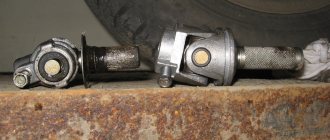
Rear drive
All of the above instructions are relevant for front-wheel drive car models. As for rear-wheel drive vehicles, not only the gearbox is removed here. The first step is to remove the driveshaft, then the clutch slave cylinder. Next, unscrew the bolts holding the gearbox. They also unscrew the drawstring. After this, you can safely remove the box and change the rear crankshaft oil seal of a Ford or other rear-wheel drive vehicles.
Attention! Oil seals are made from materials of varying degrees of density. This is done so that they are selected according to the type of oil. If you install oil seals for mineral oils, and the engine is filled with synthetic oil, the seals may dissolve.
Installation of the oil seal (try it on the crankshaft)
Before installation, the oil seal is tried on the crankshaft. The surfaces of the seal housing and the crankshaft are lubricated with oil. After installation, check the status. If no leaks are observed, then everything turned out well. Experts also advise changing both engine seals at once - both the rear and the front.
Here's how to replace crankshaft seals. On front-wheel drive cars, this task can be accomplished even by beginners. As for rear-wheel drive with a longitudinal engine, the procedure requires enormous costs and time. The price for replacing crankshaft oil seals at a service station is affordable (from two thousand rubles), so you can entrust the car to specialists.
Selection rules
When choosing a seal yourself, it is recommended to give preference to the original or a high-quality analogue. Particular attention is paid to labeling, which every manufacturer necessarily supplies its products with:
- “VA” – for camshafts;
- “BASL” – for improved protection against dirt;
- “B1” – for uneven and worn surfaces;
- “B2” – with an additional metal ring for large diameters;
- “BA0F”, “B10F” – without a spring element;
- “DRL (RS)” – with a left notch on the inner surface;
- “DRW (RD)” – with a right notch on the inner surface;
- “D” – for limited pressure indicators (no more than 2 bar);
- “B” – for limited pressure indicators (no more than 10 bar);
- HD – for limited pressure indicators (no more than 100 bar);
- “RT” – with Teflon surface (PTFE);
- “UD” – with a universal profile;
- “U” – with the presence of the old profile.
The cost of the oil seal depends not only on the characteristics of the material used in production and the pricing policy of the company, but also on the production method. Profiles cut with a cutter are noticeably cheaper, but do not always correspond quite accurately to the specified parameters, so it is recommended to give preference to products produced using a matrix.
Where are they used?
The number and design of oil seals depends on the car model and its features. In any vehicle that has an internal combustion engine, there will definitely be two seals. They are installed on the crankshaft on both sides.
In addition to this part, the following parts of the car need seals:
- Timing valve stem (also called valve stem seal or valve stem seal);
- Timing camshaft;
- Oil pump;
- Wheel hub of a front-wheel drive vehicle;
- Steering rack;
- Rear axle gearbox;
- Differential;
- Rear axle shaft;
- Gear box.