A brake force regulator, or sorcerer in common parlance, is a mechanical device designed to relieve excess pressure in the rear drum brakes.
On VAZ-2109, VAZ-2108, VAZ-2114 and other front-wheel drive models produced in Togliatti, it was installed in the rear left part of the body, under the bottom, in front of the rear suspension beam. The brake pressure regulator on the VAZ-2107 model and other “classics” is located on the right in the direction of travel of the car.
New vehicles equipped with ABS and EBD do not use the sorcerer.
The device of the VAZ brake system
The brake system of Togliatti-made cars is quite simple; the vehicle consists of the following main parts:
- pedals, which are pressed to achieve braking;
- brake master cylinder (MBC), it transmits the force of pressing the pedal through hydraulics to the working cylinders, respectively, to the wheels. GTZ VAZ - dual-circuit, the circuits are divided to transmit fluid pressure to the front and rear wheels;
- a vacuum booster that makes it easier to press the pedal;
- tubes that connect the elements of the vehicle;
- brake working cylinders (RTC);
- pads (drums) and discs;
- brake distributor (pressure regulator).
When you press the brake pedal, the piston in the brake fluid compressor compresses the brake fluid and transmits its pressure to the brake pedal. The pistons of the working cylinders are expanded under the influence of hydraulics, moving the pads towards the discs or drums. The movement of the wheels slows down, and thus the car slows down.
How does a sorcerer work?
The regulator itself consists of a cylinder, valve, spring and rod. The latter is connected to the rear beam, which ensures the operation of the VAZ-2109 sorcerer. Also, brake fluid circuits pass through the rear brake pressure regulator. For their mounting on the device there are 4 threaded entries. How does the sorcerer regulator work on a VAZ? During emergency braking, the front of the car is pressed to the ground, and the rear is raised. This causes the regulator rod to move, which blocks the flow of fluid to the rear cylinders. A spring located under the valve prevents it from closing completely. Therefore, the rear mechanisms still work, but later and weaker than the front ones.
Malfunctions occurring in the brakes
From time to time, various malfunctions occur in the vehicle, and the working and master cylinders also often fail. The following breakdowns occur at the RTC:
- the piston gets stuck in one of the positions;
- the inner surface wears out;
- The sealing cuffs fail (tear or swell).
The main sign of a faulty condition is the appearance of smudges (leaks) of brake fluid (FL) from the RTC. If the pads are worn down to bare metal, the pistons in the RTC extend too far, and as a result, the brake fluid may leak and the brakes will fail.
In the GTZ, the piston can also jam, the internal cavity of the mechanism can wear out or rust, and the cuffs can leak. Symptoms of a GTZ malfunction are as follows:
- when braking, the brake pedal (BP) “fails”, the effectiveness of pressing disappears, this usually happens when there is a small leak from the turbocharger;
- braking occurs at the very end of the pedal stroke, and you have to press the PT several times to brake;
- there are no brakes on the front or rear wheels, this happens if one of the GTZ circuits does not work.
You cannot drive with faulty working and master brake cylinders; the parts should be replaced immediately.
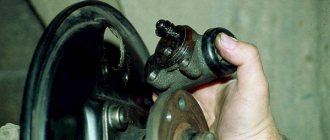
Restoration of working cylinders
The feasibility of replacing the RC cuffs can only be checked during disassembly. If critical wear and other defects are discovered, there is no point in installing new seals. In practice, most drivers change the rear cylinders completely, and only the cuffs in the front calipers. The reason is obvious - the brake mechanisms of the front wheels are much more expensive than the rear wheel brakes.
Characteristic signs of a malfunction of the working cylinder are uneven braking, a decrease in the level in the expansion tank and wet spots on the inside of the hub.
To repair the DC, you will need the above tools, new o-rings and synthetic brake lubricant. The order of work when replacing the front caliper cuffs:
- Raise the desired side of the car with a jack and remove the wheel. Unlock and remove the pins and remove the pads.
- For convenience, turn the steering wheel all the way to the right or left, and use a 14 mm socket to unscrew the bolt that presses the brake circuit hose to the caliper. Plug the hole in the pipe to prevent liquid from leaking out.
It is not necessary to separate the cylinders from the body; this is done more for convenience. To lose a minimum of fluid during disassembly, use the “old-fashioned” trick: instead of the standard expansion tank plug, screw on the clutch reservoir cap, sealed with a plastic bag.
To change the rear brake seals, you will have to thoroughly disassemble the brake mechanism:
- Remove the wheel and rear brake drum by unscrewing the 2 guides with a 12 mm wrench.
If the brake fluid leaked as a result of a malfunction, clean and thoroughly wipe all parts of the brake mechanism before reassembling.
After installation, bleed off some of the liquid along with the air by pumping up the pressure in the circuit with the pedal and loosening the relief fitting. Do not forget to replenish the supply of working substance in the expansion tank.
Video: how to change rear slave cylinder seals
Replacing the master brake cylinder
Replacing the GTZ on VAZ classic cars (2101-07) is not difficult; you can do this work yourself. To perform such an operation you will need the following tool:
- 10mm wrench (or special bleeder wrench);
- Phillips screwdriver;
- combination wrench for 13 (you can additionally use a head with a knob and a ratchet for convenience).
It is not necessary to use a pit or a lift to perform the work; replacement can be done outside in dry weather or in the garage. The work should be performed in the following sequence:
- unscrew the three brake pipes from the bottom of the device (key for ten);
- loosen the clamps of the two hoses (at the bottom of the GTZ), pull off the hoses;
- unscrew the two nuts securing the GTZ to the vacuum booster (you need a 13mm wrench or a socket with a wrench);
- We dismantle the part, install the new gas turbine unit in place, and reassemble it.
After the operation, you should add fluid to the vehicle reservoir, then be sure to bleed the brakes well.
Repair and replacement instructions
Problems with the main hydraulic cylinder can be resolved in two ways:
- Disassembling, cleaning the unit and installing new seals from the repair kit.
- Replacement of the GTZ.
As a rule, Zhiguli owners choose the second path. The reasons are the poor quality of the new cuffs and the deterioration of the inner walls of the cylinder, which is why the malfunction recurs 2-3 weeks after replacing the rings. The probability of failure of the GTZ with parts from the repair kit is approximately 50%; in other cases, the repair ends successfully.
On my VAZ 2106, which has an identical hydraulic cylinder, I have repeatedly tried to change the cuffs in order to save money. The result is disappointing - the first time the pedal failed after 3 weeks, the second time - after 4 months. If you add up the fluid losses and the time spent, you will get a full replacement of the gas turbine engine.
Replacing brake cylinder 2114
The work of replacing the GTZ on VAZ 2108-15 models is carried out approximately the same way, there are only some design differences.
We make the replacement as follows (using the example of the VAZ-2114):
- Unscrew the four tubes on the sides (two on the left and two on the right). It is better to use a special pipe wrench; you can roll up the edges of the nuts with an open-end wrench;
- unscrew two thirteen nuts securing the GTZ to the “vacuum”;
- We remove the old spare part and install a new one, not forgetting to bleed the brakes at the end of the work. At this point, the replacement of cylinder 2114 can be considered complete.
Replacing the brake cylinder repair kit
If in the GTZ 2114 the inner surface of the cylinder itself is not yet worn out, you can replace the insides of the mechanism by installing a new repair kit. The repair kit consists of four cuffs:
- three cuffs are the same, they are the same as on models 2101-07;
- one o-ring 2108.
Changing the repair kit is very simple:
- pour the liquid out of the GTZ;
- dismantle the plastic tank;
- unscrew the front stopper (made in the form of a plug);
- we take out all the contents (pistons, o-rings, springs), change the cuffs, and install the entire mechanism in the reverse order. Nothing should be mixed up here, otherwise the unit being repaired will not work.
Repairing the GTZ on VAZ models is not always advisable - if the mirror surface inside the mechanism is worn out, replacing the brake cylinder repair kit will not solve the problem, the GTZ will also leak. Most often, on VAZ cars, the entire master brake cylinder is replaced - a new assembled part costs around one thousand rubles, and the repair turns out to be unjustified.
Replacing brake cylinder 2107
If the replacement operation on a VAZ classic is not performed on a car lift, it is more convenient to do the work sequentially - first on one side, then on the other side of the rear wheel. To perform the work, the vehicle must be placed on a level surface, then proceed as follows:
- We turn off the engine, set the car to speed, and put chocks under the front wheels. Don’t forget to fully release the handbrake;
- loosen the wheel nuts of the rear wheel, jack up the car and remove the wheel;
- To prevent the car from going anywhere, it is advisable to place a “tragus” next to the jack;
- remove the brake drum - use a 12 mm combination wrench to unscrew the two guides;
- the drum usually comes off tightly, so it should be tapped from behind with a hammer through a piece of wood. You cannot hit the part with an iron hammer; the drum can split;
- unscrew the brake pipe from behind the cylinder, also 2 ten bolts securing the RTC itself;
- pull out the cylinder, freeing it from the pads;
- We install the part prepared for replacement (it is important to get the pads into the slots on the RTC pistons, we fasten all the removed parts in their places;
After the work has been done, it is necessary to top up the fuel injection system reservoir and bleed the brakes.
Replacing the brake cylinder VAZ 2109
The RTC on the rear axle of the 2109 wheels is changed according to the same principle as on the VAZ classic; the wheel and drum are also removed, the tube and two cylinder fastenings are unscrewed with a ten key. It often happens that the tube and RTC bolts on the support disk boil; to remove them carefully, you need to spray the connections with WD-40, and wait 15-20 minutes before unscrewing. The brake pipe nut will be easier to unscrew if you gently tap the metal around it with a hammer. When tapping, it is important not to break the bleeder fitting.
Replacing brake cylinder 2109 is not a difficult task, and many drivers can do this work themselves.
Which cylinder to install if replacing?
To avoid problems during operation, it is better to find the original Togliatti-made GTZ, catalog number 21013505008. But since the VAZ 2107 family of cars has not been produced for a long time, finding this spare part becomes difficult, especially in remote regions. An alternative is products from other manufacturers that have proven themselves well on the Russian market:
Judging by the reviews of the owners of the “Seven” on thematic forums, defects most often come across among the products of the Phenox brand. Advice regarding the purchase of original spare parts: do not purchase them in markets and unverified stores; many counterfeits are sold at such points.
Defective spare parts were also found during the Soviet era. I remember an incident from childhood when my father took me to drive his first Zhiguli from a car dealership. We covered the 200 km journey all night, because the pads on the rear and front wheels spontaneously compressed and the rims became very hot. The reason was found out later - a defect in the factory master cylinder, which was replaced free of charge at the service station under warranty.
Replacing the front brake cylinder
The following calipers are installed on the front wheels of VAZ cars:
- in a VAZ classic car, two front brake cylinders (FTC) are attached to the caliper brackets;
- on VAZ 2108-15 models, one PTC is installed on each side of the front axle.
Replacing the front cylinder 2109 is not difficult, it is also easy to do yourself:
- we put the car on a flat area (the work can be done without a pit and a lift), we put tackles under the rear wheels;
- jack up the car, take off the front wheel;
- unscrew the two caliper fasteners with a hexagon;
- loosen the brake hose nut;
- bend the locking washers on the upper and lower bolts, unscrew the cylinder fastenings to the caliper bracket
- we move the PTC to the side along with the bracket;
- disconnect the cylinder from the bracket, then from the hose so that the brake fluid does not leak; after disconnecting the PTC, it is better to immediately direct the hose upward;
- we install another, new spare part, and perform the assembly.
Drum brake repair kit for VAZ 2108, 2109, 21099, 2113, 2114, 2110, Priora, Kalina
- Spacer bar for rear brake pads VAZ 2108-99 left/right (2108-3507036/37) = 2 pcs.,
- Parking brake lever VAZ 2108-2199 left/right (2108-3507034/35) = 2 pcs.,
- Upper coupling spring for rear brake pads VAZ 2108-21099 (2108-3502035) = 2 pcs.,
- Rear brake shoe spring VAZ 2108 - 21099 lower coupling spring (2108-2108-3502038) = 2 pcs.,
- Rear brake pad spring for VAZ 2108 - 21099 clamping (2108-3502033) = 4 pcs.,
- Wheel lock (guide) VAZ 2101 - 2112 (2101-3101082) = 4 pcs.
Wait for the order to be processed, the manager to call and for availability clarification. Most items are in stock, but in the case of simultaneous orders, there may not be enough goods until the warehouse is replenished.
02. Taxi delivery YandexGo! call us we'll tell you
Delivery according to Citymobil - Yandex - Uber tariffs. Yandex is more convenient! . Receive your order from the taxi driver.
Option 1 (Convenient and fast and you track the taxi yourself using the application) YOU order taxi delivery in the YandexGo application. First, we will discuss availability and payment with us over the phone. Taxi courier to the entrance of the store at Baku Commissars 113 - Sign “AUTO SPARE PARTS illva.ru”. Payment for goods is made in advance on the Website or via Sber card.
Option 2 (Lengthier and more expensive) WE order the taxi. Payment for delivery of taxis and goods is made in advance, to a Sber card or on the Website.
03.1. By courier in Yekaterinburg IN THE EVENING - 250 rubles, from 21 to 23 hours
Delivery to the entrance or gate of the house. Access to the apartment is for disabled people only!
03.2. By courier outside the EKAD, IN THE EVENING, up to 20 km, from 20 to 22 hours
Deliveries that are too distant can be discussed and agreed upon with the courier!
13. Courier (if the delivery distance is from 20 to 30 km)
Delivery beyond the EKAD to remote settlements 20-30 km. Even more remote ones are discussed individually!
04. Russian POST, prepaid
We recommend! From 2022 - this is the Best delivery method!! You can create your personal account and download the Russian Post application!
The delivery cost will be calculated by the manager and notified by phone (Usually from 270 rubles). If the phone number is not available or the cost of the order is small, then we send an invoice for the order by E-mail.
The TRACK NUMBER will be sent by e-mail.
You can check the reliability of our store on the official websites of spare parts manufacturers: SS20, Tehnoressor, Demfi, SEVI, CBD - online store illva.ru - IP Koroleva, recommended as a reliable supplier of original factory spare parts.
Replacing the brake cylinder VAZ 2101-07
On VAZ classic cars, the PTC changes a little differently than on front-wheel drive VAZ cars. The front caliper on the “Classic” can be changed as a whole assembly, but it is also possible to replace only the cylinders. The work is carried out as follows:
- We also put the car on the platform, remove the front wheel;
- unscrew the bolts securing the caliper itself;
- move the caliper to the side, disconnect the hose;
- We take out the pads from the caliper and twist the brake pipe from it.
- if the pins for securing the pads cannot be removed, they will have to be cut with a grinder, then installing new fasteners;
- the brake cylinders are mounted on a bracket in the guides, and they are removed either with a pry bar or by gently tapping with a hammer;
- we install other cylinders, a tube and pads with pins, and complete the assembly.
Replacing the brake cylinder cuff
If desired, on VAZ cars you can not change the entire rear working cylinders, but only replace the cuffs. To do this, you need to disassemble the RTC - remove the pistons and spring, remove the old cuffs from the pistons and install new ones. It is advisable to repair the RTC only if the cylinders did not last long, but they began to leak. The thing is that on VAZ cars the RTCs are very inexpensive, it is advisable to change the rear cylinders as a whole - replacing the cuffs is often unjustified.
Repair kits for VAZ cars from Balakovo
Repair kits for VAZ cars, design numbers and their purpose...
Greetings, readers to the blog RtiIvaz.ru. This page lists and shows repair kits for VAZ cars. In fact, there are a lot of repair kits and it is difficult to show them all on one page.
Therefore, I posted on this page just a photo of eight main kits that go to important components of cars and that you have to deal with as you use the car.
As the car is used, tires quickly break down and require replacement. When repairing a car, they often have to be changed, since rubber wears out faster than iron. If you do not change tires on time, the consequences are obvious; car breakdown will be expensive.
Rubber products are not expensive, and you need to buy them from manufacturers who have proven themselves to be the best in the market, and there are a lot of them now and the prices are incredible. One of the good manufacturers of rubber products is the plant in the city of Balakovo.
Let's look at a photo of an auto repair/computer distributor 51r for front-wheel drive carburetor Lada 2108. Design numbers:
The auto distributor repair kit consists of two rings, one of which is larger in size. If the ring does not coincide with the socket, it is recommended to stretch it a little. When installing a timing belt/computer, you must use a sealant for reliability.
Next, let's look at photos of auto repair kits for front and rear struts 2108.
Rear side view. Front side view.
Let's take a look at the repair kit 24P and 25P for the front and rear telescopic oil struts for VAZ 2108 cars; 2109; 2110; 2111; 2112.
On the top background you can see photos of repair kits. The repair kit for the front struts is twice the size of the rear struts.
Design numbers of the front struts:
- VAZ 2108-2905613r-2 pieces.
- 2108-2905616r-2 pieces.
Leveling up
After replacing any cylinder in the vehicle, it is necessary to bleed the brakes. Bleeding on any car always begins with the furthest wheel from the GTZ. On all VAZ cars, first of all, they start pumping the brakes from the rear right wheel, then move to the rear left, right front, and the front left wheel is pumped last. If the brake pedal takes at the very end or is hard, bleeding should be repeated, the work should be done according to the same scheme again.
Some tips
- If you start having problems with the brakes, first of all you need to carry out an external inspection of the vehicle: check the fluid level in the reservoir, make sure that the front/rear cylinders are not leaking. There should not even be stains of brake fluid in the brake hydraulics.
- “Brake fluid” must be filled with the same brand; it is recommended to completely replace the brake fluid at least once every two years.
- If faults are identified in the gas turbine engine, and it has already served for at least a year, it is more advisable to replace it completely than to repair it. The same can be said about the rear working cylinders.
- Before changing the turbocharger, the brake fluid should be removed from it; this operation is usually done using a syringe.
- Usually a leak in the master cylinder is not visible, but if there is any suspicion that this part is faulty, you should remove the main cylinder - there will be traces of leaks at the rear, and this indicates its faulty condition.
- If, during an external inspection, cracks were found on the brake hoses, it is better not to take risks and immediately replace the defective parts.
For every motorist, a car breakdown is a disappointment, but many problems can be solved without a service station thanks to a ready-made repair kit. Such sets also exist for master brake cylinders, but we’ll figure out how to use them below.
Functions of the master cylinder
This element can rightfully be called the heart of the entire braking system. It converts the force applied to the pedal into hydraulic pressure. Essentially, it performs the functions of a hydraulic pump and is responsible for the correct supply of fluid to each wheel. Structurally, it is divided into two sections, one is responsible for the operation of the front wheels, and the second - the rear. Thus, even if the performance of one of the circuits is impaired, the second will still complete the task. On rear-wheel drive vehicles, these sections are divided along axles.
The main elements of the brake master cylinder (MBC) are a body, two pistons, return springs and a reservoir, it also contains a lock washer and rubber gaskets. The principle of operation of the node is as follows. The piston moves along the cylinder and closes the compression hole; pressure is created in the first circuit, causing movement of the second circuit. The resulting void is filled with liquid. The spring acts as a limiter and returns the pistons to their original places.
Causes of breakdowns and their symptoms
One of the main reasons for brake master cylinder failure is uneven distribution of fluid in the system, leading to circuit failure. The wear of the sealing collars located at the points where the rod enters the cylinder has a negative effect. It is also possible that scuffs may appear on the pistons and deformation of their return springs with rubber cuffs.
In addition, the compression hole becomes partially or completely clogged. The above malfunctions can be caused by poor-quality brake fluid. Any failed part should be urgently dismantled and a new one installed in its place; if the cylinder mirror is faulty, the entire assembly must be replaced. Moreover, you cannot hesitate, since the correct operation of the gas turbine engine is one of the keys to your safety.
Much can be understood by the performance of the brake pedal. So, if it has a reduced stroke, then most likely the reason lies in the compression hole. It may be clogged or blocked. It may also be due to the lack of clearance between the gas turbine seal and the piston. When the piston gets stuck, the channels are blocked and the cuff is deformed, the pedal does not make a full stroke. But if it moves too easily, then the cause is a hydraulic fluid leak, and the rubber bushings need to be replaced. Sticking of the piston is indicated by the wheels braking when the pedal is released.
Location and purpose of the GTZ
The master cylinder is an oblong cylinder with sockets for connecting brake circuit pipes. The element is located in the rear of the engine compartment, opposite the driver's seat. The GTZ is easy to detect by a two-section expansion tank installed above the unit and connected to it by 2 hoses.
The cylinder is secured with two M8 nuts to the flange of the vacuum brake booster. These components work in pairs - the rod coming from the pedal presses on the GTZ pistons, and the vacuum membrane enhances this pressure, making the driver’s work easier. The cylinder itself performs the following functions:
- distributes fluid over 3 working circuits - two serve the front wheels separately, the third - a pair of rear ones;
- through fluid, it transmits the force of the brake pedal to the working cylinders (RC), which compress or expand the pads on the wheel hubs;
- directs excess fluid to the expansion tank;
- returns the rod and pedal to their original position after the driver stops pressing it.
Diagnostics and repair - replacement of repair kit
Where to start diagnosing the brake system and GTZ? First of all, it is necessary to carry out a visual inspection, since any damage - drips, wet spots on the body, cracks, etc. - are very alarming signs. Are there any external defects found? Then you should check the brake pedal travel, it should be smooth and soft, jamming and failure are unacceptable. If everything is in order, then the next step is to test the braking system in action. You can check the dismantled master brake cylinder for leaks only at a service station or if you have a special stand. All its elements are treated with alcohol, and for rubber gaskets only replacement is suitable. Pay special attention to the GTZ mirror; chips, scratches and other damage are not allowed on it.
If damage incompatible with life is detected, you can replace the brake master cylinder repair kit yourself. Naturally, the first thing to do is dismantle the part. It is installed in the engine compartment housing. Having reached the unit, drain the brake fluid; to do this, you need to pry off the corresponding clamps with a screwdriver and pull out the pipes. After which the studs are unscrewed and the GTZ can be freely removed.
Malfunctions and methods for diagnosing a hydraulic cylinder
Checking the brake system in general and the GTZ in particular is performed when characteristic signs appear:
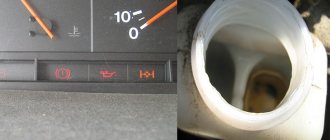
- the red lamp for insufficient brake fluid level came on on the instrument panel;
- the free play of the pedal has increased greatly or it openly fails;
- to slow down the car you have to press the pedal hard;
- uneven braking - the car pulls to the side when pressed sharply;
- the vehicle slows down with difficulty, the pedal presses to the floor.
The easiest way to diagnose hydraulic cylinder problems is to carefully inspect it for leaks. Usually the liquid is visible on the vacuum booster housing or on the side member under the turbocharger. If the expansion tank is intact, you need to remove and repair the master cylinder.
How to quickly and accurately identify a faulty turbocharger without checking other elements of the system:
- Using a 10 mm wrench, unscrew the brake pipes of all circuits one by one, screwing plugs in their place - M8 x 1 bolts.
- Also plug the removed ends of the tubes with caps or wooden wedges.
- Sit behind the wheel and apply the brake several times. If the hydraulic cylinder is working properly, after 2-3 pumping the chambers will be filled with liquid from the tank and the pedal will stop pressing.
On a problematic GTZ, the o-rings (cuffs) will begin to leak fluid back into the reservoir, and the pedal failures will not stop. To make sure the breakdown is complete, unscrew the 2 flange nuts of the cylinder and move it away from the vacuum booster - liquid will flow out of the hole.
It happens that the cuffs of the second chamber become limp, but the rings of the first section remain operational. Then during the diagnostic process the pedal will fall slower. Remember, a working turbocharger will not allow you to press the pedal more than 3 times and will not allow it to fail, since there is nowhere for the fluid to escape from the chambers.
When to change cuffs?
Any brake system contains a large number of metal pipes connected using metal fasteners and sealed with cuffs. The seals prevent brake fluid from leaking through moving parts and provide a sealed brake system.
The main signs of a cuff malfunction are a decrease in braking efficiency and a decrease in the level of brake fluid in the reservoir. First you need to find the specific location of the leak. To do this, you need to examine each wheel of the car one by one. If there are traces of brake fluid on it, then this is a clear sign that this brake cylinder has a faulty seal that needs to be replaced. After this, the brake lines and master cylinder are subject to diagnosis.
Found traces of brake fluid indicate a violation of the tightness of the element, which occurs due to worn out seals.
Determination of breakdowns of the GTZ VAZ-2110
You can determine the faulty part yourself; to do this, you just need to know what to look for:
- Brake fluid leaks on the vacuum booster at the junction with the master brake cylinder indicates that the cuff in the cylinder is worn out.
Leaks on the vacuum booster indicate wear on the seal in the cylinder.
- If the brake pedal has become too soft , this may also indirectly indicate wear on the turbocharger. In this case, both the cylinder bore and the piston cuffs may be worn out. Although often a soft brake pedal indicates that the brake system is not pumped.
- The brake pedal may stick , which indicates a blockage in the brake cylinder body.
- If the return springs are broken , the brake pedal will not return to its original position.
In any case, you need to determine for yourself whether it’s worth bothering with disassembling the GTZ and repairing it or immediately installing a new part.
Is it worth buying a repair kit and is it profitable?
Buying a repair kit can save the money spent several times, but it will increase the time costs.
Based on the cost of the GTZ at 1,000 rubles, you need to think carefully about whether it is worth disassembling the brake cylinder for such a sum. Repair kits can be incomplete or complete . In any case, you need to purchase a complete one, since no one will measure the forces on the return springs.
You can also repair the brake master cylinder yourself.
An attempt to save money will result in a long procedure of disassembling, washing and drying all parts. When washing, you need to make sure that no gasoline or oil gets on the rubber parts, as this can damage them.
Therefore, the use of a repair kit can only be justified in the following cases:
- The assembled part is not available for sale.
- Inability to allocate 1,000 rubles for a purchase.
- The desire to understand the brake system with your own hands from beginning to end.
In other cases, it is better to immediately install the assembled part.
How to change the brake master cylinder cuff + Video
If the fault affects the master brake cylinder, then you need to purchase a special repair kit, because it contains more than one cuff.
- Set the vehicle to speed and drain the brake fluid from the reservoir and brake cylinder. To do this, unscrew the drain bolt with a spring at the end of the cylinder, and press the pedal vigorously to squeeze out the remainder.
- Next, you need to unscrew the lines from the brake master cylinder. Their fastenings are made in the form of metal fittings that can be unscrewed with a wrench. Now unscrew the cylinder fasteners and remove it.
- This will be followed by disassembling the cylinder and replacing the old parts with new ones. Pay attention to the location of the cuffs inside the cylinder. Their installation must be strictly identical, otherwise you risk reducing braking efficiency many times over.
During the installation process, be careful and do not use too sharp tools. This is due to the fact that the slightest crack in the seal will lead to its rapid wear, which, in the best case, will force you to tamper with the brake system again, and in the worst case, scrap the broken car.
After repairing the cylinder, it is installed in place, and the line fittings are connected to it. Fill the brake fluid and bleed the system to get rid of air, which also impairs braking.
This completes the replacement of the master cylinder cuff. As you can see, it's not difficult at all.
Design and principle of operation of the unit
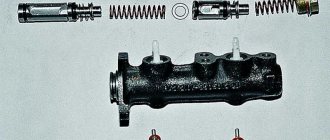
At first glance, the design of the master cylinder seems complex, since it consists of many small parts. A diagram and list of these elements will help you understand the device (the positions in the picture and in the list are the same):
- Die-cast metal housing for 2 working chambers.
- The washer is a retainer for the bypass fitting.
- A discharge fitting connected by a hose to the expansion tank.
- Sealing gasket of the fitting.
- Limit screw washer.
- The screw is a piston movement limiter.
- Return spring.
- Support cup.
- Compensation spring.
- Ring sealing the gap between the piston and the body - 4 pcs.
- Spacer ring.
- Piston servicing the circuit of the rear wheels;
- Intermediate washer.
- A piston operating on 2 circuits of the front wheels.
Since there are 2 chambers in the GTZ housing, each has a separate bypass fitting (item 3) and a limit screw (item 6).
At one end the cylinder body is closed with a metal plug, at the second there is a connecting flange. At the top of each chamber there are channels for connecting system pipes (screwed on threads) and discharging liquid into the expansion tank through fittings and pipes. Sealing collars (item 10) are installed in the piston grooves.
The GTZ operating algorithm looks like this:
- Initially, return springs hold the pistons near the front walls of the chambers. Moreover, the spacer rings rest against the limiting screws, the liquid from the tank fills the chambers through open channels.
- The driver presses the brake pedal and selects free play (3-6 mm), the pusher moves the first piston, the cuff closes the channel of the expansion tank.
- The working stroke begins - the front piston squeezes the liquid into the tubes and forces the second piston to move. The fluid pressure in all pipes increases equally, and the brake pads of the front and rear wheels are activated simultaneously.
When the driver releases the pedal, the springs return the pistons to their original position. If the pressure in the system rises above normal, some of the liquid will flow through the channels into the tank.
An increase in pressure to a critical level often occurs due to boiling of the liquid. While on a trip, an acquaintance of mine added counterfeit DOT 4 to the expansion tank of the “Seven”, which subsequently boiled. The result is partial brake failure and urgent repairs.
