Any car with a manual transmission needs to have its clutch replaced regularly. Replacing the clutch yourself is not particularly difficult if you have the necessary equipment and you know the procedure. The mileage of the disc is 70–150 thousand kilometers and depends on the operating conditions of the vehicle. Other clutch parts are changed as needed. After reading the article, you will learn how to change the clutch without going to a car service center.
Equipment and tools required for work
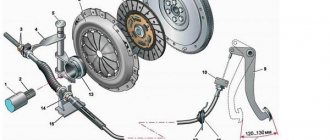
Clutch alignment guide
To work you will need:
- pit, overpass, lift or jack;
- a set of open-end and socket wrenches;
- mount;
- winch;
- input shaft of the gearbox (manual transmission) or a special mandrel corresponding to the type of gearbox;
- brake fluid (for vehicles with a hydraulic clutch);
- extension cord with carrying lamp;
- assistant.
Clutch replacement
Complete replacement of the clutch kit involves the following procedure:
- removal and installation of manual transmission;
- replacement:
- disk;
- baskets;
- master and slave cylinders (if any);
- cable;
- release bearing.
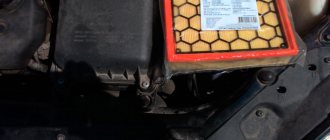
Removing and installing the box
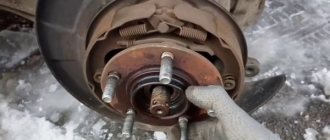
Technologies for removing and installing manual transmissions on cars with rear-wheel drive and front-wheel drive are different. On rear-wheel drive vehicles, it is necessary to disconnect the clutch connecting the manual transmission to the driveshaft. On front-wheel drive vehicles, you will need to remove the drive shafts and insert plugs in their place. After this, disconnect the cables or links of the gear selection device, unscrew the fastening nuts, then remove the gearbox input shaft from the bearing in the engine flywheel.
Be sure to check the condition of the gear selector seal. Oil stains in the area of the rod indicate oil seal wear.
When installing, it is necessary to rotate the box shaft so that it fits into the flywheel splines. When removing or installing a manual transmission on vehicles with all-wheel drive or a large engine capacity, use a winch. After installing the manual transmission on the car, it is necessary to adjust the length of the rod that presses the fork.
Brief summary
Replacing the fastening mechanism on cars is a labor-intensive process, but it can be done independently.
To do this, you need a specially equipped place, tools, as well as knowledge of the features of installing parts. We discussed how to make the clutch mechanism of some cars in this article.
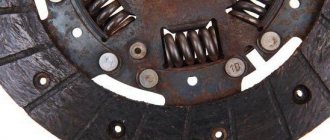
Replacing the disk and basket
Replacing the clutch disc is done as follows. Unscrew the basket mounting bolts, then remove all parts from the flywheel. There should be no traces of oil on the flywheel or driven disk surface. If there are marks, it is necessary to check the condition of the gearbox oil seal, otherwise the oil leak will continue, which will reduce the service life of the disc. Droplets of oil falling on the surface of the lining or driven disc damage them. If the condition of the oil seal is unsatisfactory, replace it. If the surface of the driven disk is covered with deep scratches or cracks, change the basket.
Wipe with a rag, then degrease the surface of the flywheel and the basket driven disk with gasoline. Insert the disc into the basket, then slide both parts onto the manual transmission input shaft or mandrel, and then insert into the hole in the flywheel. When the mandrel reaches the stop, guide the parts along it to the flywheel and screw the basket with standard bolts. Pull out and then reinsert the mandrel a few times to make sure the disc is seated straight. If everything is normal, insert the mandrel and tighten the bolts with a force of 2.5–3.5 kgf-m. More precisely, the force is indicated in the repair instructions for your machine. This completes the replacement of the clutch disc. Replacing the clutch basket is done in the same way. The maximum mileage of the basket is 150–250 thousand kilometers and depends on many factors.
Remember, replacing a clutch disc is a responsible operation, so do not perform it in a hurry or while intoxicated.
Vibration after replacing the clutch appears due to improper alignment of the disc or weak tension of the basket. If this happens, you will need to remove and reinstall the drive and cage.
Re-riveting driven disk linings
To replace worn friction linings of driven disks, you must:
- drill or cut off the rivets with a pointed chisel and remove the linings; Drill out the rivets carefully so as not to damage the holes in the disk;
- place a new lining on the disk, mark the centers of the holes, drill holes and countersink them so that the rivet heads are 0.5 mm from the surface of the lining;
- select brass or copper rivets according to the diameter of the disk holes and the thickness of the assembled disk with linings so that the length of the protruding part of the rivet is approximately equal to 0.7 of its diameter;
- rivet the linings to the disk manually or using a bench tool with frequent and strong blows (so that the heads of the rivets on both sides are buried 0.5 mm from the surface of the linings).
Rice. Bench device for riveting clutch disc linings.
After riveting, the surfaces of the linings are cleaned with a file or emery stone and the disc is checked for runout in the centers on the mandrel. The runout from the short end of the disk hub at a radius of 120-150 mm should not exceed 0.5 mm. If the runout is greater than the specified value, the disc is straightened on the plate with hammer blows.
The linings of the driven clutch disc (for GAZ-51 and M-20 Pobeda cars) are riveted to leaf springs located around the circumference of the disc. In this case, each overlay is riveted separately.
Replacing cylinders
- Replacing the clutch master cylinder is necessary if installing new O-rings does not improve system performance.
- Replacing the clutch slave cylinder is necessary if brake fluid continues to leak even after installing new seals.
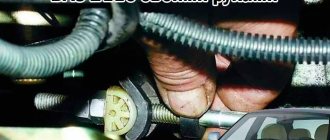
b - working cylinder pusher
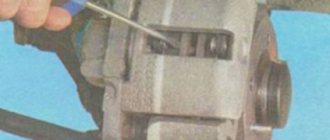
To remove the slave cylinder, remove the spring that returns the fork when the pedal is released. Next, remove the 2 nuts that secure the slave cylinder to the transmission housing. Holding the working cylinder suspended, unscrew the rubber hose that fits it.
To avoid brake fluid leakage, immediately screw the new slave cylinder to the hose. To remove the master cylinder, pump out all the fluid from the reservoir. Unscrew the fitting with the copper tube that goes into the cylinder and close it with a rubber plug to prevent brake fluid from leaking out. Move the tube to the side so it is out of the way, then unscrew the two nuts securing the master cylinder to the car body. Pull towards you and unclip the joint to which the pedal is connected. Pull out the pin and disconnect the cylinder from the pedal. Install the master and slave cylinders in the reverse order. Don't forget to adjust the length of the rod that pushes the clutch fork.
Master cylinder
After installing new cylinders, pour new brake fluid into the reservoir and be sure to bleed the clutch. To do this, put a rubber tube on the valve and lower it into a transparent container, pour brake fluid into it, then ask him to smoothly press/release the pedal 4 times. After this, ask to press the pedal again and not let go without your command. When the assistant presses the pedal for the fifth time, unscrew the valve to drain the fluid. Then tighten the valve, and then ask an assistant to release the pedal. It is necessary to pump the clutch until you are sure that the fluid comes out without air. Add brake fluid to the reservoir in a timely manner so that the cylinder does not suck air. If the brake fluid level drops too much, re-bleeding will be required.
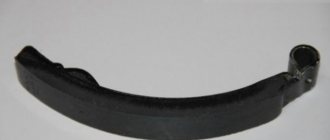
How to replace the plug
The clutch drive fork is a kind of lever that retracts the pressure plate and disengages the clutch. In hydraulic drive gearboxes, such a mechanism, consisting of a pair of legs, a metal rod and a lever, is quite rare.
Replacement instructions
Along with other automotive mechanisms, the clutch fork can fail due to wear or cracking. Replacement steps:
- removing the return spring;
- bending the cylinder and removing the fork axis;
- removal of special protective coating;
- removing the plug.
At the final stage of replacement, a new mechanism is installed. For this purpose, the end of the spring is inserted into the hatch and smoothly moves towards the end past the bearing coupling and springs to a special recess with petals.
Replacing the cable
The cable replaced the hydraulic clutch. Higher reliability, low maintenance requirements and low price made the cable very popular. The cable must be changed if the mileage has exceeded 150 thousand kilometers or more than 10 years have passed since the previous replacement. Replacing the clutch cable is not difficult even for an inexperienced driver. Release the fork from the return spring, then remove the cable. After this, unpin the connection and remove the cable from the pedal. Pull out the pin, then remove the old cable through the interior. Install the new cable in the same way. This completes the replacement of the clutch cable. The cable must be changed if even slight damage is found on it. If this is not done, the cable will break while driving, making it impossible to change gears.
Replacing the release bearing
The mileage of the release bearing should not exceed 150 thousand kilometers. In addition, replacement of the release bearing will be required if the gears begin to shift indistinctly or if there is noise when pressing the clutch pedal. The procedure for replacing the release bearing is described in detail in the article replacing the release bearing.
The principle of operation of the clutch in a car
This mechanism in a car is needed for more uniform gear shifting, reducing torsional vibrations, as well as temporarily disconnecting it from the engine gear. Components: drive and mechanism.
To supply force to any mechanism in the car, the drive mechanism comes into operation. Any mechanism in a car is equipped with a drive; its structure has its own specifics and operating features.
The shutdown drive, based on the hydraulic principle, has elements such as pedals, cylinders, a power plug, a pressure bearing, and a pipeline.
The mechanism transmits torque through the entry of friction force. Thanks to it, the engine and gearbox are temporarily separated, followed by their gradual reunification.Its components are a crankcase and a casing, a drive disk, a pressure disk together with springs, and a driven disk with wear-resistant linings.
Considering the video of replacing the mechanism yourself, the question arises of how to do it yourself.