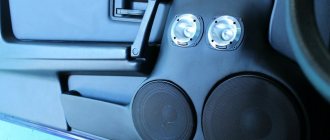
Music in the car is a pleasure and entertainment on the road, but there is one unpleasant moment. The speakers in the car are constantly exposed to dust and dirt, all sorts of debris flies in from the street, the speakers in the rear parcel shelf of hatchbacks especially suffer from this. Over time, so much debris accumulates in them that the diffuser begins to make a terrible grinding noise during operation.
In this article I will show you how you can try to repair speakers using improvised means at home. There are many similar articles and instructions on the Internet, but I just want to share my experience.
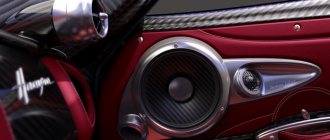
I have a pair of 6x9″ 3-way, coaxial car speakers with the above symptoms. Let me make a reservation right away: when working, you need to use maximum caution, accuracy and patience; if this is not about you, then it’s better not to even start.
In the preface, I would like to remind you a little theory about the design and operation of dynamic heads; this will make it easier for me to further explain the process in the text.
The basis of the dynamic head (speaker) is the basket, the frame on which everything rests. A diffuser is glued into the wide part of the basket through a suspension. The diffuser produces sound when it vibrates, and the suspension ensures its freedom of movement. The diffuser is usually dome shaped and can be made from pressed paper, polypropylene or even aluminum. The suspension is usually made of rubber; in low-power bass and midrange speakers, it is made of paper. At the constriction of the diffuser there is a coil that moves on a core (core) around the magnet. The permanent magnet increases the EMF of the electromagnetic field, thereby increasing the movement of the diffuser. The coil on the core is centered with a washer creating the necessary uniform gap between the coil. The centering washer is also glued to the speaker basket; without it, the coil would touch the magnet or core. Wires are led from the coil to the diffuser and from it, through flexible “antennae”, to the contact pad for connection to audio equipment.
Crunching and noise in the operation of the speaker occurs due to debris trapped between the coil and the core during their operation (movement). Such garbage may contain metal particles and other magnetic dust, which is difficult to remove in a simple way. In this case, speaker repair begins with disassembling them. I would like to immediately make a reservation that the speakers by their design are not intended for disassembly and, accordingly, the manufacturers of these speakers do not provide for this in their design. But everything that has been assembled can be disassembled, you just need to put your head and hands in the right way.
Disassembling the speaker begins with unsoldering the current-carrying conductors from the diffuser to the terminal block. In our case, this is a multi-way car speaker on the core of which two smaller ones are attached - midrange and high-frequency speakers. The conductors also need to be unsoldered from them, and the housing securing them to the core must be unscrewed with a screw passing through the core from the magnet side. In a regular speaker, there is a dust cap in this place of the diffuser and there is no need to remove it.
The next step in speaker repair is to separate the cone from the basket. We will separate the diffuser along with the suspension, coil and centering washer. Plants and factories usually use glue similar to the domestic “moment”, so I dissolve it with acetone. We fill a regular medical syringe with acetone and wet the suspension in the places where it is glued to the basket. It’s good if you can bend the suspension a little and work underneath it, closer to the glue. We do the same with the centering washer, but don’t pour a lot of acetone, you can peel off something you need.
It can take quite a long time before acetone takes effect, and you need to periodically re-wet it with acetone because it quickly erodes. When separating the diffuser, you do not need to pull on it, you can tear or deform the suspension and the diffuser itself, you can help with a flat screwdriver using it as a spatula. You need to act carefully, slowly, especially when working with sharp objects, otherwise you can easily damage the diffuser and all the work is a waste, and the speaker is a waste. If it does not come off, it is better to add acetone and wait. After separating the diffuser, we move on to the centering washer; it must be handled with the same care and done the same.
Having separated the diffuser from the basket, you can proceed to cleaning the hole around the core (core). To be honest, there are no special recipes here and cleaning a magnet from metal debris is not easy. The gap is very narrow and it is impossible to get there with any brushes. I was able to clean it using a metal paper clip (photo below) which was magnetized on its own and the metal debris stuck to it. You can try with a wooden or plastic stick; sometimes you can blow it with air under high pressure. In general, we clean it as best we can, the main thing is that there is no debris left around the core. It is also necessary to clean the coil itself; a lot of debris also sticks to it. It must be handled no less carefully than other parts; its round shape can be damaged and then you will have to look for a suitable round mandrel and straighten it, otherwise there will be even more noise from the speaker than before. By the way, in the photo below you can see how the aluminum frame of the coil is eaten away by debris during operation, it happens that the wire frays and a break occurs, in this case a new coil is wound, which will require even more time, concentration and action.
Upon completion of the cleaning, we can say that we have now mastered speaker repair , but we still have to assemble it, and this also has its own nuances.
Assembly is done in the reverse order by gluing the elements into place, but you must not just glue them, but glue them evenly! To do this, you need to find an old, unnecessary x-ray or a piece of photographic film, and cut it to a size so that it, rolled into a tube, fits into the gap between the coil and the core (core). This film will help us center the coil and set an even gap. It is advisable to take the thickness of the film such that it fits tightly into the gap without backlash. We place the diffuser in the basket and center the coil with film, align and position it exactly on the basket. First of all, we glue the centering washer; we will glue it with ordinary “moment” glue. We smear the gluing area and press it, in fact we do it as written in the instructions for the glue. It’s inconvenient to press, so regular clothespins will help. We definitely need to wait for the glue to set, otherwise our centering may go wrong. As soon as the glue grabs the washer, glue the diffuser to the basket, but do not remove the film, let it remain until the glue dries completely. After gluing the diffuser, you can put the rim around the suspension in place, turn the speaker over, placing it on a flat surface and press it with something heavy. Once the glue has completely dried, check the movement of the diffuser by gently pressing it with your fingers, there should be no extraneous sounds, the diffuser should move in and out easily and without jamming. If yes, then we did everything correctly and centered it well; if not, we will have to repeat everything.
Types of speaker malfunctions
The main part of any speaker is a dynamic emitter, which converts the electrical signal into sound waves. It also breaks down most often. What are the most common speaker problems?
All emitter failures are usually associated with three main reasons:
- improper operation;
- factory defects - the use of low-quality parts or errors when assembling the device;
- natural wear and tear of acoustic equipment.
It is quite simple to attribute a breakdown to one of the reasons - in the event of a manufacturing defect, speakers, as a rule, break within a short time after purchase; natural wear, on the contrary, takes a very long time - with proper use, even cheap high-quality speakers can last at least ten years . Thus, a sudden breakdown most often refers to errors when working with speakers.
Incorrect operation
The main cause of breakdowns during the operation of speakers is failure to comply with the permissible power limit of the signal supplied to the emitter. Most often this is due to the fact that the user makes a mistake when determining the power of the speaker and amplifier. This is very easy to do, since power can be calculated using several methods. The values of effective, sinusoidal and amplitude powers can differ dramatically from each other - the excess when taking into account the wrong type of power can exceed 200%. Of course, the column burns out the first time it is plugged into the network.
Overloading of dynamic drivers is quite common in speaker systems whose speakers are equipped with multiple speakers. In such a speaker, the power of the electrical signal may be incorrectly distributed between the tweeter, midrange speaker and subwoofer. As a rule, the victim of such a problem is the tweeter, which requires significantly less power than its counterparts. The power of the tweeter is usually no more than 1/10 of the total power of the speaker. If a user tries to apply more current to the tweeter by over-boosting the ultra-high frequencies using an equalizer, the fragile high-frequency driver may break instantly.
In addition to electrical problems, mechanical damage to any element of the speaker may also occur. It is usually protected by a fabric or metal decorative grille, but it is nevertheless quite easy to damage the emitter. The cap that protects the device from dust, the diffuser suspension and the membrane itself - a thin film, often paper, which is extremely easy to tear or pierce - can be damaged. The consequences of these damages can be very serious: the alignment is disrupted, which causes the coil or sleeve to break, making sound reproduction physically impossible. The same result is caused by the displacement of the core from the center of the speaker - in this case, the most important parts of the device get stuck in a magnetic trap.
Such breakdowns are usually caused by very careless handling of the speakers - most often by dropping the device. In this case, both fragile portable speakers made from not the most durable materials and massive floor-standing speakers with high power can be damaged. Although the latter, of course, are better protected from mechanical damage.
Manufacturing defects
All parts of the speaker are usually glued together, and improper gluing can cause the stationary parts to move out of their intended places. Even the diffuser may come off, making it impossible to vibrate and, accordingly, receive sound waves. Poor fastening of moving parts and wires significantly reduces the life of the speaker, and natural wear occurs too quickly.
Natural wear and tear
When properly assembled, the most fragile parts of the device suffer from wear and tear - the suspension and flexible leads - that is, the diffuser holder and the wire that supplies the signal to the coil.
Garbage coil getting caught in gap
This can also be treated, but here you will have to tinker longer and it is not a fact that you will be able to properly remove the diffuser and clean the slot from dirt, and then put it back on the glue. How can you repair the column in this case:
- Open the lid.
- Unsolder (disconnect) the wires and remove the speaker.
- We take a cotton or other rope, soak it in acetone and place it around the perimeter of the contact of the upper part of the diffuser funnel with the basket body.
- We do the same with the centering washer, since the diffuser will have to be completely dismantled.
- When the glue softens enough, carefully tear off the diffuser from the upper rim of the basket, and the spider from its bed circle.
- Remove the diffuser and clean the slot from debris. This can be done with a compressor, a vacuum cleaner, or various mechanical devices, for example, cardboard. Under no circumstances should you poke into the slots of the magnet with pieces of iron. If you scratch the surfaces of the walls, the speaker will squeak as the coil rubs against the burrs.
- When everything is clean, we reassemble the speaker in the reverse order as we disassembled it.
- After immersing the coil magnet into the slot, before firmly seating it on the glue, the diffuser should be carefully centered so that no squeaks are heard when the diffuser is immersed down. The coil should move silently in the slot.
- Next, let the glue dry for 24 hours, assemble and test. If everything sounds great, you're doing great. If not, then you're still great. At least they tried. But the speaker will have to be replaced with a new one.
Diagnostics
It seems that it is very simple to distinguish mechanical damage from electrical damage - just remove the protective panel and inspect the speaker for damage. If everything is in order with the integrity of the parts, then the failure is related to the electrical part. However, it is difficult to distinguish some types of breakdowns by ear and eye - for example, a malfunction of the flexible coil lead. In this case, most often the sound does not disappear completely - the speaker may make extraneous sounds and become silent from time to time.
To determine the breakdown of the flexible terminal, as well as coil malfunctions, an ohmmeter is used, connected to the speaker terminals with a static membrane. If the needle starts to twitch, that’s where the problem lies. To fix the damage, you will have to disassemble the speaker, separate the broken parts and install new ones - they can be bought at any radio equipment store.
Plug
Very often the problem is in the plugs. In this case, you will need to test with a multimeter. Here's how to fix the column in this case:
- First, let's diagnose the problem. To do this, first of all, remove the cover by unscrewing the fasteners.
- We set the multimeter (tester) to ring and, one by one, touching all the contacts of the plug in the places where the conductor is soldered, coming from the plug to the speaker board, we look for matches. If at least one of the contacts does not ring, that is, does not deflect the arrow or deflects barely, then the problem is either in the wire or in the plug.
- We change the wire and plug together so that “your head doesn’t hurt.”
- We tighten the column cover and check that the repair is complete.
Current speakers do not have plugs. Therefore, you need to ring the wire itself by squeezing out the contacts (clothespins) on the speaker and on the amplifier. If at least one wire does not ring, change the wire, and everything is in order.
Replacing flexible leads
Repair can be carried out in two situations - with free access to the terminals, in which case disassembling the speaker is not required, and with the device closed. In the first case, of course, the repair is much simpler. Due to the presence of magnets inside the speaker, it is advisable to use a tool that is not made of steel, if one is available, since magnetizing it can lead to damage to the membrane or cap.
The flexible lead is connected to the electromagnetic coil's own wiring. To separate these parts, you need to heat the gluing area with a soldering iron and carefully tear off the old pigtail from the coil. You must act carefully so as not to damage functional parts.
It is best to purchase a new terminal from a speaker parts supplier. But you can do it yourself - for this you use any stranded copper wire with the same cross-section as the original part. Its twisting must be made the same as that of the flexible terminal being replaced. All wires are glued together with special glue and tinned. Then the spare part must be glued to the coil terminal and securely fixed on the inner surface of the diffuser.
Manual winch: lever or drum - which is better to choose?
The driver can cause a breakdown himself. This is mainly possible if you listen to music for a long time, turning on the equipment at maximum power. During active loading, the coils overheat. Since they are attached with glue in many cases, due to heating the glue melts, and the coil simply peels off from its seat. Hence the wheezing. To solve the problem, you will have to change the coil, use fresh glue, and also avoid repeating similar situations.
Even with prolonged operation at maximum speed, the amplifier can be damaged. This is an even more expensive device, so replacing it will require more money.
Disassembling the speaker to replace parts
The complexity of disassembly depends only on the type of glue used in the production of the emitter. If the structure was held together with epoxy resin, disassembling the device can be very problematic. But if the applied glue is dissolved with acetone or alcohol, you can safely begin repair work. It is advisable to use acetone, even if the glue is better dissolved by ethyl acetate - its toxicity is much lower, so the work will be safer for health.
Disassembly proceeds in the following order:
- The suspension comes off. This must be done carefully so as not to damage it. Acetone is carefully poured under the suspension using a pipette. When the glue begins to dissolve, a match or toothpick is inserted into the unstuck area as a support. Moving around the entire circumference, peel off the entire suspension in the same way.
- The centering washer comes off. This can be done either from the body side or from the diffuser side.
After removing these two parts, full access to the insides of the speaker will open. Then it will be possible to repair any of its parts: removing and replacing them is best, although you can try and replace, for example, winding the coil yourself. However, without experience in such work, the result is unlikely to be satisfactory.
How to remove metal filings from a magnetic gap?
If there are metal filings in the magnetic gap, then when the speaker is operating, parasitic overtones may appear, such as rustling, crackling, etc.
To remove sawdust, use two simple tools - a piece of copper or brass wire and a wooden spatula. A spatula for large speakers can be cut from the handle of a small brush, and for small ones - from a toothpick.
First, using a bent wire, the filings are moved into the visible area of the magnetic gap.
Then the wooden spatula is covered with a layer of “88H” glue, which is allowed to dry. When the glue has hardened a little, the spatula is placed in the magnetic gap and sawdust is collected. If it was not possible to remove all the sawdust in one step, then the blade is cleaned and a new layer of glue is applied to it.
Both of the above operations are repeated until sawdust is no longer visible in the magnetic gap.
Return to top to "Navigation".
How does the dynamic head work?
The schematic drawing shows a cross-section of the speaker. This is roughly how low-frequency and mid-frequency loudspeaker heads are designed.
- Suspension (corrugated).
- Flexible output (pigtail).
- Bracket (secures the braid to the diffuser).
- Damper (protects the pigtail from breaking near the terminal).
- Hole in the housing for flexible output.
- Insulating strip (holds the terminal).
- Terminal.
- Solders connecting the flexible lead to the terminal and the coil lead.
- Coil output.
- Coil.
- Speaker housing (basket, frame).
- Diffuser (membrane, diaphragm).
- Dust cap (plug).
- Centering washer.
- Sleeve.
- Pole piece.
- Kern.
- Top flange.
- Magnet.
- Bottom flange.
The letters N and S indicate the North and South poles of the magnet. This is the usual arrangement of the poles, although the opposite occurs occasionally.
The following picture shows a schematic cross-sectional drawing of the tweeter.
- Coil output.
- Insulating gasket.
- Suspension (elastic extension of the dome).
- Diffuser of dome design (membrane, diaphragm).
The main difference between tweeters and midrange and bass drivers is the absence of a centering washer.
In addition, many HF heads use a dome-shaped diffuser, often called a membrane. The dome and surround of such speakers are a single unit, and the sleeve is attached to the dome.
Since the stroke of the tweeter cone is small, the coil leads often play the role of flexible leads.
And now the donors have arrived
I think it’s clear that the donor headphone speakers should have the same dimensions. I was lucky, the drivers were 40mm in diameter at the outer edge, and the coil diameter was about 13mm. The vast majority of computer headphones have the same dimensions. But even among 40 mm speakers there are sometimes speakers with a larger coil diameter.
Now you need to gather all your concentration into a fist and carefully, as if you were a heart surgeon, peel off the diffuser. The diffuser is glued around the perimeter with some kind of rubber glue.
A needle is perfect for hooking up the diffuser. The main thing is to take your time. The diffuser is a thin polyethylene film that stretches easily and breaks quite easily.
It turned out to be more convenient to peel off from the place where the wiring runs. Before this, the wiring was sealed off from the contacts. As the peeling progressed, the knife was also actively used. By hooking the tip of a knife under the diffuser and pressing it on top with your finger, we slowly peel off the diffuser and move in a circle.
As a result, we have what we needed - a donor to repair the headphone speaker. We perform similar operations with the second speaker.
Character of wheezing
Most often, owners of low-quality speakers complain about wheezing during work.
In this case, interference occurs only at high volumes. To try to find out the true cause of the defect, it is recommended to determine the nature of wheezing:
- temporary interference - wheezing appears immediately after switching on, and after a while disappears or is constant;
- symmetry - the speakers wheeze together or only one of them;
- dependence on volume - wheezing at high, low or when adjusted;
- the presence of wheezing if there is a telephone near the speakers.
You should also pay attention to the technology used to play audio files. Perhaps the reason is not in the speakers. So, if the connected speakers wheeze on the music center, but not on the computer, then problems arise precisely on the first audio equipment.
Important point! If new speakers begin to wheeze, you can send them for free diagnostics by contacting the seller.