What to do if the bumper on a Lada Largus is damaged
Damage can be of various types. According to the official technical documentation, bumper repairs on the Lada Largus are not carried out. In case of any damage associated with cracking or fracture, the element must be replaced.
Naturally, in case of minor damage, car owners prefer repairs, because the prices are not low. Modern craftsmen can do almost anything. But if the element has received multiple damages, then no one will undertake to repair such a bumper.
Repair is a simple procedure:
- The separated parts are connected to each other and fixed with a clamp.
- The surface is cleaned of paint and leveled.
- The joint is drilled with a special drill.
- The parts are soldered together using molten plastic using a special hairdryer.
- An alternative option is to solder a metal mesh onto the back of the bumper, which connects the two parts and makes the joint strong.
- All that remains is to prime the bumper and paint it.
For those who decide to replace the bumper after all, you need to know the catalog numbers or article numbers:
| Bumper | Front | Rear |
| For painting | 8450000245 | 8450000256 |
| Unpaintable | 8450000244 | 8450000257 |
There is a difference between a painted and non-painted bumper. The second option is intended for cars with a basic configuration, where a black bumper with a matte surface comes from the factory.
The first option is needed for those who are going to paint the element in the body color. Despite the differences, the parts are completely interchangeable.
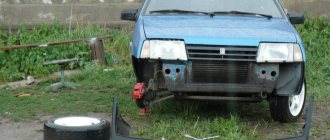
How to remove the front bumper on Largus
Removing the bumper is necessary not only in case of damage, sometimes it is necessary to replace the radiator, replace headlights, or perform other work. you need to know how to properly remove this element from the car.
Procedure:
- Open the hood and remove the four grille mounting screws using a T30 bit.
- On the right and left sides in the area of the fender liners, unscrew 2 T20 screws.
- Unscrew the three screws securing the bumper to the fender liners on each side.
- Unscrew the three T30 screws in the middle of the bumper from the bottom.
- Bend the fender liner and unscrew the screw securing the bumper to the fender using a 10mm socket.
- Unfasten the bumper from the side mounts and pull it by the middle part, completely removing it from the car.
- Installation of a new product occurs in the reverse order.
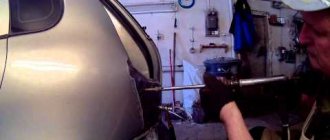
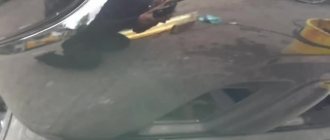
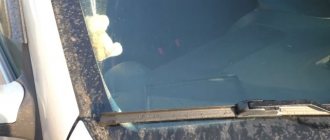
Process photos:
The final stage:
If repair work will be carried out on the bumper, it is necessary to install the element on a special stand to avoid scratches on the front part of the product.
general information
Manipulating the body kit takes no more than 20 minutes, even for a novice auto mechanic. Bolts with soured threads can complicate the situation and prolong the work time. Most often this happens with the four screws that secure the radiator and body kit. The bolts sit as if rooted, and it takes no effort to move them. In such cases, a penetrating lubricant such as WD-40 comes in handy. It must be applied in advance, right under the bolt head. After a short period of time, the lubricant will do its job, and the screw will easily unscrew.
When installing the body kit, it is recommended to lubricate the screw threads with grease or grease, such as “Universal” or “Mobile”. Thanks to this treatment, it is possible to avoid souring and corrosion of fastening joints. This will make it easier to remove the bumper again and extend the life of the screw elements.
A removed body kit is a good reason to inspect devices and parts to which access was denied. Check the condition of the wires, fasteners, inspect the power bumper, etc. If rust is detected on the body, the area is treated with anti-corrosion treatment. This will prevent further damage and hole formation.
Removing the rear bumper of Lada Largus
Removing the rear bumper is also not difficult. It is much easier to replace than the front one.
Procedure:
- Unscrew two T20 screws securing the bumper to the fender liners on each side.
- Unscrew the lower bumper mounts with a T30 bat.
- Open the trunk doors and unscrew the upper screws securing the bumper to the body with a Torex T30 bat.
- Pull the sides of the bumper down on each side and disengage it from the body, overcoming the forces of the plastic clips.
Installing a new bumper is done in the reverse order.
It is recommended to carry out all work with a partner, as there is a risk of damage to the plastic element or paintwork of the body when removed from the car.
Removing and installing the system cooling radiator
| How to remove the front bumper on a Lada Priora: step-by-step instructions Removal Place the car on a two-post lift, brake with the parking brake, turn off the ignition and disconnect the ground wire terminal from the battery. battery crankcase protection Remove the front bumper Drain the liquid from the cooling system above (see engine). Flush the engine cooling system (see For). higher than vehicles with power steering reservoir Remove 1, Figure 13-4, the power steering pump from the mounting control, without disconnecting the pipelines, and tie it to Figure. engine 13-4 — Disconnecting the power steering pump reservoir: — power steering pump reservoir; — fastening controls; — bracket for fastening the power steering pump reservoir Unscrew two, remove 2 and screws bracket 3 securing the power steering pump reservoir (screwdriver with Torx bit Operation). T30 for all car configurations clamps Remove the inlet and outlet hoses of the engine cooling radiator (tool for removing elastic clamps Mot. 1448). Disconnect the inlet and outlet hoses of the radiator of the cooling system. For air conditioned cars Figure 13-5 — Removing the air deflector: — air deflector; — air deflector mounting screw Disconnect the wiring harness from the electric fan to the holder. Disconnect the air conditioner pipe from the holder at Disconnect. electric fan condenser 2, Figure 13-6, air conditioner from the engine cooling radiator (flat-head screwdriver). |
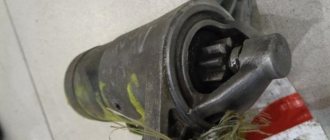
Is it possible to replace the bumper amplifier on Largus
The Lada Largus, like any other car, has a bumper amplifier installed from the factory. In case of an accident, especially a serious one, this part is not straightened. It must be replaced, since it is part of passive safety and the next impact, the consequences of an accident for everyone inside the car can be fatal.
It will not be possible to replace the amplifier by simply unscrewing it from the side members. At the factory, when assembling the car, it is welded. Therefore, replacement is carried out by cutting it off from the body and welding a new part.
Preparatory work
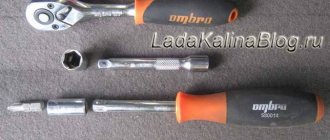
Before replacing the crossover, you need to carry out a number of preparatory measures and stock up on the necessary set of tools. So, for work you may need:
- TOPX key set.
- Curly and flat screwdrivers.
- Rags.
- Jack.
- Wire brush.
- WD solution
For subsequent ease of replacement, perform the following steps:
- Drive the car onto an overpass, inspection hole, or lift the vehicle using a jack. This way you can easily dismantle the fasteners located on the bottom of the car.
- Using a rag, clean the body kit from dust, traces of corrosion, and dirt. Use a wire brush to brush the underside of the car and wheel arches. Dirt and corrosion will not fall on the driver during the replacement.
- Treat bolts, rivets, screws with WD 40 solution and wait 15-20 minutes. During the operation of the car, corrosion appears on the fasteners and they become clogged with dirt. Subsequently, they are difficult to dismantle. If you cannot unscrew the bolts and screws, cut them off with a grinder.
After carrying out the necessary preparatory work, you can begin replacing the Renault Duster buffer.
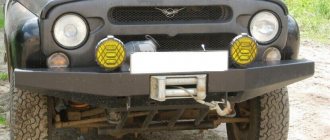
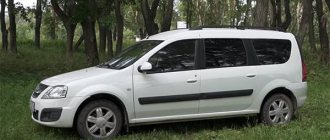
Installation of a "kenny" on Lada Largus
“Kanguryatnik” is a design that protects the bumper from various impacts, for example, against bushes and trees. These products are used mainly by hunters and fishermen. Below you will find general recommendations for installing a kenguryatnik:
- Remove the license plate from the car if the gateway requires it to be closed.
- Check the completeness of the product before installation.
- Read the instructions carefully. Most guards are attached to the front subframe bolts.
- Loosen the subframe bolts so that the product's lugs can snap into place.
- Ask your partner to position the bumper guard level and secure it with your hands in the position in which it will stand.
- Tighten the subframe mounting bolts.
- If necessary, install a state license plate on the car.
Attention! The installation of such products is considered to be a change in the design of the vehicle associated with a change in its dimensions. Such changes must be registered in the MREO in accordance with the procedure established by law. Otherwise, the car owner may receive a fine of 500 rubles and an order to remove the product from the car.