Fuel injection has undeniable advantages over the carburetor principle of mixture formation. First of all, this means more accurate dosing of fuel, and therefore greater efficiency and acceleration of the car and less toxicity of exhaust gases. However, the main executive part of the injection system - the nozzle - operates under difficult conditions and is therefore very demanding on maintenance.
Nozzle (injector)
— a controlled solenoid valve that ensures a dosed supply of fuel to the engine cylinders. There are injectors for central (single-point, mono) and distributed (multi-point) injection.
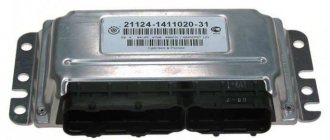
Control block
— an electronic unit that controls the injection system, in particular the operation of the injectors.
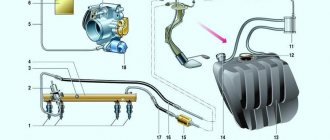
Nozzle device:
a — single-point injection nozzle, b — distributed injection nozzle 1 — filter, 2 — electrical connector, 3 — electromagnet winding, 4 — nozzle body, 5 — core, 6 — valve body, 7 — valve (b — valve needle), 8 — sealing ring, 9 — spray hole.
Fuel is supplied to the injector under a certain pressure (depending on the engine operating mode). Electrical impulses supplied to the injector solenoid from the control unit actuate the needle valve, which opens and closes the injector channel. The amount of fuel sprayed is proportional to the pulse duration specified by the control unit. The shape and direction of the spray torch play a significant role in the process of mixture formation and are determined by the number and location of the spray holes. Central injection.
Fuel is injected into the common intake manifold by one nozzle (for all engine cylinders), which is installed in front of the throttle valve, in the place where the carburetor should be, and is characterized by low resistance of the electromagnet winding (up to 4-5 Ohms).
Single-point injection is an intermediate step in the transition from a carburetor to distributed injection systems and was installed on cars mainly in the 80s of the 20th century. In the 90s, single-point injection was almost universally replaced by multi-point or distributed distributed injection.
Separate injectors inject fuel into the intake manifolds of each cylinder. They are located at the base of the intake pipes (at the cylinder head housing) and are characterized by a relatively high resistance of the electromagnet windings (up to 12-16 Ohms). The exception is the injectors of turbocharged engines, which have a winding resistance of up to 4-5 Ohms. On some latest generation vehicles, fuel is supplied directly into the combustion chamber (direct injection). The injectors of such engines are characterized by a high operating voltage of the electromagnet (up to 100 V).
Main signs and causes of injector malfunction.
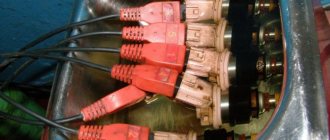
The condition of the injectors significantly affects engine performance. The main signs of their malfunction are: jerks and dips when the load on the engine increases; insufficient power developed by the engine; unstable operation at low speeds; increased toxicity of exhaust gases. You can check the functionality of the injector electromagnet yourself by touch or using a stethoscope. Valve activation is accompanied by characteristic clicks. Valve immobility may be the result of damage to the electrical circuit, poor contact of electrical connections, lack of electrical impulse, or a break in the injector solenoid winding.
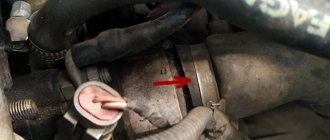
The most common malfunction of injectors is their contamination. They are located in an area exposed to high temperatures. The consequence of this is coking by the resins contained in the fuel (especially low-quality fuel), the formation of solid deposits on the injector, blocking (partially or completely) the spray holes and violating the tightness of the needle valve. In addition, general contamination of the fuel system elements (tank, pipeline, filter, etc.) leads to clogging of the injector channels and filter with sludge particles. The main way to restore normal operation of injectors is to flush them.
Number of injector Kalina 8 valves
Recently, AvtoVAZ has significantly expanded the range of injectors installed on the assembly line.
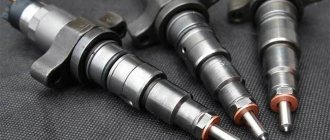
Currently, 4 types of Siemens Deka injectors are “seen” on VAZs: “thin” 20734 (orange) / 20735 (blue) and “thick” 6393 (beige) / 20734 (yellow). The situation with the same number of injectors of different design is incomprehensible, but it is a fact. BOSCH injectors with catalog numbers 0 280 158 502 and 0 280 158 022 are also installed.
These injectors have so far been encountered only once on the Kalina car.
“Thin” Siemens differ in the location of the nozzles, in 20734 all 4 nozzles are located in the same plane in a cone-shaped recess, and in 20735 they are spaced apart in pairs in two different planes (see photo). Such injectors are called “double-flare”, each torch pours fuel onto “its own” inlet valve, and not onto the partition between them.
“Thick” Siemens Deka nozzles are available in two types: 6393 (beige) and 20734 (yellow). It is unclear what caused the use of the same code (20734) for structurally different injectors. I don’t want to think that there weren’t enough numbers or imagination :). There is an assumption that the “thin” nozzles for some reason did not suit Siemens-Deka and they were replaced with ordinary ones.
No clear relationship has been found at this time between engine type and installed injectors. At this time, statistics are being collected on installed injectors on different engines. At the moment, the generalized table looks like this:
Source
Cleaning procedure
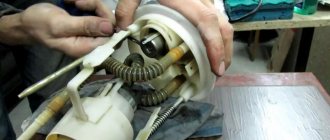
First of all, you should remove the barrel with two IAC pipes. Then you should disconnect the strip with the wires from the injectors, after first removing the clamps from below. On the bar with the injectors, unscrew the four screws and carefully pull the bar off the injectors. How to check injectors without removing them from the engine. Signs of injector failure. Checking the winding resistance level on the injectors
The work should be done carefully so as not to damage anything due to negligence. Each injector should be pulled out in turn. Now you should take some container and fill it with Vince cleaner.
how to clean injectors. Demonstration of a faulty air flow sensor on a Kalina, Priora. The container should be convenient for washing the nozzles in it. While they are “acidifying”, you need to clean the IAC with a spray. Typically injectors are coated with coke around the nozzle. Externally, coke looks like resin. It is very difficult to pick, but it is quite possible to clean it. After the coke has been removed, use a blunt needle to very carefully clean the funnel-shaped surface around the nozzle. How to check the power supply to the injectors. This check is carried out if the injectors themselves are working, but any of the injectors do not work when the ignition is turned on. From time to time you need to use a spray to blow away everything unnecessary. After the injectors have been cleaned from the outside, they should also be rinsed well from the inside. To flush the inside of the nozzles, you will need a source with a voltage of 3-12V, a foot pump with a pressure gauge. A set of rubber rings for the injectors on the button, how do you clean the injectors? The end of the hose is removed from the pump, and the cleaner is poured into it. Then the hose is put on the nozzle. After you have pumped up to about 6 atmospheres, you should apply a voltage to the injector at 3V. Sometimes it happens that for the first time it is necessary to apply a voltage of 6-9 Volts. This is due to the fact that the injectors may not “click”. Voltage should be supplied “in portions”, periodically pumping up the pressure using a pump. Once each injector has been cleaned, they should be replaced in reverse order.
As soon as you start the engine, it will immediately become clear that all the troubles are associated with poor quality fuel. It is because of this that a lot of bad things settle in the engine. If you want to make sure of this, you just need to remove any hose and see what is inside.
Number of injector Kalina 8 valves
Kachan
I have a turquoise BOSCH stock, for example, 1.5 16V engine with return, RTD at 3 atm
Kachan
I have a turquoise BOSCH stock, for example, 1.5 16V engine with return, RTD at 3 atm
Briefly tell me what to put instead of 996?
Briefly tell me what to put instead of 996? You have to remember it just in case. I have these and the ramp is square in cross section.
Briefly tell me what to put instead of 996?
Briefly tell me what to put instead of 996? You have to remember it just in case. I have these and the ramp is square in cross section.
Kachan
AMAROCK
And no one likes Siemens forces
Yes, it has long been the custom to believe that Siemens is better than BOSCH. Some say the spread is large, others say the needles stick, leak, etc. In short, since then, wherever I see them, people are asking about BOSCH
Yes, it has long been the custom to believe that Siemens is better than BOSCH. Some say the spread is large, others say the needles stick, leak, etc. In short, since then, wherever I see them, people are asking about BOSCH
I have no prejudices, but Kachan says that they are not suitable.
These are not, but others will do just fine. There are 4-hole Siemens under the S/O Stopudov ramp, I saw it in person on the display.
Information on icons and features
You can not
start topics You
cannot
reply to messages You
cannot
edit your messages You
cannot
delete your messages You
cannot
vote in polls You
can
attach files You
can
download files
Source
Ultrasound or chemicals for cleaning the injector?
So, it was decided that the injectors and injector needed to be cleaned. Which method should I choose? Common methods are washing the injector without removing the injectors or cleaning the injector on an ultrasonic bench. The cleaning efficiency of the second method is several orders of magnitude higher, but in this case, except for the nozzles, nothing else is cleaned. For VAZ cars, sometimes cleaning is not the right solution. It is much easier and cheaper to simply replace the injectors.
Today, simple single-circuit installations are used for washing and cleaning. These are containers in which the solvent is located. The unit is placed next to the machine. A hose is connected to the inlet of the fuel rail to inject the product into the system. The cleaner, which acts as both a cleaning agent and a fuel, is supplied to the system by a compressor.
But there is a drawback: this method does not allow the cleaning fluid to pass through the pressure regulator and shut-off valve. This is ineffective and does not flush out the fuel system. Double-circuit stands are much more efficient, since the cleaning liquid passes through all fuel systems. As for ultrasound, it began to be used back in 1985. A bath for such cleaning is a container with a cleaner. An ultrasonic emitter is installed at the bottom of this bath.
The disadvantage is that you only need to clean the injector nozzle. And modern sprayers cannot be cleaned using ultrasound. And this process is quite labor-intensive.
It is preferable to use imported solvents as a cleaner for injectors and injectors. They are of high quality. These are, for example, injector cleaning products such as the German Liqui Moly, the Belgian Winns or the American Hi-Gear. Domestic products were also tested, but neither “Toilet duckling” nor “Moidodyr” were suitable for these purposes.
What kind of injectors are installed on viburnum 8 valves
Injector siemens 734 orange thin VAZ 2110-2112, Lada Priora, Granta 1.6 l, 8 cl
Bosch 107 Volga injectors with increased performance for VAZ 2101-2115, Priora, Kalina, Granta, Niva
Delphi injector 21127 for Lada Granta, Kalina 2, Priora, Vesta, Xray
Connector for injector and knock sensor for Lada Kalina, Priora, Granta, Datsun
Injector clip for Lada Kalina 2, Priora 2, Granta, Vesta, X-ray
AVTEL fuel ramp for Lada Kalina, Priora, Granta with a 1.6 l 8 class engine.
AVTEL fuel ramp for Lada Priora, Kalina, Granta 1.6 l 16 cl
Siemens pink thick injector for VAZ 2110-12, 2113-15, Lada Granta, Kalina, Priora, vesta, xray 1.6 l, 16 cl
Interchangeability
This issue is quite relevant, especially taking into account the cost of original products from the imported automobile industry. But it’s not so simple here, let’s give an example
In the first production models of the Gorky Automobile Plant, the injection Volgas were equipped with a BOSCH air flow sensor. Somewhat later, imported sensors and controllers replaced domestic products.
A – imported filament air flow sensor manufactured by Bosh (pbt-gf30) and its domestic analogues B – JSCB “Impuls” and C – APZ
Structurally, these products were practically no different with the exception of several design features, namely:
- The diameter of the wire used in a wirewound thermistor. Bosch products have a diameter of 0.07 mm, and domestic products have a diameter of 0.10 mm.
- The method of fastening the wire differs in the type of welding. For imported sensors this is resistance welding, for domestic products it is laser welding.
- Shape of a thread thermistor. Bosh has a U-shaped geometry, APZ produces devices with a V-shaped thread, and products from JSC Impulse are distinguished by the square shape of the thread suspension.
All the sensors given as an example were interchangeable until the Gorky Automobile Plant switched to film analogues. The reasons for the transition were described above.
Film air flow sensor Siemens for GAZ 31105
It makes no sense to give a domestic analogue to the sensor shown in the figure, since outwardly it is practically no different.
It should be noted that when switching from filament devices to film devices, most likely, it will be necessary to change the entire system, namely: the sensor itself, the connecting wire from it to the ECU, and, in fact, the controller itself. In some cases, the control can be adapted (reflashed) to work with another sensor. This problem is due to the fact that most filament flowmeters send analog signals, while film flowmeters send digital signals.
It should be noted that the first production VAZ cars with an injection engine were equipped with a filament air flow sensor (made by GM) with a digital output; examples include models 2107, 2109, 2110, etc. Now they are equipped with a BOSCH 0 280 218 004 mass air flow sensor.
To select analogues, you can use information from official sources or thematic forums. As an example, below is a table of the interchangeability of mass air flow sensors for VAZ cars.
Compatibility table for mass air flow sensor for the VAZ model range
The presented table clearly shows that, for example, the MAF sensor 0-280-218-116 is compatible with VAZ 21124 and 21214 engines, but is not suitable for 2114, 2112 (including those with 16 valves). Accordingly, you can find information on other VAZ models (for example, Lada Granta, Kalina, Priora, 21099, 2115, Chevrolet Niva, etc.).
As a rule, there will be no problems with other brands of cars of domestic or joint production (UAZ Patriot ZMZ 409, Daewoo Lanos or Nexia), choosing a replacement mass air flow sensor for them will not be a problem, the same applies to products of the Chinese automobile industry (KIA Ceed, Spectra, Sportage etc.). But in this case, there is a high probability that the MAF pinout may not match; a soldering iron will help correct the situation.
The situation is much more complicated with European, American and Japanese cars. Therefore, if you have a Toyota, Volkswagen Passat, Subaru, Mercedes, Ford Focus, Nissan Premiere P12, Renault Megane or another European, American or Japanese car, before replacing the mass air flow sensor, you need to carefully weigh all the solution options.
If you are interested, you can search online for an epic about an attempt to replace the “native” air meter with an analogue on a Nissan Almera H16. One attempt resulted in excessive fuel consumption even at idle.
In some cases, searching for an analogue one will be justified, especially if you take into account the cost of the “native” VU meter (for example, the BMW E160 or Nissan X-Trail T30)
Theory, operating modes
All implemented technological changes in motors must be considered as a set of measures aimed at improving performance, effective savings and advantages over competitors.
Injection for mass-produced vehicles was widely introduced more than 15 years ago. Many vehicle owners have no idea what changes have taken place in the fuel supply system in order to bring the engine's capabilities to perfection, and thereby reduce emissions of harmful substances. For the most part, the entire design is quite simple, but is complicated by the presence of a large number of parts and sensors that create a single whole of the entire complex.
Advantages of the fuel injection system:
- maintaining constant pressure in the system;
- fine spraying of the mixture;
- fuel injection is available “as used”;
- the operation of the complex does not depend on the operation of the engine;
- several injections into the cylinder are possible to ignite the mixture;
- reduction of exhaust emissions;
- reducing particulate matter pollution;
- noise reduction;
- fuel efficiency;
- maximum performance.
Cleaning petrol injectors
To prevent contamination from causing engine problems, you need to clean them periodically. This increases their performance and engine efficiency.
You can get by by adding any additives to the fuel. They will dry clean the inside. You can clean each nozzle by first dismantling the part. Cleaning is carried out using ultrasound, mechanical and chemical.
It is better to take the cleaning composition in a spray can.
— prepare a contact button, a syringe, a tube extending the end of the syringe, and a large container. From any telephone charger, cut off the plug; you only need the wire and contact wires with their terminals.
— Insert the nozzle neck into the end of the syringe, from its rear side.
— connect the wires to the button, then to the charging wire from the mobile phone, which is plugged into a socket (220V).
— insert the tube into the spray nozzle of the cleaning agent can, and place the opposite part of the nozzle into an empty container.
— press on the can, directing a stream of cleaner into the nozzle channel and activate the button by pressing, ensuring the supply of cleaner.
- repeat the jet of cleaning agent a couple more times to completely get rid of the dirt.
Cleaning without removal, in addition to using additives, is carried out in two more ways:
- increase in pressure. The revs accelerate without the car moving. Bring them up to 5000 and hold for 5 seconds. With such a load, self-cleaning occurs.
- everything is the same, but on XX. Then the load is a little less.
You need to clean the fuel filter and pump screen, as well as the gas tank.
It is recommended to clean injectors every 30 thousand mileage. This is an excellent preventative for long engine operation.
Which injectors are better to install on a VAZ-2114
The first, but not the last sign of injector failure is increased fuel consumption.
In addition, detonation, failures when changing engine operating modes, and unstable idling may occur.
For 2016, AvtoVAZ installs several types of injectors and many of them are interchangeable. Today there are several main types - three types of Bosch injectors and three types of Siemens injectors. First, let's look at Bosch injectors.
BOSCH injectors
Their use depends on the engine size and the number of valves. There is no particular variety in VAZ-2114 engines, so there are only the following options:
- Injector BOSCH 0280 158 022. The nozzle is marked black, has a productivity of 1.9644 mg/sec, and operates at a standard pressure of 3.8 atmospheres. Installed on a 1600 cc engine with 16 valves. Works with January 7.2 controller.
BOSCH nozzle: productivity 1.9644 mg/sec
BOSCH nozzle: productivity 1.922 mg/sec
The new injector may have a thicker O-ring and, accordingly, a longer nozzle. The injectors are completely interchangeable. These injectors can only work with the January 5.1 controller.
In addition, you need to know which engine control controller is installed on the car, since January 5.1 and January 7.2 may require injectors of different capacities.
Siemens Deka injectors
There is no certainty with Siemens injectors, since the plant can install injectors of different markings on the same engine. However, there is a clear difference between the injectors for eight-valve and 16-valve engines .
In the first case, the nozzle is single-flame, in the second - double-flame, that is, it sprays fuel onto each of the intake valves separately.
They are marked as VAZ20734 (orange markings) and 20735 (blue markings). On eight-valve engines, a Siemens 6393 nozzle with a thick torch can be used. Its productivity is 1.662 mg/sec, and its operating pressure is 3 atm . Each of these injectors can be installed on a VAZ-2114 engine.
Features of the design and repair of modifications of the LADA KALINA car
*On some cars the 11183 engine was installed.
The engine compartment of a car with an 8-valve 1.6i engine : 1 — tensioning mechanism for the generator drive belt; 2 - spark plugs with high-voltage wire tips attached to them; 3 - ignition coil; 4 — knock sensor; 5 - generator Cars of the LADA KALINA family are produced in three body types: sedan, hatchback and station wagon, and are equipped with three engine models (see Table 16.1). The 11194 engine, which began to be equipped with the car from mid-2007, is discussed in detail in the sections of the chapter (see “Engine and its systems”). From the beginning of production, only eight-valve engines with a displacement of 1.6 liters were installed on the car, mainly model 21114, used on LADA cars of the “tenth” family. Some of the cars were equipped with the 11183 engine, which is used in cars of the SAMARA family. Both engines are similar in technical characteristics, but have minor design differences. Externally, these engines differ in the color of the cylinder block: the block of the 21114 engine is blue, and the block of the 11183 engine is gray. Engines are assembled on different production lines. The 11183 engine has a 21083 series connecting rod piston group with a pressed pin, and the 21114 engine has a 2110 series connecting rod with a floating pin. The 21114 engine has a clutch disc with a diameter of 200 mm, and the 11183 engine has a clutch disc with a diameter of 190 mm, but with imported linings. The engines are unified in other parts. The features of the design and repair of these engines are described below in the relevant sections. The cylinder head of an eight-valve engine is more compact (compared to a sixteen-valve engine), so all engine attachments are accessible from above. The alternator drive belt can be adjusted without removing the windshield washer reservoir. Replacing the voltage regulator and removing the generator can be done from above. The knock sensor and other elements of the engine management system are easily accessible. The camshaft position sensor is installed in the cylinder head plug. It responds to a pin pressed into the camshaft (see “1.6i engine camshaft - removal and installation”).
The ignition system of eight-valve engines uses one ignition coil. It consists of two two-terminal ignition coils, made in a single housing. Sparking occurs in two cylinders simultaneously (1-4 or 2-3). The ignition coil is connected to the spark plugs by four high-voltage wires with permanent tips.
Elements of the ignition system of the 8-valve 1.61 engine : 1 - ignition coil; 2 - set of high-voltage wires. Engines use A17DVRM spark plugs, where: A - thread Ml4×1.25; 17 - heat number; D - length of the threaded part is 19 mm, with a flat seating surface; B - protrusion of the thermal cone of the insulator beyond the end of the threaded part of the housing; R - built-in resistor; M - bimetallic central electrode. You can install spark plugs of a similar type from other manufacturers on the engine: - WR7DCX (BOSCH); — LR15YC (BRISK “SUPER”).
Spark plug for 8-valve 1.6i engine : 1 - side electrode; 2 — central electrode (in the thermal cone of the insulator); 3 - threaded part of the body; 4 - sealing ring; 5 — hexagonal part of the turnkey housing; 6 — insulator (spark plug markings are applied to it); 7 — contact tip (removable, mounted on a thread) Features of repairing the ignition system are shown below (see the relevant sections). On eight-valve engines, the 1118 series fuel rail is used, which differs from the 11194 engine rail in the shape and design of the injector mounting. You can remove the fuel rail from the engine without dismantling the intake pipe and receiver (see “Fuel rail of the 1.6i engine - removal, disassembly, assembly and installation”).
Fuel rail of the 8-valve 1.6i engine : 1 - diagnostic fitting; 2 - fuel rail; 3 — fitting for connecting to the fuel line; 4.5 6 and 7 - injectors Nozzles 1118-1132010 (SIEMENS VAZ 20734) are installed on the fuel rail.
Injector of the 8-valve 1.6i engine : 1 - nozzle; 2 — rubber sealing ring; 3 - terminals for connecting the wiring harness block Since 2009, some cars with a hatchback body began to install the 21126 engine, which was previously only equipped with cars of the LADA PRIORA family. This engine differs from the 11194 engine in its larger displacement and, accordingly, has a different cylinder block and pistons with a diameter of 82 mm. The factory designation of the model is VAZ-11196. Cars of the LADA KALINA family (models VAZ-1117, −1118 and −1119) differ in the design of the rear part of the body. Other body parts are identical for all models. The tailgate of a station wagon is shaped differently from that of a hatchback. In this case, the rear lights are not located on the rear pillars, but are built into the rear fenders above the bumper. Similar to how this is done on a sedan car. The taillights of the sedan and station wagon are similar in shape, but are not interchangeable.
When to change: self-diagnosis
The fuel system of an injection engine has a fairly extensive architecture and faults can only be identified after an accurate diagnosis of each of the system elements. For example, a drop in engine power may be the result of either a malfunction of the injectors, insufficient performance of the fuel pump or a clogged fuel filter.
In addition, jerks and dips, unstable idle and difficult starting, increased consumption, can occur when the injector is simply clogged.
You can check the injectors themselves directly on the engine without removing them. To do this, just start the engine and remove the wires from the connector one by one. If the stability of the engine changes at the same time, the engine starts to oscillate, then the injector is in order. If, when removing the wires from the connector, the stability of the motor does not change, the injector needs to be cleaned or replaced.
Service Manual
To ensure that electrical work does not cause trouble, the car owner must at least understand the electrical circuit of the VAZ. If a malfunction occurs in the operation of a particular equipment, using a diagram you can find out what the problem is and where to look for the cause. In some cases, a problem in the operation of certain devices can be solved by reconnecting the plug (if we are talking about poor contact of the device with the electrical network).
In practice, our compatriots often encounter problems with the operation of relays - the contact legs of these components can burn out as a result of voltage surges in the electrical network. Even if the relay legs are intact, but the equipment does not work, the device must be dismantled and disassembled - perhaps the contacts are burnt inside. If necessary, they can always be cleaned with a wire brush or sandpaper.
To prevent the battery from discharging, the battery must be recharged from time to time, especially before the onset of cold weather and at the end of winter. During the cold season, batteries discharge the fastest; this happens due to frost, so with the onset of winter, car owners often face the problem of starting the engine in the morning. If you doubt the battery's performance, you can try testing it with a multimeter; to do this, connect the tester probes to the battery terminals. Ideally, with the engine running, the battery voltage should be between 13.5 and 14 volts. If the resulting value is less or more, this indicates that the battery is not operating correctly.
Replacing injectors (full technology)
Before replacing injectors on a VAZ-2114 of any generation, it is necessary to relieve the pressure in the power system.
To do this, remove the rear seat cushion, open the hatch and remove the contact block from the fuel pump. Now it is de-energized and will not build up pressure.
We start the engine and wait a few minutes until all the fuel in the system is used up. The pressure has been relieved, now you can safely remove the old injectors and replace them with new ones. We proceed according to the following algorithm:
How to recognize faulty fuel injectors? How to check injectors?
Before you learn how you can test your fuel injectors, a few words about what a fuel injector is. The fuel injector replaced the carburetor, which mixed fuel with air, forming an air-fuel mixture (FA), for subsequent supply to the combustion chambers of the car engine.
By the way, carburetors still exist, mainly on classic cars, as well as special vehicles. On all modern cars it was replaced by injectors starting in 1990. With the advent of injectors, the fuel injection system began to work under the control of the engine ECU (electronic control unit).
Despite the many advantages of injection systems, for many motorists, giving up a carburetor was a real tragedy. Since before this, most motorists repaired and adjusted the injection system without outside help and expensive tools.
However, fuel injectors are more reliable and efficient than a carburetor, so progress is inevitable in this situation. However, at the same time, they can cause trouble for their owner, and in such a situation, not everything is as simple as with a carburetor, and usually a visit to a service station is required to solve the problem.
But is it possible to independently diagnose problems with injectors, and if so, what is needed for this? You will find out about this now.
Which injectors are better to install on a VAZ-2114
The first, but not the last sign of injector failure is increased fuel consumption.
In addition, detonation, failures when changing engine operating modes, and unstable idling may occur.
For 2016, AvtoVAZ installs several types of injectors and many of them are interchangeable. Today there are several main types - three types of Bosch injectors and three types of Siemens injectors. First, let's look at Bosch injectors.
BOSCH injectors
Their use depends on the engine size and the number of valves. There is no particular variety in VAZ-2114 engines, so there are only the following options:
- Injector BOSCH 0280 158 022. The nozzle is marked black, has a productivity of 1.9644 mg/sec, and operates at a standard pressure of 3.8 atmospheres. Installed on a 1600 cc engine with 16 valves. Works with January 7.2 controller.
BOSCH nozzle: productivity 1.9644 mg/sec
BOSCH nozzle: productivity 1.922 mg/sec
The new injector may have a thicker O-ring and, accordingly, a longer nozzle. The injectors are completely interchangeable. These injectors can only work with the January 5.1 controller.
In addition, you need to know which engine control controller is installed on the car, since January 5.1 and January 7.2 may require injectors of different capacities.
Siemens Deka injectors
There is no certainty with Siemens injectors, since the plant can install injectors of different markings on the same engine. However, there is a clear difference between the injectors for eight-valve and 16-valve engines .
In the first case, the nozzle is single-flame, in the second - double-flame, that is, it sprays fuel onto each of the intake valves separately.
They are marked as VAZ20734 (orange markings) and 20735 (blue markings). On eight-valve engines, a Siemens 6393 nozzle with a thick torch can be used. Its productivity is 1.662 mg/sec, and its operating pressure is 3 atm . Each of these injectors can be installed on a VAZ-2114 engine.
Signs of broken or dirty injectors
Diagnosing the operation of a car engine is a rather complex process, as it requires accuracy. It often happens that with the same symptoms, the causes of the malfunction can be completely different.
For example, increased fuel consumption and poor engine starting can be caused by both dirty, broken injectors and bad spark plugs. Therefore, it is better to once again make sure that the diagnosis is correct.
The most common symptoms of faulty fuel injectors are the following:
- a sharp increase in fuel consumption;
- loss of dynamics, drop in engine speed;
- problems with ignition, engine starting;
- fuel leaks accompanied by a strong smell of gasoline;
- Frequent engine vibrations when changing gears, slowing down, jerking while driving.
Fuel consumption jump
A significant increase in gasoline consumption during vehicle operation often indicates a clogged fuel injector. The quality of the air-fuel mixture formation process can be greatly affected even with minor contamination, since the injector nozzle has a very small diameter.
As a result, the efficiency of the power unit is significantly reduced. With such malfunctions, the injector nozzle cannot form a gasoline cloud of the required configuration.
As a result, a larger volume of gasoline burns inside the exhaust manifold. Because of this, the dynamic characteristics of the car are reduced, the load on the ignition coil, high-voltage wires, and spark plugs increases.
RPM drop
In cases where too much fuel is sprayed inside the cylinder, the engine speed is “flooded” with gasoline. Because of this, the dynamics of the car during acceleration are significantly reduced. In addition, with a constant load while the machine is moving, the engine speed will vary significantly. Normally, they should remain at a stable level.
Fuel leak
If the fuel injector housing is damaged, gasoline begins to leak out of it. As a result, the fuel simply does not reach the injector. Leakage often occurs through a defective device seal, which often cracks over time. When checking the injector, traces of leaks can be found on the nearest fuel rail.
Along with fuel leaks, a persistent smell of gasoline often appears. On the other hand, this situation occurs when a stuck injector is left open or damaged. Under such circumstances, it is important to find the real cause of the odor.
Problems with ignition and starting
If the injector nozzle is clogged, a sufficient amount of fuel does not flow into the cylinder, so the power unit will misfire while the car is moving. This will clearly manifest itself as a certain pause when pressing the accelerator pedal. If the proportions of the air-fuel mixture are violated, the power unit is susceptible to overheating.
When, despite the noise of the fuel pump, the car engine does not start, this indicates that the injector does not have a spark.
Frequent vibrations
Injector malfunctions lead to interruptions in the ignition process of the air-fuel mixture inside the cylinders. Therefore, while driving, the engine will vibrate and tremble. This occurs due to interruptions in the operation of one or more cylinders.
When to change: self-diagnosis
The fuel system of an injection engine has a fairly extensive architecture and faults can only be identified after an accurate diagnosis of each of the system elements. For example, a drop in engine power may be the result of either a malfunction of the injectors, insufficient performance of the fuel pump or a clogged fuel filter.
In addition, jerks and dips, unstable idle and difficult starting, increased consumption, can occur when the injector is simply clogged.
You can check the injectors themselves directly on the engine without removing them. To do this, just start the engine and remove the wires from the connector one by one. If the stability of the engine changes at the same time, the engine starts to oscillate, then the injector is in order. If, when removing the wires from the connector, the stability of the motor does not change, the injector needs to be cleaned or replaced.
How to check fuel injectors if problems occur?
The easiest way is to entrust this to specialists at a service station, but there are ways to check the fuel injectors yourself, at least preliminary, after which you can decide whether to go to a professional for service or not.
You should pay attention to any, even the slightest, signs indicating problems, for example, if the “CHECK” lights up on the “tidy”, this may indicate many malfunctions, including faulty injectors.
One of the most popular ways to check injectors is to listen to their operation. Your ears can actually tell you a lot, provided you know what the sound is supposed to be.
Ideally, of course, it is better to have a stethoscope similar to the one used by doctors, but the average car enthusiast is unlikely to have one. So let's trust our ears and a screwdriver!? Yes, yes to a big long screwdriver!
Replacing injectors (full technology)
Before replacing injectors on a VAZ-2114 of any generation, it is necessary to relieve the pressure in the power system.
To do this, remove the rear seat cushion, open the hatch and remove the contact block from the fuel pump. Now it is de-energized and will not build up pressure.
We start the engine and wait a few minutes until all the fuel in the system is used up. The pressure has been relieved, now you can safely remove the old injectors and replace them with new ones. We proceed according to the following algorithm:
- We de-energize the car by removing the negative terminal from the battery.
Disconnect the negative terminal from the battery
Remove the hose from the pressure regulator
Disconnect the electrical connector of the throttle position sensor
Disconnect the connector from the idle air regulator
Disconnect the connector block from the injector wires
Unscrew the fuel rail mounting bolts
We dismantle the fuel rail with injectors
Squeeze the spring clip and disconnect the electrical connector of the injector.
Rock the injector and remove it from the fuel rail.
Installation of injectors is carried out in the reverse order. Before installation, it is advisable to check the integrity of the o-rings ; if they have lost their elasticity, it is better to replace them with new ones. The injectors are installed and ready for further use. Good luck to everyone!
Video about removing and cleaning injectors on a VAZ-2114
It may be leaking, you forgot to check it, if you inflate the ramp with forces up to 3 bar and the forces get wet from the side of the mesh, then your cleaning is a “dead poultice”, and therefore, without further disassembling, you put the ramp in place and go buy a new injector.
It may be leaking, you forgot to check it, if you inflate the ramp with forces up to 3 bar and the forces get wet from the side of the mesh, then your cleaning is a “dead poultice”, and therefore, without further disassembling, you put the ramp in place and go buy a new injector!
Source
Malfunctions caused by clogging of the structure
Fuel injectors for the VAZ 2114 have rather low performance. In combination with the poor quality of gasoline at domestic gas stations, problems often arise with the VAZ engine caused by clogging of the element and their nozzles. For stable and balanced operation of the engine, it is recommended to monitor the condition of the injectors.
When the accelerator is applied sharply, dips occur, the car drives poorly on a not warmed-up engine, jerks or slows down - poor-quality system operation.
Based on the following indirect signs, we can safely say that the injectors require cleaning, and in some cases, replacement:
- stopping the engine at idle;
- increased gasoline consumption;
- the motor does not produce rated power;
- low engine response;
- unstable operation of the power unit;
- failures when moving.
Cleaning the VAZ system at a service station
You can clean the injectors using ultrasound by taking your VAZ to a service center. A qualified specialist using good equipment will perform this procedure, which will have a positive effect on the dispersion of the spray and increase the productivity of the structure. Cleaning at the station helps restore spray quality, which will increase engine efficiency, throttle response and power. The list of work performed at a service station may include measuring CO, adjusting idle speed, removing the rack with injectors, and measuring productivity. Next, the main procedure is ultrasonic cleaning, as well as replacing the fuel filter and system seals.
Injectors for VAZ 2114
Removing an element
But all this pleasure costs money, and high-quality work at a good service station costs a lot. Therefore, there is an alternative - cleaning the system with your own hands
First, let's pay attention to the features of dismantling injectors
- First, remove the fuel rail.
- Unfasten the wiring block (by pressing on the bracket).
- Using a screwdriver, disconnect the injector retainer.
- Extracting the elements.
- We remove the O-rings, since they are squeezed out and new ones must be installed during reassembly.
During dismantling and reassembly, no damage to the nozzles or entry into the system is allowed. In order to install new injectors on the ramp, you need to do everything the same, but only in reverse order.
Do-it-yourself system cleaning
Cleaning the structure without your car visiting a VAZ service center can be done in two ways.
In the first case, you must first buy an injector and carburetor cleaner and o-rings for the system.
After removing the injectors from their regular places, we lower them into a suitable container with injector cleaner. We separately clean the IAC using a carburetor spray. A layer of resin is formed around the nozzle on the structure, which must be carefully cleaned by periodically washing it with a spray.
We carry out internal cleaning using a pump and a power source with a voltage of 3 to 12 volts. We pour cleaner into the pump hose and pump the nozzle under a pressure of 6 atmospheres, simultaneously applying voltage. The voltage can be raised to 9-12 volts until a characteristic crackling sound appears.
Next, in reverse order, we put everything back in place, connect the block and we can start the VAZ engine.
The second method is more economical, but more troublesome. We only purchase liquid for cleaning carburetors. Pour the spray into the pump hose and connect the latter to the system.
A high-quality carburetor spray can provide excellent external reading of the injector, but it will take longer to tinker and soften the coking. Next, we apply voltage to the injector in jerks until it crackles and perform internal cleaning. When installing the injectors in their original place, it is advisable to carefully lubricate the new seals with soapy water, which will increase the tightness.
Periodic maintenance and cleaning of fuel injectors will ensure stable engine operation and economical operation of a VAZ vehicle.
Symptoms of a problem
If you clean and maintain the injector assembly in a timely manner, they can last quite a long time. But when to clean the elements is difficult to determine, so there are a number of signs of malfunction.
- Starting the engine with difficulties or not the first time.
- Loss of power and traction.
- Troubling is a clear sign of uneven fuel supply.
- Increased consumption.
- Jerking of the vehicle in the winter season.
If the above symptoms occur, it is necessary to urgently clean the injectors. After the procedure, the performance of the car engine should return to normal. If this does not happen, then you should look for reasons in another place, such as the fuel pump, fuel filter or cylinders.
Search
There are two ways to clean nozzles
at home There are two ways to clean the nozzles at home
. This will be discussed in this article.
It often happens that on your next trip, when you press the accelerator pedal, you suddenly feel a breakdown or, for example, the car begins to “slip”, and in bad weather it moves very poorly. Well, all this points to the need for a quick cleaning of the injectors. How to clean injectors using viburnum? | Lada. Of course, there are many service stations these days, so you can go straight there. There, specialists will carry out ultrasonic cleaning.
Using an industrial method, you can restore 90% efficiency. Improves dispersion. This means that the fuel droplet size decreases as you cut. Productivity also increases, and fuel begins to be consumed evenly by the nozzles . And, importantly, the sprayer has been restored. This improves engine efficiency, the "response" is noticeable at low speeds, and this has a positive effect on the increase in power.
You may also like
- How to Remove the Seat Upholstery of a Skoda Octavia Tour How to lay out the backrest of the Skoda Octavia seats How to completely fold the back seat in a Skoda Octavia Tour car. Photo report at https://octavia-a4.ru/Skoda Octavia makes a double floor. Getting ready for a long trip. Double flooring in the luggage compartment…
- Fiat Scudo Gearbox Repair
Fiat Scudo. Italian passenger car. The brand has managed to strengthen itself in the global market. Compared to the older models of the 1980s, modern Fiat car models are leaders in quality and durability, which justifies repeated…
How to remove the shock absorber VAZ 2107
Shock absorbers are a suspension element that provides comfort during driving and operation. A number of parameters depend on the choice of their characteristics, and their performance is a guarantee of not only convenience, but also safety when driving. Regulus...
Do-It-Yourself Volvo S80 Steering Rack Repair
Repair of Volvo Volvo Es80Repair of the VOLVO S80 railway; this may require a steering mechanism, which replaces not only the cuffs, but also other parts of the rail. Steering rack. a rather complex mechanism, sensitive to many factors. Mechanism…
How to set the ignition on Java 350
How to install Java 638 ignition |How to install Java 638 BSZ ignition without the help of others | How to install ignition on JAWA638. If something is not clear or I didn’t explain something, ask in the comments! JAWA 350 Ignition timing (contact) Java...
Replacing the Gazelle Business Heater Motor
Gas stove (heater)1. Replacing the motor plate in Gazelle BusinessI will tell you everything in order. The motor speed control resistor is located in the furnace body and is cooled by the furnace motor. Dust and moisture sit on it, at the end of which it...
maintenance stations, a list of services will be offered immediately. I want to know how to check the engine on the injector using. They are ready to measure CO and CH, check the engine at idle, and disassemble the fuel rail. The nozzles will be checked for tightness and performance twice (at the end of the work they will be checked) and will be cleaned with ultrasound. Specialists will also replace the fuel filter and rubber seals. nozzles
. Once the engine is installed, station personnel will adjust the CO and CH as well as the engine at idle.
But there is one problem, all the work of the maintenance
It costs money, and sometimes quite a lot.
Often, motorists love not only to drive their car, but also to “lift it themselves.” On the one hand, this is even a plus, because the costs will be much lower.
How to clean injectors at home
at your discretion?
You may also like
- How to Insulate the Doors of a VAZ 2110 Passengers of a VAZ 2110 car, sitting in the back seat, complain of cold feet in the cold season. If you pay attention to this fact, you will see that even when parked, cool air leaks into the cabin and leaks through the vents...
- Replacing the Alternator Belt ZMZ 406
In order for the engine to work normally in a Volga or Gazelle car, it is necessary to correctly set the time stamps on the ZMZ-406. On cars, a chain or belt can be used as a drive. Each type has many advantages and disadvantages,…
Checking Lada Priora injectors
As mentioned above, both the fuel system ECU and the injector itself can fail. To carry out a complete diagnosis of the ECU, special software is required, which the average motorist simply does not have. Therefore, the only option is to diagnose the machine at a service center. The program, connected to special equipment, will quickly detect ECU errors and correct them.
A full check of Priora injectors is possible only on a special stand
And if problems arise in the mechanical part of the injector, then the diagnostic program will be useless. The maximum that it can do is indicate which cylinder is not working correctly. After this, the car owner can only replace the failed injector on the specified cylinder, since these devices cannot be repaired.
Technical characteristics of the VAZ-21126-77 engine
| VAZ-21126-77 | |
| Installed on cars: | Lada Granta Sport and Lada Kalina Sport |
| Years of production, year | since 2013 |
| Cylinder block material | cast iron |
| Supply system | injector |
| Type | in-line |
| Number of cylinders | 4 |
| Valves per cylinder | 4 |
| Compression ratio | 11 |
| Engine volume, l | 1,6 |
| Power | 120hp/5900rpm |
| Torque | 154Nm/4740rpm |
| Fuel consumption (city/highway/mix), l | -/-/7.8 per 100 km |
| Oil consumption | 50g/1000km |
| Engine oil quantity | 3.5l |
| Engine life (according to the passport/actually) | 200/200 thousand km. |
Let us remind you that in another article we determine the best VAZ engine for a modern Lada car.
Keywords: Lada Granta engine | Lada Kalina engine
8
Found an error? Select it and press Ctrl+Enter..
Coronavirus has an impact on AvtoVAZ, new details
How to use the standard LADA telescopic jack
Review of carpet overlays for rear arches of Lada Largus
Instructions for changing engine oil Lada Largus (K7M and K4M)