Symptoms of Worn Brake Pads
Any breakdown is preceded by a certain sign of malfunction. On Niva this manifests itself as follows:
- Vibration when braking. But these may not necessarily be pads. Much more often the cause of this is a crooked brake disc.
- Deterioration in braking performance.
- Various squeaks when braking.
If at least one of these symptoms appears, it is recommended to check the condition of the pads.
Choosing pads for Niva Chevrolet
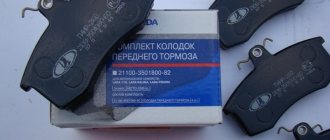
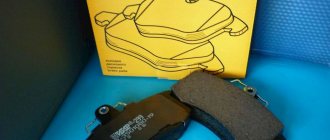
Different types of braking systems are used on the rear and front wheels of this car. Based on this, the pads on them are also different: disc pads on the front wheels, drum pads on the rear ones. The part that plays the main role in the braking process is the pads; they bear the main load and wear out the most during operation.
Pads for Niva Chevrolet
The pads differ from each other in the raw materials used in the manufacturing process, their service life and, accordingly, their price.
When choosing pads, you should focus on the following criteria:
- The lower the heating temperature during braking, the longer the pads will last.
- The need to increase the degree of pads in cold seasons.
- Sounds made by the brake system during braking.
- Maximum service life.
How to choose front pads?
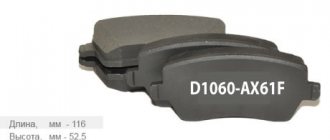
There are many manufacturers that produce linings for Niva 21213 and 21214. Among them are the following:
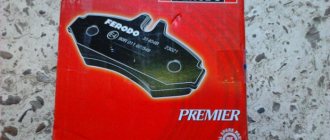
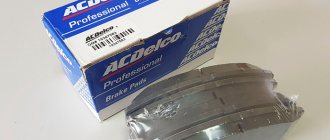
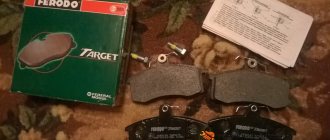
- Original. Catalog number – 21213501090. Price is 556 rubles.
- PILENGA. The price is 401 rubles.
- BOSCH. Price: 839 rubles.
- LUGAS. Price: 853 rubles.
BREMBO is considered to be the best manufacturer of brake pads for Niva 4x4 and Niva Chevrolet. But their price is quite high - 1123 rubles.
The choice of pads should be based on operating conditions. If the car is often used on highways or in the city, then good pads, like Lucas and Brembo, are needed, but for off-road use the original will be enough. The manufacturer of the brake discs is much more important for Niva, since the discs more often suffer from factory defects and often arrive at the store already crooked.
Preparatory stage
The process of removing the front brake pads of a car from a Chevrolet Niva:
- Put the car on the handbrake. It is also recommended to set the vehicle to maximum speed.
- Install chocks under the wheels.
- Remove the bolts on one of the wheels. Sometimes this process turns into an almost impossible task. What could be the problem:
- Deformation of parts or joints. This can happen after a strong impact.
- Applying physical force when tightening bolts without getting into the threads.
- Formation of rust or oxidation of parts.
- Raise the “working” side with a jack.
- Remove the wheel.
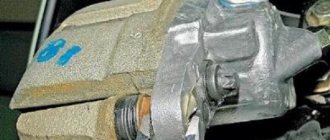
- Unscrew the caliper:
- get rid of the fixing cotter pin;
- remove the clamping brackets. It is also advisable to lubricate them on both sides.
- Remove the brake pads. This can be done using a flathead screwdriver. You need to pry it off from both sides of the disc, helping with your hands if necessary.
- Get rid of burning particles.
- Check the condition of the dust protection cuff.
Don't forget to clean the brake pad housings. This can be done using a pipette or syringe. The sockets also need to be lubricated with copper grease.
Replacement process
To change the brake pads on a Niva, you must perform the following procedure:
Remove the front wheel of the car:
Remove the two brake caliper studs:
First you need to remove the stoppers from them.
Remove the brake caliper mounting:
Remove the old brake pads and install new ones in their place:
Pump out a small portion of the brake fluid and press the pistons inside the brake cylinder. Lubricate the caliper studs and other moving parts of the Niva Travel brake mechanisms with caliper grease:
Reassemble the elements in reverse order.
This procedure is performed similarly for modifications of VAZ 21213, 21214 and Niva Travel.
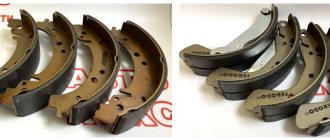
What are pads
The brake pads are arched in the shape of the letter “C” and are installed in the rear wheel drums, where they do their work. The brake pad consists of the following elements:
- main part made of special steel;
- friction lining applied to the brake pads from the back of the head;
- fastening elements, which are various holes.
Rear brake pads
Let's briefly consider the principle of operation of the rear pads. So, the brake pads are located in the rear wheel drums, two in each. They are located with the inner side facing each other, and the outer one, with a friction layer, interacts with the wheel drum. The resulting interacting force, which is accompanied by the release of energy, ultimately leads to the car stopping.
When you press the Niva Chevrolet brake pedal, pressure is created in the brake system, which acts on the pistons of the working cylinders of the front and rear wheels. Next, the so-called extrusion of the pads occurs; the friction part interacts with the moving wheel drum (or disk) and leads to its braking. As the pads wear out, the friction layer wears off. The inside of the drum is also erased.
When is pad replacement necessary?
Before replacing the rear pads, an inspection must be carried out. A malfunctioning handbrake does not mean that the brake pads are urgently needed. They change in the following cases:
- If the thickness of the friction layer is less than the permissible value, that is, less than 1.5 mm.
- There is oil or other liquids on the lining.
- There are cracks, gouges or chips on the layer.
- Poor connection between the gasket and the base.
Only disassembly and detection of one of the above damages indicates the need to replace the pads.
Replacement of brake system elements
Replacing elements requires the availability of basic tools and careful implementation of repair actions. 1) It is necessary to place the Niva Chevrolet car on a flat surface and set second gear to the gearbox. Bars are placed under the wheels to secure the car in a stationary state. Set the handbrake to its lowest position. 2) Using a jack, lift the rear part and remove the wheel. Next, the drum is removed and a picture of the arrangement of the elements of the rear brake system is observed. Now you can remove the brake pads in two ways, let's look at both:
- First extraction path:
- One of the ends of the upper spring is pryed off with a screwdriver and removed.
- The spacer bar installed below the spring is removed.
- The support post, located in the middle, is held by hand on the back side of the shield and, using pliers, the outer post of the front block is rotated until the slots coincide with the protrusions.
- The tension spring with both cups is removed and the stand located on the reverse side is removed.
- The upper part is slightly retracted and the lower spring is removed.
- Next, retracting the rear part, the drive lever is pulled out and freed from the tension cable.
- Second extraction way:
- The support posts are removed from both edges.
- The rear block is pryed up with a screwdriver and removed, after first removing the spacer plate.
- The upper fastenings are removed from the working cylinder.
- The lower spring and both elements are removed along with the spacer bar and the spring.
- The tip of the cable is removed from the lever, and the brake pads assembled with the bar and spring are removed.
- Now holding one element, the spring and spacer are removed.
Next, replacement continues, but before installing new ones, it is necessary to check all parts: springs, spacers, struts. If there is damage or stretching, it is better to replace them. 3) Lubricant is applied to friction points, as well as to the threads of the spacer bar if old spacers are used.
Problems with Niva Chevrolet front calipers
Quite often, Chevrolet Niva owners complain about sounds that should not occur when the brake system is operating.
The situation can be resolved using several methods:
- Change the caliper guides. This can be done by unscrewing all the bolts of the caliper guide elements. If it doesn't come out of the blocks well, you can use physical force and a hammer.
- Treat the caliper mechanism with lubricant. For this process, it is necessary to use a lubricant with a high level of temperature resistance.
- Install quality pads.
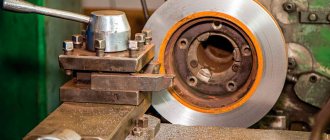
Characteristic differences between different types of brake discs
- Ventilated and non-ventilated: since their technical characteristics practically do not differ from each other, we combine them into one class. The indicator of moisture-heat-gas removal is at an average level. Wheels of this modification are an ideal solution for daily trips, moderate driving style, and minimal off-road use;
- With notches, with through holes: a design with multiple holes in the disk and grooves allows excess heat and moisture to be removed as quickly as possible. noise, gases. Brake discs of this design are installed off-road, at high speeds, and when operating equipment in special climatic conditions.
Obviously, the cost of the first modifications is 10 - 15% cheaper than analogues. Despite the budget price, the service life hardly exceeds 50 - 55 thousand km. Which type of disc is best is up to the car owner to decide.
Replacing wheel bearings and brake discs
Replacing wheel bearings and brake discs
Post by muzolya » Mar 20, 2010, 4:02 pm
Hello everyone again)
I will change Thor. Disks.
1 – Tell me what difficulties and problems may arise?
2 – Will it be necessary to touch the wheel bearing?
Re: Changing brake discs.
Post by Suicide » March 21, 2010, 00:37
Re: Changing brake discs.
Post by ALK » March 21, 2010, 00:42
Who knows what's going on behind the fence of the zoo? ©
Re: Changing brake discs.
Post by muzolya » Mar 21, 2010, 02:06
Re: Changing brake discs.
Post by Suicide » March 21, 2010, 02:57
There are conical bolts. You can knock it inside the disk. But to push a week out of there =) Although, if they try REALLY hard so that not a single one fails..
For example, pull it off with a puller ala for brake drums, then carefully put a new one in place and press it in with nuts.
If you try without taking it apart, then yes.
And so, you put the car on supports, unscrew the ball and steering rods, the hub nut, take out the knuckle, hub, CV joint, knock out the disk... put everything back and adjust the bearings...
Re: Changing brake discs.
Post by Pilot » March 21, 2010, 03:12
Re: Changing brake discs.
Post by Suicide » March 21, 2010, 03:17
Re: Changing brake discs.
Post by Captain » Mar 21, 2010, 04:38
Re: Changing brake discs.
Post by muzolya » Mar 21, 2010, 04:47
Re: Changing brake discs.
Post by Captain » Mar 21, 2010, 04:58
Re: Changing brake discs.
Post by Suicide » March 21, 2010, 05:28
Re: Changing brake discs.
Post by Zhora » March 21, 2010, 1:23 pm
Re: Changing brake discs.
Post by Pilot » March 21, 2010, 2:36 pm
Suicide 1 nut that always unscrews or 3 bolts that always turn sour, which you have to install new ones every once in a while. Captain It's not very convenient to twist those bolts. Well, to me anyway. And so the head is high and normal. Again, they are secured by bending the plate. And here business is 1 minute extra.
Suicide Zhora I wrote it, with a sledgehammer on the lever. With 2-3 hits, anyone will pop up. Let’s not touch the ball anyway!
PS: 2 years of work in the service teaches you to do everything quickly, and not oh! with all sorts of nuts, washers and groovers with a diameter of 8 mm.
Original
| Article/OEM | Price, rub.) |
| 2121-3501070 per unit. | from 1200 |
| 2121-3501070-00 (front, set) | from 2500 |
| 2121-3501071 per unit. | from 1200 |
| 2121-3501070-11 (front, set) | from 2500 |
| Article/OEM | Price, rub.) |
| 2121-3502070-01 per unit. | from 1100 |
| 2121-3502070-00 (front, set) | from 2400 |
| 2121-3502072 per unit. | from 1100 |
| 2121-3502070-24 (front, set) | from 2400 |
This is interesting: Hydraulic compensators on Mitsubishi Lancer 10, valve adjustment