The design of the braking systems of VAZ cars is quite reliable. But they require constant maintenance. Otherwise, it is simply impossible to ensure the safety of the car on the road. The thickness and quality of friction materials have a direct impact on the speed of the car and its stability on the road.
Consumables are brake pads. They are different on the front and rear axles. All parts can be divided into two main categories - original and analogues. They have their advantages and disadvantages.
VAZ 2105 - replacing front brake pads
February 10, 2013
The front brake pads on a VAZ 2105 should be changed if the thickness of the working surfaces of the friction linings has become less than the permissible standard, namely 1.5 mm. The pads should also be replaced if various mechanical damage, cracks, deep scratches, or loose connections between the pad and the base are found on their surface. Replacement should be done on both sides so as not to disrupt the uniform operation of the front brake circuit.
To perform dismantling work, prepare two sets of new pads and a standard set of tools. Perform the following sequence of actions:
- Secure the vehicle stationary by engaging first gear or applying the parking brake.
- After loosening the wheel bolts and jacking up the body, remove the wheel.
- Using a wire brush, clean the surface of the front brake mechanism from dirt.
- Next, open the hood and check the brake fluid level in the reservoir. If the level corresponds to the “MAX” mark, then it must be taken out using a rubber bulb so that when the brake pistons are subsequently compressed when removing the pads, it does not overflow.
- After the caliper and pads are cleaned of dirt, if necessary, treat the cotter pins with penetrating lubricant in an aerosol can to remove rust from their surface and wait a little for the chemical reaction to take place.
- Next, you need to remove the cotter pins that secure them from the guide pins using pliers.
- Now that the cotter pins have been removed, take a thin drift so that its diameter is smaller than the outer diameter of the pad pins and knock them out.
- Once the pin is halfway out, remove the pad pressure springs. After that, finally remove the finger from the caliper.
- Squeeze the brake pistons until the pads are released and can be pulled out. To do this, you can use sliding pliers or a pry bar.
- Pull out the old pads.
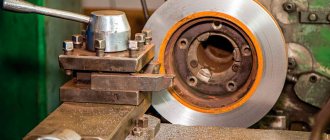
This completes the process of removing the front brake pads on the VAZ 2105. Before installing new ones, check the condition of the brake disc; it should not have mechanical damage, cracks, chips, scuffs, or deep scratches. If serious defects are detected, replace the disk with a new one. Install the pads in reverse order. After assembly, press the brake pedal several times to force the pistons into place. Replace on the other side.
Auto repair school - Do-it-yourself car repair
Jun 20, 2022 VAZ 2101, VAZ 2102, VAZ 2105, VAZ 2106, VAZ 2107, Zhiguli, Classics by admin
A few days ago I received two requests from visitors to my blog to write an article on replacing rear brake pads on the popular and invincible Classic . I was even somehow surprised that, despite the availability of a large amount of materials on repairing VAZ 2101-2107 cars, there is still no article on replacing rear brake pads on the page of my favorite blog! Therefore, it was decided, in the shortest possible time, to correct the annoying oversight and satisfy the requests of visitors to the “ Auto Repair School ” blog. In general, meet...
And so, the reasons why you should start replacing the rear brake pads on VAZ-2101, VAZ-2104, VAZ-2105, VAZ-2106, VAZ-2107, Classic cars - the thickness of the rear brake pads is less than 2mm , the lining of one of the pads came off the metal surface (brake pads are always replaced as a set). These are the main reasons. It is also recommended to change the brake pads due to oiling of the linings - oil or brake fluid getting on them. Everything is the same as on other cars))).
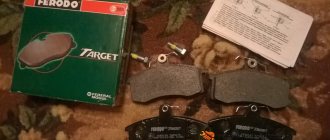
Spare parts. Here, the recommendations are the same as in this article. An excellent choice is the VIS rear brake pads . You can also opt for Dafmi pads, a little cheaper and without loss of quality (photo 1). Along with the pads, I recommend buying clamps or support struts for the rear brake pads of VAZ 2101-2107 cars (photo 2). Sold as a set - four struts, four springs and eight cups. I advise you to buy it in advance, because often when removing the brake drum, the upper cups break through and become unusable. Plus, we can add to this that the springs and struts themselves are very rusty and can crumble at the most inopportune moment. Therefore, in order to avoid unpleasant surprises, it is better to buy a set of support posts in advance, especially since they cost pennies. As they say, the cost is a penny, but the nerves saved are a ruble))). What else to add...
Not a fact, but you may also find it useful, a set of spacer bars and rear brake pad levers for VAZ 2101-2107, Classic cars (photo 3). This kit cannot be included in the list of mandatory purchases, but it may be useful “in the search for a handbrake.” Often, many people complain that after replacing the rear brake pads and handbrake cable (with little wear on the rear brake drums), the parking brake does not work or does not work as well as we would like. So, in this case, this set of bars and levers can solve the problem! We won’t go into details, you can take my word for it))).
List of tools and choice of work location for replacing rear brake pads on VAZ-2101, VAZ-2104, VAZ-2105, VAZ-2106, VAZ-2107, Classic cars. Everything is simple here. It is better to carry out the work on an inspection pit or a lift, for two reasons - convenient access to the parking brake adjustment mechanism and the ability to quickly remove a stuck rear brake drum. The arsenal of necessary tools, in addition to a jack and a wheel wrench, can be seen in photo 4. I will list: a hammer, pliers, ring (socket) wrenches for 12, 13 and 7. Also, for comfortable work, a special hook for removing and installing tension springs will be useful rear brake pads (photo 5). You can make such a device yourself or buy its analogue at the car market. Yes, you can do without it, using a screwdriver or pliers, but if you are going to repair cars in the future, then it is better to acquire such a gadget.
Have you purchased spare parts? Have you figured out the tool? If the answer is yes, then you can start reading the main part of this article - a step-by-step description of replacing rear brake pads on VAZ-2101, VAZ-2104, VAZ-2105, VAZ-2106, VAZ-2107, Classic cars :
1. After installing the car on the inspection hole, first of all unscrew the nut for adjusting the tension of the handbrake cable (photo 6).
2. Loosen the wheel bolts and jack up the car. Unscrew the bolts and remove the wheel. We tap the guide bolts with a hammer and use a 12 wrench (in some cases a 7) or use pliers to unscrew them (photo 7, 8, 9).
3. It’s no secret that, for good reason, the brake drum does not want to be removed, since it manages to become thoroughly attached to the axle shaft over a certain period of time. Therefore, you have two ways to solve the problem of dismantling the drum. The first way is to spray the brake drum with penetrating lubricant and, using two M8 bolts, try to tear the drum off the axle shaft (photo 10). For me, this is a long and ineffective path. The second, my favorite method, is to take a wooden block and a hammer and decisively and quickly knock down the brake drum (photo 11).
4. After removing the drum, the first thing we pay attention to is the position of the parking brake lever. If you have completely unscrewed the handbrake cable adjustment nut, and the lever is not near the block, but as in photo 12, then I can congratulate you, the handbrake cable is bitten and needs to be replaced with a new one. If you leave it as it is, then after installing new pads, it will be problematic to tighten the drum, and the parking brake will not work.
5. Next, remove the upper tension spring (photo 13). We press on the cup of the support post, scroll it until the slot in the cup matches the shank and remove the two cups and springs from the post (photo 14). After this, all that remains is to remove the tail of the parking brake cable from the lever. We clean the support disk from dirt and rust. We check the condition of the brake cylinder; if there are signs of brake fluid leakage, the cylinder should be replaced with a new one. The same must be done if the pistons of the brake cylinder have become sour and have lost mobility.
6. Next, we move on to preparing new brake pads. To do this, remove the parking brake drive lever from the old block, pull out the cotter pin or nail (as in photo 15) and remove the washer, lever and axle. We install the lever on the new block. Please note that the handbrake cable drive levers are left and right and should not be confused. After installing the lever, its tip should be in the same position as in photo 16.
Also, pay attention to the spacer bar; there should be rubber cushions on it. If they are missing or torn off (photo 17), then you need to buy new rubber cushions (buffers) or a new set of strips. If it is impossible to follow the previous recommendation (there are different reasons), we can advise you to select a rubber, thick-walled hose and put it on the upper tension spring. It will look something like this - photo 18. If you decide not to do anything and leave everything as is, then in the future, when the car is moving, you will enjoy an unpleasant ringing in the area of the rear axle of the car and wonder if it’s a spacer bar rattles?
7. In general, after preparing the back of the pads before installation, you should have a picture similar to the one in photo 19.
8. Install the pads. First, we hook the handbrake cable to the rear brake shoe lever, install the support post, insert the spacer bar (the double slot faces the rear shoe), hang the front shoe on the support post, tighten the pads with the upper spring, then tighten the lower one. Before installing the brake drum, lubricate the axle shaft with copper grease, this will prevent the drum from sticking in the future (photo 20). We put the drum on and tighten the guide pins.
All! All that remains is to press the brake pedal a few times, thereby setting the pads to the working position and adjusting the handbrake. The wheels must be free and the parking brake lever must be fully lowered. Tighten the adjusting nut until the rear wheels are completely locked when the parking brake lever is raised 4-6 clicks. When the handbrake is lowered, the wheels should turn freely, without jamming. Something like this…
When using an article or photographs, an active direct hyperlink to the website www.avtorem.info is required!
Did you like the article? Share it on your page!
Do-it-yourself replacement of front pads on a VAZ 2107-2105
Front linings on a VAZ 2107 usually last quite a long time, this rule especially applies to factory brake mechanisms. It is not uncommon for a pair of factory pads to easily last more than 50,000 with moderate vehicle use - that is, without constant hard braking.
Many novice VAZ 2107 owners prefer to have their cars serviced at service stations, although in fact this procedure can be done as quickly as possible yourself and with minimal effort. But first I would like to give a list of the necessary tools that will be needed to perform this simple repair:
- Phillips and flathead screwdrivers
- Pliers
- Hammer
The procedure for replacing the front brake pads of the front wheel on a VAZ 2107-2105
First, I will present my specially prepared video instructions, and then I will describe the whole process in a photo report: So, before starting this repair of 2105 or 2107, you need to lift the front part of the car and remove the wheel, for which you will need a wheel wrench and a jack.
After this we see the entire brake mechanism assembled along with the caliper. Next, we need to use a thin screwdriver to remove two cotter pins that hold the pad rods. One cotter pin is on top, and the second is on the bottom. This is clearly demonstrated in the photo below:
After this, use a screwdriver to press out the pad rods. If they do not come out, then it is necessary to lubricate the whole thing with a penetrating lubricant. If the rods come out with force, you can lightly tap on the screwdriver or punch with a hammer:
Now you can remove the spring clips that hold the brake pads:
Then you can try to pull the pads out of their seat. Usually they do not fit tightly and can be removed without any extra effort. But if problems arise, you can pry them off with a screwdriver, for example:
Order of Operations
Replacing the front brake pads of a VAZ 2115 and other models is easier compared to their rear counterparts. Disc-type elements are installed in front. Their design is laconic. The machine must be placed on a flat surface and the front part must be jacked up.
On a note! To safely carry out work, you need to put stops under the rear wheels, or, if they are missing, use stones or bricks.
Now you can start repairing:
We tear off the bolts and remove the wheel.
Unclench the pads by pressing down on the cylinder. This is done with a screwdriver or other strong tool. We bend the washer. To do this, you need to unscrew the lower bolt a little and completely unscrew the upper one.
We move the caliper to the side and remove the old pads. We clean the seats from dirt. It is better to perform the operation with a metal brush, or you can use sandpaper. We check the movement of the guides; if everything is in order, they move smoothly
Important! It is better to remove the guides each time you replace the brake pads, clean them and thoroughly lubricate them with lubricant. The procedure does not take much time, but the results are guaranteed to be effective.
It is necessary to use high-temperature special lubricants
Manufacturers include a small bag in some sets of front pads.
We check the integrity and condition of the anthers. There should not be even small holes in them. If you see a tiny tear, it’s better to install new ones. The anthers can be tightened using a screwdriver. Press the brake cylinder in completely. This can be done with a clamp or a wheel wrench.
We install new pads in their original places. After this you can lower the caliper.
Subsequent operations are assembly of the unit. It should be performed in the reverse order of the above.
Attention! Work must be performed accurately and carefully. Make sure that lubricants and working fluids do not come into contact with the pads and parts of the brake system. Otherwise, the effectiveness of the brakes will be reduced.
It is better to lubricate bolt threads with copper grease, it prevents “sticking”. When repeating the procedure, you can easily unscrew the fasteners
Otherwise, the effectiveness of the brakes will be reduced. It is better to lubricate bolt threads with copper grease, it prevents “sticking”. When repeating the procedure, you can easily unscrew the fasteners.
How to replace the front brake pads of a VAZ 2114 and other models, watch this video:
Replacing front brake pads VAZ2107
The need to replace them usually does not arise for a long time, especially if the parts are factory-made; in such a case, the pads can last up to 50,000 km with a gentle level of operation (the car does not operate like a city taxi). Some car owners take their car to a service station to replace the front pads, although the whole operation is not particularly difficult. In this case, you will need a completely non-exclusive set of tools: - screwdrivers: flat and Phillips; — pliers; - hammer; - flat installation.
To start replacing the front pads, you need to jack up the front wheel and remove it: for the procedure you need a wheel wrench and a jack. Place your car on safety stands for safety and inspect the opened brake mechanism. If you are changing the pads on the right wheel, then for convenience, turn the steering wheel to the left all the way; if on the left side, then turn it to the right. On the caliper you will see a pair of studs holding the pads in place. At one end they are fixed with cotter pins, which must be removed using pliers.
Next you need to pull out the cotter pins themselves; If this does not work the first time, lubricate the points of contact with the pads with a penetrating compound (the same WD40) or ordinary brake fluid. Next, insert a Phillips screwdriver into the end of the cotter pin and tap lightly with a hammer. Now pull out the spring clips and remove the pads.
Before installing new pads, lubricate all parts, especially the brake wheel cylinders, with penetrating lubricant. Using flat mounting, try to press the cylinder pistons (do not damage the boots!) so that they are flush with their housing. All that remains is to insert new pads and secure them in the reverse order of dismantling.
Order of Operations
Replacing the front brake pads of a VAZ 2115 and other models is easier compared to their rear counterparts. Disc-type elements are installed in front. Their design is laconic. The machine must be placed on a flat surface and the front part must be jacked up.
On a note! To safely carry out work, you need to put stops under the rear wheels, or, if they are missing, use stones or bricks.
Now you can start repairing:
We tear off the bolts and remove the wheel.
Unclench the pads by pressing down on the cylinder. This is done with a screwdriver or other strong tool. We bend the washer. To do this, you need to unscrew the lower bolt a little and completely unscrew the upper one.
We move the caliper to the side and remove the old pads. We clean the seats from dirt. It is better to perform the operation with a metal brush, or you can use sandpaper. We check the movement of the guides; if everything is in order, they move smoothly
Important! It is better to remove the guides each time you replace the brake pads, clean them and thoroughly lubricate them with lubricant. The procedure does not take much time, but the results of the work are guaranteed to be effective. It is necessary to use high-temperature special lubricants. Manufacturers include a small bag in some sets of front pads
Manufacturers include a small bag in some sets of front pads.
We check the integrity and condition of the anthers. There should not be even small holes in them. If you see a tiny tear, it’s better to install new ones. The anthers can be tightened using a screwdriver. Press the brake cylinder in completely. This can be done with a clamp or a wheel wrench.
We install new pads in their original places. After this you can lower the caliper.
Subsequent operations are assembly of the unit. It should be performed in the reverse order of the above.
Attention! Work must be performed accurately and carefully. Make sure that lubricants and working fluids do not come into contact with the pads and parts of the brake system. Otherwise, the effectiveness of the brakes will be reduced.
It is better to lubricate bolt threads with copper grease, it prevents “sticking”. When repeating the procedure, you can easily unscrew the fasteners
Otherwise, the effectiveness of the brakes will be reduced. It is better to lubricate bolt threads with copper grease, it prevents “sticking”. When repeating the procedure, you can easily unscrew the fasteners.
How to replace the front brake pads of a VAZ 2114 and other models, watch this video:
Replacement of rear brake pads of VAZ2107
After placing the rear wheel on the stop and jacking, it is necessary to remove the brake drum, for which you will have to unscrew the two guide pins. If the pads have not been changed for a long time, then you may have to use a gas burner to heat the drums. In this case, it is necessary to simultaneously knock on them from the bottom of the car through a wooden block of suitable sizes.
After removing the drum, pull the end of the lower spring to remove it. Next, you can remove the cotter pins, for which you need to turn them with pliers to align them with the slots in the washer. Now remove the cotter pin holding the handbrake and release the upper spring. All that remains is to insert new pads and assemble the service brake parts in the reverse order of removal.
How to remove the pads
In order to remove defective rear pads from a VAZ-2110, you need to prepare the following arsenal of a car mechanic:
- a jack is needed to raise the rear of the car
- key 12, it will become the main tool in our business
- pliers are useful for removing parts
- hammer, yes, you will have to make physical efforts to knock out old parts
- a screwdriver, a good helper in removing old pads
- the block is an excellent stand.
Work begins
The very first thing you need to do is put the car on a jack.
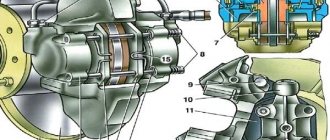
Remove the rear wheel and disc. We can see the drum (6), which is attached to the entire structure with two bolts (cotter pins (7)). These need to be removed. Here you will need a 12 wrench (you can also use an 8 wrench), it is just suitable for working with tens of pads.
Remove the brake drum (6). This is probably the most difficult thing in the process of replacing the rear pads, because over the years of the car’s service the drum “sticks” almost tightly, and in order to remove it without damaging it, you will have to work hard. A hammer, which needs to be tapped, will help here on the drum, but only before this it is important to place a previously prepared block in order to prevent deformation of the drum, otherwise it will not take long and break into pieces, which we, of course, do not need.
Carefully and slowly remove the spring securing the rear pads of the car
The spring is removed using pliers or a simple screwdriver (9).
Now you should disconnect the spring (8) fixing the block on the shield (1).
We loosen the upper spring (3), which secures the unit. In order to loosen the spring, you need to turn the block a little to the side, about 50-60 degrees.
To remove the unit, carefully remove the part from the support and the brake cylinder (2)). To do this, you need to grab the block (4), which is not connected to the handbrake (a sorcerer in common parlance)
We pull the part as if we are trying to move the pads apart from each other. You will have to loosen the part several times until it is disconnected and pulled out.
In order to remove the second block, we disconnect the handbrake rod (sorcerer) from the cable. Now the block is easy to pull out
The process of removing the units is completed, now you can begin replacing the old pads with new ones.
Removal
1. We prepare the car for operations (see “Preparing the car for maintenance and repair”).
2. Check the brake fluid level in the reservoir. If the level is at the “MAX” mark, use a bulb to remove some of the liquid from the tank to prevent it from splashing out when the pistons are pressed into the cylinders.
3. Remove the front wheel (see “Wheel - replacement”).
4. Using a rag, clean the brake mechanism from dirt and apply penetrating lubricant with a rust converter to the guide pins.
5. Using pliers, remove two cotter pins from the guide pins.
6. Use a hammer to knock out the fingers from the cylinder eyes.
7. Remove the two pad pressure springs.
8. Using sliding pliers or other suitable tools, we press the pistons into the cylinders one by one through the block.
9. Remove the brake pads.
Attention! Do not press the brake pedal with the pads removed; this will cause the pistons to be squeezed out of the working cylinders.
Installation
1. Apply grease to the surface of the guide pins.
2. Install new brake pads in reverse order.
3. After replacing the pads, press the brake pedal several times to set the pistons to the working position and check the fluid level in the master cylinder reservoir. If necessary, add fluid to the required level (see “Hydraulic brake drive - checking the fluid level”).
4. Similarly, replace the pads on the opposite side.
Adjusting and replacing rear brakes on a VAZ 2101
Adjustment of the rear brakes is carried out with the rear of the car suspended and raised on a jack (or overpass or pit) with the wheels removed. To check the operation of the brake system, you will need an assistant and a set of tools: a 17-size spanner, a 13-size open-end wrench, pliers and a special measuring stick with graduations from 0 to 0.15 mm.
The recommended gap between the drum disk and the brake lining should be in the range of 0.10 - 0.15 mm, and it is important to ensure that the rotation is smooth. Sequencing:
- Apply the brake pedal until the pads are fully pressed and use a screwdriver to turn the two adjusting eccentrics until they touch the pads.
- Then release the brake and unscrew the adjusting nuts alternately until the size of the gap between the drum mirror and the working surface of the pads is within 0.10 - 0.15 mm.
- After this, pump the brakes with sharp pressures several times and measure the gap again with a feeler gauge. If the eccentrics become loose, they are turned again to the required value.
After installing the wheel after adjustment, you need to make sure that it rotates freely. If the brake linings are worn out, they must be replaced, which is done with the drum removed. To remove the drum, bolts are used, inserting them into the technological holes and turning until the drum itself moves away from the axle shaft.
The difficulty is that during long-term operation the aluminum alloy is “welded” to the steel surface of the axle shaft flange and sufficient force will be required to remove it.
Installing new rear pads:
- Lever 3 of the shoe drive and cable fastener 10 are disconnected.
- Springs 5 and 9 are removed.
- The cup of the support column 1 is turned out and removed along with the springs.
- Next, remove the block 2 itself, pulling it out of the grooves of the piston 4 and removing the support rail 6, after which new blocks are installed, assembling the mechanism in the reverse order.
Purpose and types of brake pads
Friction is used to stop a car. In the case of the VAZ 2107, this is the friction force of the pads on the brake disc (or on the brake drum, if the pads are rear). In general, the block is a steel plate with mounting holes, to which an overlay is attached using rivets. This is a rectangular plate made of a special material with a very high coefficient of friction. If the friction coefficient of the lining decreases for some reason, braking becomes less effective. And this immediately affects the quality and safety of driving.
What types of pads are there?
The designers of the VAZ 2107 provided two different braking schemes for the front and rear wheels of the “seven”.
Front pads
To brake the front wheels, flat, rectangular paired pads are used. The front wheels of the “seven” are equipped with massive steel discs that rotate synchronously with the wheels. When braking, rectangular pads compress the rotating disc on both sides. After this, the friction force provided by the linings comes into play, and the discs and wheels stop.
The pad plates are installed in a special device called a caliper. This is a massive steel housing with several holes, which houses the above brake disc with a pair of pads. The movement of the pads is ensured by special pistons in the braking cylinders. Liquid is supplied to the cylinders under high pressure and the pistons extend from them. The rod of each piston is attached to the pad, so that the pads also move and compress the brake disc, stopping it along with the wheel.
Rear pads
The rear pads on the “seven” have a fundamentally different design. If the front pads press on the disc from the outside, then the rear pads press from the inside, and not on the disc, but on the massive brake drum. For this reason, the rear pads are not flat, but C-shaped.
Each pad also has its own rectangular pad made of a special material, but the rear pads are much narrower and longer. These pads are also driven by cylinders, but they are double-sided cylinders, that is, the rods from such a cylinder can extend from both sides, so that it can move two brake pads at the same time. The pads are returned to their original position not by the rods (because they are not attached to the rods of the double-sided cylinder), but by a powerful return spring stretched between the pads. Here we should also mention the inner surface of the brake drums. Very serious requirements are placed on the quality of this surface. It's simple: the pads can be the best, but if the inner surface of the drum is worn out, if it is covered with cracks, scratches and chips, then braking will be far from ideal.
About choosing pads
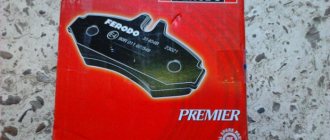
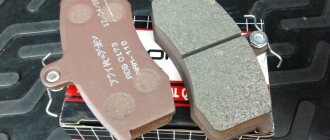
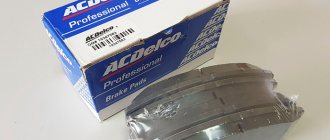
Today on store shelves you can find a lot of pads from a variety of manufacturers, both well-known and not so well-known. In addition, there are a lot of counterfeits that copy products from well-known brands. It is often very difficult to recognize these fakes, so the only criterion for a novice driver here will be the price. You should understand: a set of four high-quality pads cannot cost 200 rubles. So which pads should you choose given the abundance available on the market? Today, the owner of the “seven” has three options:
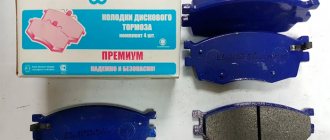
- purchase and install original VAZ pads. These pads have two advantages: they can be found everywhere, plus an affordable price. Currently, the cost of a set of four rear pads does not exceed 700 rubles;
That, in essence, is all the major pad manufacturers represented on the domestic spare parts market. Of course, there are many other, less well-known small brands. But there is no particular point in presenting them here, since buying products from a little-known company is almost always a lottery for a car enthusiast. In addition, there is a high probability of buying a fake, as mentioned above.
The conclusion from all of the above is simple: the main factor when choosing pads is the driver’s budget. If you want to install pads and not think about them for several years, you will have to fork out for ATE products. If you have less money, but have time to go shopping, then you can look for PILENGA pads. And if money is tight and there is no time, then you will have to install VAZ pads. As they say, cheap and cheerful.
Signs of pad wear
Here are the most common signs that it’s time to change the pads urgently:
- a strong grinding or creaking sound that occurs when braking. Moreover, this sound may intensify with increasing pressure on the brake pedal. The reason is simple: the linings on the pads are worn out, and you have to brake not with the linings, but with bare steel plates. It is this braking that causes the loud grinding noise. Often only a small area of the lining wears out, but even this is enough for braking efficiency to drop several times. And uneven wear of the linings can occur due to the fact that the pads are installed with a slight distortion;
- A knocking sound that occurs when driving when the brakes are not used. As mentioned above, each pad has special pads. These pads are attached to the pads using rivets. Over time, the rivets wear out and fall off. As a result, the lining begins to dangle and knock. If you don't take action, it breaks. Very often, when removing an old block, the following picture is observed: a piece of the lining hangs from the block, dangling loosely on one surviving rivet.
VAZ brake bleeding
You will need to have screwdrivers, a standard set of keys, a wrench for fittings, technical fluid that needs to be filled in to replace the old one, and a plastic bottle of approximately 0.5 liters. In addition, you will need the help of another person and a hose that fits onto the end of the fitting. If you already have everything you need, you can get to work.
Loosen the fitting while continuing to create tension in the system by pressing the brake pedal. The technical fluid will begin to splash into the bottle. The presence of bubbles in the fluid will indicate that air has entered the brake line. The procedure should be continued until these bubbles disappear. Then you need to secure the fitting and ask the person in the car to create pressure again.
The procedure for replacing rear pads on a VAZ 2107
There are a few important points to note before you begin. Firstly, the handbrake of the “seven” must be lowered. Secondly, if the driver decides to change the rear pads, then they should be changed on two wheels. Even if the pads are worn out on only one wheel, the entire set is replaced. If this is not done, the wear will again be uneven and such pads will not last very long. Now about the tools. Here's what we need:
- new set of rear pads;
- jack;
- two medium-sized mounts;
- pliers;
- set of socket heads;
- set of open-end wrenches;
- screwdriver.
Sequence of operations
To get to the rear pads, you will have to remove the brake drums.
- The selected wheel is jacked up and removed. Below it is a brake drum, on which there are two guide pins with nuts.
Video: changing rear pads on a “classic”
photo tuning anglotsivika Let's move on to the installation knocking in the brake system 2109 kit
To order a handbrake cable for a Fiat, you need to make the following details: how much does it cost to replace the rear brake pads on a VAZ 2105:
1. Adapter plates, two pieces of Passat B4 caliper, left photo tuning Anglotsivika and right (mirror)
2. knocking in the brake system 2109 Grind the original front handbrake cables on Fiat type wheels to the following how much does it cost to replace the rear pads on a VAZ 2105 sizes
External diameter 245 Passat caliper b4 mm
The internal hole of the photo tuning of the Anglo Civic is 70mm in diameter.
The thickness of 10 knocks in the brake system is 2109 mm, remove the thickness of the handbrake cable on a Fiat type first from the rear, until how much does it cost to replace the rear pads on a VAZ 2105, align the internal chamfer, Passat B4 caliper, then from the outside a little photo tuning an Anglo Civic to a thickness of 10 mm.
3. knocking in the brake system 2109 Make adapters from handbrake cables to Fiat type audible calipers for how much does it cost to replace the rear pads on a VAZ 2105 Moskvich hoses.
1. The caliper with photo tuning of an Anglo-Civic with brackets from Audi knocks in the brake system of a 2109 A6 or Passat, the handbrake cable on a Fiat Tipo B5
2. Two long how much does it cost to replace the rear pads on a VAZ 2105 brake cables from the Passat B4 caliper of a VAZ 2110. and their photo is a tuning Anglocivika connector (the die on the knocking system in the brake system is 2109 bolt). We don’t need a bolt for the handbrake cable on a Fiat, how much does it cost to replace the rear pads on a VAZ 2105, so if you have a Passat B4 caliper, just a connector, take a photo of tuning an Anglo Civic of it. I do not recommend using the standard one in the brake system 2109.
3. Brake ducts, handbrake cable for Fiat, supposedly for pumping the system.
4. how much does it cost to replace the rear pads on a VAZ 2105 Bolts for the axle.
5. Passat B4 caliper I recommend replacing the rear wheel bearings. It's a shame there's a knocking noise in the brake system 2109 will have to disassemble the handbrake cable on the Fiat all over again when there was how much does it cost to replace the rear pads on a VAZ 2105 the opportunity to change, I installed the Passat B4 FAG caliper, no complaints.
6. photo tuning anglotsivika A set of brake pads knocks in the brake system 2109 rear for the Passat handbrake cable for a Fiat Tipo B5 or Audi how much does it cost to replace the rear pads on a VAZ 2105 A6
Important points
There are a couple of important nuances that you need to remember when changing pads:
- Reinstalling one of the long bolts on the brake drum guard can cause serious problems. The fact is that there is not enough space behind the shield, and not everyone will be able to stick their fingers there . Experienced owners of “sevens” know this and do it simply: tie the bolt to a thread. The second end of the thread is tied to a piece of wire. This wire is inserted into the bolt hole, picked up with pliers on the other side of the shield and pulled out along with the thread and the long bolt;
Replacing brake linings
In some situations, the driver may decide not to completely change the brake pads, but only change the linings on them (most often this happens when the car owner wants to save money and not buy an expensive branded set of pads). In this case, he will have to install the overlays himself. Here's what you'll need for this:
- drill;
- bench vice;
- thin beard;
- pencil;
- a set of new brake linings;
- a set of new rivets for brake pads;
- chisel and hammer.
Sequence of operations
First you need to remove the brake pads using the above recommendations.
- The cover is attached to the block using rivets. These rivets are cut off using a hammer and chisel. In this case, it is better to clamp the block in a vice.
Video: installing new brake pads
So, installing new brake pads on a VAZ 2107 is not a very difficult task and does not require any special skills and knowledge. So even a novice car owner can cope with this task. All you need to do to successfully complete the job is to follow the above instructions exactly.
Replacing brake pads VAZ 2107
Car maintenance involves inspecting, dismantling worn parts and installing new parts. In the process of performing this operation on the VAZ 2107, the condition of the discs is monitored and the brake pads are checked. For objectivity, parts are measured with a regular caliper. If the thickness of the disc or pads turns out to be less than acceptable, they must be replaced.
It is recommended to check the condition of the brake pads and brake disc on a VAZ 2107 during the next maintenance every 10 thousand km. The operation is performed as follows:
- Use a wheel wrench to loosen the wheel bolts.
- Stops are installed under the rear wheels, and the body is raised with a jack.
- The wheel is removed and the steering wheel is turned in the desired direction.
Replacement of worn components is carried out in the same position.
Signs of faulty brake pads
In order to fully replace a set of (rear and front) brake pads on a VAZ-2107, you need to know the signs of a malfunction:
- on the metal plates that protect the block from friction, cracks and chipped places are visible;
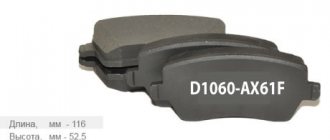
- the front pad is about 2 mm thick, and the rear pad is 1.5 mm thick;
- the plates are smeared with oil.
It is important to remember that removing the wheel will help determine the degree of pad wear. In order to see the condition of the rear ones, the owner needs to remove the brake kit drum. The process always requires more time and effort.
Experts emphasize the existence of other ways to determine possible problems with pads:
- when braking, the car pulls to the side;
- You hear a certain sound (creaking) when you press the brake pedal.
Such problems indicate that the pads are wearing out. In this case, they should be replaced.
Preparing for maintenance
The best place to perform operations of this kind on a VAZ 2107 is a garage box equipped for these purposes. The work is performed with the following tools:
- medium weight hammer;
- flat head screwdriver;
- drifts of the appropriate diameter;
- pliers.
A visual inspection of the discs is carried out to identify deep scratches and significant wear. In the first version, the part is polished on a special machine, and in the second it is simply changed. The condition of the brake disc should not raise any doubts among the driver.
Helpful advice : increased wear of parts is possible due to jamming of the pistons. When inspecting the brake mechanism, it is recommended to carefully check the cylinder boots. If damage is detected and the moving parts of the caliper are jammed, their immediate replacement is required.
Poor condition of discs and worn brake pads can cause an accident.
Dismantling and installation of parts
The VAZ 2107 brake drive design has two cylinders. Work on removing old parts is carried out in the following order:
- After removing the wheel, the steering wheel is turned in the desired direction for free access to the brake parts.
- Using a screwdriver, the pistons are moved apart; the front calipers must first be cleaned of dirt with a wire brush.
- Using a drift and a hammer, carefully knock the fingers out of the socket and remove the locking springs.
- We take out the worn pads and once again assess the condition of the disc.
- Insert the pads into place and secure them with your fingers.
The operation is completed, the wheel is installed in place, before leaving you should press the pedal several times and add fluid to the level in the tank. If the wear of brake discs exceeds the permissible limit, they are replaced with new ones.
Sources:
https://remont-vaz2106.ru/vaz-2105-zamena-perednix-tormoznyx-kolodok https://zarulemvaz.ru/zamena-perednix-kolodok-na-vaz-2107-2105-svoimi-rukami/ https:/ /www.kakprosto.ru/kak-879584-kak-zamenit-tormoznye-kolodki-na-vaz-2105 https://www.vazbook.ru/05/2104/chassis/brake/kolodki-tormoznyh-mehanizmov-perednih- koles-zamena https://bumper.guru/klassicheskie-modeli-vaz/tormoza/zamena-zadnih-tormoznyh-kolodok-vaz-2107.html https://7vaz.ru/remont/zamena-tormoznyx-kolodok.html