Despite the fact that the model has long been discontinued, there are plenty of original spare parts on the car market. In addition to factory parts, a number of components manufactured by foreign companies are available for sale. Obviously, the price of domestic brake system elements will be cheaper than their foreign counterpart.
Brake pads must be replaced if the limiting friction lining thickness of 2.0 mm is reached. Below this norm, there is a high probability of deformation and splitting of the lining into pieces. Elements of the brake system must be immediately replaced if engine, transmission oil or antifreeze gets on the surface.
The process of replacing pads is not complicated; every driver can do it, even without experience in servicing equipment.
Pads for VAZ 2106
Despite the fact that the model has long been discontinued, there are plenty of original spare parts on the car market.
In addition to factory parts, a number of components manufactured by foreign companies are available for sale. Obviously, the price of domestic brake system elements will be cheaper than their foreign counterpart. Brake pads must be replaced if the limiting friction lining thickness of 2.0 mm is reached. Below this norm, there is a high probability of deformation and splitting of the lining into pieces. Elements of the brake system must be immediately replaced if engine, transmission oil or antifreeze gets on the surface.
The process of replacing pads is not complicated; every driver can do it, even without experience in servicing equipment.
How to independently replace the front and rear pads on a VAZ 2106
Preparatory stage: a set of automotive tools, rags, new pads, liquid to remove layers of rust and corrosion.
Sequencing:
- Place the machine on a level platform. The option with an inspection hole or road overpass is excluded due to inefficiency;
- We jack up the front wheel with a hydraulic jack, remove it, having previously installed the wheel chocks;
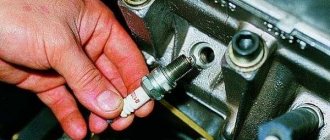
- Use pliers to remove the guide pins. Please pay attention to the pressure springs; they may fly out during the work;
- Using a flat-tip screwdriver, press the slave cylinder into its original position. We widen the gaps to remove the brake pads;
- We remove worn pads, carry out preventive maintenance on the brake caliper, and clean it from rust and deposits. If necessary, use a liquid like WD-40;
- Replace with new pads, assemble the structure in reverse order.
Subject to the above recommendations and the purchase of original spare parts, the service life of the brake system elements is 20 - 25 thousand km. mileage A moderate driving style and average ambient temperatures will increase the service life by 5 - 7 thousand km.
Brake pad malfunctions
The following characteristic signs indicate problems with the pads:
- sounds unusual for brake operation (creaking, squealing, grinding);
- car skidding when braking;
- the need to apply more force to the brake pedal;
- black or metal dust on wheels;
- increased braking time;
- The pedal does not return to its initial position when released.
Brake pads must be changed when the friction material thickness reaches 1.5 mm. If this is not done, a grinding (squealing) sound will occur. In addition, such sounds may be present when installing low-quality pads.
Shocks when braking
The appearance of shocks during braking can be caused either by the condition of the pads themselves, or by a damaged surface of the brake disc or drum, soured pistons in the cylinders, or other malfunctions. To identify the problem, you will need to disassemble the brake mechanism and carefully inspect the parts for wear and damage.
Car skidding
There can be many reasons for skidding - severe wear of the pads, damage to the discs, loose caliper mounts or suspension malfunctions.
Once a situation arose with my car when, while braking, the car began to pull to the side. It would seem that it is necessary to diagnose the brake system. However, after a detailed examination, I discovered that the cause of this phenomenon was a damaged longitudinal rod (rod) of the rear axle. It was simply torn from the eyelet. After replacing this part the problem disappeared.
Video: why a car pulls to the side when braking
Stiff or soft pedal
If you notice that the pedal has become unusually tight or, conversely, soft, then most likely the pads have become unusable and will have to be replaced. Additionally, it is worth inspecting the hoses supplying fluid to the brake cylinders and the cylinders themselves. If the piston sticks in them, then the problem with pedal stiffness may also manifest itself because of this.
Appearance of plaque
Plaque can appear both when using low-quality pads, which leads to their rapid erasure, and with normal parts. However, in the second case it should be minimal. Dust can also appear during aggressive driving, i.e. during sudden starts and braking.
From personal experience I can say that after installing the front pads from AvtoVAZ, I observed black dust on the discs. The plaque was clearly visible because the discs were painted white. From this I can conclude that the appearance of black dust from the process of erasing the pads is a normal phenomenon. Perhaps installing more expensive parts will help get rid of this phenomenon. However, if you are sure that the car has good quality pads and their condition is normal, then there is no reason to worry.
Pedal sticking
If the brake pedal does not move back when pressed, this indicates that the pad is sticking to the disc. This phenomenon is possible in frosty weather when moisture gets on the brake elements, but it would be useful to inspect the pads. If the car cannot be stopped for a long time when you press the pedal, then the reason lies in worn out pads or air getting into the hydraulic system. You will need to inspect the brake components and possibly bleed the brakes.
Brake pads VAZ 2107
The basis of the safety of any car is the braking system, in which the main component is the brake pads. Let’s talk about the purpose of the pads, their types, malfunctions and replacement on the VAZ “Seven” in more detail.
What are they used for?
Today, almost all cars use the same braking systems based on the friction force. The basis of this system is special friction mechanisms located on each wheel. The friction elements in them are brake pads and brake discs or drums. The car is stopped by the action of the brake pads on the drum or disc using a hydraulic drive.
What are there
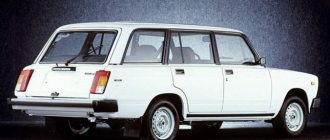
On the seventh model Zhiguli, the brake pads have a design difference, since there are disc brakes in front and drum brakes in the rear.
Front
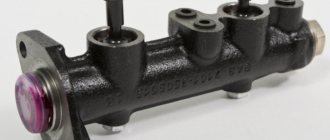
The front brake mechanism of the car is equipped with pads with catalog numbers 2101–3501090. The part has dimensions:
- length 83.9 mm;
- height - 60.5 mm;
- thickness - 15.5 mm.
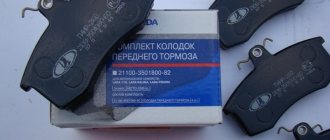
The front brake elements on all classic Zhiguli cars are installed the same. The manufacturer and supplier of original front brake pads for the VAZ conveyor is JSC TIIR.
TIIR brake pads are supplied to the AvtoVAZ assembly line
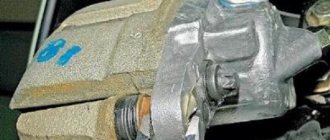
The design of the front brake mechanism is quite simple and consists of the following elements:
- brake disk;
- caliper;
- two working cylinders;
- two pads.
Design of the front brake mechanism of the VAZ 2107: 1 - guide pin; 2 - block; 3 — cylinder (internal); 4 — pad pressure spring; 5 — tube for the brake mechanism; 6 — caliper; 7 - fittings; 8 — tube of working cylinders; 9 — outer cylinder; 10 — disc brake; 11 — casing
The condition of the pads must be periodically monitored to ensure that the thickness of the linings is at least 2 mm. If the friction material is thinner, the pads need to be replaced.
Rear
For drum brakes, pads with article number 2101–3502090 and the following dimensions are used:
- diameter - 250 mm;
- width - 51 mm.
The original product is produced by AvtoVAZ OJSC. As with the front ones, the rear pads are suitable for any classic Zhiguli model.
Products from AvtoVAZ OJSC are used as original rear brake elements.
The rear axle braking mechanism has a simple drum design that works to expand. It consists of the following elements:
- drum;
- brake slave cylinder;
- pads;
- parking brake lever.
Design of the rear brake mechanism of the VAZ 2107: 1 - handbrake cable; 2 — parking brake spacer lever; 3 — rack support cup; 4 - block; 5 - cylinder; 6 — tension block spring (upper); 7 — expansion bar; 8 — tension spring (lower)
Which ones are better
There is no need to skimp when choosing braking elements. In addition, it must be taken into account that the design of the “seven” brake mechanism does not have any modern systems that increase the level of safety. Therefore, you should buy the products in question in accordance with the following indicators:
- the optimal friction coefficient according to GOST is 0.35–0.45;
- minimal impact on brake disc wear;
- long service life of linings;
- absence of extraneous sounds during braking.
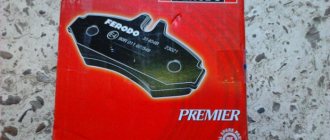
If we consider brake pad manufacturers, then for active driving preference should be given to ATE, Ferodo. For a more relaxed driving style, when overheating and high loads on the braking system are not expected, you can purchase Allied Nippon, Finwhale, "TIIR". When purchasing a brake element, attention should be paid to the composition from which the friction lining is made. If the pad is made using large metal shavings, which is noticeable by characteristic inclusions, the brake disc will wear out much faster, while characteristic indentations will remain on it.
The best option would be those pads that are made from high-tech compounds that prevent rapid wear of the brake disc.
For active driving, it is recommended to install Ferodo front brake pads
General job description and tools
You will need:
- repair pit (can be done on a flat area, driving the front wheel onto a hill. But this greatly complicates the work)
- jack,
- balloon wrench (balloon),
- garage tools: pry bar, wrenches, screwdrivers, etc.
General procedure:
- We hang the front of the car with a jack.
- We remove the wheel.
- We turn the steering wheel all the way so that it is convenient to work.
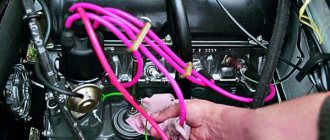
- We find out the scope of work, check the caliper, brake disc, integrity and connections of hoses and pipelines.
- Remove the brake hose from the mount.
- Use a balloon to press out the brake piston.
- The level of brake fluid in the expansion tank will immediately rise.
- We remove the fasteners from the bracket on the caliper and remove the bracket itself.
- We replace the pads.
- We assemble the entire assembly in reverse order.
We present the entire process of replacing brake pads using the example of a VAZ classic car.
What are the best pads to buy for the “seven”
And so, it is clear that you should not skimp on the reliability of the brakes, especially for a car designed in the middle of the last century and devoid of ABS and other bells and whistles to increase safety. Therefore, we recommend buying pads for the VAZ 2107 that best meet the following indicators:
- optimal friction coefficient both in “cold” mode and on warm brakes (0.35-0.45 according to GOST);
- high lining life and minimal wear of the brake disc.
- absence of uncomfortable sounds, creaks, vibrations when braking;
The last point is subjective, since the pads squeak due to the unsatisfactory condition of the brake system as a whole, disc wear, and poor caliper performance, which is also very important to consider when replacing brake pads on a VAZ 2107 yourself.
Under severe operating conditions (under heavy loads and sudden braking), choose solid pads from the following companies: ATE, Ferodo. For more moderate city driving, which does not involve frequent overheating and large constant loads on the brake system, buy “softer” pads - Allied Nippon, Finwhale, TIIR.
When purchasing, it is important to pay attention to the composition of the friction clutch; pads using large metal shavings, in the form of inclusions, can greatly wear out the disc, leaving grooves on it. It is best to buy pads with modern high-tech compounds that will protect the disc from premature wear.
Replacing Front Brake Pads VAZ 2106
replacing front brake pads
for VAZ 2101-VAZ 2107
Welcome! Brake pads. They wear out over time, like any other part of the brake system, but, nevertheless, if you, for example, take brake fluid, you need to replace it every 2-3 years (how to change the fluid, see the article: " replacement
brake pads on a VAZ "), but the situation with the pads is somewhat different, they need to be changed only after they are completely or actually completely worn out, but if you ignore this replacement, car brakes will be much worse, because do not delay with this, but
how to know whether it is time to change the data shoe or not, and we will also explain in this article how to make a fake data shoe
, so to speak, we will try to explain everything on our fingers, but in this case, If you still have any questions, ask them in the comments and we will answer them for you!
The note! To change the brake pads, you first need to bring tools specially equipped: with a hammer, as well as some penetrating oil, which makes the sour calipers even easier to tap (if you don't know what kind of fingers you have) then, a little later, you will understand everything and, thanks to the penetration of the lubricant, you can, for example, use WD-40 if you have it, or something else), and you will also need to stock up on a caliper (not necessary, but better if d), take it with you a medium sized beard (not too big) or you can use a not very sharp screwdriver, instead you will need a jack to lift the car, a wrench that does not support put the car on them or just slide it under the rear wheels so the car doesn't fall off from the jack when replacing it, and take pliers with you, since it will be very difficult to open the pads without them!
Auto repair school - Do-it-yourself car repair
May 24, 2016 VAZ 2101, VAZ 2102, VAZ 2105, VAZ 2106, VAZ 2107, Zhiguli, Classics by admin
An original article from the “ do-it-yourself car repair ” section, which describes in detail the procedure for replacing the front brake pads on VAZ 2101 , 2106 , 2107 .
The time to replace the front brake pads does not come when, when braking, a characteristic grinding sound of metal on broom appears. It's time to change the pads when the thickness of the friction linings reaches 1.5-2.0 mm.
Replacing the pads is not a complicated procedure and can be easily done by a handy person at home and, of course, with a minimum set of tools. To do this you will need: a jack, a wheel wrench, a hammer, pliers, a steel drift (about 8 cm long and 4-5 mm in diameter), pliers or, in extreme cases, a large screwdriver.
Replacement process:
First you need to secure the car with a parking brake or two blocks placed under the rear wheel. Next, jack up the car and remove the wheel. We take out the fixing pins with pliers and knock out the guide pins with a drift, while making sure that the pressure springs do not “fly away”.
Using pliers or a large screwdriver, we press the pistons into the caliper cylinders and remove the worn pads . Assembly is carried out in the reverse order, having previously lubricated the guide pins with machine oil. And the main and very important point: After assembly, do not forget to “bring together” the pads by pressing the brake pedal several times!
When using an article or photographs, an active direct hyperlink to the website www.avtorem.info is required!
Did you like the article? Share it on your page!
How to properly install pressure springs
This question has divided all professional car mechanics into two camps. Some argue that it is correct to install from the brake disc side, as shown on the left side of the screenshot below, others - from the brake cylinder side, as shown on the right.
The first ones say - there is no difference, the main thing is that they press the pads and do not let them “rumble”. The latter explain it this way: if you install “gulls” on the disc side, then with their edges they will press the brake element against the disc, increasing wear on the friction clutch. If you install it with the side facing the cylinders, they seem to move them apart; they do not come into contact with the disk, so there is no wear during movement.
If you think logically, then the second part of the people is right. The springs have a design in which they, with their rounded edges, attract the pads in the direction of their installation. Therefore, if you place the springs on the inside, their edges will slightly press them against the disk - they will wear out faster. If from the inside, then there will be no such effect.
Video on how to shoot a classic in a garage:
How to choose spare parts
How long the pads will last depends on the driver’s driving style (aggressive driving) and the conditions under which the car has to be driven. The pads wear out faster if the car moves around the city in jerks: either picking up speed in fairly short sections, or using sharp braking.
Helpful advice
When choosing spare parts, it is not enough to be guided by cost or brand. When purchasing new brake pads, buy them from the same batch. The features of friction lining production are important. If the spare parts are from the same batch and from the same manufacturer, the difference in the physical and mechanical properties of the material will be insignificant.
The procedure for replacing brake pads is carried out on both wheels of the same axle at once. Wherein:
- Be sure to analyze the condition of the parts and mechanisms of the brake system.
- To assess brake disc wear, use a caliper and measure its thickness.
- Check the entire assembly for damage and find out if the geometry of the structure is broken.
Signs of faulty brake pads
In order to fully replace a set of (rear and front) brake pads on a VAZ-2107, you need to know the signs of a malfunction:
- on the metal plates that protect the block from friction, cracks and chipped places are visible;
- the front pad is about 2 mm thick, and the rear pad is 1.5 mm thick;
- the plates are smeared with oil.
It is important to remember that removing the wheel will help determine the degree of pad wear. In order to see the condition of the rear ones, the owner needs to remove the brake kit drum. The process always requires more time and effort.
Experts emphasize the existence of other ways to determine possible problems with pads:
- when braking, the car pulls to the side;
- You hear a certain sound (creaking) when you press the brake pedal.
Cost of brake pads for VAZ 2107
The price of high-quality pads for a classic VAZ, of course, depends on the lining materials used, technological features and manufacturer.
| Front pads for VAZ 2107 | |||||
| Brand | TIIR (original) | Allied Nippon | AND THOSE | Ferodo | Finwhale |
| vendor code | 2101-3501090 | ADB 0281 | 13.0460-2966.2 | FDB 96 | V 211 |
| Price | 260 rub. | 340 rub. | 700 rub. | 430 rub. | 370 rub. |
| Rear pads for VAZ 2107 | |||
| Brand | VAZ (original) | TSN | ATE |
| vendor code | 2101-3502090 | TSN 2.3.1 | 03.0137-0232.2 |
| Price | 750 rub. | 500 rub. | 1240 rub. |
It should also be emphasized that there are now a lot of fake brake pads for such a popular car. Therefore, choose only trusted manufacturers and pay attention to the packaging, configuration and labeling on the products. For example, the Ferodo brand uses tape with red or blue stripes to seal a box of pads.
Signs of wear on VAZ 2110 pads
- The characteristic sound during braking is a creaking, grinding sound.
- When pressing the pedal, a shaking (beating) is felt; this occurs if the pad is deformed.
- “Sinking” of the brake pedal, change in pedal sensitivity.
- Increased braking distance.
- Black carbon deposits on the wheel rim.
- When the friction lining reaches one and a half millimeters.
Replacing brake pads (linings) yourself will not be particularly difficult, and given the current cost of service at stations, it is also quite important for the average driver. Let's look at this process step by step below.
When and how to change pads on a VAZ 2107
It is better to think about replacing brake pads not when the linings have already worn down to 1.5 mm, and the brake disc has developed to a minimum thickness of 9 mm, but to decide on the choice in advance.
On average, pads last 15-30 thousand. km. depending on driving style. The service life of the brake discs is enough for 2-3 sets of pads.
In order to independently replace the pads with new ones, this should be done for both front wheels at once, that is, as a set. To replace you will need:
- jack;
- wheel wrench for removing wheels;
- pliers;
- screwdriver.
After lifting the body with a jack, you need to secure the rear wheels and the body well with supports to safely remove the front wheel. Next, remove the wheel and check the condition of the brake system, measure the thickness of the disc in different places, and the thickness of the linings.
In order to remove the old pads, you must first pull out the cotter pins that secure the pins in the hub. Next, carefully knock the pins out of the hub with a small screwdriver; you can use WD-40 if they are stuck to the caliper lugs. After these manipulations, remove the springs that secure the pads, move the pistons apart and remove the old pads. More details about replacing the front and rear brake pads on a VAZ 2107 can be found in the video or in the article with step-by-step illustrations on our website!
Replacing rear brake pads on VAZ 2101-2107 cars
Reasons why you should start replacing the rear brake pads on VAZ-2101, VAZ-2104, VAZ-2105, VAZ-2106, VAZ-2107, Classic cars:
- The thickness of the rear brake pads is less than 2mm
- The lining of one of the pads has come off the metal surface (brake pads are always replaced as a set).
- oil or brake fluid getting on the linings.
List of tools and choice of work location for replacing rear brake pads on VAZ-2101-2107, Classic cars. Everything is simple here. It is better to carry out the work on a viewing hole or a lift, for two reasons - convenient access to the parking brake adjustment mechanism and the ability to quickly remove a stuck rear brake drum. An arsenal of necessary tools: a hammer, pliers, socket wrenches for 12, 13 and 7. Also, a special hook for removing and installing the tension springs of the rear brake pads will be useful. You can make such a device yourself or buy its analogue at the car market. Yes, you can do without it, using a screwdriver or pliers, but it will waste much more nerves.
And now the actual process of replacing the rear brake pads:
- After installing the car on the inspection hole, first unscrew the nut for adjusting the tension of the handbrake cable.
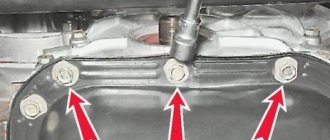
2. Loosen the wheel bolts and jack up the car. Unscrew the bolts and remove the wheel. We tap the guide bolts with a hammer and use a 12 wrench (in some cases a 7) or pliers to unscrew them.
- As a rule, the brake drum does not want to be removed, since it manages to become thoroughly stuck to the axle shaft over a certain period of time. There are two ways to solve the problem of dismantling the drum. The first way is to spray the brake drum with penetrating lubricant and, using two M8 bolts, try to tear the drum off the axle shaft. Often this is a long and ineffective way. The second method is to take a wooden block and a hammer and decisively and quickly knock down the brake drum.
- After removing the drum, the first thing we pay attention to is the position of the parking brake lever. If you have completely unscrewed the handbrake cable adjustment nut, and the lever is not near the block, then the handbrake cable is bitten and must be replaced with a new one. If you leave it as it is, then after installing new pads, it will be problematic to tighten the drum, and the parking brake will not work.
- Next, remove the upper tension spring. We press on the cup of the support post, scroll it until the slot in the cup matches the shank and remove the two cups and springs from the post. After this, all that remains is to remove the tail of the parking brake cable from the lever. We clean the support disk from dirt and rust. We check the condition of the brake cylinder; if there are signs of brake fluid leakage, the cylinder should be replaced with a new one. The same must be done if the pistons of the brake cylinder have become sour and have lost mobility.
- Next, we move on to preparing new brake pads. To do this, remove the parking brake drive lever from the old block, pull out the cotter pin and remove the washer, lever and axle. We install the lever on the new block. Please note that the handbrake cable drive levers are left and right and should not be confused.
- After preparing the back of the pads for installation, you should have something like this:
Next is the installation process:
- We install the pads. First, we hook the handbrake cable to the rear brake shoe lever, install the support post, insert the spacer bar (the double slot faces the rear shoe), hang the front shoe on the support post, tighten the pads with the upper spring, then tighten the lower one. Before installing the brake drum, lubricate the axle shaft with copper grease, this will prevent the drum from sticking in the future. We put the drum on and tighten the guide pins.
All! All that remains is to press the brake pedal a few times, thereby setting the pads to the working position and adjusting the handbrake. The wheels must be free and the parking brake lever must be fully lowered. Tighten the adjusting nut until the rear wheels are completely locked when the parking brake lever is raised 4-6 clicks. When the handbrake is lowered, the wheels should turn freely, without jamming