This review discusses how to connect an alarm system to the central locking of the following cars: VAZ-21099, as well as 2110 and 2115. There are three standard connection schemes: for central locking controlled by negative polarity, positive and variable. But different cars have their own nuances. Sometimes it is necessary to add a fuse to the “+12 Volt” wire, sometimes, on the contrary, this is not required. VAZ locks, in turn, belong to the simplest type, the first. But the standard scheme published on the Internet is not suitable for them.
Signal and central locking, VAZ-2110
This review discusses how to connect an alarm system to the central locking of the following cars: VAZ-21099, as well as 2110 and 2115. There are three standard connection schemes: for central locking controlled by negative polarity, positive and variable. But different cars have their own nuances. Sometimes it is necessary to add a fuse to the “+12 Volt” wire, sometimes, on the contrary, this is not required. VAZ locks, in turn, belong to the simplest type, the first. But the standard scheme published on the Internet is not suitable for them.
Connecting the alarm to
The representative of the Russian automobile industry, the VAZ 2110, has not been produced for several years. However, this model can still be found on our roads, and quite often. The pros and cons of such a car are standard. One thing remains unchanged: in order to preserve the car and make it safe from theft and other problems, you need to work on it. Installing central locking, alarm and other options is sometimes simply necessary. Before connecting the alarm to the central locking on a VAZ 2110, you need to prepare the necessary tools, carefully select the alarm and understand its options. Basically, car enthusiasts who own a “ten” do everything with their own hands. Connecting an alarm system to such a car will cost a pretty penny, and it makes sense to pay for something that you can do yourself, and even in a way that is convenient for your loved one.
Features of the VAZ central lock
Everyone knows that the Lada models listed here use central locking controlled by negative polarity. This literally means the following: we apply “0 Volt” to one wire - all locks close. We apply the same voltage to the other wire (second) - they unlock. This is done in many European cars. What does it mean to “supply “0 Volt”? This means connecting the wire to ground.
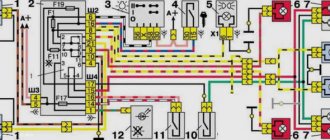
The central locking control unit has the following wiring:
Let's look at the central locking connection diagram, which is implemented “from the factory”:
First, we may decide that the triangular connector (labeled “C”) is suitable for our purposes, since it contains control contacts. But please note that the standard circuit uses a microswitch located in the driver's door. We will break two wires coming from this switch, and the relays built into the alarm unit will be connected to the breaks. Other options are excluded.
Dismantling
If previous activities have shown that intervention in the design of the ignition switch is required, work in any case will begin with dismantling the device.
We have special step-by-step instructions for this.
- To begin, disconnect the negative terminal from the battery of your VAZ 2110. This way you will ensure your safety and the safety of all wiring. You know what the consequences of a short circuit are.
- Next, remove the casing on the steering column. This is how you gain access to the castle.
- If you feel that the rotary switches will interfere with your work, it is better to remove them immediately. The work does not last for a couple of minutes, so all irritants should be put aside.
- Armed with a chisel and hammer, unscrew the mounting bolts with round heads. Don't get confused, they are the only ones there. Try to perform this operation as carefully as possible so as not to knock off the bolt head.
- Now take the pliers and remove the bolts.
- Insert the key into the ignition and turn it to position zero. This will disable the anti-theft system.
- Next in line is the bracket that held the previously removed bolts and the ignition switch itself.
- Mark the contact wires using different colored markers. Otherwise, you can easily mix them up during reassembly.
- Often it is not necessary to completely replace the lock, but only partial repairs. For example, change the backlight bulb, or fix a microswitch problem.
- Disconnect the connectors that used to operate the ignition switch.
- To replace the backlight bulb, disconnect the corresponding connectors, and then use pliers to remove the bulb.
- To replace the contacts, use a screwdriver to press out the special latches.
- Using a shaped screwdriver, unscrew three screws, after which you can remove the rod.
- Use a regular flathead screwdriver to pry out the clips and remove the microswitch.
- Next, new ones are inserted in place of the dismantled elements.
Checking status
Let's make the alarm system and central locking together
Any modern alarm unit is equipped with two relays connected to the central locking control unit. One relay is opening, the second is locking, and the circuit in the general case looks like this:
In our case, the green and white cords coming from the signaling unit will be required, as indicated in the diagram. However, they will not be the only ones needed. We will connect the relay contacts to breaks in the standard wiring. This means there will be not 2, but 4 cords.
Connection diagram for VAZ central locker
Take another look at the diagram published in the first chapter. We will connect the relay to the gap in the white and brown wires going from the microswitch to the central lock control unit. And it is obvious that it is easier to break these wires near the 8-pin connector. The same one shown at the beginning.
To avoid any questions, we will show you what should happen as a result:
The common contacts are connected to the wires coming out of the microphone. The white cord continues with the brown wire coming from the door, and so on. Normally closed contacts are also used, along with normally open ones. These are the features of connecting to the VAZ central locking system.
An approximate sequence of actions performed by the installer:
We have given this sequence to emphasize once again that the relays are switched on between the microphone and the central lock control unit. There is no need to connect any additional devices. As a result, the alarm system will be able to control the state of the locks.
Remember that installation is performed by removing the negative terminal from the battery.
All wires added to the car structure must be protected (use heat-resistant tubes or electrical tape). Twisting is not the worst method to connect two wires. But it's even better to use soldering.
An interesting nuance from practice
It would seem that if a person has experience working with electrical equipment, he can do everything according to the instructions given. As a result, if no mistakes are made, you may encounter an interesting phenomenon. Instead of closing, there will be a short-term locking followed by opening. And vice versa. What to do in this case?
Take a look at what exactly may be present in some of the configurations:
The driver's door may not have an actuator. And then, it is useless to connect the signaling system to the control unit. There is no actuator, which means there is no one to close or open the door and move the microphone lever. Let's say the locks are closed, and then we remove ground from the brown wire and we get the following: the white wire is on ground, unlocking occurs.
We note the following: installation can only be carried out when you are sure that there is an actuator in the driver's door.
There were configurations where only a microswitch was installed. There is no need for arrogance here - adding an actuator will be difficult, since standard wiring must go to it. As you understand, it may not be available from the factory. And it’s unclear what to do then.
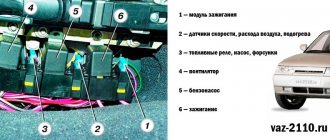
There remains one unanswered question - where exactly the central locking control unit is located. In these VAZ models, if there is a central locking system, then there is also a control unit. And it is located under the torpedo cover, next to the driver, on the right:
Installing a block for automatic engine start
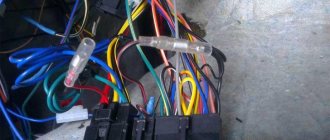
The device is assembled. The wires are signed. I also insulated everything and signed all the wires. I like order in everything, and I advise you to do the same.
In the car, I first removed one terminal from the battery so as not to get hurt myself and only then got into the wiring.
I connected the wires of our device to the engine starting system block. First, I took out the car alarm unit and identified the wires from the additional channels, and also figured out the sensors and door locks. I have a blue wire going to the handbrake. I didn’t capture the process itself on camera, but I think everything is clear here.
As a result, everything is connected perfectly for me.
I only have one green wire left free. You can stick it anywhere. I even thought about putting it on the radio. I imagined how I find my car in the dark by the sounds of my favorite radio wave - I smiled. Otherwise, it can be placed on headlights or side lights - it’s more convenient to look for. I haven't decided yet.
Having removed the steering casing, I hid the remote start unit there - it fit! That's the whole installation!
Using autorun in practice
I launched it from home. Here's my procedure:
- The VAZ 2109 stove does not work: reasons, what fuse
- Disarmed.
- I start the fuel pump - this is my first additional channel. Be careful not to get confused!
- I block the doors.
- I'm starting the starter. The first time I didn't have enough 3 seconds for the engine to start, so I pressed the button twice.
- The engine started up and began to purr, making me happy.
- I go to the car and remove the lock from the key fob.
- I get into the car, insert the key into the ignition, turn it one notch.
- I take the handbrake off and listen to my car stall (the car thieves won’t be able to get away - it’s a trick).
- You can go.
If you change your mind or decide to reschedule the trip, go to the car, take the handbrake off and turn it off. (Although, as an option, you can install an additional relay for this purpose - a simple matter).
So, I have outlined everything, I hope it is accessible and understandable. This is my first master class, so I accept all comments, take into account wishes, and accept praise!
Didn't find the information you are looking for? on our forum.
If you find an error, please select a piece of text and press Ctrl+Enter.
We recommend reading:
Cast iron drums for the VAZ 2114 Operating temperature of the VAZ 2115 engine, 8 valves, injector Why does the heated seats on the VAZ 2114 not work VAZ 2114 gasoline consumption, highway, city, mixed cycleVAZ 2110 checking the DPZ with a multimeterReplacing thresholds on the VAZ 2107VAZ 2109 carburetor engine smokes, causes and malfunctionsHow to disassemble the caliper on VAZ 2107
Similar articles
What kind of oil to pour into the VAZ 2115 engine? Choosing oil for the VAZ 2110 VAZ color chart, codes, names, descriptions VAZ error codes - table with a list of all errors–>
- 3.5Rating
- 7506Views
Winter is no longer tanning and the time will come again to dream of being able to get into a car with the engine already turned on and warmed up in the chilly twilight of a December morning...
Unfortunately, most budget-class alarm systems are not equipped with a remote car start function (the so-called autostart), however, the traditional presence in such systems of free additional channels allows, with little effort and money, to implement this opportunity on cars of any brand and, in any case, , on a VAZ 2110.
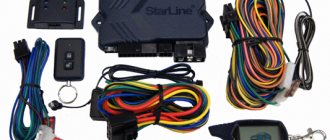
In order to provide remote start of the VAZ 2110 you will need:
- Alarm system with feedback already installed on the car and equipped with a key fob with at least two additional buttons (for example, for panic mode and opening the trunk);
- Four-contact relays in the amount of four pieces;
- Connection blocks for connecting relays;
- Insulating casings, electrical tape, and a soldering iron with all the necessary consumables.
Practical implementation of the autostart scheme
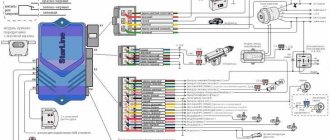
Below is a schematic electrical diagram of autostart with color-coded wires for almost all variants of the VAZ 2110 car (to be on the safe side, you can conduct a comparative analysis with the wiring diagram of your particular type of car).
In order to implement the circuit in hardware, first of all we fasten the pads in one row using electrical tape, after which, if the pads have more than 4 contacts, we remove the extra wires from them (this way there is less chance of mixing something up). Also, in order to make our device more compact, the wires of the pads can be shortened somewhat. Next, we carry out soldering in strict accordance with the diagram, protecting the joints with cambrics and insulating tape.
As mentioned above, this device is designed to work with standard feedback signaling having two additional channels.
There are usually no problems with having at least one free channel, but to use the second channel you often have to limit yourself in some way (say, refuse to open the trunk remotely). The first and second relays are connected to the indicated second and first channels, respectively. We connect the fourth relay to the handbrake limit switch - on a VAZ 2110 this is most conveniently done on the universal connection block of the instrument cluster. This relay is designed to prevent relays No. 2 and No. 3 from turning off after the first alarm channel opens (on some alarm systems this happens in less than three seconds, which is clearly not enough). Relay No. 2 supplies +12V voltage from the ignition switch (thick pink wire) to the power circuit of the electric pump and to turn on the instrument cluster.
As for relay No. 3 (with a green wire coming from it), then, at your discretion, it can be connected to the headlights or dimensions. This solution will make it easier to find a car in the dark and will confirm from a distance that the device has been activated.
And finally, relay No. 1 plays an important role in starting the starter. It is this relay that supplies current to the starter after the second alarm channel circuit is closed.
For ease of placement in a car, the assembled device is placed in a case of a suitable size, or, without further ado, all four relays can be connected to each other with ordinary electrical tape (the main thing is not to forget to clearly mark the output terminals). At the next stage, all the above wires are connected (after first disconnecting the power wires from the battery). The additional unit itself is located behind the dashboard or in the free space of the steering casing.
Automatic startup sequence (using the Tomahawk alarm as an example)
- We disarm the car;
- Using the button of the first additional channel, we start the fuel pump;
- Using the control button for the second additional channel, we start the engine (if the pause in the channel is too short, try again).
Please note that without installing the car on the handbrake, the car will not start remotely (and therefore will not move without a driver in the cabin). According to the logic of the operation of some security systems, after removing the handbrake, the car may stall. You shouldn’t be afraid of such situations - this is just another step of protection from intruders (as a rule, to avoid turning off the engine, before removing the handbrake, you should insert the key into the lock and turn it one notch).
Similar materials
Where is the alarm unit located?
The block of the anti-theft complex can be located anywhere in the car, because when installing a security system, installers are guided by the rule: the block is placed in a place inaccessible to intruders, otherwise the anti-theft system will not be able to perform its function.
Locate car alarms in typical locations where they are most often installed by professionals. The alarm is usually installed and placed inside the cabin.
To find an alarm in your car, it is recommended that you first look under the dashboard. Automakers often leave enough space underneath to install additional equipment. This installation method is also convenient because power is supplied to the dashboard from the battery.
In some cases, the alarm unit is installed under the inner trim of the driver's door. You can also find the unit under the front passenger door interior panel. You can look under the panel located near the handbrake. Installers rarely install an anti-theft system near the clutch, since this mechanism operates quite often and can damage the anti-theft wires. For the same reasons, the anti-theft system unit is rarely installed in the engine compartment.
You can look for the block under the driver's seat. This installation location is sometimes chosen by motorists who install anti-theft devices themselves. Professional installers will not install the unit in such a place.
If the car is equipped with standard anti-theft electronics, the location of its installation is described in the car's operating instructions.
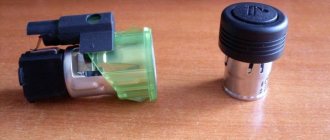
What does it look like
The power supply can have a very different appearance. In most cases, it looks like a small rectangular box made of black plastic with a lot of wires attached to it.
How to find limit switches quickly and without any problems
Many people do not quite know where the limit switches are located in Kalina, Niva or other cars. But when you have to install an alarm, searching for them takes quite a lot of time. In order not to waste extra time on inspecting the interior of your own car, you should use the following tips:
- find the documentation for the car and look at the layout of various systems, devices, limit switches and wires that lead to them;
- look at the instructions for the alarm system - often this is where you can find the location of connection points such as limit switches;
- look for a layout diagram for a Niva, Viburnum or other vehicle models on the Internet;
- look for these points in the car interior using a voltmeter.
These methods will help the car enthusiast find absolutely all limit switches if he needs to connect an alarm system or replace these switches with new devices. The limit switches are designed to make it easier for the driver to deal with different systems of the car, and it doesn’t matter whether it’s a domestic car - Niva, Kalina or foreign models, everything will be as comfortable as possible.
Who can you trust to install an anti-theft device?
There are the following options for installing an alarm on a VAZ 2110:
When installing this security system yourself, you must have certain knowledge and skills in the field of electronics and car design. The same requirements apply to friends, colleagues and acquaintances involved in these technological operations. The most successful option would be to shell out 2 – 2.5 thousand rubles and contact specialists in order to avoid failure or incorrect installation of fairly expensive equipment.
Some technical features of choosing a car alarm for a VAZ 2110
The anti-theft device must be selected with power outputs for direction indicators, repeaters and side light indicators. Such outputs are not suitable for low currents; there is a high probability of wiring burnout. If the system is structurally equipped with one power wire, then we select the side lights as the alarm indicator; if there are two wires, we connect the turn indicators and their repeaters on the wings. Such a security device must also have power outputs for the door locks. A pulse value of 0.8 s is sufficient for a VAZ 2110. A good car alarm for a VAZ 2110, a photo of which is posted on our website, should have different buttons for turning on and off the “anti-theft”; it is recommended to select a system with a dynamically changing radio pulse code, which negates the scanning recording the code of car opening by car thieves. We choose an ordinary, autonomous type of sound siren; for security alarm systems with reverse scanning, an isolated monotone siren with a power of 20 W is required.
LCD key fob for car alarm StarLine
Tools required to install a car alarm on a VAZ 2110
These tools include:
Selecting a location for installing a security device
During this procedure, fulfill the following conditions:
car alarm control unit
We believe that it is better to secure the control unit behind the instrument panel, having previously covered it with foam rubber cloth and leave open spaces for connectors for connection.
What's what or how it works
I take the Tomahawk 7000 - this is my alarm system. I have two additional channels on it. One of the channels is free and intended for any use. This is stated directly in the instructions. In general, it has feedback and two additional channels activated from the key fob.
One more thing. I hope that everyone remembers and understands that the alarm will only give us a “minus”. It will not be able to supply electrical voltage to the relay.
We enable the rightmost relay to prevent the next two relays in the middle from tripping when the auxiliary alarm channel opens.
So, we start working with relay 2, which is located on the edge. I connected it to the end of the handbrake, connecting it to the electrical connector that fits into the instrument cluster. We close our chain. At this point, the middle relay begins transferring power from the thick red wire. It is supplied from there to the instrument cluster and the fuel pump wire.
The automatic start unit must be connected to the ignition switch connector. Since there are 8 wires, 3 of which are thick, we connect to them.
The leftmost relay will turn on the starter. We close the second channel of the car alarm. The pleasant roar of the engine is our relay that helps supply electric current to the starter.
- VAZ 2115 starter relay - where is the VAZ 2115 starter relay located
The second middle relay with an outgoing green wire can be connected to the headlights or parking lights to make it easier to search for the car at night. I haven’t decided where to connect it yet, so I left it just like that.
Important point! It is necessary to install a program neutral sensor for those who have a car alarm with an automatic engine start function, otherwise your car will drive away on autopilot!
Design and principle of operation
The alarm control unit is the central element in the entire anti-theft system, interacting between all sensors and anti-theft subsystems. A control unit was built based on a central microprocessor that receives signals from sensors and control panels, processes information from them and makes decisions on further actions according to a pre-programmed algorithm of actions.
When installing an anti-theft system, security sensors are built into different parts of the car that detect vibrations, impacts and other external influences on the car. When information about an unusual situation is received from such sensors, an electronic signal is transmitted to the control unit. After processing this signal, the central processor turns on a sound and light alert about an attempted theft, transmits information to the control panel, and blocks those locks that were not closed at the time of operation.
When a coded signal is received from the remote control, the central processor can turn the car's security mode on or off, while locking or unlocking the car's doors and trunk.
The alarm control unit is equipped with a permanent storage device - a hard disk memory that can store information even in the absence of power. This is necessary so that in any situation all the standard settings and codes that are needed to disarm the car and arm it are saved.
VAZ 2114 door switch wire
Door limit switch VAZ 2114: use, modernization and replacement
Limit switches - also known as limit switches - are electromechanical devices whose task is to open/close an electrical circuit. Although the device was originally developed for use in engineering structures, but with the increase in the number of electronics in vehicles, they began to be widely used in their control system.
So, since the 50s of the last century, almost all cars were equipped with an automatic system for turning on the light in the cabin when the front door was opened, but with the progress of progress, an increasing number of tasks began to be assigned to the limit switches used in the car, for example, the limit switches of the VAZ 2114 are located on the entrance doors and trunk.
Correct modernization of VAZ 2114 limit switches
The most common problem in cars of this series is that the driver's door switch of the VAZ 2114 wears out and then does not work, so there is no need to talk about the normal operation of sensors, alarms and even lights in the cabin.
The second most unpleasant problem that VAZ 2114 car owners may encounter is that the standard limit switches do not report that the door is not closed when it is slightly open by one click of the limit switch. Such a design flaw not only does not allow the car owner to be confident that all doors are closed, but also leaves a significant loophole for intruders.
Therefore, if you want the signal to be triggered even when the door is slightly open, you will have to slightly change its design with your own hands.
IMPORTANT! The design of the rear door limit switches on the VAZ 2114 differs from the design of the front doors; this should be taken into account when selecting materials and methods for solving the problem.
The essence of the problem is to reduce the stroke length of the limit switch to obtain the required response of the entire electrical network.
The simplest solution from available materials is the following modernization:
- We take the upholstery piston of your own car.
- We replace the standard “washer” with this piston.
- Using available means, measure the distance between the edge of the cap with the base; it should be 1 mm.
- We fix the design and check it; the light bulb in the cabin will act as a kind of quality control; it should light up after one click.
Typical problems and their solutions
Electronic anti-theft systems of a car are subject to breakdowns and various types of malfunctions. In some cases, technical problems that arise can be resolved independently.
First of all, due to incorrect placement of additional shock and volume sensors, they may malfunction, and the alarm will go off without obvious reasons. An alarm that constantly goes off when the car owner is absent for a long time can completely discharge the battery and deprive the owner of the opportunity to start the engine. To eliminate this problem, it is recommended to check the correct placement and connection of the shock and volume sensors and, if necessary, reconnect them in accordance with the rules. Replace faulty sensors.
The alarm may not work correctly due to a large amount of interference interfering with the operation of the remote control. There are several solutions to solve this problem:
If the anti-theft system does not respond to commands from the remote control, you should start troubleshooting the possible problem with the key fob. If commands from the key fob are well received up close, but do not work from a long distance, it means that the internal battery on the remote control has run out. You can replace it yourself.
Many remote controls have a battery charge indicator. If there is no such indicator, it is recommended to start fixing the problem by replacing the battery or charging the key fob.
If the remote control does not function with a fully charged battery, you need to check the alarm operation using a spare remote control. It is possible that the remote control itself is faulty. If the spare key fob controls the anti-theft system well, then it is recommended to replace the main one.
In cases where independent actions do not help to establish the operation of the anti-theft system, it is recommended to contact the service department.
This review discusses how to connect an alarm system to the central locking of the following cars: VAZ-21099, as well as 2110 and 2115. There are three standard connection schemes: for central locking controlled by negative polarity, positive and variable. But different cars have their own nuances. Sometimes it is necessary to add a fuse to the “+12 Volt” wire, sometimes, on the contrary, this is not required. VAZ locks, in turn, belong to the simplest type, the first. But the standard scheme published on the Internet is not suitable for them.
Problems in the operation of the activator electric drive
The central locking actuator is quite fragile and does not tolerate overload. The activator body, made of plastic, can easily melt if the frequency of door closing is excessively high. The duration of the control pulse also plays an equally important role. Try to always remember about the extreme fragility of the activator and not to load it during operation.
It is easy to guess that the activator is located in each individual door of the car. If the body of one of them melts due to overheating of the electric drive commutator, this becomes the cause of many problems:
- the activator on individual doors stops functioning;
- Constant overloads in a jammed electric drive cause the fuse to fail.
The actuator mechanism is entirely made of plastic. Gears can easily wear out and break during operation, or melt when the commutator overheats. As a result, when the central locking operates, characteristic creaking sounds are heard - a sure sign of imminent failure of the activators. Likewise, if the gearbox of the mechanism is humming, but the doors do not open or close.
Malfunctions of this kind can also be associated with all sorts of defects in the gearmotor and its traction. If you have recently replaced your central locking system, the reason may be that it was installed incorrectly. The mechanism may also be incorrectly adjusted or the fastening may be damaged. In any case, the door trim should be removed and checked visually.
Selecting a security alarm for installation on a domestic car
The function of remotely closing and unlocking all car doors is mandatory for all types of modern anti-theft alarms. It is impossible to install an alarm without a central lock, so car owners are forced to install a central lock before purchasing a security system.
The trade offers motorists hundreds of models of anti-theft alarms in a wide price and functional range.
When choosing a car alarm for installation on domestic cars, the main selection criteria for car owners are:
Owners of VAZ-made models do not need to worry about the difficulties of flashing factory protections or bypassing standard immobilizers. However, experts do not recommend that novice car tuning enthusiasts begin work by independently installing security systems equipped with:
If you want to install a full set of security options on a VAZ model, you will have to contact a specialized service, where they can install additional equipment.
The easiest way to install a simple car alarm with a minimum set of functions on your own.
On sale you will find dozens of simple anti-theft car alarms that are available for self-installation on VAZ models; all you have to do is choose the ones that are suitable for the price and set of functions.
Do-it-yourself autostart of a VAZ engine
In the bitter cold, sometimes I, like many car enthusiasts, feel cold while warming up my car. Somehow I came up with the idea of building such a device myself so that I could start the engine of my car from the alarm key fob. To do this, I decided to use additional channels. You press the button and the engine turns on. The car warms up smoothly. Agree that it is quite unpleasant to shake in a cold car. And with remote start, this problem disappears.
So, before we begin installing the device, let’s consider what materials we will need.
Here's what I used to assemble the device:
- Car alarm with feedback. On the key fob of such an alarm there are two extra buttons on which you can set modes or change them to others. I have such buttons free.
- Four contact relays – 4 pieces. We'll buy it at a car parts store for prices ranging from 60 to 90 rubles.
- The pads for these same relays are also 4 pieces. We buy it there at prices ranging from 20 to 40 rubles.
- Connection diagram, soldering iron, insulating tape.
Don't forget to bring your big wish!
Features of the VAZ central lock
Everyone knows that the Lada models listed here use central locking controlled by negative polarity. This literally means the following: we apply “0 Volt” to one wire - all locks close. We apply the same voltage to the other wire (second) - they unlock. This is done in many European cars. What does it mean to “supply “0 Volt”? This means connecting the wire to ground.
The central locking control unit has the following wiring:
Let's look at the central locking connection diagram, which is implemented “from the factory”:
First, we may decide that the triangular connector (labeled “C”) is suitable for our purposes, since it contains control contacts. But please note that the standard circuit uses a microswitch located in the driver's door. We will break two wires coming from this switch, and the relays built into the alarm unit will be connected to the breaks. Other options are excluded.
Without autostart
Most Starline B9 alarm options are not equipped with an automatic engine start function. Here it is important to correctly connect all the wires to the car components, as well as correctly connect them to the central control unit.
You should first connect the orange-violet wire directly to the handbrake push-button switch. When the parking brake is raised, it closes on the car body. It is also important to open one of the standard circuits, and then connect an additional relay into the gap. An example of the connection is posted below.
Additionally, a motor blocking circuit is connected. Here, too, you need to open the car circuit, and connect a black and yellow cable (thin) from the ignition switch side and a thick wire of the same color from the starter into the gap.
You can also connect a digital engine locking radio relay to this circuit for enhanced protection against theft. The corresponding relay is already included in the Starline B9 kit. After installation, you need to remember it using a special programming algorithm. Optionally, the alarm kit includes a GSM module, which is capable of sending signals to determine the location of the car.
The system must be connected to the side headlights and interior lighting for user convenience and to provide light indication assistance during the programming of functions. The blue wire (interior lighting) is responsible for this option, and the yellow-red cable can be used to connect to the low beam headlights, as well as activate the “Light Track” option. Below is a connection diagram in both cases.
Lock connection diagram
Having a power outlet equipped with a fuse, these cables are connected directly to the alarm relay. We would be lying if we did not say that in reality there is another option for installing the alarm.
The approximate price for a regular central locking activator with 2 terminals, a two-wire electric lock, is RUB.
For each door, repeat the steps VAZ central locking To better understand the idea of connecting an alarm, it is still worth studying the instructions included with it.
Personal experience is described here, so you always have the opportunity to do something better, more beautiful, more convenient, and so on. So, in the diagram, the index X2 indicates the six-pin control connector of the BUBD, which was mentioned at the beginning.
You can see the VAZ central locking diagram in the picture. The central locking functions operate remotely at a distance of up to 10 meters. Single-wire central lock control circuit. Let's look at how to connect the central locking, as well as installing a simple remote control. It will cost more, but it turns out to be 3 in one: door locking, connection of a security alarm and automatic raising of lowered windows.
Work execution algorithm
Now in great detail about installing autorun.
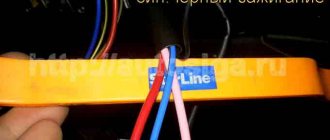
First, I eradicated the yellow (located in the center) wire from the purchased pads. We don't need him at all. It turned out that there is now an equal number of wires on the relay and on the blocks.
Secondly, I wound 4 pads one after another with insulating tape, so they can be cleverly soldered.
Thirdly, the wires of the pads were reduced by 60%, again, soldering is very convenient, and the appearance of the device has become prettier.
- VAZ 2107 starter relay: purpose, malfunctions and repairs
Let's make the alarm system and central locking together
Any modern alarm unit is equipped with two relays connected to the central locking control unit. One relay is opening, the second is locking, and the circuit in the general case looks like this:
In our case, the green and white cords coming from the signaling unit will be required, as indicated in the diagram. However, they will not be the only ones needed. We will connect the relay contacts to breaks in the standard wiring. This means there will be not 2, but 4 cords.
Connection diagram for VAZ central locker
Take another look at the diagram published in the first chapter. We will connect the relay to the gap in the white and brown wires going from the microswitch to the central lock control unit. And it is obvious that it is easier to break these wires near the 8-pin connector. The same one shown at the beginning.
To avoid any questions, we will show you what should happen as a result:
The common contacts are connected to the wires coming out of the microphone. The white cord continues with the brown wire coming from the door, and so on. Normally closed contacts are also used, along with normally open ones. These are the features of connecting to the VAZ central locking system.
An approximate sequence of actions performed by the installer:
We have given this sequence to emphasize once again that the relays are switched on between the microphone and the central lock control unit. There is no need to connect any additional devices. As a result, the alarm system will be able to control the state of the locks.
Remember that installation is performed by removing the negative terminal from the battery.
All wires added to the car structure must be protected (use heat-resistant tubes or electrical tape). Twisting is not the worst method to connect two wires. But it's even better to use soldering.
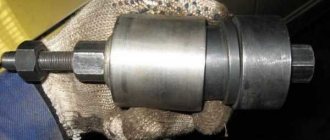
Reasons for replacement
It is necessary to replace the entire lock or just the contact group, depending on the nature of the breakdown and the situation with your car. Therefore, we will consider options when replacement may still be required.
| Reason for replacement | Your actions |
| There was an attempted theft, as a result of which the integrity of the lock was compromised | In this case, only the contact group and the cylinder can be replaced, since the lock itself is most likely intact. Lower costs and required repair efficiency. Although experts advise purchasing a new lock right away and installing it |
| The keys were lost and there was no spare | There is no point in trying to find a master who will turn you exactly the same key as before. You will have to purchase a lock and install it on your car |
| Problems with contacts or contact group | It is not difficult to check whether this is really the problem. Turn off the battery by disconnecting the negative terminal, then remove the cover under the steering column and check the wires for resistance. Switch the key alternately to positions 1,2 and 3, while measuring the resistance. If the ohmmeter shows “zero”, then the lock really has a problem and needs to be replaced. |
| There was a desire to improve the castle | Often, car owners replace the standard ignition with a more modern one, equipped with lighting. It is not expensive, but it is convenient to use in the dark. No need to fumble for the key slot |
When checking the contact group, be sure to disconnect the negative terminal from the battery, otherwise a short circuit will occur, and not only the contactor will have to be replaced.
Pinout in photo
Circuit and pinout
First of all, get acquainted with the lock diagram and wire connection diagram, which will allow you to better understand the features of the 3Z pinout.
As you can see, the pinout includes 8 elements. What does each of them mean and what functions are they responsible for? We'll figure out.
Enabling and disabling APS-4
The immobilizer, even if it is activated, does not interfere with the operation of any car alarm that you decide to connect additionally. The only thing is that autostart will be impossible with it. It is possible to install a crawler or activate the Valet mode. But in the second case, the engine can be started with a blank, and in the first case, you will need to hack the alarm system.
Shutdown procedure
Of course, here we are looking at how Valet mode is turned on. It will be easy to use:
A sequence is considered that allows you to programmatically disable the APS unit. For the Bosch MP7 controller, step 9 looks different.
Now it will be said exactly how.
Imagine that step "9" is replaced by the following three:
Using this sequence, the Valet mode is installed in those cars where the MP-7 ECU controller is used. VAZ cars with this controller are not uncommon. By the way, the statement almost does not apply to the 2110 family: the “Ten” was more often equipped with a domestic ECU unit.
Source
And finally, some tips
If you install an alarm system on a VAZ 2110 yourself, you must fulfill the following requirements:
- Do not leave any labels about its brand and technical data on the installed anti-theft system. Car thieves are also experts in this matter.
- Do not advertise the presence of an anti-theft remote control, which can easily determine its type.
- When leaving your car at a repair shop, do not hand over the alarm remote control. The key is duplicated, and another key fob is added to the alarm memory block
- Make sure that only the key fobs you need are in the memory unit if you have saved the installation instructions.
- Do not combine the ignition key and the alarm remote control in one place. If there is a stop function, a stolen car can be blocked if it is stolen in the driver's line of sight.
- Keep the remote control with you at all times, sometimes if the limit switch does not work for one reason or another, the system may again put the car in security mode.
- After installing an anti-theft device with auto start, do not expect that the car will start better.
- There is no perfect anti-theft device. There is always a chance of getting into trouble, even with the coolest car alarm on a VAZ 2110.
Add a commentAdd a commentWe recommend readingSources used:
- https://www.vazz.ru/avtozapusk-na-vaz-2110/
- https://www.elektrik-avto.ru/publ/avtosignalizacii_i_protivougonki/vaz_2110_obespechenie_avtozapuska_dvigatelja/4-1-0-740
- https://electronavto.ru/signalizacii/tochki-podklyucheniya-signalizacii-k-avtomobilyu/tochki-podklyucheniya-signalizacii-k-avtomobilyam-vaz-2110-2111-2112.html
- https://roomavto.ru/drugoe/tochki-podklyucheniya-signalizacii-vaz-2112.html
- https://masteravaza.ru/elektroprovodka-i-elektrooborudovanie/signalizaciya-elektrooborudovanie-i-elektrooborudovanie/signalizaciya-na-vaz-2110-21
Basic functions of the SOBR car alarm
If you attempt to break into or steal, messages will be sent to your phone, and you will also receive voice messages about the state of your car at the moment. Using a phone or smartphone, you can remotely control the system components or additional devices connected to it installed on the car.
If you try to steal, you can use your phone to block the engine. And thanks to a wireless relay with a motion sensor, your car will report movement or tilt when trying to remove wheels or evacuate.
The SOBR anti-theft system has modes such as panic, comfort, valet and turbo timer. When the ignition is turned on, the door automatically closes, and when the ignition is turned off, it opens. If the vehicle loses power, the system continues to operate and protect your property.
The anti-theft system not only informs you about the problem, but also indicates the exact reason for the alarm. And if you have an additional GPS device, your car will report its location.
Starline A91 programming scheme
To control the Starline A91 system, you need to bind the remote controls: the main and additional key fobs. This is the first stage of programming the alarm functions provided for in the user manual.
To bind key fobs, perform the following steps:
- find the Valet service key;
- turn off the ignition in the car;
- press the key seven times;
- turn on the vehicle ignition again;
- wait for a seven-fold sound signal from the siren, confirming the ability to register the key fob signaling in the memory;
- on the remote control being registered, simultaneously press and hold the second and third buttons until a sound signal appears from the standard siren;
- all procedures are repeated with each prescribed key fob, and after completion, turn off the ignition.
The Valet service button is usually located in places that are fairly easily accessible from the driver’s seat, but at the same time hidden from the eyes of prying eyes. These include the safety block, under the driver's seat or steering wheel, in the glove box, or under the dashboard.
Valet is used not only for linking key fobs, but also for subsequent programming of certain functions. The procedure for prescribing each of them is indicated in the manual included in the kit.
Gearbox selection loops
To select the type of gearbox when connecting the Starline A91 anti-theft complex, use a loop on the black wire. This loop is easily visible in the photo of the device's cable system. If we are talking about a manual transmission, the owner of the car must tear it apart. In the same case, if the vehicle is equipped with an automatic transmission, the loop is not touched.
Lada 2110 › Logbook › StarLine A91
There was some kind of Inspector
no feedback...just opening and guarding.
Dimensions were connected to the whitefish. True, there was feedback in the form of a beeping key fob without buttons, but it stopped working. So I decided to buy a whitefish with feedback, and with heating right away. I spent a long time choosing and realized that they were all the same... some for 15, some for 3 thousand are cracked by specialists with a difference of a few seconds, well, maybe a minute. StarLine A91 Dialog
for 4500 on the Internet. I thought I’d install it myself, but when I saw this bundle of wires, I went nuts! I decided to go to the specialists so that they would do it properly and give a guarantee. (4000 rubles said o_O) We need to save money.
Additional features of the SOBR anti-theft system
A smart car alarm system will inform you about the car's status at any time. If your phone or smartphone is connected to the anti-theft system, when the battery discharges below 11 Volts, it will notify you to connect to power.
Also, if the battery charge in the key fob is low, you will receive an SMS message indicating a decrease in battery life. When you connect the microphone function, you can listen to what is going on in the car or outside, so you can safely go to the store and leave the children in the car.
Using your phone, you can unlock the door on a VAZ 2110 or 2112, if, for example, you forgot the key fob in the apartment, this way you can start the engine. If you come to visit in winter and the car remains outside, by sending an SMS to the system with an engine warm-up timer, you can sleep peacefully, since the car will warm up at the time you set. If you don't have a phone, you can receive Internet links about the location of your vehicle.
By installing your PIN code on the system, you can check the status and location of the car at any time from another phone number when you enter it. If you have installed such a multifunctional system for the first time, it will be able to help you in control thanks to voice prompts that will indicate when and which buttons to press.
Practical connection operations
To install a car anti-theft alarm you will need simple tools and materials:
- screwdrivers, wrenches (special pullers are not needed to dismantle interior elements of VAZ models);
- soldering iron and soldering accessories (solder, acid);
- multi-colored single-core cables (selected according to the colors of the standard electrical wiring or the pinout of a specific electrical circuit);
- linear meters and multimeter;
- insulating materials;
- fastening elements (special plastic clips are preferred).
The easiest way to find the central locking control unit is when installing the main car alarm control unit. For example, on the VAZ 2110 it is located rather inconveniently.
Most often, for the convenience of installing alarm elements, you have to completely disassemble the dashboard, door cards, remove the trunk upholstery, and disassemble electrical devices of lighting systems.
During installation, it is convenient to use wires of the same colors as those coming from the central locking control unit.
Having disassembled the door card, you can connect the control wires directly to the electric drive of the lock.
It depends on the car alarm model whether you need to purchase additional relays. Sometimes standard fuses and power switches may not withstand the additional load.
The easiest way to connect a car alarm to the central locks of VAZ models is to solder into the wire breaks (usually white and brown). To do this, you need to lay a four-wire cable from the two internal relays of the alarm unit to the eight-pin connector for controlling the door microswitches.
To avoid oxidation and damage to the integrity of the wires (this leads to false alarms), you must follow simple rules:
- carry out electrical installation work with the battery disconnected;
- connect electrical wiring only by soldering or terminals, insulate connections;
- use cables with a small margin in length, lay them in bundles, and securely fasten them to body elements;
- Observe the color of the cables for easy identification during alterations or repairs.
After completing the electrical installation work, do not rush to reinstall the removed parts. The final assembly of interior elements, doors, trim is carried out only after installing all elements of the anti-theft alarm system, making adjustments, and checking the functionality of the security system.
You can see in detail how to connect the alarm system to the central locking on a VAZ 2110 in the video:
Installation of the system and its components
If you are unable to leave the installation to a professional, no problem, because thanks to the ease of installation, you can do it yourself. During the installation process you will need the following tools:
- car alarm kit;
- nylon ties;
- terminals;
- soldering iron with reagents;
- multitester;
- wire cutters;
- insulating tape;
- wire stripper;
- Screwdriver Set;
- drill.
Before installing a car alarm on a VAZ 2110 or 2112, you must disconnect the negative terminal of the battery. If you cannot disconnect the battery power, then turn off the audio system, lights and other operating components, and also pull out the security system power fuse. But be extremely careful when connecting to circuits marked +12 Volts.
To install the main unit of the SOBR anti-theft system on a VAZ 2110 or 2112, you need to remove the car’s dashboard and secure it there with screws or zip ties.
To prevent accidental entry of moisture or water into the system unit, the outgoing wires must be directed downward. Do not mount the main unit in the engine compartment under any circumstances, as this may adversely affect the operation of the alarm.
Install the siren in the engine compartment of a VAZ 2110 or 2112 in such a way that water, dirt and moisture do not get on it, but at the same time in a hard-to-reach place. Also, in a place protected from moisture and dirt, the limit switches of the trunk and hood are fixed, paying special attention to the insulation of wires laid from the passenger compartment.
Control unit electronics
The VAZ-2110 central locking circuit consists of semiconductors and electromagnetic relays. But the latter are not used in all central locking models. After all, it is much more efficient to use transistor switches; they work on the principle of a relay, but there is no physical stress. As a result, mechanical wear is completely eliminated. But there is still a chance of breakdown of semiconductor elements.
If there is a breakdown, the central locking system on the top ten will either be constantly set in motion, or will completely stop responding to action. To check the operation of the control unit, it is necessary to connect alternately to the yellow and red wires of the driver's door gearmotor. Preferably directly on the connection block to the control unit. If the flags go up and down normally, then there is no point in blaming the electronics for failure; you need to look for the cause in other components.
Alarm system VAZ 2112
Security alarms can help you find your car where you left it.
Security means can be classified as follows:
- locks blocking controls and opening the engine hood,
- devices that prevent engine starting,
- electronic devices that include an audible alarm,
— devices that make it difficult to remove individual components from a vehicle.
Installation
We install the hood and trunk opening sensors so that they are shorted (to ground) when opened. This will require brackets. As a rule, in the engine compartment the limit switch is placed on the engine shield (on the bolt securing the sound insulation of the front panel). In the trunk on the side of the upholstery bolt near the side shelf:
The siren is mounted in the engine compartment using any free bolt, in this case instead of the adsorber. If necessary, an additional hole is drilled for better fastening of the bracket. The siren horn should be directed downward to prevent moisture from entering.
The shock sensor should be firmly attached to the body so that it can perceive vibrations around the entire perimeter of the car. The sensor should not be placed near air ducts or in direct sunlight. Most often, the shock sensor is attached with self-tapping screws to the front panel under the instrument panel.
The alarm unit itself is placed in any convenient place, for example, behind the ECU under the dashboard. We attach the antenna to the windshield.
How to disable
Switching the car alarm to valet mode (service mode).
To do this, we need to find the secret alarm button. As a rule, it is placed in the area of the safety block in the cabin or under the dashboard. If you have it installed elsewhere, then you know where to find it.