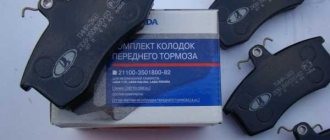
Car : Lada Priora. Asked by : anonymous. The essence of the question : I choose rear pads, which ones are better?
Hello everyone, PRIOR GUARDS. Nice site, I approve. Now I will change the rear pads and handbrake cable. The previous ones lasted about 50,000 km , which is generally cool for me. I love to rock out and pull the handbrake in the winter.
It’s a pity I didn’t remember which ones I set last time. And if I take them out of the drum, I’ll see what brand it is. And if not, which of the not very expensive ones last a long time and brake well?
When do pads need to be replaced?
Replacement is required if:
- When braking there is an unpleasant squeaking noise.
- There is a lot of oil on the surface of the pads.
- The friction lining moves away from the base.
- The thickness of the pads is less than 1.5 mm.
- Chips and deep grooves appeared on the surface of the linings.
Remove the rubber plug and inspect the pads.
To check, roll the Priora into the inspection hole. We need to find a special hole located on the brake shield. It should be covered with rubber. Remove the plug and inspect the brake pads. You can measure the thickness, which should be at least 1.5 mm. Cracks, scratches, chips and other defects are also visible through the inspection hole.
You can find a more detailed review of the front brake pads on the CS20 company website at the link - https://cs20.ru/articles/stati/perednie-tormoznye-kolodki-kakie-vybrat/. The article describes the technical characteristics and appearance of the pads.
Snapshot1
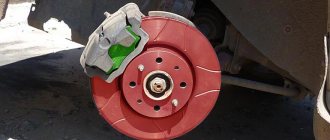
Using a caliper or micrometer, we measure the thickness of the disk, which should not be less than 17.8 mm.
Otherwise, both disks must be replaced. Using a caliper or micrometer, we measure the thickness of the disk, which should not be less than 17.8 mm. Otherwise, both disks must be replaced.
Using a caliper or micrometer, we measure the thickness of the disk, which should not be less than 17.8 mm. Otherwise, both disks must be replaced.
Priora with ABS sensor
If you received a Priora with additional options, then before you begin dismantling the rear pads, you must remove the ABS sensor. If you don't do this, you will most likely damage it during repairs. The sensor installed on the brake mechanism is held on by just one screw. It can be unscrewed using an E-8 star socket.
Unscrew the sensor using the ABS coupling head
Adjusting the brakes
After replacing parts, it is worth adjusting the handbrake using the adjusting screw, and also bleeding the brakes.
Additionally, inspect the integrity of the mechanism parts, oil seals and seals. If necessary, replace. Before driving on public roads, check the functionality of the system and remember that the car will slow down worse at first, because the pads need to get used to the drum.
Difficulties in selecting parts
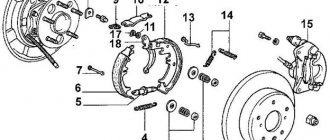
Before you begin replacement, you must select a suitable set of pads. There are many options for the Lada Priora on the market. Conventionally, they can be divided into two categories - parts equipped with ABS and those without this system. It is not difficult to understand what type your Lada Priora is - the diagram of cars with an anti-lock braking system includes an ABS sensor and a wire connected to it.
The basic principles of selection are common to the two categories. The product must be well packaged, have protective holograms and quality certificates. When purchasing a whole set with release springs, it is advisable to check them. We often came across sets from China where the spring brackets were turned in the wrong direction.
There is no need to look for how much the cheapest kit for a VAZ will cost. It is better to give preference to original parts or famous analogues. Even at a higher cost, the pads will provide excellent service life and excellent braking dynamics.
Selection for cars with ABS
Below is a list of pad sets with the best price-quality ratio.
| Part name and number | Minimum price, rub. |
| AT 2090-118BP | 400 |
| AutoReal AV18-350-2090 | 450 |
| Pilenga BSP1005N | 600 |
Selection for cars without ABS
If your Lada Priora is not equipped with an anti-lock braking system, then you should purchase special pads. The most popular sets are the following.
| Parts brand | Initial cost, rub. |
| Fortech FB-2102 | 500 |
| Pilenga BST1002N | 550 |
| Bosch 0986487219 | 800 |
How to change rear brake pads on a Priora
Work should begin by lifting the car using a jack. You must first remove all excess brake fluid from the tank.
Only original models are considered the best option for replacement.
Replacement of rear brake pads of Lada Priora with ABS
The presence of an ABS sensor in a car makes some adjustments to the mechanism maintenance procedure. However, you should start working on the car by placing it on a level area with good access. Then you need to turn on first gear and install special stops under the wheels to prevent rolling.
Important! You should not raise the handbrake, as it will be more difficult to change the rear pads of a Lada Priora with ABS.
The drum must be removed carefully, since the material from which it is made is very fragile
Before the main process, you should remove the speed sensor located on the inside of the wheel rim. To do this, you will need an “8” key, which is used to unscrew the fixing bolt and remove the device from the bracket.
Further sequence of actions:
- The wheel bolts should be loosened and the wheel raised.
- Then you need to completely unscrew the bolts and remove the wheel.
- Then it's time to remove the drum. To do this, use a key to unscrew all the guides. However, if there is nothing to grab onto, you will need a small vice.
- If the part does not give in without additional effort, you need to take a rubber hammer and knock it down by tapping along the entire circumference.
- When the drum is removed, they proceed directly to replacing the brake pads. To do this, remove the cotter pin that secures the handbrake lever. Then it is released from the spring.
- Then the pads are disconnected from the springs that fix them from below and support them in a vertical position.
After replacing the pads will be hard for some time, so you should take this into account when braking - Next, new models are installed.
- Then all the parts are assembled into the car in the reverse order. Important! The spring should be removed while holding the cylinder pistons so that they do not come out. This may cause system fluid to leak.
After completing all manipulations, tighten the handbrake cable using the nuts located under the machine.
Replacement of rear brake pads of Lada Priora without ABS
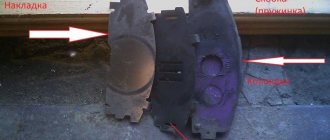
Changing the rear brake pads installed on a Priora without ABS (the photo shows the standard arrangement of parts) should begin by removing the wheel.
After this, the algorithm is followed:
- First, unscrew the guides and remove the drum. If necessary, use a hammer.
- Next, using screwdrivers, press on the piston and push it inside the cylinder.
- Then remove the tension spring from the groove, and then the spacer bar located between the two pads.
- Using the same tools, remove the tension springs and disconnect the parking brake drive.
- Then remove the finger and move the lever to the side. A new set is installed, and the entire sequence is repeated only in reverse order.
- After this, adjust the handbrake.
Replacement
Replacement is carried out using a lift or on an inspection pit. Regardless of the location of the parts, we will need the same set of tools. It includes Phillips and flat-head screwdrivers, a deep socket for 7, long-nose pliers and pliers, spanners for 17 and 13. You may have problems dismantling the rear drum, so prepare a socket for 30 in advance. It is recommended to purchase a wrench for the “seventh” head .
Rear brake pads on Priora
- We lift the rear part of the Lada Priora and place additional supports. We remove the drum - it is held in place by two pins, which are shown in the photo below;
We unscrew both fasteners and try to rip off the drum - If it was not possible to dismantle the drum in this way, then remove it along with the hub. This takes longer, but is more convenient, since the unit will not interfere with unscrewing the brake mechanisms;
- We take long-nose pliers and take out the handbrake cotter pin;
Pull the fasteners up using long-nose pliers - Find the right lower spring and remove it. This can be done with a screwdriver or other convenient tool - it should come off the fastening point;
- The next step is to remove the fasteners that hold the rear pads in a vertical position. Small springs can be easily unscrewed using pliers;
- We are trying to manually remove the brake pads. Try moving the top parts of the part apart. If that doesn't work, remove the top spring;
We separate the plates, after which the block will fall down - When all the fasteners are removed, the parts we need will fall. We install new components in reverse order.
If you cannot install the drum after installing the new components, you will need to loosen the handbrake cable. You will find it under the bottom of the Priora.
Front
Before removing the front pads, it is necessary to pump out some of the brake fluid if it is at the MAX level. This can be done using a syringe. Also remove the front wheels.
- Using pliers, it is necessary to bend the edges of the locking plate;
- Now we have access to the bolt - unscrew it with the 13th key. If the bolt rotates, tighten it with a 17 key;
- Raise the caliper body and remove the front brake pads from the guide mounts;
Unscrew the bolt with the 13th key, and hold it with the 17th key so that it does not turn - As you can see, the front parts are easier to remove. Thoroughly clean the landing areas before installing new components;
- The piston should be pressed out with any convenient tool - a wrench, a screwdriver or long-nose pliers. If it is too tight, use a screwdriver for extra pressure; Carefully roll the lock washer antenna
- Replacement is carried out in the reverse order.
When the replacement is completed, you need to press the brake pedal several times. After this action, the pistons will be securely locked.
Brake pads should be replaced on both wheels at once. Then Priora will brake normally even in emergency situations.
Remove the brake drum.
Do not press the brake pedal after removing the drum, as the pistons may come completely out of the cylinder. If the drum cannot be removed...
...then, turning it evenly, we strike the end of the drum with a hammer with a plastic tip (or an ordinary hammer through a wooden block).
Using a screwdriver, we remove the hook of the upper tension spring from engagement with the block...
...and remove the spring.
Using a screwdriver, pry the hook of the lower tension spring out of engagement with the block...
...and remove the spring.
Using a screwdriver, remove the pressure spring from engagement with the block.
Remove the front pad.
Remove the spacer bar. Having disconnected the pressure spring from the rear block...
...and remove the rear shoe lever from the hole in the parking brake cable end. Straightening the cotter pin...
...and remove it from the hole in the parking brake lever pin.
Remove the washer from your finger.
Remove the lever and remove the finger. Install the parking brake lever onto the new pad in the reverse order.
Install new pads in reverse order.
To make it easier to assemble the pressure spring with the block, we use the lower tension spring, hooking its end to the hook of the pressure spring.
While tensioning the spring using a screwdriver, insert the hook of the spring into the hole in the block. Before installing the drum, it is necessary to recess the pistons inside the working cylinder. For this…
...press the pads with two mounting blades, leaning against the shoulder of the brake shield. After installing the drum, press the brake pedal several times to set the pistons to the working position. Adjusting the parking brake.
Recommendations
Comments 134
Tiir 260 pads or some other number! Cheap and cheerful! They don’t hold together, they brake well, and most importantly, the brake discs don’t wear down like Ferodo pads!
Lada Sport we have the best pads in the city. from 100 km hour to 0 km hour with abs 10 meter brake without abs 5-6 meter but without abs the tires will deteriorate
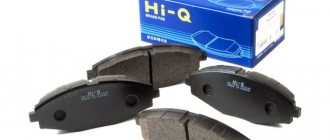
I installed Hi-Q for 300 rubles. I've driven 60k on them and there's no squeaking. There's just a lot of soot from them.
Installed LPR + new disks. Peace and grace)
Of all the things I've tried, green ferodos are just not red!
EBC ONLY! JUST try EBC, read my post, very high quality pads!
I also suffered from the same problem: (I installed green Ferodo, they brake perfectly, no squeaks, and they don’t get dirty, the wheels are clean
I installed the green ones, they creaked like on a UAZ, install the Chinese ones and don’t worry about the norms of the pads and the discs will last a long time with them
They stand exactly as in the photo - nothing whistles
I really don’t know if they still make them. Ukrainian.
I found it in a store last year.
Lada Sport red as in the photo, 10 thousand flight is normal, although at one time they tried to creak a little, then they stopped
so I installed hola and they didn’t creak either
Try applying copper grease to the contact points between the pad and the bracket and the piston.
I've been driving NIBK for a year, no complaints at all
I recently installed a Lada Sport, as in the photo the wheels are a little dirty, there are no squeaks, the brakes are good
I set the finwheel to silence, the brakes are good, only soot on the discs. And so everything is good.
I had a whistling noise because the brake discs were worn out, I installed new ones and now there is silence.
Ferodo stick the red ones in. they are soft and don’t creak
I just installed TIIR-299, lubricated everything I could with anti-squeak grease, I’ve been riding for two weeks now and couldn’t be happier. Compared to ferodo greens, TIIR-299 brakes better. And on the green ferododo you feel like you’re driving a Kamaz
Can you tell me the name of the lubricant? I, too, with Tiir 299 brakes excellently, but when pressed smoothly, when the pads approach the discs, they squeak a little.
Look in my blog. like the penultimate recording when I changed the pads
I just installed TIIR-299, lubricated everything I could with anti-squeak grease, I’ve been riding for two weeks now and couldn’t be happier. Compared to ferodo greens, TIIR-299 brakes better. And on the green ferododo you feel like you’re driving a Kamaz
I installed green ferodos, they brake perfectly, no squeaks, and they don’t get dirty, the wheels are clean
The same ones have been standing for 2 years now, no problems...
watch this video, where the guy talks about this problem in detail.
Do you understand why there is a whistle or not? It appears because there is resonance in some place. Resonance occurs from high-frequency vibrations. Vibrations appear from a discrepancy between the sizes of the block and the bracket into which it is inserted, as an option. You either buy new brackets, or clean the old ones to perfection, or use blue anti-squeak grease from liquid moth. There will be no resonance with it.
And not because of the composition of the pads? Because of the large chips in them. They start whistling only when you press the brake pedal a little, and in a traffic jam, for example, when you push
This is all nonsense, I think. Then the same pads would whistle for everyone. You already have a bunch of pads. You don't need a lot of money to check my version. Disassemble, remove the pads, use a screwdriver to scrape them all to perfection and install the ones that creaked. If there is a creak, then I think that the brackets are already worn out. Buying lubricant for 100 rubles and lubricating the places where the pads ride and where the piston meets the pad will be cheaper than a set of new pads. If you get it together, tell me what happens. Interesting. I've never had such problems. Neither with factory discs (with decent wear) and factory pads, nor with factory ATE discs and pads, nor with new Brembo max discs and the same old ATE pads.
I’ve already ordered ATE, so I’ll clean everything out and grind off the wear from the disk.
haha, my budget was small, at that time I installed something called Rosdot (inexpensive) and nothing creaks anymore, no matter how much lol
Stitch the work helped me
Stitch the work helped me
from the disk? Outer edge?
Yes internal and external on both sides
try not the sport, but the simple ones in blue packaging) I’m on the Lada Sport myself now, everything seems to be fine so far. I skated the blue 50.
A friend of mine recently installed blue ones on Kalina, 1t. already skated in my opinion and whistle
damn then I don’t know how to help(
Yes, I already ordered it through existential ATE
try not the sport, but the simple ones in blue packaging) I’m on the Lada Sport myself now, everything seems to be fine so far. I skated the blue 50.
I installed sport, everything is fine, only over time the edge of the pads blurs, and sometimes you need to disassemble and remove it (the edge)
Replacing rear brake pads (in drums) on Lada cars
The minimum permissible thickness of the friction linings of brake pads is 1.5 mm. Rear pads should only be replaced as a set on two rear wheels at once. Otherwise, the car may pull to the side. On all modern Lada cars (XRAY, Vesta, Largus, Granta, Priora, Kalina and Niva), replacing the rear pads is carried out in the same way without significant differences.
Required. new rear brake pads, a set of keys and remove the car from the handbrake.
Check the brake fluid level, if it is around 0, then pump out some of the fluid. Jack up the car and remove the wheel. Further:
- Unscrew the guide pins.
- remove the drum from the hub, knocking it with a hammer through a wooden spacer.
unscrew the drum guide pins
remove the drum from the wheel hub.
Next in order:
- disengage with the spring block.
- and remove the upper spring first.
- then the bottom one.
disengage the spring from the block, remove first the upper spring then the lower spring
- disengage the pressure spring from the block.
- remove the front pad.
- remove the spacer bar.
disengage the pressure spring from the block, remove the front block, remove the spacer bar
- Having disconnected the pressure spring from the rear block, lower the block.
- remove the rear shoe lever from the hole in the handbrake cable end.
Having disconnected the pressure spring from the rear block, lower the block
remove the rear shoe lever from the hole in the handbrake cable end
- pull the cotter pin out of the hole.
- remove the washer.
- pull out your finger.
pull out the cotter pin from the hole, remove the washer, pull out the pin
Before installing new brake pads, remove dirt and wipe the rear brake parts. Assembly is carried out in reverse order. To install the pressure spring with the block, use the lower tension spring, hooking its end to the hook of the pressure spring. We tighten the spring with a screwdriver and insert the hook of the spring into the hole in the block.
we use the lower tension spring, hooking its end to the hook of the pressure spring
we bring the pads together with two mounting blades
Move the pistons to the center of the cylinder, bringing the pads together with two mounting blades. After completing the work, press the brake pedal 2-3 times to bring the pads to the drum. For clarity, the entire process is also shown in the video:
Let us remind you that periodically monitor the serviceability of the brake system and change the front brake discs on time.
Vehicle preparation and tools
Before you start replacing the rear pads with your own hands, you need to prepare a tool. We will need:
- a set of standard keys;
- minus and Phillips screwdriver;
- pliers;
- wooden mallet or rubber mallet;
- metal brush;
- Additionally, you can get graphite lubricant, VD-40 fluid and a special hook for removing the tension springs.
The machine should also be prepared for work:
- open the hood and find the brake fluid reservoir. Use a syringe to remove the brake fluid to the minimum mark. The spent pads extend further, the cylinder itself is similar, and when changing pads you will have to refill it. The brake fluid will return to the reservoir and may spill onto the engine, so it is worth taking it away;
- All wheels must be securely secured by placing wheel chocks on them.
Replacing rear brake pads on a Priora - instructions
The service life of the rear brake pads of the Priora is quite long, but provided that the quality of the components is decent. Even factory ones can easily travel more than 50,000 km with careful operation without sudden braking or maneuvers using the handbrake. But there are also such instances that after the first 10,000 km they already begin to exhibit a terrible sound during operation, and efficiency sharply decreases.
If you decide to replace it, then below I will try to provide detailed instructions for replacing the rear pads on a Priora with a detailed photo report of the work done. So, first of all, it’s worth talking about the tool that you will need for all this work:
- Screwdriver flat and Phillips
- Pliers and long-nose pliers
- 7 deep head and knob
- Head 30 (if the rear drum cannot be removed in the usual way)
Progress
Initially, you need to remove one or two wheels at once. Once you have completed this task, you need to twist the pins and remove the brake drum. This is done by churning. Use a spacer and a hammer to avoid bending the structure.
Next we perform the following steps:
- Two springs are attached to the brake pad. They must be removed one by one. First, the upper part is used, then the lower one.
- Next comes the turn of the pressure spring. Let's take it off.
- Now the front block is available in front of you, and it will not be difficult to dismantle it.
- Once the first block is removed, the spacer bar must be removed.
- Now comes the turn of the second pressure spring, which holds the rear pad. We disengage.
- We remove the lever of the part from the hole in the tip of the handbrake cable and remove the cotter pin.
- The last step is to remove the washer and pin. All. The rear block is accessible for dismantling.
Before installing new parts, it is necessary to clean the system of dirt and dust accumulated inside. Assembly is carried out in the reverse order, but with some nuances. Firstly, it is not so easy to return the compression spring back into engagement, so the lower compression spring will help us here. Hook it onto the end of the clamping rod and use a screwdriver to pull it towards the block. The pistons must move to the middle of the cylinder, this is done using special mounting blades.
How to change pads on a VAZ 2112
As soon as the work is completed, it is necessary to calibrate the pads. A few presses of the brake pedal are enough to do this. If any points remain unclear to you, you can watch the video instructions on our website. There is nothing complicated in the work, you just need to allocate a little time.
Replacement of rear brake pads on a Lada Priora car is carried out under the following conditions: the rivet connection of the friction linings with the base of the pad has become loose, the thickness of the friction linings has become less than the maximum permissible 1.5 mm, as well as when the working surface is damaged or oily. It is recommended to replace the pads on each side, regardless of the condition. Simultaneous replacement will prevent the occurrence of skidding when braking due to different technical conditions of the pads. To carry out repair work, prepare a standard set of tools and perform the following sequence of actions:
- Engage first gear and place chocks under the front wheels. Then remove the wheel from the side to be repaired.
- Check the brake fluid level in the reservoir. If it is at the maximum mark or higher, then the liquid must be pumped out. This step is necessary to counteract the leakage of fluid when squeezing the brake pistons when the drum is subsequently seated in place.
- Unscrew the two locking pins and remove the brake drum.
Next we proceed to dismantling the pads. The first step is to remove the upper and lower tension springs. To do this, using pliers, carefully remove the ends of the springs from engagement with the springs.
Next, remove the front pad guide spring, and then carefully remove the pad itself.
Remove the expansion bar. Next, remove the rear shoe guide spring and the shoe itself, disconnecting the parking brake drive rod end from it.
Brake pads whistle when braking
It is necessary to remove the drive lever from the rear block using the handbrake. To do this, use pliers to remove the locking pin, washer and bushing. Replace the lever with the new one.
At this point, the repair work on removing and replacing the rear brake pads on the Lada Priora has been completed. Replace them, and then perform the installation in the reverse order. Since the outer diameter of the friction linings has increased, problems with installing the brake drum are possible. For ease of installation, it is necessary to compress the pistons of the brake cylinders using two mounting blades. And also use a sharp knife to grind off the chamfer on the pads. Also check the condition of the drum; perhaps a chamfer from wear has formed on its working surface; if it is present, grind it off with a file, while working carefully so as not to damage the working surface.
see also
Comments 47
When the Byda Priora with abs back only installed the factory ones, but now the Lada-Sport pads in front are factory, everything slows down, nothing creaks. I also installed Nippon, Ferodo, Ferodo, I remember it was terribly warm with them, they were too hard apparently.
I installed the standard ones. They squeak like an old UAZ, they eat up the disc, but they brake well.