In general, in practice, handbrake cables on Priora are changed extremely rarely. And if this is necessary, then in most cases for the following reasons:
- Over time, the cables stretch out, that is, they become longer. Accordingly, even with the lever fully raised, the effectiveness of the handbrake will be greatly reduced.
- Failure or complete rupture of the cable, which can occur during sudden braking using the handbrake (there are such amateurs), or when the lever is pulled too tightly for a long time.
If for one of the reasons you had to encounter a similar problem, then it must be solved by replacement. To do this we need the following tool:
- Long nose pliers
- Flat screwdriver
- Head for 7, 10 and 13 mm
- Ratchet or crank
- Extension
- Penetrating lubricant
How to tighten the handbrake on a Lada Priora step by step instructions
The handbrake is the most important element of any car, ensuring its stability while parked. But after some time it weakens, this is due to the deterioration of the cable tension. Therefore, the parking brake must be tightened from time to time. Lada Priora is available in hatchback, sedan and station wagon bodies; there are no fundamental differences in the procedure for different cars. The same applies to cars with ABS. Some virtuosos manage to perform a lift without a pit, from the salon, but we will consider standard methods. Today we’ll talk about how to tighten the handbrake on a Priora and what you will need for this.
Progress
So, initially you will need to prepare the necessary tool. Fortunately, tightening the cable does not require a lot of tools; you can get by with two 13-size open-end wrenches. Before starting work, you need to drive the car onto an overpass or pit, this will be much more convenient for you
It is important to know that according to regulatory documents, the handbrake must hold the car on a slope of up to 25%
So, if you have installed the car, you will need to engage first gear and lower the lever to the down position. The next step-by-step instructions are as follows:
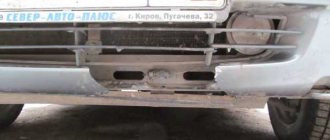
Remove the heat shield. It is secured with 4 fasteners, which will need to be removed, then the cover should be removed and set aside. Under the cover there is a special rubber stand, which is attached to the additional muffler. After you remove the heat shield, nuts will open in front of you, which allow you to adjust the handbrake
You will need to look for the one that allows you to set the position of the tip. The end nut is additionally secured with a lock nut, which should be loosened
There is no point in removing it, just twist it a couple of turns. Make sure there is nothing obstructing the nut. Experts recommend loosening both nuts at once, because in this case the cable will immediately tighten. The locknut must be returned to its original position and tightened tightly, because the safety of your car depends on it.
When everything is ready, you can perform a control test. Return to the driver's seat, engage neutral and set the brake to park.
When fixing the lever, you need to count the number of clicks. With an average pressing force, their number will not exceed 5 times.
Second test. By lowering the handbrake to its extreme position, you need to check whether the rear wheels are spinning well. If everything is good, then they will spin easily, without any significant effort. If something interferes with them, then you will have to loosen the nut again and tighten it. Next, the devices are installed in the reverse order. If any points remain unclear to you, you can watch the video on our website.
What to do if there is no result
Sometimes motorists are faced with situations in which tightening the cable does not improve the quality of the handbrake. In this case, it is necessary to deal directly with the brakes. The main culprit is the brake pads. They can:
- wear out;
- “get stiff” and not respond to handbrake commands.
Installing new brake pads will help achieve normal results. Experts recommend dismantling the brake drums and checking the movement of the brake pads. If they don't move, it means they're stiff. If there is still movement, the problem must be looked for in other nodes. The primary culprit may be a stretched handbrake cable. If all else fails, it is best to turn to professionals.
Why did it happen so?
Perhaps the automatic requests do not belong to you, but to another user accessing the network from the same IP address as you. You need to enter the characters into the form once, after which we will remember you and be able to distinguish you from other users exiting from this IP. In this case, the page with the captcha will not bother you for quite a long time.
You may have add-ons installed in your browser that can make automatic search requests. In this case, we recommend that you disable them.
It is also possible that your computer is infected with a virus program that is using it to collect information. Maybe you should check your system for viruses.
If you have any problems or would like our support team, please use the feedback form.
In the article we will talk about the handbrake system and describe how to tighten the handbrake on a Priora. This will help the owners of this car to limit themselves to independent work, without having to pay for the services of a service center. Knowing the design of the system, regulation will not take much time.
Replacing hand brake cables for Lada Priora VAZ 2170, 2171, 2172
Lada Priora Sedan Priora white cloud 163 Logbook Starts up and immediately stalls in cold weather
| 5. Remove the cable end from the equalizer.
| 7. Bend back the two brackets securing each cable.
| 9. Loosen the nut securing the cable holder on the rear axle beam and remove the cable from the holder.
| 11. Remove the cable from the brake shield. 12. Install the cable in the reverse order of removal In this case, pay attention to the fact that the cables are installed crosswise in the bracket. After installation, adjust the parking brake (see “Adjusting the handbrake”)
Brake system Brake malfunctionsBleeding brakesVacuum brake boosterBrake pedal bushingsBrake master cylinder reservoirBrake master cylinderReplacing front brake padsBrake discBrake wheel cylinder (front)Brake drumRear brake pads (replacement)Brake wheel cylinder (rear)Pressure regulatorAdjusting pressure regulatorBrake hoses, front brake aRear brake brake hosesBrake pipesHandbrake lever springHandbrake lever brakes Replacement of hand brake cables Calibration of ABS ESP system |
Less work - longer operation?
Many drivers believe that rare use of the handbrake ensures maximum performance of this unit. In fact, such an attempt to preserve the RT resource gives a completely opposite effect.
The less often you use the handbrake on your car, the less movement the cable makes in its sheath. This leads to loss of efficiency and performance of the cable. Loss of mobility leads to the appearance of breaks when the handbrake is rarely applied. As a result, at the most inopportune moment the car does not stand still as it should.
To prevent problems with the RT, periodically inspect the condition of the unit, and also do not forget to squeeze the parking brake handle when necessary and required by traffic rules.
Replacing the parking brake cable
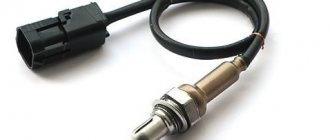
Lada Priora Sedan Logbook Victory over Lambda probe
To make replacing the handbrake cable easy and safe, we drive the car into a pit or use a lift. Raise the rear end using a jack. We remove the wheel.
Next we need to release the cable from the adjusting mechanism. It is located under the car, near the handbrake lever. read more at the link To get there, unscrew the 4 nuts of the central muffler protection from the body using a No. 10 wrench. Be careful - they may rust and break off. It is advisable to treat them with WD 40.
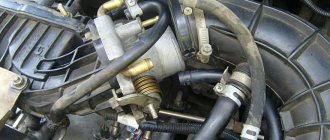
We remove the rubber bands that secure the muffler and move the protection forward so that it does not interfere. On top of the muffler is the parking brake adjustment mechanism.
Using a long head No. 13 with a cardan, unscrew the adjusting nut and remove it from the rod.
Remove the cable equalizer from the cable adjusting rod and remove the front end of the cable from the hole in the body bracket. Then we remove the cable from the fastenings to the beam and body.
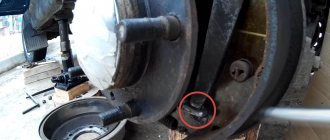
Next, remove the rear brake drum. To do this, use a long socket or wrench No. 7 to unscrew the two drum guides to the hub. With a few blows of the hammer we knock the drum off the hub and remove it.
At this stage of work, we have the opportunity to see the condition of the brake pads. There should be no peeling. If the minimum thickness is 2 mm or less, then they should be replaced. If the wear of the brake drum on the plane adjacent to the pads is more than 1 mm, then the drum should be replaced. The brake cylinder must be dry and free of brake fluid leaks and dust caps.
Next, remove the cable from the brake shoe flag, and the cable casing from the brake drum boot.
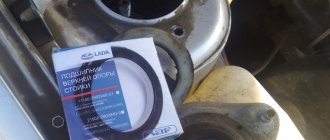
We install a new cable. To do this, simply perform all the steps in reverse order: • put the end of the new cable into the brake pad flag; • thread the cable into the fastenings on the body and beam; • insert the front end of the cable into the hole in the body bracket; • insert the ends of the cables into the equalizer, put them on the rod and tighten the adjusting nut.
After the cable is installed, put on the brake drum. Tighten the guide nuts. We rotate the drum to make sure that the pads do not jam. The drum is easy to spin. We tighten the adjusting nut on the rod until the block begins to come into contact with the brake drum, this will be visible when you turn it - the drum will turn tightly.
Now you need to adjust the handbrake. We check how many clicks the parking brake lever is tightened. It is advisable to make 3-4 clicks from start to finish, while the car should be in a disengaged state.
If everything is adjusted, we put the protection in place. We screw it on. We put on the muffler rubber bands. We install the wheel. We compress the wheel mounting bolts.
To prolong the life of your parking brake cables, use them frequently. Otherwise, the cables become rooted, jammed, and then break. To learn more about how to extend the life of your parking brake cables, read the article “How to Avoid Replacing Parking Brake Cables.”
Basic faults
According to the law, a malfunction of the handbrake is accepted in two cases:
- If, at a 16% slope, the handbrake does not hold the equipped car (without cargo and passengers, but with a full tank of gasoline, the driver’s weight is taken to be 75 kg).
- If, on a 23% incline, the handbrake does not hold the vehicle at full load (the maximum permissible vehicle weight has been reached).
In reality, more often than not, a malfunction of this brake mechanism of the Lada Priora is noticed not by measuring the steepness of the slope, but by clicks. When another click of the handbrake is added to the usual “set of sounds” when leaving the car, every car enthusiast understands that it’s time to tighten the cable.
But the problems don't end there. For the parking brake system they can be as follows:
- The cable has stretched too far. Over time, it undergoes deformation. It can be tightened, but to a certain extent.
- The cable broke. When the “limit” is reached, the mechanical device will have to be replaced.
- The handbrake indicator on the dashboard does not light up or go off. This is due to the sensors.
- The lever button is stuck.
How to Adjust the Parking Brake Safety and Comfort
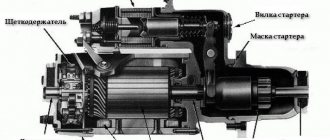
Lada Priora Sedan Logbook Preparing for winter. Starter
- The lever rises by 2-3 clicks, the number depends on the model;
- We jack up the car. It is most convenient to carry out work in the inspection hole;
- Then, loosen the tightening nut of the adjusting unit. By rotating the other nut, tighten the cable until braking force appears on the suspended wheel;
- Let go of the lever, the wheel should spin without much interference. Raise the lever again to its maximum position. The wheel should stop spinning. This is repeated several times;
- Once you are sure that the settings are correct, you should tighten the locknut.
AutoFlit.ru
Design
Many people mistakenly believe that the handbrake is a simple lever located near the gearbox, on the right hand of the driver. In fact, it is a whole system of elements that are connected to each other.
When the hand brake fails, in 90% of cases the culprit is a cable or a pair of cables that go to the rear brake pads from the equalizer.
To determine the reasons for the failure of the handbrake, it is necessary to understand the circuit diagram of the device and its components.
Handbrake diagram
The device includes a number of structural elements. Namely:
- Lever arm;
- Traction;
- Springs;
- Lever button;
- Main cable axis;
- Bolts;
- Washers;
- Drive unit;
- Equalizer;
- Case;
- Locknuts;
- Cotter pins;
- Right and left lever;
- Expansion left and right strip;
- Lock washer, etc.
Replacing the handbrake cable on VAZ 2109 and 2110. We can do without a service station
- Jack;
- New handbrake cable;
- New repair kit for rubber bushings;
- Drum type brake pads for rear wheels;
- Automotive tool set;
- Shoes for ramp wedges.
- It is necessary to have an overpass or inspection hole, since without them we will not be able to get under the bottom of the car;
- We put the car in neutral, carefully wedge the front wheels from possible spinning;
- We make sure that the handbrake is lowered to the “off” position, climb under the bottom of the car and, using a cape, unscrew the central rod - the handbrake cable tensioner, which is located in the rear of the transmission. A characteristic distinguishing feature is a lever with two tensioners at the ends;
- After the cable is lowered from the front tensioner, we proceed to the rear part. To do this, jack up the rear wheels one by one, tear off the mounting bolts and remove the wheels;
- This frees up access to the brake block and cylinder. Using a Phillips screwdriver, unscrew the 3 screws and remove the brake module cover. We see in front of us two pads and a brake cylinder with a cable tensioner;
- Considering that we previously weakened the central rod, using pliers we disconnect the lower cable arm from the brake pad, having first removed the spring;
- Having removed the handbrake cable from one side, you can proceed to the other, having first put a new cable in place of the old one. Next, we install a modular brake complex. If necessary, the pads need to be replaced, otherwise you will have to do this only after a couple of thousand km;
- Having processed the second wheel in a similar way, all we have to do is place the second ends on the central tensioner and tighten it to the appropriate level with a nut;
- The performance test is carried out as follows: the car is placed on a slope of at least 25% with the handbrake. The number of fixations should not exceed the limits from 2 to 7;
- Next, you should get out of the car and try to move the car down using physical effort, if this does not work, then you did everything correctly, otherwise you need to tighten the handbrake cable a little;
- Fulfillment of all conditions may indicate that you can continue further and you are not afraid of any technical inspection.
AutoFlit.ru
When is cable drive repair needed?
While operating the vehicle, it is important to determine the moment when replacing the handbrake cable becomes absolutely necessary. When stopped by a traffic police inspector, the defect is equated to a technical malfunction and is punishable by a fine. A simple check of the functionality of the handbrake is to park the car on a slope with the brake applied. If the car rolls, it's time to start repairing it.
The main symptoms of problems with the cable mechanism are as follows:
- Excessive heating of brake drums.
- Lack of response when tensioning the cable transmission.
- Worn cable sheath.
- The tension adjustment of the mechanism is broken.
If the last point can be solved with a simple adjustment, then other manifestations of the malfunction require drastic methods. In this case, you need to understand the reasons for the situation:
- cable breakage or stretching;
- moisture entering the shell, especially in winter;
- souring of the cable inside the sheath due to insufficient lubricant.
Sometimes you can do without replacing the cable or other elements of the handbrake - just restore the lubrication. Practice shows that such a procedure, carried out once a year, significantly increases the service life of parts.
Brief conclusions
Adjusting the handbrake is a simple process. It should be carried out regularly so that the car does not fail while driving. Many people turn to service centers to carry out such work. It is better to perform the adjustment at home to be sure of the result.
Wear on the rear brake pads is inevitable, which is why the handbrake cable has to be tightened over time in order for the parking brake to work effectively. On the Priora, as well as on other front-wheel drive cars of domestic production, the adjustment is performed in the same way, and to perform it you will only need two 13-size keys, preferably open-end ones.
To see all this work clearly, I recorded a video lesson that will show this process in as much detail as possible.
Sources
- https://maslo-5w30.ru/avto/kak-pomenyat-tros-ruchnika-na-priore-o-regulirovke-i-remonte-uzlov-legkovyh-avtomobilej
- https://zamanuha66.ru/zamena-trosika-ruchnika-priora/
- https://delis-avto.ru/avto-lada-drugoe/zamena-trosov-ruchnika-priora.html
- https://AlanSpb.ru/drugoe/zamena-trosika-ruchnika-priora.html
- https://avtonomnaya-gazifikaciya.ru/kalina/trosik-ruchnika-priora.html
- https://TrueScooters.ru/tehservis/regulirovka-ruchnogo-tormoza-priora.html