Replacing cables and parking (hand) brake lever
| The mechanically actuated parking brake system acts on the rear brake mechanism. |
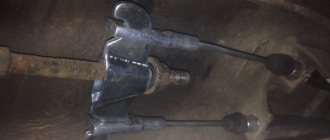
REAR CABLES
4. Remove the lever axle retaining ring.
6. Pull the cable inside the cabin.
Source |
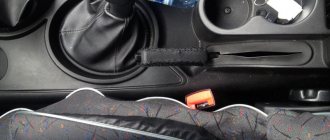
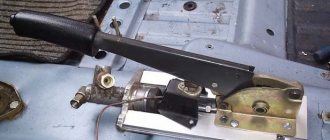
15.30. Handbrake lever
| GENERAL INFORMATION |
Knocking out the bushing securing the gear sector of the ratchet
Removal
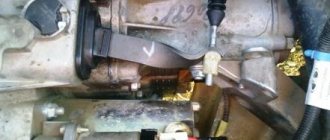
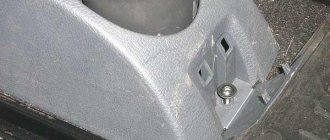
Location of the handbrake lever mounting bolts
Drilling out the rivet of the handbrake lever rotary axis
EXECUTION ORDER
1. Remove the ground wire from the battery. 2. Raise the car and secure it on stands. 3. On models with a catalyst, unscrew the four nuts and remove the thermal shield of the central section of the exhaust system.
4. On models with SOHC engines, measure the length of the handbrake cable threaded bushing protruding from the adjuster, then loosen the adjuster and disconnect the cable from the handbrake lever rod. Remove the rubber O-ring from the underbody of the car and the handbrake lever rod. 5. On models with DOHC engines, measure the length of the handbrake lever protruding from the compensator, then unscrew the nut and remove the compensator from the rod. Remove the rubber O-ring from the underbody of the car and the linkage.
6. Remove the front passenger seat.
7. Remove the rear of the center console.
8. Access to the handbrake lever mounting bolts is possible through the windows in the mat
If there are no windows in the mat, using caution, cut out the windows yourself or release and fold back the mat. 9
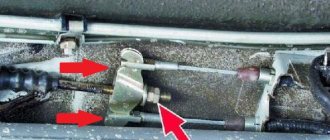
Unscrew the bolts and lift the handbrake lever so that you can disconnect the electrical connector of the handbrake warning lamp switch (see Fig. Location of the handbrake lever mounting bolts).
10. Disconnect the electrical connector and remove the handbrake lever with rod.
11. To replace the gear sector of the ratchet, using a steel rod of the appropriate diameter, knock out the bushing from the handbrake lever.
12. Install a new ratchet gear and secure it with a bushing.
13. To remove the latch, drill the rivet in the rotary axis (see Fig. Drilling the rivet of the rotary axis of the handbrake lever).
14. Install the new latch and secure it with a rivet. At the same time, check that the latch can move freely.
15. If necessary, unscrew the bolt and remove the handbrake warning lamp switch.
Installation
Installation is carried out in the reverse order of removal, taking into account the following points...
| EXECUTION ORDER |
| 1. Install the rear center console. |
| 2. Install the front passenger seat. |
| 3. On models with DOHC engines, install the compensator on the handbrake lever rod and secure it with a new self-locking nut. At the same time, screw the nut to the same distance as before removal. |
| 4. On models with SOHC engines, secure the handbrake cable adjuster so that the protruding part of the threaded bushing is the same as before removal. |
| 5. Adjust the handbrake, then install the wheels and lower the vehicle. |
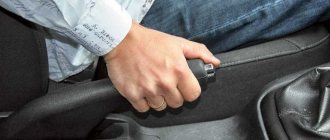
Chevrolet Niva RAMMSTEIN › Logbook › Replacing the front parking brake cable
The year before last, before a trip to Crimea, I changed the rear handbrake cable on the shnivy, I installed it from an AT company (Czech Republic). After installation, a week later, the handbrake stopped holding, and I drove without a parking brake for almost 2 years. And here we recently cleared the snow in front of the house so that the car is parked on a slope and constantly rolls towards the gate. And so that it wouldn’t roll, I decided to fix the handbrake after all.