03/02/2022 1,674 Fuel system
Author: Victor
Correct operation of the idle speed sensor allows you to reduce wear on the piston group, as well as the crankshaft of the car. If signs of incorrect operation of the device appear, the controller can be checked manually, with a multimeter or using a homemade stand.
[Hide]
Purpose of the idle speed sensor
Purpose of IAC in vehicles equipped with an electronic ignition system:
- The microprocessor module determines the ratio of air and fuel when creating the air-fuel mixture in the injection power unit.
- The control unit measures a certain volume of gasoline or diesel fuel.
- The electronic type of systems is equipped with controllers for the crankshaft, throttle position, knock and flow meter. In accordance with the readings of these devices, the fuel pump is activated. The ignition is distributed to specific cylinders of the internal combustion engine.
- If the driver releases the gas pedal, the fuel valve closes completely. This leads to the fact that the proportions of the combustible mixture are violated. Combustion products move into the chamber when there is a difference in pressure between the exhaust and intake manifolds.
The idle speed sensor in electronic ignition systems performs the function of adjusting the composition of the combustible mixture during engine starting. Using the signals sent by the controller, the microprocessor module makes a decision about fuel enrichment. In doing so, it ignores the readings sent by the throttle control. The sensor transmits signals along the line. If necessary, a free channel opens in it through which air passes. This leads to equalization of engine speed while driving or idling.
User Roman Lozovoy presented a detailed review of the controller from the manufacturer General Motors for the Daewoo Lanos.
When to sound the alarm - a list of problems
Let's look at what deviations in engine operation make you think. It should be taken into account that some of them are also characteristic of other problems, for example, poor quality of the fuel used, failure of the throttle sensor. But there are also specific features.
- The engine is unstable at idle. This is clearly audible: changes in speed become obvious. In addition, engine vibration may occur, which has an extremely negative effect on its operation. As a result, the time resource of its operation is reduced.
- When the gear is switched off, the engine stops completely. This problem is especially noticeable at traffic lights, and as a result it is dangerous.
- The speed is unstable (randomly decreases or increases). “Dancing” sounds appear.
- After starting, the unit “refuses” to operate at higher speeds (that is, you press the gas pedal, but there is no reaction).
- When some electrical appliances are turned on: heater, air conditioner, long-range headlights or fog lights, the engine speed decreases.
Such problems occur as a whole when the situation is neglected. Even if one of the above appears, measures must be taken.
Reasons why these problems occur
Regardless of what caused the breakdown, there is no point in delaying diagnosis and replacement; this type of breakdown significantly affects the operation of the engine, which is not for nothing called the “iron heart” of the car. So, what could be the reason:
- The needle guides have been erased.
- The wire inside the sensor has broken.
Principle of operation
The operating principle of the valve is as follows:
- The control unit calibrates the sensor readings if it is detected in the system.
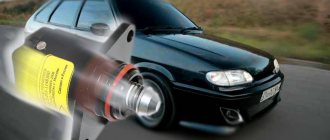
- The controller itself is a stepper electric motor. It is equipped with a conical needle, which is located in a special hole in the throttle valve channel.
- The regulator does not transmit information to the microprocessor module, but receives it from it. Therefore, it is more correct to call it not a sensor, but an actuator - a valve.
- The control unit determines, based on a signal from the flow meter, that there is no air in the combustible mixture. It then compares these impulses with those transmitted by the TPS.
- The regulator device receives voltage. This causes the needle to move out of the canal. the missing volume of air is supplied to the combustible mixture for mixing.
The microprocessor module also receives pulses about the temperature level of the coolant and engine fluid. If the engine starts at low negative temperatures, it must be warmed up, which will reduce wear on friction elements and units. To enrich the mixture, the idle speed sensor channel opens slightly; for this, the driver does not need to press the gas.
At the beginning of the device operation, the action algorithm is as follows:
- The key turns in the lock and the ignition is activated.
- The rod extends all the way. Thanks to this, the needle closes the bypass channel.
- When the rod rests against the calibration hole, the control unit begins to count steps backward.
- Voltage is applied to the windings. As a result, the valve returns to its original open state.
The number of reverse steps is adjusted when flashing the control unit; this indicator may vary depending on the device model. For example, on a Bosch ECU it is 50 steps, and on January modules it is 120.
User Dmitry Shark spoke briefly about the principle of operation, as well as about diagnosing the idle speed controller.
Injector
A throttle valve is used at the input of the collector device in injection engines. It is equipped with an individual controller for determining the position at a specific point in time.
When the engine starts or the powertrain stops, the following occurs:
- The microprocessor module receives data on rotation speed.
- Then the control unit analyzes the operation of the power unit and specifies its intended purpose.
- Readings from the throttle controller and air are compared. The control unit determines whether the damper is closed or not. He can also “understand” which mixture is supplied to the cylinders of the power unit - lean or enriched.
- The IAC valve opens. The air flow bypasses the damper. This makes it possible to maintain speed at a certain level, programmed in advance.
In fact, several ignition system devices are involved in this process. If the car engine stops or stalls due to problems, the operation is checked manually. This is due to the fact that there is no feedback from the IAC and the diagnostic system.
Diesel power units are not equipped with a throttle valve, so they do not use idle speed sensors, they are useless.
User Alex ZW spoke in detail about the principle of operation of the IAC controller in a car.
The revs are floating at XX - what else could be the reason?
As mentioned above, wires go from the ECU to the sensors. Their common harness is located in the engine compartment. This harness is wrapped with electrical tape, which contains three wires connected and sealed with sealant.
Over time, the tightness of the connection is broken, therefore, when vibrations occur while the engine is running, the quality of the connections decreases. As a result, the effect of floating speed is observed, which can be easily eliminated by every car owner.
To do this, you need to cut the twists and reconnect the wires, followed by soldering their connections. After this, insulate the connections, and enjoy smooth engine idling. Below is a video that clearly shows that the reason for the engine over-gassing at idle is precisely the twisting of the wires from the ECU.
https://youtube.com/watch?v=fz8LEYIsvIQ%3F
There are a lot of reasons for floating speeds, as can be seen from the material, but finding the exact reason is quite possible if you approach this issue from an objective perspective. You should not immediately disassemble the engine and look for the cause of the floating speed inside, as it may be a simple malfunction, for example, contamination of the adsorber or a malfunction of its valve. Even if the pipe leading from the adsorber filter to the valve is damaged, air leaks will occur, which will lead to floating speed. You can clearly see this by watching the video.
https://youtube.com/watch?v=HLz6q470h1U%3F
Lanos cars from Chevrolet and Daewoo are unpretentious and reliable, but even they have various malfunctions and have their own “diseases”. Using the information described above, you can not only easily but also quickly identify the causes of floating engine speed and successfully eliminate it.
https://youtube.com/watch?v=PtAdJrGjq-o%3F
In conclusion, we need to answer the question: is it possible to identify the cause of floating speed using computer diagnostics? No. Diagnostics will only show a faulty sensor or problems in the system, but the cause of the floating idle must be determined independently, which sometimes very often causes great difficulties.
Start with what you recently repaired that caused the problem. If the speed suddenly starts to fluctuate, reset the ECU settings and check the operation of the internal combustion engine again. If the reason does not go away, you need to start with something simple, gradually moving to more serious and possible malfunctions.
Source
Design features
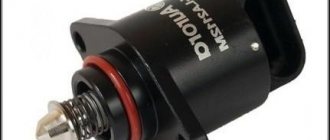
The valve structurally consists of:
- electric stepper motor;
- four-position rod;
- spring element;
- needles.
When IACs first appeared, they were rotary or solenoid mechanisms. Such devices had two positions - open and closed. This contributed to a decrease in the efficiency of engine speed control. Today, cars use four-step sensors, characterized by the possibility of stepwise feed through the bypass.
The idle air control itself is classified as a consumable item and is therefore considered non-repairable. It can be repaired if it malfunctions, but it will be cheaper to replace it completely.
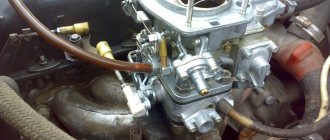
Where is RXX located?
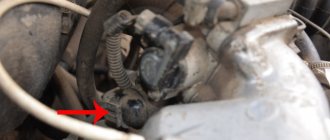
The device should be located next to the throttle valve and TPS. In some cars, the sensor can be fixed directly to the damper body using varnish. Sometimes the device is mounted using two bolts equipped with special mounting holes. The main thing is that the distance from the needle to the mounting flange on the installed device is 2.3 cm.
Connection diagram
Idle air controller connection diagram
One harness consisting of four cables is connected to the idle speed sensor; it comes from the microprocessor module. As a result of this connection, diagnostics may cause certain difficulties. The car owner will not be able to simply apply voltage to the terminals of the device, since the microprocessor module does this pulsed.
Simple reasons for jumps in Lanos engine speed at XX
Floating speeds have arisen on Lanos, which means it’s time to carry out diagnostics. It is necessary to start looking for reasons from simple points. Having figured out what floating speeds are and how to determine them, let’s consider all sorts of reasons that can influence their appearance. These reasons include:
- Air is sucked into the manifold, which is associated with a leak. This is the main reason that has already been mentioned above. The tightness of the collector assembly can be compromised not only through the damper. Air can be sucked into the device through the throttle valve axis from the TPS side or the location of the cable mounting mechanism.
- Worn or dirty injectors - it is recommended to clean or rinse them every 60 thousand km. If this is not done, the consequences will be reflected not only in the form of an abrupt crankshaft rotation speed, but also in a decrease in engine power, an increase in consumption, etc. If the odometer already shows more than 60 thousand, and the injectors have not been washed, then it’s time to do it. Even if they are not the reason, it certainly won’t make things worse.
- Malfunction of high-voltage wires. Be that as it may, armored wires are consumables, just like candles. They do not need to be changed as often as spark plugs, but it is necessary to do so. Moreover, the reliability of the spark depends on the quality of the selected high-voltage wires, so you should not save.
- Faulty spark plugs. If the spark plugs have not been changed for a long time, then it’s time to carry out this simple procedure. Modern spark plugs rarely last more than 20 thousand km, so experts recommend changing them every 10 thousand km.
- Fuel supply system malfunction. Here, the occurrence of floating speed can be influenced by the fuel pump, the RTD fuel pressure regulator, and even the adsorber. Moreover, there is no need to rush to change the fuel pump. It is recommended to start troubleshooting by replacing the filter mesh.
- Use of low quality fuel. If the car is on gas, and the speed fluctuates when using any of the two types of fuel, then this reason can be immediately ruled out. In any case, it is not recommended to refuel at gas stations with suspiciously low prices.
- Reducing compression. The reason for its decrease may be not only wear of the CPG, but also damage to the cylinder head gasket. Air leakage contributes to floating engine speeds.
https://youtube.com/watch?v=cHWAx3UE9yc%3F
All of the above reasons are classified as simple, and to eliminate them you do not need to resort to the help of craftsmen and specialists. If you love your car, then even eliminating complex causes should not be trusted to unqualified technicians. After all, no one can repair a car better than its owner - it sounds banal, but it’s a fact. Next, we proceed to consider all possible reasons for the floating speed on Lanos, as well as Sense and Chance.
Signs of incorrect IAC operation
Symptoms of a regulator failure in a car:
- The car engine stopped running. When driving or standing at a traffic light, the speed of the power unit can arbitrarily increase or fall, and then return to normal. They may freeze.
- The car's engine began to idle. Detonation is heard - a metallic knock from under the hood.
- While driving, there is no compensation for the increased load on the car's engine.
- Difficulties arose in starting the power unit. If the driver has to press the gas additionally when starting, this indicates wear and the need to replace the idle speed sensor.
- Warm-up speed is absent or maintained at an insufficient level.
- The car engine may randomly stall for no apparent reason. This occurs when idling, releasing the gas pedal, or shifting the transmission lever.
- The crankshaft speed may drop randomly when energy consumers are activated. For example, air conditioning or heating systems, windshield wipers, optics, etc.
Signs of failure
The main symptoms that the idle speed sensor is not working correctly are:
- speed in parking mode is unstable;
- reduction in crankshaft rotation speed when any consumer is turned on (windshield wipers, headlights, air conditioning, radio, heater);
- no increase in shaft rotation speed when starting the internal combustion engine;
- stopping the engine when turning off a gear or changing gears.
Attention: These symptoms are not 100% the cause of IAC failure, as they are similar to the failure of the TPS damper sensor. However, in the latter version, the Check error lights up, and the idle speed controller is not connected to the engine control system and does not have self-diagnosis.
Main breakdowns and malfunctions of IAC
Causes of problems with the idle speed sensor:
- Power supply circuit interrupted. This malfunction may be related to the wiring in the car, oxidation or damage to the contact elements on the block. If the connection is of poor quality, then this problem will appear periodically. It may be difficult to diagnose the device.
- Contamination of the rod, which leads to its incorrect movement. This problem is the most common and manifests itself as a result of the accumulation of dirt deposits in the channels of the throttle assembly. If the damper is not cleaned for a long time, then the reason should be looked for on the sensor rod.
- Failure of the electric motor. It is unlikely that such a device will be repaired; the engine must be replaced as an assembly with the regulator.
- Destruction of the sealing element due to wear. The problem may appear immediately after replacing the sensor if an old ring is installed instead of a new one.
- Rod wear. If the regulator is working properly, then the shutter should move without snagging, and slipping in the worm gears is not allowed. To determine the condition of the structural elements, you will have to disassemble the device.
The channel “Sdelaj Sam!” spoke about the causes and signs of malfunctions in the idle air valve! Pljus interesnoe!
Diagnostics
Before checking the operation of the controller, perform the following steps:
- The parking brake lever is tightened. Wheel chocks must be placed under the wheels of the vehicle.
- The engine compartment of the car is opened and the negative terminal is disconnected from the battery. To do this, use a key to loosen the fastener on the lock.
- The engine compartment is being inspected. You need to find the idle air control.
- The block with the wire is disconnected from the device.
Manual check
This diagnostic stage is considered the simplest in terms of implementation:
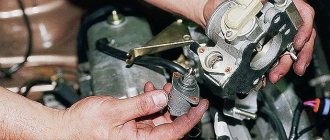
- The block with wires is disconnected from the device.
- Two bolts are unscrewed and the regulator is removed.
- The sensor is connected to the microprocessor unit. The controller must be held in your hands.
- The engine is being started, it is advisable that an assistant do this. At this point, the rod should be pulled into the coil all the way. This occurs as a result of receiving an impulse from the control unit. Then it should move out a short distance.
Manually checking the idle air control valve allows you to determine the functionality of the rod. When performing this, you can make sure that the part does not bend or jam inside the device.
But this verification option does not give a 100% result. It is possible that the modification of the idle speed sensor installed on the vehicle does not match the firmware of the microprocessor unit. The rod extends, but the required amount for its extension is unknown. Therefore, the block and plug are checked, and only the latter is marked.
During a visual inspection, it is necessary to diagnose the integrity of electrical circuits and coils. You should also check the condition of the bypass channel and needle for wear.
User Igor Belov spoke in detail about performing a manual check, as well as other methods of testing the idle air valve.
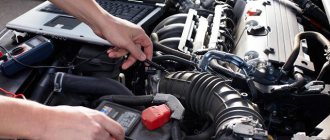
Diagnostics with a multimeter
You can check the operation of the controller using the tester like this:
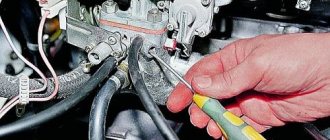
- The connector with the wire is disconnected from the regulator in the engine compartment. If the car is equipped with a 1.6 liter engine, then it is necessary to unscrew the two fastenings of the throttle mechanism to the receiver in advance. Then it moves away from the end of the latter by about 1 cm.
- First, the tester diagnoses the controller's electrical circuit to make sure whether voltage is supplied to it or not. The negative terminal of the multimeter is connected to ground, that is, the body or engine of the car. The positive contact should be connected to pins A and D, they are marked on the connector.
- The ignition is activated and the tester readings are read. The multimeter must first be set to ohmmeter operating mode. The resulting voltage value should be at least 12 volts. If this parameter is lower, then there is a possibility that the problem is a low battery. In the event of a complete lack of power, you must ensure the integrity of the electrical circuit or control unit.
- The ignition is turned off. The next step will be diagnosing the controller itself.
- The multimeter is reconfigured into resistance measurement mode, its terminals are alternately connected to contacts A and B, and then to C and D. The resulting diagnostic value should be about 53 Ohms.
- Then the resistance is measured between pairs A and C, as well as B and D. On them, the working value should tend to infinity. If the values obtained are different, the sensor must be replaced.
Pulse testing on a homemade stand
You can assemble a homemade device without chips; its diagram is shown below:
- The equipment uses 6 volt charging. It can be taken from a mobile phone.
- Connector pads can be purchased at any specialty store.
- During diagnostics, the sensor is first disconnected from the microprocessor module. The rod stroke is checked. If the light indicator of a homemade stand lights up brightly, this indicates that the regulator rod is faulty. If the light is on at half power, then the mechanism is working.
Scheme of a simple homemade diagnostic stand
The price of such equipment is at least 1,500 rubles. Considering the low cost of the idle speed sensor, using a proprietary stand is not economically profitable.
Ways to eliminate the “sore”
How to fix the problem? For this we only need a screwdriver. Let's begin the procedure.
- By disconnecting the terminal block and also unscrewing two screws, we dismantle the assembly.
- We notice that traces of rust inside interfere with the movement of the wheel that regulates the position of the damper.
- We fill the insides of the defective device with a penetrating anti-rust aerosol.
- Use a development screwdriver to turn the wheel.
- We reassemble in reverse order.
Check to see if the engine idle speed is now high. The problem should go away.
Now let's look at another case. Let's say we have high idle speed in a VAZ 2114. This is what we do when faced with this situation.
When clarifying the circumstances of the problem under investigation, we always initially check the operation of the idle speed sensor. This device consists of a needle built inside an electromagnetic coil. The needle either moves inside the coil, moving away from the hole in the throttle pipe, or moves out, closing this hole, thereby stopping the supply of air for combustion of the mixture.
Also read about adjusting engine idle speed and repairing a Tavria car muffler with your own hands. This element is located at the throttle valve, opposite the gas pedal cable. To diagnose it, we pull out the terminal block from it, start the car, after which we see that we still have high engine speeds that have not changed at idle. Then we remove this defective unit, then clean it or replace it. For work we take:
- Unscrew the two screws. We take out the broken node.
- We connect the wiring to it. Turn on the ignition. If the needle of the device moves slightly inside the coil to the touch, then it is working.
- If the needle does not react when an electric current is applied, wash the device with a toothbrush using gasoline.
- We do the assembly in reverse order.
When you cannot restore the functionality of this unit with your own hands, it is better to purchase a new one. Moreover, the cost of spare parts is low.
Other fixes
This node can be diagnosed as follows. It is necessary to disconnect the terminal block from our mass flow regulator, and then start the engine, after which it is necessary to drive the crankshaft speed above 2000 rpm.
In this case, the emergency mode is automatically launched, portions of the mixture are now calculated only by the position of the damper. If the sensations show that the car with the disconnected sensor has become more dynamic than with the connected one, then the malfunction of this unit is obvious.
To replace it, take the following tools:
- Phillips screwdriver;
- flat screwdriver.
- After turning off the engine, disconnect the wires from the mass air flow sensor.
- Loosen the clamp and remove the hose on the inlet pipe.
- We dismantle the defective device by unscrewing two bolts.
- We are replacing the device.
- We do the assembly, moving backwards point by point.
This is how this cause of high revs is eliminated.
For some reason it didn't help
Now let's look at another situation. The car owner changed, for example, the idle speed sensor, and the crankshaft speed became high, or remained high as before.
The reasons for this unpleasant phenomenon may be as follows.
- Most likely, the car enthusiast made the replacement just like that, at random, maybe it would stop turning too quickly. The real state of affairs suggests that the fault needs to be looked for elsewhere.
- If this sensor is not a completely new model, it has an adjusting bolt, it may need to be tightened in order to adjust the problem unit. Modern idle air valves do not require any additional adjustment when installed. However, for example, if the Priora has high idle speeds, then you can look for the adjusting screw on this car.
- It is possible that the new spare part was defective.
- The new spare part was installed incorrectly.
Here, perhaps, all the roots of the phenomenon are listed.
How to clean the idle air control?
Cleaning a proven IAC is considered using the example of a Chevrolet Niva:
- The engine compartment is opened and the battery is disconnected. To do this, you need to dismantle the cover of the air filter device, which is removed and put aside.
- The block is disconnected from the air controller. The connector is located on a thick rubberized corrugation connecting the intake manifold and the air filter cover. This block is attached using a special U-shaped bracket. During dismantling, it may jump out, so you need to be careful.
- Then the corrugation is disconnected from the intake manifold, it is fixed with a clamp. The same must be done with the rubberized pipe; it connects the corrugation to the valve cover of the power unit. The hose is fixed with an iron bracket.
- The thin pipe connected to the intake manifold is disconnected and removed along with it. This hose is pulled onto the fitting.
- Inside the pipes you can notice contamination in the form of carbon deposits and traces of engine fluid. All hoses must be cleaned and washed, after which they must be blown out. To complete the task, it is recommended to use a special cleaning agent or WD-40 liquid. The main thing is that there is a tube included with the cylinder.
- The idle speed sensor itself is made in a black plastic case and is installed in the intake manifold. The plug is disconnected from it and the two bolts that secure the device are unscrewed. The procedure is performed using a short screwdriver with a Phillips head; first, traces of sealant must be removed from the bolts. When dismantling the device, you must also remove the O-ring.
- The IAC is being cleaned, and fuel can also be used for this. The procedure is carried out using rags and cotton swabs. You cannot pour a lot of liquid into the mechanism so as not to damage it. After each cleaning, the sensor should oxidize and dry.
- It is recommended to remove dirt from the intake manifold; dirt is removed using rags. The idle speed sensor seat is cleaned throughout its entire depth. Contaminants are also removed from the device fitting.
- After cleaning, the entire structure is reassembled in the reverse order. A new rubber ring is installed on the idle speed sensor, after which the controller is mounted in place and fixed. The connector is connected to it, and the air filter device is installed back.
Dismantled corrugation with hoses
Removing the IAC from the seat
Cleaning the sensor with WD-40
Cleaning the needle and bypass channel
To provide access to valve parts, removal of the IAC is required using the following technology:
- disconnecting the block from the connector;
- cleaning the connector contacts and plug with a cotton swab soaked in WD-40;
- unscrewing screws with a curved screwdriver;
- removing the regulator to check the condition.
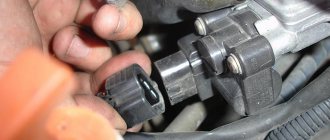
Attention: There is no need to disassemble the regulator, just spray the spring and rod with needle with WD-40 spray, wait for it to dry, and at the same time clean the throttle bypass channel.
The adjustment is made by the on-board network controller itself. However, for stable operation of the engine, you should check the distance from the mounting flange to the protruding needle cone. By default it should be 23 mm.
What do you need to know when replacing the IAC?
To change and install a controller that allows you to regulate idle speed, you need to pay attention to the position of the rod. It must not be allowed to be pushed forward too much. This can happen if the device is connected to the block and the ignition is activated before installation. It is not allowed to push the rod in by hand.
If the valve is installed with the needle extended and the retaining screws are tightened, damage to the unit may occur due to shearing of the worm gear. It is impossible to repair such a sensor. Depending on the vehicle model, after installing a new regulator, it may need to be calibrated. In some cars, this procedure is carried out using special equipment or a stand.
On VAZ cars, calibration is performed as follows:
- A terminal is connected to the negative output of the battery.
- The key is turned in the lock to turn on the ignition for ten seconds. There is no need to start the power unit.
- The ignition is turned off.
User Ovsyuk talked about replacing the idle air valve on his own using the example of a Lada Samara car.
Tips for extending the service life of IACs
To increase the service life of the sensor, you need to follow simple rules:
- The air filter device must be replaced on time.
- You cannot park your vehicle for long periods of time in winter. At low negative temperatures, the car owner must periodically start the power unit, warm it up and perform gas changes. This will allow the valve to be designed to prevent it from sticking.
- Do not allow foreign liquids to enter the throttle mechanism area. Sprays for quick starting of the engine usually do not pose a danger to the sensor, but it is better not to overdo it.
Nuances of choosing a sensor
The original idle speed controller is marked as XX-XXXXXXXX-XX. The last two characters define the compatibility label.
More details about them:
- odd characters (03 and 01) are interchangeable, as are even characters (04 and 02);
- device group data cannot be replaced, that is, even ones cannot be replaced with odd ones.
You can identify a fake low-quality idle speed sensor by several criteria:
- there are no distinctive marks on the device packaging;
- the tip of the rod has a dark shade;
- the yellow sticker on the device body has no frame;
- original sensors are equipped with a thin black seal, while counterfeits are equipped with a thick red ring;
- the body of a low-quality device will be 1 cm shorter;
- non-original sensors are equipped with a white spring instead of a black one, its turns are sparser;
- There are no caps with a diameter of 3 mm on the case rivets.
Video “Self-calibration and removal of the rod from the IAC”
User Ruslan K talked about how to remove the needle from the regulator at home and calibrate it without special equipment.
Do you have any questions? Specialists and readers of the AUTODVIG website will help you ask a question
Was this article helpful?
Thank you for your opinion!
The article was useful. Please share the information with your friends.
Yes (100.00%)
No
X
Please write what is wrong and leave recommendations on the article
Cancel reply
Rate this article: ( 2 votes, average: 5.00 out of 5)
Discuss the article:
FakeHeader
Comments 33
Really very informative. However, I’ll add my two cents, I also had the same problem, I was itching to disassemble the XX regulator, I’m thinking about how to get this rod out of there. And he went all the way as the author. Only in my regulator the pins easily pulled out like duckbills (later I appreciated this, since I had to open it more than once). Then, when I saw 4 wires under the cover and that’s basically it, I got upset and started surfing the Internet about the internal structure of the engine. And this helped me a lot. The white cap inside covers the bearing, which is held on the magnetic rotor by a retaining ring. After removing the retaining ring, you can wash and lubricate the bearing and twist the rotor from the rod and disassemble the entire mechanism. You can also wash the inside of the rotor, etc. However, for those who climb inside, I’ll immediately warn you that in my Siemens regulator, the thin short wires immediately came off the lid. And it was hardly possible to make out any other way. Then there was a terrible hemorrhoid of servicing and extending these wiring, filling the joint with sealant, turning the cover 180 degrees, since the place with the sealant did not allow the terminals on the cover to fit there. I forgot to change the polarity when I unrolled the cover and this caused the car to idle at 2500 rpm. Overall, the day turned out to be fabulous. Yes, IMHO it is better to use a special lubricant for metal-plastic friction pairs. I used Liqui Moly Thermoflex Spezialfett.
Thanks for the useful information. I have an unusable IAC lying around somewhere, I need to take it apart and have a look.
Isn’t it possible to simply drip engine oil from a syringe onto the rod without removing it?
You can simply drip oil, but sometimes the old grease on the rod screw thickens under the influence of engine temperature; it would be better to remove it.
I’ll tell you a little about my first experience in engine repair and the unexpectedly found way to disassemble the IAC at home.
Immediately after the purchase, having driven the first kilometers in my new car, nuances in the engine’s operation began to appear. Moreover, they appeared and disappeared completely unpredictably and had different characters. Sometimes there was no idle and when the gas pedal was released the car immediately stalled, other times the engine seemed to be throttling, rattling very loudly, and sometimes there was simply no traction. In general, by method of elimination, replacing everything on the ignition, I eventually got to the IAC. A new one was already on its way to replace it, but while I was waiting I decided to try cleaning the one that was standing.
Since this was my first renovation, I didn’t know all the nuances yet. As a result, having unscrewed and brought the IAC home for washing, I ran into the problem that I could not disassemble it. I was too lazy to return to the car to remove the rod by turning the ignition on and off as advised on the Internet. Therefore, after googling that IAC is just a bipolar stepper motor, I began to think about how to supply a series of current pulses to the coils so that it would unscrew the rod itself. As a result, having connected the wires to the IAC, I built a contact group from what was at hand, so that it would be more convenient and faster to supply current to the coils in the required sequence and polarity using a 12V power source.
After disassembly, it turned out that the motor inside was broken: the rotor axis with the magnet, which had already rubbed off a little on the stator, did not stay in place. I also had the impression that this IAC had been dismantled before me.
I cleaned and glued everything together. I reassembled it in the same way as I took it apart, pulling the rod in as far as it would go to install it on the motor. Thus, I successfully skated 150 km on the repaired IAC before replacing it with a new one. As a result, the problems with unstable engine operation went away.