If you learn how to remove the cooling radiator of a VAZ-2110, then you will be able to do other domestic cars. Life dictates its own rules, you bought a car - learn to maintain it, especially since VAZ allows you to do it yourself, after all, it’s a mechanic.
A machine is a system of interconnected mechanisms and elements; deviations in the operation of at least one of them already leads to emergency situations - failure of the entire structure. The radiator of the cooling system, according to auto mechanics, is almost one of the most vulnerable parts susceptible to deformation. Mechanical damage occurs very simply - all it takes is a flying pebble or a fallen tree branch.
Another reason for failure is the destruction of soldering and welding points. The longer the chemical contact, the greater the disturbance in the operating mode of the pump or thermostat, which in turn increases the temperature of the cooling solution.
The attached lid valve does not make it possible to reduce the pressure in a timely manner; there are too many leakage points.
Pro tips on why you need to know the model of the old one when choosing a new radiator
When purchasing a new radiator, be sure to check what type of device your vehicle is equipped with, since the radiator model, as a rule, depends on the volume of the power unit and can be either new or old.
As a rule, a modern car, be it a domestic model such as the VAZ 2109 or a foreign car, is a complex system of parts interconnected with each other. If even one link in the chain breaks, it will ultimately lead to the breakdown of others. A car is like a living organism, and for a VAZ 2109, replacing a cooling radiator is a process that will help save not only some parts, but also the engine itself, because a faulty radiator will not cool it properly. Replacing the VAZ 2109 cooling radiator is a mandatory job that you can easily do with your own hands.
VAZ 2111
The VAZ 2111 retained all the technical advantages of the “tens”, but at the same time was adapted for the transportation of goods. The car body was noticeably lengthened. It also became taller, which also increased cargo capacity. Rails are installed on the roof, which makes it possible to transport cargo weighing up to 50 kg on the top rack.
This is the first time such comfortable rear seats have been used. The rear seat can be folded in a special way and then any cargo up to two meters long can enter the interior and trunk of the VAZ 2111. In this case, the seat can also be folded across, leaving room for the passenger.
During the production of Lada 2111, several options were tried. The most worthy of more attention is the VAZ 2111-90. This is a kind of Niva hybrid. All four wheels are driven. In addition to greater capacity, this VAZ 21114 car also has high cross-country ability. The VAZ 2111 comes standard with a 1.6-liter engine. The new model uses a 1.8 liter engine! The suspension is completely from Niva. The new model was called "Tarzan". Passive and active safety characteristics have been noticeably improved throughout the Lada 21111 model range. In 2009, the VAZ 21112 was discontinued.
Club VAZ 2111 – these are photo reports of club meetings, mutual assistance and practical advice. The forum will always help you with solving non-standard problems, repairing and identifying problems with your car yourself - this is the VAZ 2111 forum.
Why does the engine overheat?
The engine on a VAZ 2110 can overheat for various reasons. The first priority is a decrease in the efficiency of the cooling system. Why does it stop working properly?
- The cooling system pipes may become clogged. Today such a situation is rare. Mainly provided that very low-grade coolant is used for CO. There is only one way out - change the pipes and use normal coolant.
- Various smudges and leaks lead to a decrease in the coolant level. Here you will have to replace all the components that are causing the leak.
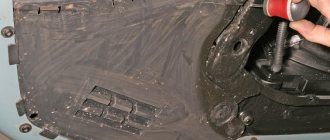
- The housing is dirty. Over time, debris, dirt, leaves, insect corpses, and so on accumulate on the radiator housing. This negatively affects work efficiency. Therefore, be sure to periodically clean the exterior of the housing.
- Radiator leak. In such a situation, you will have to remove it, assess the extent of the damage and decide whether to repair it or replace it with a new one.
What to do next
To replace the old VAZ-2110 radiator with a new device, repeat the above in reverse order, starting from the last point. In order for the radiator to work well, it is also worth checking the condition of the rubber bushing on the upper fastener. If the part is very worn, replace it with the one you just purchased.
The subsequent steps to install a new product are as follows:
- fix the air ventilation device;
- tighten the casing well;
- place the radiator in its original place in the VAZ-2110, put the lower mounting pads on the pins;
- When the radiator is already standing, add antifreeze.
Design
Diagram of the engine cooling system
The structural elements of the cooling unit being considered today are:
- Two body parts;
- Pipes;
- Cores;
- Drain valve located at the bottom of the housing;
- Filler plug at the top of the housing with two valves (inlet and outlet).
Also in fairness, it is worth including a thermostat and an electric fan in the cooling system, which play an important role in cooling the engine.
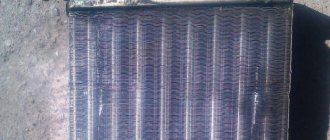
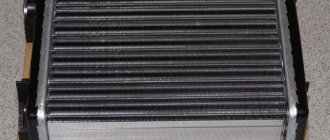
- The housing consists of two tanks with adjacent pipes through which coolant passes.
- The core is a series of brass tubes that are soldered to the cooling fins. They can be found inside the case.
- The fill plug allows coolant to be redirected to the radiator, and the drain valve allows the coolant to drain when needed.
Turning off the coolant supply
Let's move on to practice.
Before removing the radiator, you need to turn off the heating and drain the water. How to do it?
I will analyze the heating shutdown in an apartment in an apartment building. It is difficult to give any general recommendations for autonomous heating systems due to their individuality.
The simplest scenario is to turn off the water using valves, ball valves or chokes installed on the supply lines. It is enough to close the shut-off valves on both connections - and you can disassemble the connections on the radiator plugs, after first placing a basin or other container under them to drain the water.
A jumper must be installed between the connections with shut-off valves. Without it, a closed throttle or tap will stop circulation throughout the entire riser. Very soon your neighbors will come to you and begin to loudly question your high moral qualities.
Correct connection: shut-off ball valves on the connections and a jumper between them.
If the connections do not have shut-off valves, you will have to look for and reset the riser. It’s worth making a short lyrical digression here.
In apartment buildings with standing wiring, two bottling layouts are used:
Top filling means supply to the attic. Risers connect it to the return bottling located in the basement or subfloor. Each riser operates independently of the others and is switched off at two points - below and above;
A pair of heating schemes with top filling.
In a house with bottom filling, the supply and return wiring is done in the technical basement. The risers are alternately connected to both bottlings and connected in pairs by jumpers on the top floor of the house. Accordingly, two risers will have to be turned off - supply and return.
To determine the type of wiring, look into the basement. If there are two horizontal pipes in thermal insulation along the perimeter of the house, you have a bottom fill, and one has an top fill.
Bottom filling: both return and supply lines are laid around the perimeter of the house.
First, find your boner. In the basement it is easiest to navigate along the flights of stairs between the entrance and the first floor landing, in the attic - by the windows of the apartments. Further actions depend on the type of bottling.
Top filling
In the case of top filling, the shutdown procedure will be as follows:
- Turn off the attic valve. Do not unscrew the plug;
The outlet of the riser from the supply bottling in the attic looks something like this.
- Turn off the valve in the basement;
Riser and return flow in the basement.
- Unscrew the plug one or two turns and wait until the pressure of the stream of water hitting the thread drops. This will ensure that the shut-off valves are in full working order;
- Unscrew the plug completely. The water hanging in the riser will flow out after you open the line to the radiator.
Bottom filling
Here are instructions on how to turn off the heating riser in a house with bottom filling with your own hands:
- Shut off your riser and the two adjacent to it;
- Unscrew the plug one or two turns;
If instead of a plug there is a sump on the riser, the task will be greatly simplified.
- Open the valves on adjacent risers one by one. This way you will identify the boner associated with yours;
- Fully open the valve you don't need. Close the riser connected to yours;
- Unscrew the plugs on your riser and the risers connected to it.
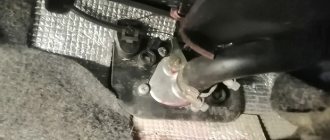
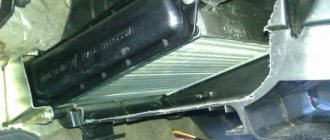
Radiator is a vulnerable car part
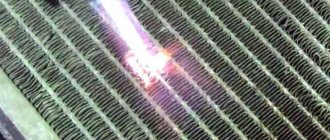
The radiator itself is a rather vulnerable part of the machine, because it has a brass body that is subject to numerous loads. And this part is thin in design, and if you take into account the huge number of soldered joints in it, then a quick failure becomes understandable. The radiator is located in front of the car and a pebble from the road or a tree branch that accidentally hits it can become a fatal bullet. Even the smallest foreign objects that get into the radiator can destroy soldering and resistance welding points.
In addition, the mutual influence of the elements of the car in this case plays a cruel joke. Long-term use of chemicals, like it or not, weakens the contact zone, disrupts the operating mode of the pump, increases the temperature, etc. In addition, if the radiator cap valve gets stuck, it will not allow the pressure to be released in time, which will ultimately lead to the appearance of many spots leakage.
Materials used
If the joints of the pipes and radiators do not match, you can use a corrugated hose.
Galvanized steel pipes are used to change the system or extend the connections to heating accumulators. They are joined with threaded connections; welding is not used. The melting point of steel is +1400°C, and zinc is +900°C. The zinc completely evaporates in the weld area.
Required components:
- blind and straight radiator bushings;
- two shut-off valves;
- paired locknuts when installed on squeegees, their size corresponds to the diameter of the connections;
- brackets for fixing the convector on the wall.
Sometimes stainless steel corrugated pipes are used. Durable products are bent; compression fittings are used for connection, installed with adjustable wrenches.
Replacing the cooling system radiator
Replacing the cooling system radiator
The radiator must be replaced if a coolant leak is detected in it.
WARNING
Remove the radiator only when the engine is cold.
You will need: a 10" wrench, pliers, a flat-blade screwdriver.
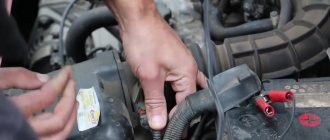
1. Disconnect the wire from the negative terminal of the battery.
2. Drain the coolant (see Replacing the coolant).
3. Remove the hood lock (see Removing, installing and adjusting the hood lock).
4. Remove the air intake (see Removing and installing the air filter housing).
5. Remove the top panel of the radiator frame (see Removing and installing the front bumper).
6. Press the clamp of the wiring harness block...
7. ...and disconnect the block from the additional fan resistance.
8. Remove the steam removal hose from the expansion tank plug nipple.
9. Squeeze the clamp ears with pliers, slide the clamp along the hose...
10. ...and disconnect the hose from the upper radiator pipe.
11. In the same way, disconnect the hose from the lower radiator pipe.
12. Remove the two bolts securing the left radiator mounting bracket.
13. Remove the left radiator mounting bracket.
14. Similarly, remove the right radiator mounting bracket.
15. On vehicles equipped with air conditioning, disconnect the condenser from the radiator (see Replacing the condenser).
16. Lift the radiator and remove the lower brackets for its fastening from the holes in the radiator frame.
17. Remove the radiator assembly with the electric fan from the engine compartment downwards.
Tools
Be sure to acquire the following materials:
- Torque wrenches;
- Bypass;
- Bulgarian:
- Adjustable wrench;
- Gas key;
- Roulette;
- Drill;
- Pencil;
- Soldering iron;
- Level;
- Lever pipe wrench.
In addition, it would not hurt to have a Mayevsky tap, without which no plumbing work can be done. It is imperative to have plugs that are suitable in size for the junction of batteries and radiators, as well as for installing additional taps. In addition to the plugs, it is recommended to immediately stock up on gaskets.
If, in addition to dismantling, you plan to replace batteries and pipes, then you need to stock up on new sections of pipes; it won’t hurt to buy Rifar bimetallic heating batteries, or some other analogues. In this case, you will need American cranes or simpler options. A polypropylene tap is very useful; with its help it will be easy to ensure that the heating is working when the radiator is removed. The PPR limit switch will be necessary for carrying out work in the neighbors’ area. If communication with them is unsuccessful, you will also need a clerk.
Among other things, the cost of cast iron batteries is much lower than their analogues, while the heat dissipation can be envied by these same analogues. Cast iron batteries also have low hydraulic pressure. Such batteries are very reliable and do not require any specific skills to operate.
The only drawback of these units is their extremely unpresentable appearance. However, manufacturers today know a lot about the style of radiators and try to give their cast-iron counterparts the most attractive appearance, especially since modern technologies make it possible to do this.
Replacing a cast iron battery cannot be done without a lever pipe wrench, which is used to remove locknuts and flanges. If this work is not possible, you have to use a pipe cutter. In this case, cutting must be done in front of the same nut. The following dismantling steps include:
- Disconnecting the heater from the system;
- Removing the heater from the fasteners;
- Heater disassembly and cleaning.
Very often, removal is carried out not only for replacement, but also for cleaning the radiator. Thus, cast iron radiators are very difficult to disassemble, but it is simply necessary to clean them of rust so that they work as if they were newly purchased. Before you start disassembling the battery, you need to prepare the tools:
- Blowtorch;
- Tow;
- Pipe wrench;
- Brush;
- Gaskets;
- Chisel;
- Bulgarian;
- Nipples;
- Hammer;
- Battery key.
You need to start disassembling the battery by heating the plugs with a blowtorch, after which they can be easily removed. After this, the nipple is cut between the sections using a grinder, so it becomes possible to disconnect the sections. Next, these nipples are removed with a hammer, and the battery is cleaned.
The reverse process is much more difficult - it’s no longer the same as unscrewing the heating battery with a wrench. First, you need to assemble the sections and group them, then the sections are connected using a set of gaskets, silicone and nipples, the latter being selected relative to the direction of the thread - this must be taken into account. Don’t forget about flushing the newly assembled radiator.
When the assembly process is completed, it is necessary to secure the removed radiator. This procedure involves either fastening to previously installed brackets or to new ones, especially when they were previously poorly installed. In this case, the first holes must be covered and puttied. New holes are drilled according to the measurements taken. Again, the holes are filled with nipples and brackets.
The best sealing can be achieved by securing all joints with tow. Moreover, cast iron batteries are connected to the pipes by means of bends. Be sure to ensure that the plugs are turned out. This is the algorithm for dismantling a cast iron battery. For convenience, it is recommended to purchase 300 mm heating radiators.
Reasons for removing a cooling system element
When a car breaks down, some reasons lead to the need to remove the radiator. The main ones:
- various types of mechanical damage;
- individual radiator tubes are clogged with dirt, deposits in the form of scale and rust;
- getting a car into an accident.
To eliminate the malfunction or replace it, you will need to dismantle the device. You need to take this work very seriously and do it carefully. In order for the process to be carried out efficiently, you need to at least briefly know what parts the radiator assembly consists of. It includes:
- device body;
- expansion tank;
- Electrical engine;
- engine casing;
- impeller (fan);
- rubber cushion;
- drain plug;
- various hoses;
- a pump that is powered by a drive belt.
Cooling system: 1 – expansion tank plug; 2 – expansion tank; 3 – radiator supply hose; 4 – hose from the radiator to the expansion tank; 5 – radiator outlet hose; 6 – left radiator tank; 7 – aluminum radiator tubes; 8 – sensor for turning on the electric fan; 9 – right radiator tank; 10 – drain plug; 11 – radiator core; 12 – electric fan casing; 13 – electric fan impeller; 14 – electric motor; 15 – pump gear pulley; 16 – pump impeller; 17 – camshaft drive toothed belt; 18 – heater radiator outlet pipe; 19 – pump supply tube; 20 – hose for supplying fluid to the carburetor starter; 21 – carburetor heating block; 22 – exhaust pipe; 23 – heater supply pipe; 24 – hose for draining fluid from the carburetor heating unit; 25 – thermostat; 26 – hose from expansion tank to thermostat
Non-standard situations
An unpleasant situation can happen when, when dismantling cast iron batteries, the bottom of the plug breaks off and the thread remains inside.
Proceed as follows:
- the collector is heated;
- put a chisel to the part in the direction of unscrewing it and try to turn it with a hammer;
- As soon as the edge of the thread is stuck out, it is turned out with pliers.
It is often necessary to remove old rusty batteries in which the threaded connection is corroded or even perforated.
In this situation, you need to do the following:
- “arm yourself” with a coupling made of brass or cast iron of the required diameter;
- cut off the thread from the liner, but leave the first five turns;
- drive the thread with a die;
- wrap the threads with plumbing linen soaked in paint (organic solvent), which dries quickly;
- screw on the prepared coupling;
- Now the wound thread is screwed into the coupling, and the problem is solved.
The cooling system does not work well, causes and solutions
- Clogged radiator pipes. This phenomenon, today, is very rare, and only when using low-quality coolant. In this case, the pipes should be replaced.
- Low coolant level as a result of cracks in the pipes or leaks at their attachment points.
- Housing contamination. One small detail should be taken into account here - the whole car, the radiator in particular, needs care. Do not allow it to become overgrown with fallen leaves, dirt and other debris, as this will significantly reduce its efficiency.
- There is another reason for the failure of the cooling system - the appearance of a leak in the radiator. Dismantle it so that, based on the location of the leak, its size and the general wear and tear of the device, you can decide whether it needs replacement or repair.
Can you see everyone?
Why are we talking about different ways to dismantle radiators?
How do they differ in connection methods?
- Fittings used. Traditionally, for the installation of Soviet-style cast iron radiators, a combination of a conduit (a pipe with a long thread) and a lock nut were used; now the batteries are more often connected with American ones - quick-dismount fittings with union nuts;
The photo shows the connection of an aluminum sectional radiator by an American woman.
Connection on the lines.
The location of the connections relative to the radiator. The connection can be one-way or two-way
This is important when installing on squeegees: one of the radiator plugs through passage will have a left-hand thread.
A special case
- In many houses built in the 80s and 90s, convectors are used as heating devices. The convector is a coil made of a steel pipe of the same diameter as the riser, with fins that increase heat transfer. The typical method of connecting a convector and a steel line is a butt weld.
The heating device is connected to the riser by welded seams.
Choosing something new
Before removing the cooling radiator from your VAZ 2110, you need to think about what unit will be in its place. There are not many options, but the choice should be made wisely.
Kraft model
For the domestic “ten” there are two types of cooling devices - aluminum and copper
And here it is important to think about what exactly you want - reliable, long-term operation, or minimal financial costs for its purchase
- Aluminum. They are light in weight and quite cheap. Prices directly depend on the manufacturer. But such radiators have poorer thermal conductivity and do not cool the engine as effectively. Plus, aluminum units are characterized by the appearance of corrosion after a short period of operation. Among the most popular models, we note two: Luzar. Its cost is now about 1000 rubles;
- Pramo. You will have to pay about 1600 rubles for it.