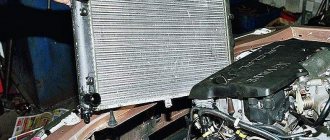
The cooling radiator is one of the most important parts of the car engine cooling system . A radiator failure can lead to engine overheating and, as a consequence, subsequent failure. The consequence of engine overheating may be a major overhaul of the engine and the entire cooling system. In this case, you can consider installing a power unit from a foreign car.
Tools required for repairs
If you want to do the repairs yourself, you need to prepare the following tools:
- keys for 8 and 10;
- screwdrivers;
- heads for 8 and 10;
- pliers;
- container for draining antifreeze;
- jack;
- sealant;
- rags.
Independent work is completely justified, since as of March 24, 2019, the average price for replacing a cooling radiator for a VAZ 2114 and other models is 2.2 thousand rubles. Which will more than double costs.
Order of Operations
If the car has a low seating position or the coolant drain tank is large, work should begin by lifting the car with a jack. The radiator is installed on the TV along with fog and regular headlights. Work should only begin with a cold engine. If the engine is hot, be sure to wait until it cools down.
Now you can get started:
- After removing the plug from the expansion barrel, the working fluid is drained into a container. It is necessary to drain all the antifreeze that is in the cooling system.
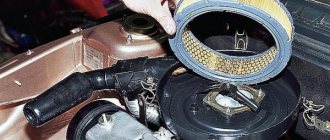
- Now you need to dismantle the filter.
- The radiator must be removed together with the electric fan. To do this, you need to disconnect the power supply to the cooler. Now you need to unscrew the pressure plate and remove it.
- Now you need to remove the inlet and outlet hoses from the pipes. To do this, loosen the fastener clamp.
The radiator with fan is tilted towards the engine and removed. Attention! Before pulling out the fan, you need to disconnect the wires. They are usually located at the bottom of the device. This is necessary in order to maintain the functionality of the wiring.
- Now you need to disconnect the fan from the radiator. To do this, use a 10mm wrench to unscrew 2 nuts. The fan must be removed along with the casing.
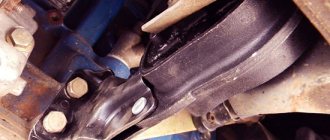
- Installation of the radiator is carried out in the reverse order to that described above. It begins with switching the new node and the fan. Important! Before replacing, make sure that there are 2 rubber cushions. If they are missing, install new ones in the crossmember holes. If they are in place, then the installation of the new unit is carried out on them.
Replacing the heater valve VAZ 2114
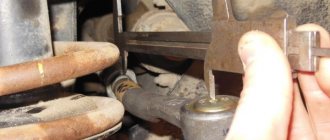
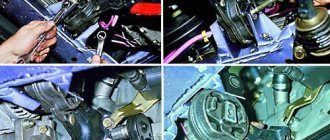
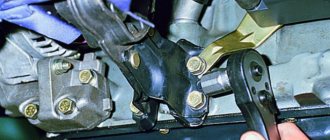
- Unscrew the two 10mm nuts on the engine shield. (photo at the beginning of the article)
- If you are changing both the faucet and the radiator, then remove the faucet along with the pipes after disconnecting them from the radiator
- Remove the latch and cable
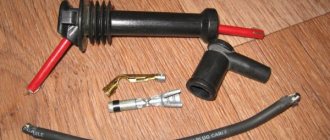
Stove valve control cable.
- We insert mounting bolts into the new stove faucet, and also mount the pipes in the position in which they were on the old faucet and tighten the clamps so that there is no pain later.
A small life hack. After installing the bolts, drop a little superglue on the seats, so they will not jump out when installing the faucet in place.
- Before installing the stove tap in place, we connect the cable and check that the tap opens and closes completely when changing the position of the manual heat-cold switch.
- If everything is normal, we install the faucet in place, connect the pipes and fill in antifreeze and enjoy the hot air from the heater even when idling.
Just for fun, I measured the air temperature at the outlet of the vent on the center console; with the engines fully warmed up and the outside air temperature +12, the thermometer showed +43 degrees in the second position of the fan.
Everything is very simple, it took about 1.5 hours to replace the radiator, and 30 minutes to replace the faucet. This procedure is easy to perform with your own hands, in a regular garage, even without an assistant.
Good luck on the roads. Not a nail. Not a rod!
Let's summarize
In general, repairs are quite accessible for doing it yourself, but you need to immediately prepare for a significant time investment. Work can last for 2-6 hours. When replacing the radiator, it is necessary to change the coolant. Work with 8-valve and 16-valve engines is carried out in the same way. If the car has air conditioning, you will have to remove and install it during the repair, but not on all models. It is advisable to replace the bushings at the same time. The work is completed by checking the functionality of the engine and the condition of the coolant. Namely, whether it is boiling.
For greater clarity on replacing the VAZ 2115 injector cooling radiator, you can watch this video:
Source
Purpose and location of the heater radiator VAZ 2114/15
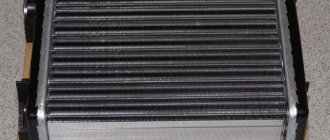
The heater radiator heats the air entering the car interior. It is the main element of the interior heating system. By passing hot coolant (coolant) through itself, the radiator heats itself and heats the air flow blowing over it. Air enters the stove both naturally while the car is moving, and forcibly with the help of a fan.
The radiator is installed in the heater casing under the center console of the panel, without dismantling which you can only see the inlet and outlet pipes connecting the radiator to the heater tap. This arrangement is very inconvenient when replacing the radiator. It is because of this that many VAZ 2114/15 owners prefer not to repair the heating system themselves, but to contact a car service center. However, replacing the radiator yourself is quite simple. To do this, you just need to know some of the features and secrets of its dismantling.
The heater radiator is located in the heater housing
Step-by-step replacement process
- Open the hood and unscrew the two bolts securing the filter housing to the front panel. Ten head bolts.
- Press the latch and disconnect the mass air flow sensor power connector.
- Lift the filter housing and move it to the side.
Unscrew the two nuts securing the radiator clamp and slide it forward from under the front panel. Eight head nuts.
Press the lock and disconnect the fan power cord.
Loosen the clamp and disconnect the pressure relief pipe from the radiator.
Remove the radiator along with the fan.
Remove the four bolts securing the fan to the radiator.
Move the two rubber silent blocks from the old radiator to the new one or install them in the holes on the body.
Install the fan onto the new radiator and secure with bolts.
Place the radiator in place and be sure to ensure that the radiator silent blocks fit into the holes on the body.
Replacing the heater radiator on a VAZ 2114/15
To replace the radiator, you will need a trestle or inspection hole, as well as the following tools:
- wrenches 8, 10 and 13;
- socket wrench 24;
- two Phillips screwdrivers (short and long);
- car jack;
- a container for draining coolant with a volume of at least 5 l;
- polyethylene film;
- dry rags.
When replacing a radiator, the hoses of the interior heating system are usually also replaced.
Replacing the radiator without removing the panel
The VAZ 2114/15 instruction manual recommends replacing the heater radiator with the panel removed. However, you can do without dismantling, just moving the panel. To do this you need:
- Place the machine on an inspection pit or overpass.
- Disconnect the negative cable from the battery.
- Using a number 10 wrench, remove the engine protection.
When replacing the heater radiator, you need to remove the engine protection - Place a coolant container under the drain plug.
- Using a key number 13, unscrew the plug and drain the coolant.
To drain the coolant, use a 13 key to unscrew the bolt plug. - After the coolant has completely drained, tighten the drain plug.
- Close the heater valve by moving the control lever to the extreme left position.
- Move the front passenger seat all the way back and recline the backrest.
- Open the glove compartment, unscrew the six screws securing it and pull it out.
To remove the glove compartment, unscrew six screws - Remove the plug in the central part of the panel and unscrew the screw located under it using a Phillips screwdriver.
The screw is covered with a plastic plug - Unscrew the five screws securing the right center console cover. Repeat the same procedure for the left cover.
To remove the center console covers, you need to unscrew the screws that secure them. - Remove the instrument panel by unscrewing the four screws securing it (two on top and two on bottom).
The instrument panel is secured with four self-tapping screws - Remove the steering column cover by unscrewing three screws at the top and three at the bottom.
To remove the steering column cover, you need to unscrew six screws - Disconnect the electrical connectors of the radio and cigarette lighter.
- Remove the lining of the damper control levers and the knob for switching fan operating modes.
Before removing the control unit, you need to remove the plastic lever covers and the switch handle - Remove the screws securing the center console.
The center console is secured at the top with two screws. - Remove the diagnostic connector by unscrewing the two fastening screws.
To dismantle the diagnostic connector, you need to unscrew two screws - After disconnecting the electrical connectors from the switches, remove the center console.
Before removing the center console, you must disconnect the electrical connectors. - Using a size 8 wrench, unscrew the two screws securing the panel base to the car floor.
At the bottom, the base of the panel is attached to the floor with screws - Unscrew the four (two on each side) self-tapping screws for the side panel fastenings.
The panel is secured on the sides with two self-tapping screws - Unscrew the screws centrally securing the panel to its base.
To detach the panel from the base, you need to unscrew two screws in the center - Disconnect and remove the electronic control unit.
The ECU is removed along with the relay and fuse bracket - Pull back and slightly lift the panel on the right side. Secure it using a jack or improvised means.
For greater convenience, the panel must be slightly raised with a jack. - Cover the floor of the car with plastic film and dry rags.
- Using a Phillips screwdriver, unscrew the screws that tighten the clamps of the radiator pipes and disconnect the pipes.
To disconnect the pipes, you need to loosen the clamps - Unscrew the three radiator mounting screws.
The heater radiator is secured with three screws - Remove the radiator from the heater housing.
- Install a new radiator.
- Connect to the new radiator and secure the pipes.
- When replacing pipes, loosen the clamps securing them to the heater valve fittings. Remove the pipes.
- Reassemble in reverse order.
Video: replacing the VAZ 2214/15 heater radiator without dismantling the panel
Replacing the radiator with dismantling the panel
According to the repair and operation manual VAZ 2114/15, the heater radiator should be replaced as follows (the set of tools is the same):
- Place the car on a platform or inspection hole, remove the engine protection, drain the coolant, following paragraphs 1–6 of the replacement instructions without dismantling the panel.
- Remove the left and right side covers of the center console by unscrewing the screws securing them with a Phillips screwdriver.
- Disconnect the cigarette lighter and radio connectors and remove them.
- Remove the lining of the heater damper and valve control levers and the fan mode switching knob.
- Unscrew the screws of the upper mounting of the center console on the left and right.
- Unscrew the four screws securing the instrument panel (two at the top and two at the bottom).
- Use a Phillips screwdriver to unscrew the self-tapping screw under the plastic plug at the top of the panel.
- Remove the panel shield and move it to the right.
- Disconnect the wiring harness blocks, having previously marked them for ease of assembly.
- Using a size 8 wrench, unscrew the bolts of the lower fastening of the panel base on the left and right.
- Remove the housing of the central deflectors from the panel.
The central deflector housing supplies air from the central air duct - Unscrew the two screws of the top fastening of the panel base on the left and right.
- Using a screwdriver, unscrew the two screws securing the panel to its base under the heater control unit.
The panel is secured with two self-tapping screws - Together with the relay and fuse bracket, disconnect the electronic engine control unit from the base.
- Remove the heater control unit.
- Unscrew the six screws on the steering column housing (three on top and three on bottom).
- Disassemble the steering wheel.
- Using a 24 mm socket wrench, unscrew the steering wheel mounting nut. Remove the steering wheel.
To remove the steering wheel, you need to unscrew the nut with a 24mm socket wrench. - Unscrew the screws on the side panel fastenings (two on each side).
- Open the glove compartment, unscrew the six screws securing it. Pull out the glove compartment.
- Disconnect the electrical connectors from the glove compartment light bulb.
- Remove the panel along with the base and move it to the left.
After removing the panel, slide it to the left - After ensuring free access to the heater, lay plastic film and dry rags on the floor.
- Replace the radiator in accordance with paragraphs 25–30 of the previous instructions.
- Reassemble and install the panel in reverse order.
Thus, replacing the VAZ 2114/15 heater radiator can be done without resorting to the services of a car service. This will require a new radiator, a standard set of tools, free time and careful implementation of step-by-step instructions from specialists.
Diagnosis of faults, repair and replacement of the Chevrolet Lanos heater radiator with your own hands
Self-diagnosis and replacement of the fuel pump VAZ 2114/2115
Changing the VAZ 2114 cooling radiator with your own hands
VAZ 2114 is considered one of the most striking examples of success of the domestic automobile industry. This model is a modified version of the VAZ 2109 and differs from it in the design of the front part of the body, updated headlights and hood, radiator grille design, as well as plastic moldings and spoilers. However, as it became known, the car is susceptible to radiator failures, which can lead to overheating, and as a result, to engine failure.
Replacing the cooling radiator
It is worth noting that the radiator from 2114 is also suitable for other representatives of the VAZ model range. As you know, VAZ’s developments are universal, so it is not surprising that not only cooling system parts, but also other spare parts from earlier and later models of this brand will ideally fit the 2114.
As one of the main parts of the cooling system that is in constant operation, the radiator may require replacement because it becomes clogged with debris or suffers mechanical damage. In addition, the coolant must be replaced in a timely manner, otherwise it will corrode it from the inside, which will undoubtedly lead to breakdown.
Refilling a new radiator
Finally, “Tosol” or antifreeze should be poured into the expansion tank of the new radiator. Basically, approximately 5-8 liters of liquid are poured into the new cooling system to cool the engine. After filling with antifreeze, the car must be started and left running for a few minutes so that the thermostat opens and the antifreeze goes into the engine cooling system. Replacing the 2114 radiator, like any other VAZ model, should be carried out in a warm room or in the summer season.
Source
The main causes of radiator failure
Engine cooling radiator
Let's look at the main reasons for radiator failure on a VAZ-2114:
- mechanical damage (bounced stones or large debris on the road);
- deposits inside the tubes in the form of scale or rust, dirt;
- damage as a result of an accident.
How to prevent engine overheating?
To prevent engine overheating, it is necessary to constantly monitor the amount of coolant in the expansion tank, the operation of the thermostat and the condition of the radiator itself.
This is what a newly installed engine cooling radiator looks like. You need to make sure it is clean and blow it out regularly.
The appearance of traces of coolant on the asphalt after a short or long period of parking, as well as wet marks on the radiator itself, is a signal to check the radiator for leaks and possibly subsequently replace it.
Engine overheating
Coolant leaks can be caused by small cracks or loose connections. In such cases, it is possible to repair the radiator even without dismantling it. When repair is not possible, the only option is replacement.