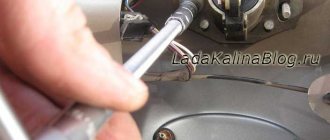
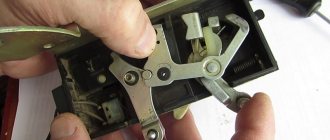
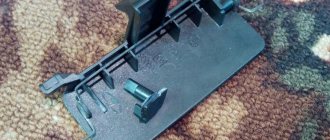
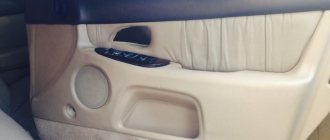
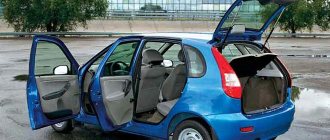
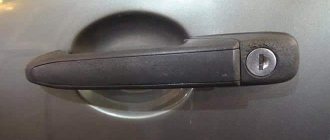
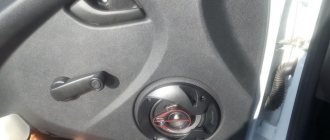
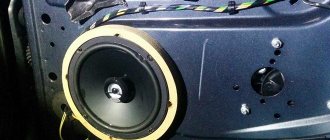
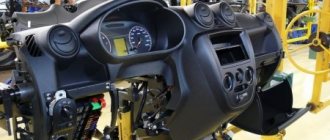
Door handles on modern Lada cars are quite reliable. However, there are cases when, in severe frost or when excessive force is used, the handle mechanism breaks and fails. In this case, it needs to be replaced. The reason for the replacement may also be the desire of the car owner to switch to the handles from the Luxury package, which are painted in the color of the body and are more pleasant to use. Regardless of your motivation, the work will be almost identical.
Before starting the work process, prepare the following tools: an “8” socket or an open-end wrench of a similar size, an extension, a ratchet, a Phillips and slotted screwdriver, plastic spatulas for working with interior plastic, penetrating lubricant in aerosols. Before starting work, disconnect the negative terminal from the battery to avoid a short circuit.
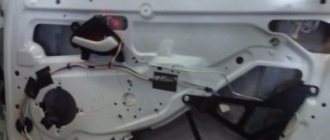
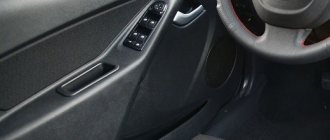
To replace the outer handle of the Lada Granta door opening, we will need to remove the door card to gain access to the inner nut securing the handle. On the front doors, unscrew the screws in the indicated places with a Phillips screwdriver, unscrew the plastic cover of the door lock button and, using a plastic spatula, unclip the door card from the body element. On the rear door, the fastening screws are located under the plastic cover of the door handle; by snapping it off we will gain access to them.
We advise you to use specialized spatulas for working with plastic; such a tool will avoid damage to the plastic and worsen the appearance of the car interior.
After the door card is released, disconnect the power wiring for the power window buttons, if your vehicle has them.
To remove the external rear door opening handles, you will need to use a socket with an “8” extension or an open-end wrench of a similar size to unscrew the two attachment points of the external door opening handle. One nut is on the inside of the door, the second bolt is on the outside.
Further actions will depend on the year of manufacture of the car. If you have a Lada Granta Liftback, or a Lada Granta Sedan / Lada Kalina released later than the fall of 2014, then in your case a rod is used in the rear door opening drive. You will need to additionally release the metal rod retainer from the door lock. If you have a car manufactured earlier than the fall of 2014, then no additional actions will be required.
After releasing the fastening points, we move the handle in the direction of travel of the car and, simulating the opening of the outer door handle, rocking it, remove it from its seat.
Considering that since 2014 AvtoVAZ has changed the type of rear door lock drive from the external opening handle, it is possible that the mechanism on the handle does not correspond to the lock mechanism. If this happens in your case, you will need to move the door lock drive from the old handle to the new one. To do this, you will need to loosen the tension of the return spring and knock out the pin holding the drive. Use a slotted screwdriver to pry up the edge of the return spring and remove it from the seat.
Front door lock device
A Lada Granta driver's door lock costs from 1000 to 1500 rubles. The price in official dealer stores is lower. To replace it, you need to remove the interior trim, disassemble the steel block and remove the core. The larva must be repaired or replaced. Sometimes it is enough to lubricate the pins with a silicone substance for the part to function properly.
The pins that fit into the slots on the right and left create a specific coding when the key is turned. Blocking occurs after prolonged wear, a sharp change in temperature, rust on the teeth or a broken pin. The lock can be easily opened with a master key or breaks if not properly maintained. Repair work may be required after unauthorized opening by a foreign object, wear of individual parts, freezing of moisture in the mechanism, or improper operation. By purchasing a set of larvae, a person receives a core for the driver's door and trunk.
Prerequisites for failure: creaking, problems when the key moves in the lock or penetrates the core, damage to the body of the cylinder.
Reviews
| № | Positive |
| 1. | Vitaly: for two years of operation of the car, there are no comments on the body or locks. From time to time I lubricate the components myself; for this I bought a special grease gun. To prevent the core from freezing in winter, I spray it with an aerosol. |
| 2. | Gennady: I used the aerosol several times to lubricate the core in winter. The door slams easily, the plastic does not rattle, the sound insulation is standard. |
| 3. | Vasily: after using the car for a year and a half, I only replaced the factory vibration and noise insulation and re-lubricated the door mechanism. Everything works as usual, there are no complaints. |
| 4. | Kirill: I’m happy with the car, the build quality is good, I fix minor breakdowns on my own. |
| 5. | Gennady: During the year, I made one unscheduled visit to the workshop to lubricate the door components. The central locking works properly and stably. Poor sound insulation, but this is easily fixable. |
| 6. | Alexander: my positive review of the Lada Granta, the car is good, it fully meets the “price-quality” criterion. Minor flaws are present, as the model is in the budget segment. |
| 7. | Ivan: I drove 75,000 km on Grant, I didn’t make any capital investments, I just bought consumables for maintenance. I treat my equipment with care, fill it with high-quality fuel, and periodically lubricate it. |
| Negative | |
| 1. | Victor: The standard locks are very weak, they wear out quickly, after which the door rattles and knocks. A year and a half has passed since the purchase, and the mechanisms already need to be changed. |
| 2. | Dmitry: after another winter, the castle on the left side flew away. There is no point in repairing it, since repairs will cost more than buying a new one. |
| 3. | Vyacheslav: the factory hinge on the left side lasted only 80,000 km, after which it was replaced with a new one. The service life is short, the quality is very poor. |
Conclusion If the need arises, you can replace the door handle on the Lada Grant yourself. The process is not complicated, and the principle of operation is intuitive.
Replacing the rear door lock
Having untwisted the cylinder, it will become clear what actions to take. If the teeth are broken or deformed, then repair work will not yield results. You will have to remove the cylinder and install a new one. It is necessary to change the Granta rear door lock according to the following scheme:
Now you can look at the condition of the internal parts. If there are no external signs of malfunction, then the lock teeth are thoroughly lubricated with a silicone substance. If a break is detected, a new core will have to be installed. Assembly is performed in reverse order.
Preparatory stage
Required tools:
- impact screwdriver;
- cross bits;
- pliers;
- plastic clips in case of damage to the standard ones;
- liquid for removing rust and corrosion;
- a new lock, the modification is chosen individually by the owner.
Procedure for independently replacing the driver's door lock on a Lada Granta Liftback
- We install the car within the perimeter of the repair area and provide unobstructed access around the perimeter.
- We take priority safety measures when carrying out work. We fix the rear row of wheels with wheel chocks and engage first gear to avoid arbitrary movement.
- Open the driver's door, use an impact screwdriver to unscrew the two screws securing the shackle to the car body, and remove it from its seat. We install a new shackle with soundproofing material.
- Let's start removing the constipation: unscrew the plastic float and remove the stem.
- We unscrew the car door card, two screws, eight plastic clips around the perimeter.
- We disconnect the block with wires from the double-glazed window control unit, speakers, and central locking.
- From the outside, unscrew the three screws that secure the lock body to the door.
- We remove the two rods, having first disconnected them with pliers.
- We carry out preventive maintenance, clean the seat, remove old grease, and apply a thin layer of new one.
- Let's start installing the new lock.
- We assemble the structure in the reverse order, unless there are other breakdowns that require surgical intervention or elimination.
During the installation process, we pay attention to the integrity of the electrical wiring, insulating layer, terminals, and blocks with wires. If there are signs of wear, replace them with new ones.
Do not operate the machine with faulty electrical wiring.
Typical door lock malfunctions
- tightness of locking the door;
- increased noise when opening/closing;
- the central lock does not lock the door and does not respond to signals;
- unlocking is accompanied by a creaking, metallic grinding sound;
- While driving, the door vibrates, cracks are visible in the places of contact with the standard seal.
Common Causes of Premature Wear
- failure to comply with the deadlines for technical inspection, preventative maintenance, lubrication, and replacement of worn elements;
- third-party mechanical damage resulting in deformation of the door or lock;
- manufacturing defects at the factory;
- the lock has become loose due to loosening of the fastening;
- violation of the adjustment algorithm;
- human factor: systematically locking the door with force.
The defect is eliminated by replacing the constipation assembly.
Replacing the rear (passenger) door lock
The procedure for preventing locking of the front/rear passenger door is carried out by analogy. The design and method of fixation are typical.
Installing a trunk lock on Lada Granta Liftback
- We place the car on a level platform and provide access to the trunk lid.
- We take safety measures when carrying out work.
- We unscrew two screws and remove part of the lower plastic trim of the trunk lid.
- Unscrew the two screws securing the lock body to the trunk lid;
- Using pliers, remove the rod from the button to the body.
- We remove the constipation, carry out preventive maintenance, lubricate the threads and the rod end.
- We install a new lock and assemble the structure in the reverse order.
- We unscrew two screws, remove the standard shackle, install a new one with sound-insulating material.
Replacing the hood lock
- Inside the car, under the dashboard, there is a hood release lever. We pull it towards ourselves.
- Release the latch and lift the hood.
- Using a TORX key set to “10”, unscrew the two screws holding the lock body to the body.
- Using pliers, remove the cable eye from the seat.
- We remove the lock, install a new one in its place, and assemble the structure again.
- Lubricate the bow-clamp with silicone grease/solid oil.
Adjusting the rear door lock
You will need a screwdriver, hammer and file. The bolts that will help you make adjustments are located under the casing. After removing it, begin the adjustment. Instructions:
It is important to check the functionality of the device and only then perform reassembly.
If the problem does not go away: there is still a creaking or difficulty opening/closing, you can use another method. To do this, use a screwdriver to loosen the fasteners of the bracket and adjust it up and down. During this, close and then open the door several times. As soon as the creaking disappears, the bracket is firmly fixed.
Source
Removing the side mirrors
Side mirrors are needed to monitor the situation on the road while driving. They are:
Interior mirrors are mounted in car interiors using self-tapping screws or bolts, suction cups, or glue. Regular bolts are simply unscrewed after first removing the plug. Care should be taken with the adhesive connection; first try to separate the bracket from the platform glued to the glass. In most cases, for these purposes, it is enough to perform a slight turn or carefully move the latches. When this is not possible, the bracket is dismantled along with the windshield. The glue holds the working elements very firmly, so you should act with extreme caution to avoid the risk of damaging the glass.
Before starting work, carefully read the technical operating instructions. The dismantling process should be strictly followed so that you do not have to buy new glass; its price starts from 500 rubles.
To remove and replace the interior mirror, presses and mediators are used. The case is divided according to a principle similar to a TV remote control or mobile phone. Find the area where the body and the mirror product meet, insert the spinner into the compartment and press firmly. There should eventually be a small gap on the body. Go over it with a pick and separate the parts of the body. Warm up the area where the reflector connects to the body with a household hair dryer and remove the mirror.
A construction hair dryer is not suitable for heating - it is too powerful.
How to get to the door mechanism
Replacing the Lada Granta door lock cylinder or the entire structure should be done by a master or someone who understands how to get to it. After removing the casing, access to the lock opens automatically. There is no need to remove the inner metal lining; the steel sheet is simply carefully bent to the side.
Always remove the car from the alarm before starting repairs.
A drive is a rotating part with a characteristic protrusion; you will see it after dismantling the casing. Replacing the larva is carried out in the following steps:
After assembling the mechanism, you should find the slot. A screwdriver is pushed into the space between the housing and the drive. If all else fails, the lock assembly will have to be removed.
Review of spare parts prices
| Name/article | Price, rub.) |
| 00001003833121 Bolt M5x10 with serrated shoulder | From 100 |
| 00001003831801 M5 nut with serrated shoulder | From 100 |
| 00001002624101 Washer 5 mm | From 50 |
| 00001003275901 Screw M6x10 | From 50 |
| 00001002605371 Lock washer 6 mm | From 50 |
| 21230610542000 Lock cylinder | From 550 |
| 11180610515000 External front right handle | From 650 |
| 11180610515100 External front left handle | From 650 |
| 21900610518000 Inner front right handle assembly | From 950 |
| 21900610518100 Inner front left handle assembly | From 950 |
*prices are current as of November 27, 2018.
Recommendations for choosing and replacing door handles
When choosing spare parts, always give preference to original ones. Good, high-quality parts are always 10 - 15% more expensive than analogues. At the same time, by purchasing a factory part, you can count on a long service life of the mechanism.
A cheap counterfeit does not provide even a third of the required resource. The final choice is up to the owner of the technical device. The deciding factor is the budget.
Lock device
The locking mechanism for the right and left doors of 2190 and other models is approximately identical. The larva looks like a cylinder equipped with a secret mechanism. In all locks with flat keys it will be replaceable.
The drive has a hole for removing the element. It is enough to press with an awl or a thin axle, you will be able to pull the knot out. The lock is usually removed first.
If you insert the key into the cylinder and turn it left and right 90 degrees, then removing the cylinder will be much easier.
Replacing the front door lock on a Lada Grant
Then the door lock on the Lada Granta with an electric drive is installed in the reverse order.
General practical information about the structure of the larva
If the main reason for the malfunction of the system is precisely the cylinder, it will be enough to correctly replace the cylinder from the inside. This will make it possible to do without completely replacing the element, and will also increase protection and allow you to install a new key instead of the old one.
Installing a new cylinder changes the mechanical design of the lock, so instead of the old key, you will need to make another one.
Reasons for replacing the lock cylinder:
Sequence of actions when replacing the rear right (left) door handle
We carry out the work modularly, since initially it is necessary to dismantle the casing, the internal filling, and unscrew the handle latches.
Stage No. 1: dismantling the card.
- We place the car on the site, provide priority safety measures, and activate the parking brake.
- Open the rear left door and raise the glass to the top position.
- We twist the blocker (soldier).
- Use a screwdriver to pry up the fastening of the window lifter handle, remove it from the grooves, and remove the lock.
Stage No. 2: disconnect the door lock rod and remove it from the door cavity.
- Using an “8” socket with an adapter, unscrew the bolt securing the handle.
- Using a screwdriver, carefully pry and disconnect the lock bars from the inside.
- We move the handle in the “forward” direction and remove it.
This completes the process of dismantling the unlocking element. Next, we carry out preventive maintenance, install new parts, and assemble the structure in the reverse order.
Adjustment: procedure
To adjust the lock on the front doors of Lada Grants, first check the gaps on the sides, top, bottom and sides. Most often, problems with opening arise due to incorrect geometry - for example, the top of the door fits tightly to the drain and body. To adjust:
To correct the position from below, the doors of the Grants are opened and then closed with palm strikes. The gaps between the body and the door structures should ultimately be the same. No force is used to avoid damaging anything.
Source
How to remove the front door: step-by-step instructions
- We place the machine on a level platform and ensure priority safety measures.
- Open the front driver's side and roll down the side window.
- Unscrew the three screws that secure the upholstery at the bottom.
- We carry out dismantling on the right side by analogy.
- We unscrew the little soldier - the door lock lever.
- Use a screwdriver to pry off the plastic plug.
- Additionally, we unscrew the screw that secures the upholstery in the middle part of the door card.
- We unscrew the screws in the armrest niche.
- Unscrew the handle fastening (two self-tapping screws).
- We insert a flat-head screwdriver between the metal body and the plastic upholstery.
- Squeeze out the plastic.
- We remove the front door trim and remove the card from its seat.
- Disconnect the block with wires from the locking lever.
- By analogy, we disconnect the contacts from the electric window drive.
- We remove the upholstery.
- Use a screwdriver to pry up the power window control unit and remove the switches.
The right door lock does not work. Research and search for the cause.
Over the last couple of months, a problem with the lock randomly not closing when arming the front right door began to bother me. For some reason, everything can be fine for a couple of days, but in the evening, when you arrive home, it just doesn’t close. I checked the connectors in the door and on the lock - everything is good and clean. According to the diagram, all three passenger door locks receive an impulse from one point, which means that the CBKE also disappears. In the end I decided to replace the lock. It was a two-pin one, without a limit switch, so I took the same one. Dear, bastard 2050 rub.
The replacement doesn’t seem to be difficult, but I cut my hands very well on the edges of the door. Putting it back together is more difficult than taking it apart, especially putting the rod back on the outer handle. After 20 minutes of torment, I spat and took off the handle. It is much easier to insert the rod through the hole from the outside.
I studied the old castle by its appearance. It turned out that the plastic casing of the electrical part had come off.
I dug further out of interest. I didn't see any obvious defects. A couple of theories arose why there might be a problem: 1) in addition to sealing, the cover serves as a clamp for the gear, and because the clamp is weakened, the gear can sometimes become warped, and therefore the lock does not work. 2) if the motor does not bring the pusher to the extreme position, then it will not click to close, and the return stroke will be idle. Maybe due to a lack of sealing, moisture or dirt has entered the motor, and it simply does not have enough effort.
UPD. Found. The motor jams for no reason. When it's jammed, you can't even turn it with pliers.
UPD2. Disassembling the motor revealed a foreign plastic particle inside the motor. At the moment when it fell into the gap between the rotor and stator, the motor did not work. After that, the reverse rotation pushed her out again. Presumably the particle was part of the plastic cap, as it matches it in color. It seemed to have fallen off from the place where it was thermally unfastened and got inside through the ventilation holes in the motor casing.
Source
Replacing the front driver's door lock.
As I wrote earlier (www.drive2.ru/l/9292608/), my central locking bothered me. He just went crazy. Out of four doors, only 3 closed (all except mine) or, on the contrary, mine closed, but 3 didn’t, or even only the front doors closed and the back ones didn’t... In general, I suffered for 4 months until I waited for maintenance. At first there was a version that there was water in the end switches, and everything needed to be ringed and removed, but it turned out that everything was much simpler, the lock was covered. The service center said that the lock was ordered from the factory and will be replaced under warranty free of charge. But my troubles did not end there...
After waiting 2 weeks, I couldn’t stand it, I called the service, to which I was told that there was no information about it yet, they would clarify it and call me back. But alas. Silence... I called 2 days later - the answer was surprising:
- We didn’t order anything. We have everything in stock... - Well, you're in trouble... When should I come to change it? - Our master will call you back and set a date... - Well, ok, no questions asked...
Another 3 days passed. Well, as much as possible... I was infuriated, I went in person. Further more interesting)
— Hello, I need to change the lock on the door, I’ve been suffering for 5 months. They promised to order it, but it turns out it’s in stock... - Yes, we know. Wait. The master is not there yet, he will call you and set a time... - No need to call me. Now give me a time. - ... - Well, or give me a boy who will sit next to the car and make sure that nothing is taken out of it or stolen! - Oh, don’t worry so much! (the boy began to make excuses, blushing)... - After 5 minutes the master came, and we decided on the date... In general, I suffered for another week.
I arrived at the appointed time, and not everything went smoothly... They forced me to pay for the car wash. Well guys, warranty service... What are you talking about? It's your fault. Okay, ok... I waited 40 minutes for the car wash... I listened to music, sat like this, turned over, sat differently, took a few dirty photos of Chernykh... What else to do when no one wants to work... No comments.
They washed Chernykh for half an hour... The rugs were dirty, well done... They always washed them, there were no complaints... They changed the lock for 3 hours... For half an hour they dumped everything on the planning meeting... What are you talking about? Oh, AvtoVAZ... I had a better opinion... They entertained me as best they could, but for the first time in the service I was like this:
The lock was changed, I think it was most likely him.
I haven’t seen it personally and have no idea what it looks like. But after the replacement, everything works, the doors close both from the central locking and from the alarm. This makes me incredibly happy. Now I’m not afraid for the car... So, tinting was my salvation. Extra eyes can’t see anything and it’s very good). In the end, I only paid for the car wash. And the lock and the work are 1330 rubles
worth... O_o...
They washed us, of course, badly, but still better than it was)
Thank you all for your attention! We welcome likes and new subscribers!
Source
general information
On machines equipped with Norma, central locking control units are installed, which are replaced with new ones if they break down. On Luxe vehicles, TsBKE are used instead. Below we will try to take a more detailed look at the central locking unit and its control unit, their relationship with the remote control, symptoms of a malfunction of this part, and also provide instructions for replacing it yourself.
Now let's look in more detail at remote control, which is intended not only for locking and unlocking car doors at a distance with synchronous activation of the security mode. In addition, it allows you to lock all locks with one turn of the key, lock and unlock all door locks by pressing one button located inside the cabin, and also turn on and off the car alarm both remotely and with the key.
Operating modes
Door locks on Grants are blocked by pressing the corresponding key on the remote control, after which they can be unlocked using the remote control in stepwise and simultaneous unlocking modes. The first of the listed modes will allow you to unlock all door locks by double pressing the key (first the driver's door is unlocked, and then all other doors). When you activate the second mode, you can unlock all the doors of the car at the same time, with one click.
To change the mode, the car owner will need to perform the following steps:
- first you need to turn on the ignition with the remote control key;
- then you will need to press and hold the unlock and lock keys in this position for five seconds;
- After the buzzer sounds, release the keys.
Blocking
If, after unlocking the door locks, you do not open the trunk or one of the doors, or do not turn on the ignition, then after twenty-five seconds all doors will be locked again.
Control from the cabin
When blocking doors directly from inside the car, you need to press the corresponding button located on the driver's door, or press a similar button in the module of the same door. Unlocking will require lifting the desired key on the door or pressing it in the module. To lock the doors from the outside, you will need to turn the key in the lock located on the driver's door clockwise, and to unlock the doors, turn the key in the opposite direction.
Window control
By pressing and then holding the lock button in this position for three seconds, you can raise the lowered door windows, with the front windows going up first, followed by the rear door windows. By pressing and holding the unlock key for three or more seconds, you can lower the raised windows in a similar sequence.
Opening the trunk
Unlocking the trunk lid lock on a Grant using the remote control is possible only after turning off the ignition. So, when opening the lid, you must either press the key on the remote control twice, with a minimum interval, or press it once, but hold it down for at least several moments. When the security mode is activated, the trunk will open synchronously with the security zone being turned off for at least half a minute. To close the lid you will need to slam it shut again.
