05 December 2014 Lada.Online 96 050 0
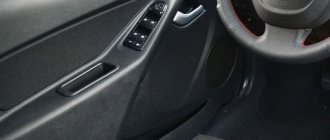
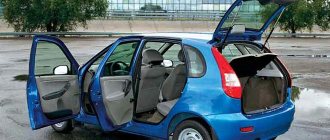
The door trim (trimming, panel) is removed in case of repair of the door lock, window regulator or speakers, as well as for modifications to the car, for example, installing additional sound insulation. Let's take a step-by-step look at how to remove the door trim of a Lada Granta with your own hands.
Reasons for removing trim from Lada Granta doors
We list the most common situations in which it is impossible to do without removing the casing:
- one or more window regulators have failed;
- there is a need to replace window glass on one or more doors;
- the car owner decided to improve the sound insulation of the car doors and glue the internal door cavities with a special sound-absorbing material;
- the locking mechanism of the door lock or its cylinder has failed (which happens much more often);
- The window lifter handle has broken (this applies to cars not equipped with electric windows).
Selecting a skin
As a substitute for standard door inserts, you can use:
- genuine leather. The cladding will look good and serve for a long time, but the cost of the material cannot be called affordable. It is better to use natural leather if you plan to upholster the car interior with your own hands;
- leatherette (dermantine) - inferior in quality, but costs much less than genuine leather. More than a reasonable option for finishing doors;
- eco leather. The material is a high-quality substitute for genuine leather. The composition includes cotton, cellulose-based artificial materials, synthetic polymers and natural leather. Has excellent elasticity, resistance to temperature changes and mechanical stress;
- velours. The material is well suited for door trim, used for car interior trim, and less commonly for ceilings;
- alcantara. High-quality samples will not be cheap, but an analogue from a budget manufacturer can be found at a very reasonable price. Of course, the material from famous manufacturers is of higher quality and easier to paste, but the budget option can also provide a pleasant tactile sensation;
- artificial suede fabric. The textile consists of polyester on a cotton base. Velvety and soft to the touch;
- a special fabric that is usually used to replace a car's headliner. The material must be dense if it is intended to cover the elbow areas, and not just decorative inserts. Prices for ceiling fabric are quite reasonable.
Material, tools
You can calculate the amount of material required for sheathing yourself. We cannot indicate these figures, since everything depends on the size of the insert, as well as the area of the bends. For an approximate calculation, you can use a ruler and formulas for calculating the area of geometric shapes. The price of fabric is set per linear meter.
You can sheathe cards using glue, which is used to reupholster the ceiling with your own hands. If you follow the technology, you are guaranteed not to have problems with GTA Boterm or universal glue “88”. If you cannot buy these adhesives, you can use Moment-1 Glue or Kaiflex K414 Glue. To cover all the door cards of an average passenger car, you will only need one 1 l/0.8 kg can. To apply the glue you will need a brush. Before gluing, it is advisable to degrease the surface. To do this, simply wipe the repair area with a paper towel soaked in solvent.
When working with light colors, it is best to use cloth gloves. Genuine leather and leatherette have advantages in this regard, since any remaining dirt can be easily removed immediately.
You will definitely need a standard kit for assembling and disassembling the door cards of your car. Usually a medium-sized Phillips screwdriver is enough for this. To avoid damaging the casing, to remove the cards after unscrewing the screw connections, you can use a set of plastic elements for dismantling car interior panels. You will also need a utility knife and scissors to trim the fabric. The need for a specialized tool may arise at the stage of detaching the fabric inserts from the plastic frame of the door cards.
Location of fasteners
The door trim on the Lada Granta is a plastic structure that is attached to the edges of the metal door using bolts and plastic latches located around the perimeter. Below is a diagram of the location of fasteners on the front doors of the Grant.
Layout of fasteners on the front door trim of Lada Granta
The rear door trim of the Lada Granta differs from the front door trim only in the shape and number of screws: there are only 9 of them, while on the front doors there are 10.
Layout of mounting holes on the rear door trim of the Lada Granta
Replacing the front door trim
You will need : disconnect the negative terminal of the battery, prepare straight and Phillips screwdrivers, as well as new clips.
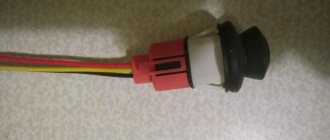
- Unscrew the door lock button.
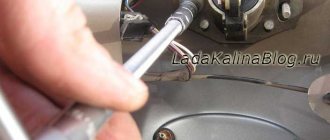
- Use a flat-head screwdriver to pry out the screw cap that secures the trim to the door.
- Unscrew the screw with a Phillips screwdriver.
- Unscrew the screw in the armrest niche using a Phillips screwdriver.
- Unscrew the two screws for the lower trim fastening using the same tool.
- We begin removing the Lada Granta trim from the lower front corner by inserting a screwdriver between the trim and the metal of the door. Carefully overcome the resistance of the pistons.
We continue to remove the door trim, moving from the corner in both directions. We remove the lock lock rod from the upholstery hole.
- Disconnect the block with wires from the door power window by pressing the lock.
- Disconnect the connector with the wiring harnesses from the front passenger door power window.
- Remove the Granta front door trim.
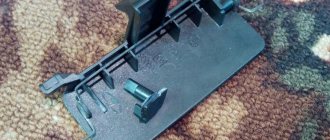
The diagram shows the location of the upholstery fastening pins on the inside.
Installing the upholstery is done in the reverse order.
Important points
- It is necessary to remember that there are also plastic latches under the fastening screws of the casing. And after unscrewing all the screws, you will have to overcome the resistance of these latches, literally tearing the trim off the door. It will not be possible to pry these clips with any tool - they are too far away. So it is not uncommon for situations when, after removing the casing, half of the clips are broken. There is only one way out: have a set of spare door latches on hand;
- on cars with electric windows, control units are located only in the front doors. Therefore, when removing the rear door trims, you will not have to disconnect all kinds of wires from the connectors;
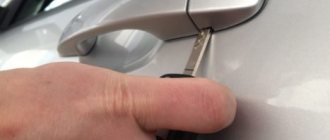
- The locking button has a left-hand thread only on the earliest Granta models, released in 2011. On later machines, the threads became right-handed.
So, removing the door trim from Granta is not a difficult task. Even a novice car enthusiast can do it. And an experienced car owner needs no more than 10 minutes to deal with one door. The picture is spoiled only by the internal plastic latches, the breakage of which, it seems, has never been possible for anyone. But this is an “innate” design flaw that you have to come to terms with.
- Author: ratico19
Rate this article:
- 5
- 4
- 3
- 2
- 1
(1 vote, average: 5 out of 5)
Share with your friends!
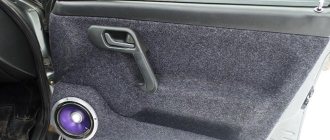
Replacing the rear door trim
You will need : disconnect the negative terminal of the battery, prepare straight and Phillips screwdrivers, as well as new clips.
- Unscrew the door lock button.
- Press out the window handle socket using a flat-head screwdriver.
- Remove the handle together with the lock by pulling it out.
- Remove the door handle cover by prying it off with a thin flathead screwdriver.
- Unscrew the two screws securing the handle using a Phillips screwdriver.
- Remove the door handle.
We begin removing the door trim from the lower front corner by inserting a flathead screwdriver between the trim and the metal of the door. We move the upholstery away from the door from the corner to the sides, overcoming the resistance of 10 pistons. We remove the lock lock rod from the hole and remove the Granta rear door trim.
We install the casing in the reverse order.
Replacing the casing yourself
Step-by-step description of the process:
- Removing door cards. You can find the dismantling algorithm in the service and operation manual or on specialized forums and autoblogs;
- detaching the insert from the plastic box. On older cars, there is a fastening method using metal rivets. They will have to be drilled out with a screwdriver. In modern cars, the method most often used is soldering the plastic frame of the insert and the door card frame. The soldering points can be made in the form of rivets. To disconnect the parts, it is enough to cut off the soldering points. For assembly you will need a soldering iron (in addition, you can solder small pieces of brass mesh into the mounting points). You can also re-fasten the elements using short self-tapping screws;
- you need to remove the old trim and thoroughly clean the surface of old glue and fabric residues. Sandpaper P120 is suitable for this;
- Clean the surface with a brush after sanding and then degrease. Wipe the surface with a cloth lightly moistened with degreaser;
- To reduce the amount of waste, cut out the workpiece using the old material as a template. Always leave a few centimeters of margin;
- coat the surface with a thin layer of glue, and then leave the cards for 10-15 minutes (temperature - at least 20ºC);
- Apply a second layer of glue, gradually applying and smoothing the fabric. There should not be too much glue, as it can soak through the fabric, ruining the appearance. It is better to smooth the material in stages, starting from one side;
- It takes 24 hours for the glue to polymerize. After drying, trim off any excess material that interferes with the assembly of the door card, as well as the openings for the handles. At this point, independent finishing can be considered complete.
Tuning options
Now you know how to change the trim on a car door. But what if you want to make your salon stand out? One of the options for tuning door cards is embossed diamonds. To create volume under the sheathing material, it is necessary to glue dense foam rubber with a thickness of at least 5 mm. Universal adhesive-based interlining can be purchased at a sewing accessories store. The material is glued to the back side of the insert using an iron. To create diamonds after gluing the “sandwich”, you need to sew the insert on a sewing machine. Non-woven fabric allows the thread to tighten the fabric covering and give volume to the surface. You should not stick it in places where there are bends, as after stitching the foam insert will wrinkle.