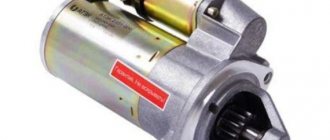
In this article we will tell you how to repair a starter yourself, using the example of repairing a BATE 426.3708 starter.
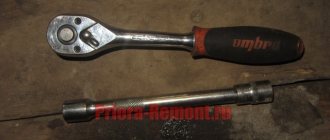
You will need: a socket head “13”, a wrench, a screwdriver, keys “10”, “8”.
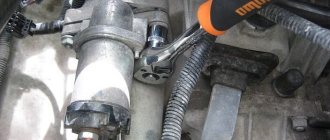
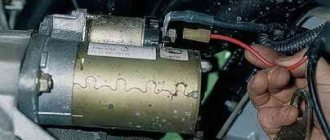
Remove the starter from the vehicle.
Remove the nut from the lower contact bolt.
Remove the washer and disconnect the stator winding terminal tip.
Remove the two screws securing the traction relay.
Remove the traction relay. To do this, disconnect the relay armature from the lever by lifting the relay.
Remove the armature and spring from the traction relay.
Remove the O-ring.
Using a tube of suitable diameter, knock the restrictive ring off the retaining ring.
NOTE
The restrictive ring is secured by a locking ring installed underneath it.
Remove the retaining ring and then the restrictor ring.
Unscrew the two fastening screws and remove the protective cover.
Remove the retaining ring...
Then the shims.
Unscrew the tie rod nuts
And remove the cover from the manifold side.
Use a screwdriver to press out the springs of both insulated brushes and remove the brushes from the brush holder.
Remove the brush holder
Features of the manual mechanism
In the selection process, most users usually prefer a manual starter. It has a huge number of advantages compared to electric and other options. Such a device includes the following parts:
- drum-shaped body;
- several springs;
- various fastening parts and cord.
It is the manual starter that is most popular, since during operation such devices often fail, so they have to be repaired, but manual options are extremely easy to repair. Let's look at what the process of restoring the starter's functionality looks like.
- Before starting repairs, you need to find a diagram from the manufacturer in order to understand the location of all the parts. In addition, it will be useful to understand the instructions.
- You need to prepare a wrench with which you can unscrew and remove the nuts.
- It's best to take a few photos before removing the starter. This will help you restore everything if you forget the location of certain parts.
- We unscrew the washer, which is located in the center of the drum.
- Find damaged elements and replace them.
Thus, repairing a recoil starter does not take too much time, which is why this type is very popular
In the process of restoring the functionality of a starter for a walk-behind tractor, the main thing is to pay attention to any details, even the smallest ones
NOTE
Four field windings are fixed in the starter housing.
Remove the plastic lever stop.
Remove the armature from the drive side cover.
Remove the intermediate support from the armature shaft.
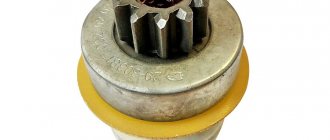
Remove the retaining ring from the starter drive.
Preventing problems
Sooner or later, problems with the starter arise on any trimmer - Stihl FS 55, MTD 790 or another brand. It is possible to delay the occurrence of such a malfunction, but to do this you need to handle the tool carefully. In particular, you should not make too sharp jerks, as this will lead to the cord breaking or the spring flying out. It is not recommended to subject the lawn mower to impacts or other physical impacts. If the starter housing breaks and the cord breaks, it can become wrapped around the engine flywheel. This will lead to a torn pulley and a burst spring.
So, if you discover that the starter mechanism on your lawn mower is broken, you should not immediately rush to seek help from specialists. Knowing how to fix a malfunction and/or replace a part, you can perform repair work yourself. This does not require any specific tool. At first, the procedure may seem complicated and tedious, but numerous videos on the Internet dedicated to repairing the starter will help solve the problem as quickly and easily as possible.
NOTE
This is what the starter drive parts look like: 1 – gear; 2–drive lever; 3–overrunning clutch; 4-plate washer.
Remove the Belleville washer...
...thrust washer...
...clutch with lever..
...and a thrust ring.
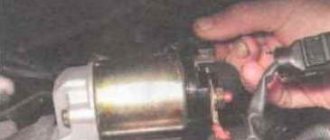
Remove the two screws securing the traction relay cover.
NOTE
Disassemble the traction relay only when repairs are necessary.
Unscrew the nuts from the two contact bolts of the traction relay.
Using a soldering iron, disconnect both winding terminals from the traction relay terminals.
Remove the cover of the traction relay.
Remove the O-ring.
Remove the contact plate and rod assembly.
Remove the return spring from the rod...
...circlip...
...and an insulating washer.
Remove the contact plate...
Where is the VAZ 2110 starter relay located?
The solenoid relay is built inside the main body along with the starter itself. To dismantle, you need to follow the following algorithm:
- Determine the location of the starter itself. It is located to the left, just below the battery. You need to look for it in the immediate vicinity of the checkpoint.
- Disconnect the negative contact from the battery. This will help avoid troubles during dismantling (electric shock).
- Dismantle the air filter to free up the “passage” for further actions.
- Disconnect all wires that go to the relay.
- Dismantle the nut that serves as a fastener for the end of the wire. For this procedure you need a key of 13.
- Unscrew the nuts that focus the starter itself. To unscrew them, you need to use a 15mm wrench. The top one can be unscrewed without any noticeable problems, but to remove the bottom one, you will need to apply a noticeable force (it is located in an inconvenient place).
- Completely remove the starter.
- Remove the nut that secures the output of the relay that performs the retracting functions, and disconnect the wiring.
- Unscrew the bolts securing the relay (you need to use a wrench and remove it.
Assembly is carried out in reverse order.
The following article will help you dismantle the starter yourself in a garage:
NOTE
Contact plate mounting parts (shown in order of installation on rod).
...isolating sleeve...
...puck...
...and a damping spring.
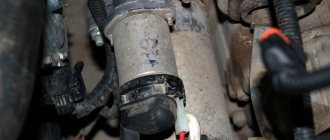
Remove the contact bolts from the cover.
NOTE
The windings of the traction relay are installed in a non-separable housing, so if they are damaged, replace the traction relay assembly.
Clean all starter parts from dirt.
Check the condition of the stator winding. To do this, turn on the test lamp in the 220 V AC circuit and connect the wire to one of the terminals of the stator winding, and connect the other end of the circuit to the housing. If the lamp is on, it means the winding insulation is damaged. Replace winding or stator. Check the second winding in the same way.
List of tools required for repair
To repair a starter, approximately the same set is required, depending on the model and manufacturer of the unit. The table below provides an indicative list of tools that will be needed for repairs.
Table - Tools required to replace the front strut
| Name | Note |
| TORX head | Required mainly when repairing starters from foreign cars |
| Head | “at 8”, “at 10”, “at 12”, “at 13”, “at 14”, “at 15”. Size varies depending on the make and model of starter. |
| open-end wrench | For access where a socket or spanner cannot reach |
| Vorotok | With ratchet and extension |
| Multimeter | To check the electrical parameters of the starter |
| Cardan for wrench | Required if access to the starter or wire mounts is difficult |
| Screwdriver | With flat or cross blade. On foreign cars, a specially shaped tip is sometimes required, for example, flat with a notch or an “asterisk” |
| Insulating tape | To restore insulation |
| Penetrating lubricant | For loosening stuck threaded connections |
| Rags | For cleaning dirt and grease residues |
In order to repair a faulty starter, it is recommended to purchase a special repair kit. It includes the main elements of the assembly that are most susceptible to wear. Sometimes such a repair kit includes some of the tools necessary to restore the functionality of the unit.
HELPFUL ADVICE
The stator windings can be checked with a megger. Connect one contact to the terminal, the other to the stator housing. The winding resistance must be at least 10 kOhm. If it is less, replace the stator.
Inspect the anchor. If the collector is dirty or has marks or scratches on it, sand it with fine glass sandpaper. If the commutator is significantly rough or if mica protrudes between the plates, turn the commutator on a lathe and then sand it with fine glass sandpaper. The core runout relative to the shaft journals should not exceed 0.08 mm. If the runout is greater, replace the armature.
If there is yellow deposits from the bearing on the armature shaft, remove it with fine sandpaper, otherwise it will cause the gear to jam on the shaft. If nicks or nicks appear on the surfaces of the journals and shaft splines, replace the armature.
Check the reliability of soldering of the armature winding leads to the commutator plates. Inspect the winding at the ends of the armature: the diameter of the winding should be less than the armature iron package. If the diameter is larger, replace the armature
Check the condition of the armature winding using a test lamp in a 220 V AC circuit. Connect the wires to the commutator plate and the armature core. If the lamp lights up, it means there is a short circuit in the armature winding or commutator plate to ground. In this case, the anchor must be replaced.
Diagnostics
To check the functionality of the starter removed from the vehicle, use a charged battery. The ground is connected to the body. The positive wire is used to find a breakdown. If the plus is connected to the corresponding contact on the solenoid relay, it will work and extend the bendix, provided that it is working properly. If the relay does not work, then it is recommended to replace it or try to repair the starter yourself. Whether it’s a VAZ or a foreign car, it doesn’t matter - the unit is designed the same on all cars. But sometimes repair is impossible - modern relays are made non-separable. If the positive wire is connected to the contact after the relay, the starter should start. If nothing happens, you need to disassemble the assembly and look for a fault inside it.
HELPFUL ADVICE
The armature windings can be checked with a megger. Connect one of its contacts to the commutator, the other to the armature core. The winding resistance must be at least 10 kOhm. If there is less resistance, replace the armature.
While holding the overrunning clutch, try turning the starter gear in both directions: it should rotate freely only clockwise. If the gear rotates in both directions, replace the drive.
Place the starter drive onto the armature shaft. It should move freely, without jamming, along the shaft splines.
If drive parts are severely worn or damaged, replace the drive. If you find nicks on the leading part of the gear teeth, grind them with a fine-grained sanding wheel of small diameter.
Inspect the manifold side starter cover and intermediate support. If these parts appear cracked, replace them. Also inspect the bushings in the cover and support in which the armature shaft rotates. If severe wear or mechanical damage is detected, replace the cover or support with defective bushings.
Inspect the bushing pressed into the clutch housing. If the bushing is worn out or has burrs or holes, replace the bushing.
Symptoms of malfunction
The manifestations are different, and all of them make it impossible to start the car engine without problems.
Characteristic features:
- grinding, noise, knocking when starting the engine, coming from the device and the flywheel;
- when the solenoid relay is activated, the starter motor does not rotate (the battery is charged);
- the electric motor of the device spins quickly, but the engine does not start;
- the solenoid relay does not work;
- the electric motor rotates slowly and is not able to rotate the crankshaft at the speed required to start the power unit.
Before you begin dismantling the unit, you need to make sure that this particular mechanism is problematic. Check the battery charge, the integrity and strength of the electrical connections and contacts, and whether the engine is jammed. You can repair a car starter yourself, the main thing is to act carefully and confidently.
HELPFUL ADVICE
The bushing is located in a blind hole in the clutch housing and is therefore difficult to access. To remove the bushing, screw a tap of a suitable size into it until it touches the bottom of the hole, as if cutting a thread in the bushing. With further rotation of the tap, the sleeve will be pressed out of the hole.
Brushes worn to a height of less than 12 mm must be replaced
Check the movement of the brushes in the holders. The brushes should move easily, without jamming. Check that the brush holders are securely fastened: they must be securely fastened.
Insulated brush holders must not be shorted to ground. Check this with a test lamp.
Check the force of the springs pressing the brushes using a dynamometer. To do this, insert the armature into the cover on the drive side, install the housing and brush holder
Insert the brushes into the brush holders. At the moment the spring comes off the brush, the force should be in the range of 9.0–11.0 N (0.9–1.1 kgf).
Check the resistance of the traction relay windings with an ohmmeter. The resistance of the pull-in winding should be in the range of 0.52–0.59 Ohm (dashed red lines), and the holding winding – 0.725–0.795 Ohm (solid yellow lines) at an ambient temperature of +15 to +25 °C. The traction relay armature must move freely in the housing without jamming.
Device failure options
The components of the autostarter are not subject to stress during driving. However, many parts wear out when the internal combustion engine starts. Almost any component can fail. Experienced drivers conventionally divide all “illnesses” of the starter into electrical and mechanical. The first assume the presence of defects in the supply of electric current from the battery. The second category is damage to individual elements located inside the case.
Electrical faults are associated with a low battery charge or loose contact components of the battery to the starter. Eliminated by visual inspection followed by reliable fixation of high-voltage wiring.
As far as mechanical “diseases” are concerned, everything is more complicated. There are about a dozen typical problems, and almost all have similar “symptoms” - the starter does not turn, the engine does not start, the car does not drive. It is difficult to determine if a starter defect has appeared - to identify faults, it is necessary to disassemble the electric motor and inspect its components.
Before briefly describing typical problems, let us pay attention to factors that may affect the reduction in the service life of this type of equipment:
- violation of the tightness of the housing;
- negative changes in the operating mode of the motor: difficult starting can increase wear of individual parts;
- damage to high-voltage wiring, which allows the starter to function, but at the same time disrupts its duty cycle;
- factory defects in the manufacture of individual elements;
- using a battery that is incompatible with this type of vehicle.
Next, we will consider typical problems and their markers.
Brush fault
The most common problem. Brushes work harder than other parts of the autostarter. From constant contact with the collector plates that are attached to the armature, they wear out and stop working. During the operating cycle, the brushes move very quickly vertically; this mode of operation leads to a gradual loosening of the holders; Over time, they stop fixing the brushes in the working position. Replacing the starter brushes along with the retainers solves the problem.
You can identify worn brushes by the following signs:
- the solenoid relay clicks, but the starter does not start;
- when the starter works, uncharacteristic sounds are heard: crunching, crackling, quacking;
- obvious burning smell when starting the starter.
Anchor failure
The operating cycle of an electric starter is based on the rotation of the starting armature. It can fail due to either mechanical or electrical reasons. First, it is worth inspecting the high-voltage wiring (it may become disconnected or oxidized) to rule out minor faults. The most common breakdown is jamming of the moving part of the armature. When the anchor is stationary, the motorist will not even hear the relay clicks.
Other damage
Rarely does this situation arise: the driver turns the key, the car starts, the driver returns the ignition key to its original position, which means the mechanism stops working. However, if there is a malfunction, the starter will not stop rotating.
The problem is extremely rare, so it’s easy to find the reasons: damage to the ignition cut-off spring; failure of the traction relay (contacts stuck or stuck together). There are also problems in which the unit operates and makes uncharacteristic noises. In this case, consider options such as:
- loosening of the starter fasteners;
- damage to the anchor journal;
- wear of the drive gear teeth.
There are also a number of signs that indicate high current wear of elements and foreshadow the imminent failure of the entire starter. Take preventative measures:
- if the starting device began to function only after the second or third turn of the ignition key;
- the trigger mechanism turns with difficulty even when the battery is fully charged;
- delay when disengaging.
It also happens that when the position of the ignition key is changed, the starter works normally, but the crankshaft does not rotate and the engine is “silent”. The freewheel needs to be replaced.
For most domestic cars, the service life of the device is stated at 100 thousand km.
However, if you ignore periodic maintenance of the device, then it will not reach 3/4 of its declared service life.
NOTE
At the same time as checking the winding resistance, check whether the contact plate closes the contact bolts of the traction relay. If the ohmmeter shows infinity, then either there is a break in the winding, or the plate does not close the contact bolts. In the first case, the traction relay must be replaced.
Inspect the contact bolts. Clean the burnt bolt heads with fine sandpaper. If the heads are severely burned out, you can rotate the bolts 180° so that they are pressed against the contact plate with the unburnt side. If the surface of the contact plate is heavily worn, it can be turned with the other side towards the contact bolts.
Element Role
All VAZ cars, including model 2109, have a standard engine starting system, which is based on an electric starter. Here's what you need to know about him.
- A starter is a small electric motor that is connected to the flywheel of the motor via a coupling (Bendix) for a short period of time to start the rotation of the flywheel.
- Despite its small dimensions, the starter passes through itself enormous currents.
- If the starter circuit were closed directly in the ignition switch, then not a single component of the system would be able to withstand such current loads. As a result, they would burn out.
- Therefore, for these purposes, the starter is connected remotely to the battery via a relay. Its contacts are designed for high currents.
- The starter operates briefly and must be turned off after the engine starts. Otherwise, its active destruction will begin due to the influence of motor power.
- Relyushka performs these tasks perfectly. Actually, it is precisely to ensure the functioning of the system and protection against current, timely shutdown of the starter, a retractor relay is included in the design.
Element diagram