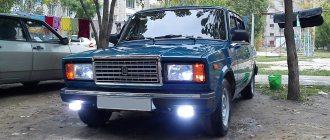
Bright headlights are the motorist's main assistants in the fight against bad weather and evening twilight. They should illuminate the road well so that you can be confident while driving even in the thickest fog. But if the light provided by standard headlights is not enough for you, we recommend installing fog lights on the VAZ 2107 for better visibility. You can do this yourself without resorting to the help of specialists. We will describe in detail below how to install correctly and how to choose “lanterns”.
Adjustment process
This work can be divided into two stages - preparing everything necessary and directly adjusting the light flux. Let's look at each of them in more detail.
Preparatory work
At this stage you need to do the following:
First of all, make sure that your equipment is working correctly and is turned on separately, and not together with the low beam headlights. If you have done everything in a homemade way, redo the design as it should be; the diagram below will tell you the correct connection procedure.
- Next, you need to check the reliability of the fastening of your PTFs; if they are loose, the adjustment will be useless. Another important nuance is the tire pressure; it must be the same so that the car stands without tilting.
- To set up, you should find a flat area with a wall or a smooth, solid fence in front of it. After this, the distance from the ground to the axis of position of the fog lights is measured, and a horizontal line is drawn on the wall at this height.
- Then the car is placed at a distance of 5 meters from the surface, at this point the preparation can be considered complete, as you can see, there is nothing complicated here, you will do all the steps with your own hands in literally 10 minutes.
Settings
Now let’s directly look at how to adjust the fog lights of a VAZ 2110; the instructions for carrying out the work are as follows:
Once the distance is set, you can begin adjusting the height. Again, it is better to adjust each headlight separately; the center of the light flux should be on the axis of the light elements; adjustment is made using a special screw located on the side; for this purpose, there is a hole for a screwdriver in the frame.
Once the work is completed, you will receive a light that meets the standards, which will provide excellent visibility even in the most difficult conditions. The photo shows an example of a PTF with xenon light; the brightness of this option is much higher than standard modifications with incandescent lamps. Do not forget about the correction if, for example, you have a towbar installed and you are towing a trailer.
Light and sound devices of the car and their location
We should start with the basics, or rather with what types of headlights and lanterns modern cars are equipped with.
Low beam headlights - designed to illuminate the road and surrounding area in a relatively small area.
High beam headlights are powerful lighting devices that illuminate the roadway over a fairly large area. Due to its high brightness, high beams can blind oncoming drivers.
Front fog lights - installed lower than conventional headlights, create a wide beam of light that well illuminates the road and the surrounding area in conditions of fog, snowfall and rain.
Daytime running lights are a separate type of headlights that are turned on during the day, regardless of weather or visibility, and are designed to increase the visibility of vehicles. Most models turn on immediately when the engine starts.
Tail lights - designed to identify the vehicle at night or in poor visibility conditions. The color of the lamps is red.
Brake lights are red lights that come on when a vehicle slows down. They burn much brighter than the side lights. Some cars are additionally equipped with a central brake light.
Rear fog lights - indicate the vehicle in fog, rain or snowstorm conditions. Not to be confused with brake lights.
Reversing lights are white and are designed to inform pedestrians and other motorists that the vehicle will be moving (or is already moving) in reverse.
Rear reflectors - used for the same purpose as side lights, they reflect the light falling on them from the headlights of passing cars. May also be known as retroreflectors.
License plate lighting – several white bulbs designed to illuminate the rear license plate of a vehicle.
Turn signals, or “turn signals,” are amber lights that are used to inform you that the vehicle is turning or otherwise maneuvering. Installed in the corners and on the sides of the car.
Connection diagram
All that remains is to connect our fog lights to the car’s on-board network. In the VAZ 2107 this is not difficult to do, since the mounting block has places for installing fuses, and all the wiring from them is routed to the blocks. But, of course, you will have to buy something in addition. Additionally we will need:
- Relay with a block for it.
- Fog light switch with a socket for it.
- Female terminals for knife blocks.
- Special automotive wires (for example, PGVA brand).
- Three fuses: one 15 and two 7.5 A.
- Two 55 W halogen lamps with H3 socket (not included with headlights).
Installation kit for connecting fog lights in a VAZ 2107 We won’t bother with the electrical circuit diagram. Let’s just assume that we don’t know how to read them and limit ourselves to the wiring diagram.
Wiring diagram for connecting fog lights in a VAZ 2107
In the diagram, the markings Ш4, Ш6, Ш7, Ш11, Ш9 indicate the blocks of the mounting block, below them, from left to right: the side light switch, fog lights (we will install it ourselves) and the head light switch.
First of all, we are looking for the installation location of the fog light relay. The author of the photo decided to install it on the mudguard of the engine compartment.
Installed fog light relay (left)
Now we pull the wiring from the mounting block to the fog lights. Since our bumper is plastic, we will also pull the ground wire along with the power wire.
We install and connect fog lights on a VAZ-2114 with our own hands (video inside)
Power harness for fog lights in the engine compartment
For greater reliability, the wires can be inserted into a corrugated cable (preferably heat-resistant). We bring the wires out into the holes in the apron, crimp the ends of the wires with female-type terminals - we will put them on the contacts of the lamps.
Power wires for fog lights, routed through the apron
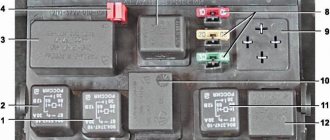
Now we open the mounting block (located in the engine compartment under the windshield opposite the passenger). In the photo below it is indicated by the number 5.
Location of the mounting block in the VAZ 2107 (position 5)
We dismantle it by unscrewing 2 nuts and get to the pads. We measure the wires of the required length, crimp the knife blocks onto them using pliers and assemble the diagram presented above. To do this, we turn off the pads one by one and insert the blade contacts into the required sockets - they must be empty. We extend the wire from block Ш4 into the interior to the installation site of the fog light switch. We will place it next to the side and head light switches in a free space covered with a plug.
Installing blade contacts into the mounting block blocks on a VAZ 2107
All is ready? We install the mounting block in place. Now let's take a look at the fuses. We are interested in those marked with arrows in the photo below. The green arrow marks a fuse common to both PTFs. It is installed initially because it also powers other circuits in the car. Its rating is 10 A, but we will replace it with fifteen amps, since the load on it will increase when installing fog lights. The red arrows indicate the fuses responsible for the left and right fog lights. Initially, they may not stand - there were no headlights on the car. We install 7.5 A fuses there.
Mounting block with installed fog light fuses
All that remains is to install and connect the fog light control button. We remove the decorative trim at the rear of the console for the gear shift knob and push out the plug from the inside, the side light button and the head light button. We assemble the circuit by cutting directly into the wires coming from the switches, connect to the wire passed from the mounting block, and install the buttons, including the new one, in place.
Fog light control button installed instead of a plug
At this point the work can be considered complete, turn it on and check it. Yes, we spent quite a lot of time tinkering with the bumper and wiring, but we got a real, high-quality fog light that won’t let us down and will keep us safe in any bad weather.
Bright headlights are the motorist's main assistants in the fight against bad weather and evening twilight. They should illuminate the road well so that you can be confident while driving even in the thickest fog. But if the light provided by standard headlights is not enough for you, we recommend installing fog lights on the VAZ 2107 for better visibility. You can do this yourself without resorting to the help of specialists. We will describe in detail below how to install correctly and how to choose “lanterns”.
Features of foglights
All “Seven” car owners know that the main light of this car reaches the average level, but for some drivers this is not enough. The situation is especially frightening when it is raining: at such moments the road surface is not visible at all, which is why thoughts arise about how to increase the illumination of the road.
The main purpose of fog lights is to provide acceptable illumination of the road during fog, which is achieved due to their close location to the road. Many car owners install an additional light next to the main one, which is incorrect. In order for the fog lights to perform their functions correctly, they need to be placed as close to the ground as possible, in our case in the front bumper, or even better under it. This is due to the physical properties of fog (closer to the ground there is practically no fog, and light travels much further there). If you install good quality fog lights, you can significantly improve the visibility from the car in bad weather.
In addition to the fact that fog lights increase the safety and comfort of driving a VAZ 2107 in bad weather, they also decorate the design of domestic Zhiguli cars. The useful equipment of the car allows for small but very pleasant tuning.
What to choose for installation
Before installing fog lights on a VAZ 2107, you need to purchase them. Which ones are better to choose? Today there is a wide variety of not only manufacturers, but also the shapes and designs of additional headlights.
It is recommended to install rectangular fog lights on the VAZ-2107, which allows them to organically fit into the angular design of the car. In addition, fogs can shine with both white and yellow light. Yellow light does not mean that these are weak bulbs. The fact is that yellow light copes much better than white with illuminating the road during fog and rain. No other shade illuminates the road surface in bad weather as well as yellow.
As for the company, you can choose from any models: Oswar, Osram, Hella, Wesem. Pay attention to the cost, since cheap foglights have low-quality optics, on which the quality of light depends. When purchasing fog lights, do not forget to purchase bulbs of the appropriate sockets and wattages.
What you need to install foglights yourself
In addition to the set of fog lights, you will also need the following list of materials:
- wires;
- relay;
- power button;
- female connectors;
- circuit breakers.
Below is a photo showing the entire list of materials required for installing fog lights.
You can purchase a special kit for installing fog lights for the VAZ 2107, which is called that. It is also important to take into account that according to GOST, additional road lighting must be installed on the car below the main headlights, but not lower than 25 cm from the road.
It is important to know! On the VAZ 2107, it is recommended to embed the headlights into the bumper, since this is where GOST is observed. You can install them below the bumper, but the distance to the road will be less than 25 cm.
Features of installing fog lights
You can start from either side: some install headlights right away, while others find it more convenient to install electrical wiring. First you need to remove the bumper, even if you mount the headlights on it. It is also necessary to remove the washer reservoir, which will greatly facilitate further actions and, of course, remove the negative terminal from the battery. Next you need to do the following:
- First you need to install the relay. It is recommended to place it under the hood on the right mudguard. For installation you will need one self-tapping screw.
- Under the car dashboard you need to find the Ш9 terminal block. You need to insert the pre-crimped end of the wire into the block, which is then routed to the right fog lamp.
- Another crimped wire is inserted into the block, the other end of which is connected to the relay, or rather to its contact “87”.
- The Ш9 block can be returned to its place. Now you need to find the block Ш11, which is yellow. Another pre-crimped wire must be inserted into contact number 8. The second end of this wire should be connected to the relay (pin 86). The block comes back.
- Now you should find the red block Ш6. In this block you need to find one free cell (it is numbered 8), and then insert another crimped wire into it. Connect the second end of the wire to relay contact number 30. Return the block to its place.
- The next block that is required is green in color or number Ш7. In the green block, in place number 1, you need to insert another crimped wire, the second end of which should be brought out to the left fog lamp.
- The remaining contact on the relay (85) must be screwed to the vehicle ground. The contact must be good, otherwise the system will not work.
- At the next stage, it is necessary to lay the wiring to the fog lights themselves. This is not difficult to do, but it is better to lay it in those places where the standard wire line runs.
- Now let's start installing the headlights. They can be embedded into the bumper, but this will require cutting out the plastic base. You can also attach them to the bottom of the bumper. The second option is not considered according to GOST, but this is what the majority does. In addition, the resulting light is no worse than if the fog lights were located in the bumper. To install fog lights, you need to mark their installation location, and then drill or cut holes.
- When all the main work on installing the wiring, relays and headlights has been done, you can begin connecting the foglights.
It's important not to forget! Before installing the headlights, you need to install light bulbs in them, if they are missing.
Connecting the fog light circuit
The most interesting point is how to connect the fog lights? For a person who is familiar with electrical engineering, this question will not be difficult, but is it really possible to connect the fog lights yourself? Of course it's real. The connection diagram for fog lights is presented below.
The diagram shows our blocks by color, on which the wires are displayed. Now we need to install fuses that will protect the fog lights from overloads. To do this, you need to open the cover of the mounting block, and then turn on the main power through fuse F1. It is recommended to replace the fuse installed in place F1 with a 15A one. In place of F3 and F4, install 7.5A fuses, which will power each headlight separately.
Now there's just a little bit left to do. It is necessary to install a button to which to draw the wires and connect them according to the diagram presented above.
If the diagram presented above is quite complex, then you can make the connection according to this diagram:
This circuit is very simple, and there is no need to bother with terminal blocks. Everything is simple and clear. One contact on the relay from the PTF, one contact on the relay is connected to the power supply for the side lights via the power button, and through another we supply power to the relay from the battery through a 10A fuse. After this, you can turn on the PTF and admire your work. It is worth noting that the connection according to the first scheme is the most correct. If one fuse fails, the second fog light will work. In any case, it’s up to you to decide how to do it, and all the necessary information is right in front of you.
Didn't find the information you are looking for? on our
forum
.
If you find an error, please select a piece of text and press Ctrl+Enter.
Installation of fog lights VAZ 2107
Do-it-yourself installation of VAZ 2107 fog lights
The purpose of fog lights (FTL) is to ensure good visibility in fog, rain or snow. In addition, modern motorists use foglights to tune their vehicle. Let's look at how to install them on a VAZ 2107 yourself.
Required tools:
- drill;
- female connector;
- several meters of wiring;
- quadruple relay;
- on/off button.
Installation of fog lights on a VAZ 2107
- To make work easier, you can remove the bumper.
- Install WESEM fog lights instead of standard ones.
- Use a drill to drill a hole for the fog light mounting bolt. In the photographs, the orange line marks the distance from the middle of the fog lights to the opening (about 15 centimeters).
Do-it-yourself installation of VAZ 2107 fog lights
- In the example presented here, the light power relay is located on the right under the hood, so the power was first supplied under the mudguard in the area of the battery, and then through the pipe and the “fang” of the bumper mount.
How to install fog lights on a VAZ 2107 with your own hands
- Make 3 holes along the harness of 2 wires connecting the right and left PTF.
How to install fog lights on a VAZ 2107 with your own hands
- Tighten the harness with a piece of copper wire.
Do-it-yourself installation of VAZ 2107 fog lights
- Screw on the light mounts and reinstall the bumper.
- Disassemble the lights and install light bulbs.
How to install fog lights on a VAZ 2107 with your own hands
- Hang the back of the lamp on the mount and pass the lead-out wiring through it.
- Clean the connector and crimp it. Connect a light bulb to it.
- Reassemble the headlight in reverse order.
Using the same principle, in the same order, install the second fog light.
Also check out
It is likely that the headlights will need to be adjusted upon completion of the work.
Installation of fog lights on a VAZ 2107
In the following photographs you can see how to connect fog lights on a VAZ 2107.
How to install fog lights on a VAZ 2107 with your own hands
Installation of fog lights on a VAZ 2107
Installation of fog lights on a VAZ 2107
Installation of fog lights on a VAZ 2107
prostovaz.ru
Parts
When my father and I did it on ours, we suffered a lot, but the effect was worth it)
You won’t regret your choice, excellent fog lights! (and the carpet is nothing like that)) How much did they cost you (exactly the fog lights?) and where did you buy them?
about the cost... in the description it seems to be Price of fog lights: 29.90 Euros + delivery 7 Euros.
about the mat... this is my construction mat, and people are already used to me taking photos on it
I’m very glad that I helped you with your choice) I hope you’re happy too?! I also guessed the price)), sorry, I probably looked it up because you indicated it) The rug is very clean for repairs)) I just asked about it)
... about the rug. A year ago I smeared it a little when it was lying in the hall because of the seven, my wife said since it was such a thing, let's go buy a new one, and I will use this one for minor repairs and photographs, so everything that is done is done for the better... my wife has been wanting it for a long time change it) )
Now I’ll select the photos and put another part in the bulletin board, this time with fogs... I’ve finished them off, all that’s left is the wiring and the final part
Expert opinion
It-Technology, Electrical power and electronics specialist
Ask questions to the “Specialist for modernization of energy generation systems”
Procedure for installing fog lights I also guessed the price, sorry I looked it up, I guess you indicated it The carpet is very clean for repair I just asked about it. Ask, I'm in touch!
We install fog lights on a VAZ 2107. Installing fog lights with your own hands
Precipitation in the form of rain, snow or fog is the implacable enemy of motorists. They cause the majority of accidents with the most severe consequences. Driving in such weather conditions can easily be called extreme, so you can’t do without special lighting devices. Fog lights were invented a long time ago; as the name suggests, they are capable of providing sufficient visibility for driving even in the thickest fog or snowfall.
Fog lights on the VAZ 2107, as on other cars, are located as close as possible to the road surface. This is done because the headlights are located at a level of high concentration of fog, that is, where it is very thick, which does not allow them to penetrate it with a beam of light. Closer to the ground, the density of the fog is less, which makes it possible for the fog lights to provide sufficient visibility for driving.
Installing fog lights is not only a vital necessity, but also one of the most popular and affordable ways to tune a car. At night, the fog lights on the VAZ 2107 also serve as decoration, perhaps someone will consider it a “collective farm”, but nevertheless it looks pretty good IMHO
In this article I will try to tell and show in detail how to install and connect VAZ 2107 fog lights with my own hands. I decided to buy WESEM fog lights for myself, which come complete with Philips bulbs.
In addition, to complete this job you will need:
- Standard 4-stroke relay (similar to that used in signals or headlights for low or high beam);
- A couple of meters of wire and electrical tape, a drill;
- Female connectors;
- The button that will turn on the fog lights.
Preparing for work
Once you have purchased the headlights you like, you can begin installation. Materials we will need:
- Female connector.
- Wiring.
- Four-stroke standard relay.
- On/Off button.
If possible, it is best to purchase a special kit for connecting fog lights on a VAZ 2107.
To make the work more convenient, we recommend removing the bumper from the car before starting the process, since the fog lights should be installed under it. Please note that according to GOST, the lamps must be located under the low beam headlights and no lower than 25 cm from the road surface.
Do-it-yourself installation of fog lights on a VAZ 2107
1. To make the work easier, I recommend removing the bumper.
2. WESEM decided to install new fog lights in the places where the standard ones are installed.
3. Using a drill, drill a hole for the fog light mounting bolt. I marked with an orange line in the photographs the distance from the middle of the fog lamp to the opening for the number, there it is about 15 cm. This distance will, in my opinion, be the most optimal, nothing will interfere with anything.
4. On my car, the power relay for the lights is located on the right under the hood. Taking this feature into account, I decided to route the power first under the mudguard near the battery, then through the pipe and the so-called “fang” of the bumper mount. As a result, the wiring came out just near the mounting location of the right fog light.
5. Now you need to drill three holes along the harness of two wires that connects the right and left PTF.
6. Then screw this harness using a piece of copper wire.
7. Now you can safely install the bumper in its place, having first screwed in the light mounts.
8. Disassemble the lights and install the bulbs in their places.
9. Hang the back of the lamp on the mount and run the lead-out wiring into it.
10. Next, you need to clean and crimp the connector and connect the light bulb to the connector.
11. Reassemble the headlight in reverse order.
If everything worked out with the left foglight, then you can proceed to install the right one. Everything is done according to the same principle, the only thing is to remember to simultaneously compress the harness and power supply to the left PTF.
Location and installation of fog lights
We've sorted out the light bulbs, now we need to decide where to install the fog lights. Here we have two options:
- Install under the bumper.
- Hit the bumper.
The first option is quite simple and will not take much time, but, alas, it does not shine with aesthetics. In addition, such fog lights are quite easy to remove, for example, if parking is unsuccessful. Yes, and GOST (see section “Requirements of regulatory documents and legislation”) in height from the road surface may not be maintained.
Installation of fog lights on a VAZ 2107 under the bumper
Embedding fog lights into the bumper is, of course, more difficult, but it will look much more aesthetically pleasing and is safer for the headlights themselves. Therefore, let’s do the insertion, especially since the middle part of the bumper in the VAZ 2107 is plastic.
Fog lights embedded in the bumper of a VAZ 2107
First, let's select and buy fog lights. On sale you can find lanterns of various shapes and sizes, but in order, as they say, to fit into the overall design of the VAZ 2107, we will choose rectangular ones. For example, fog lights made in Poland. A special charm of this model is the convenient mounting bracket, which allows you to adjust the angle of the lights, albeit within small limits.
Polish-made PTFs will suit us in design, fastenings and price
Healthy! In principle, the choice of headlights is a purely individual matter. If you wish, using the given method, you can embed anything into the bumper of a VAZ 2107.
We remove the bumper, put the headlights from the inside in their future places and mark the windows. Their size should ideally match the size of the PTF glass, but we will leave a small margin: we will make it smaller, then we will finish it with a file.
Window markings for fog lights of the VAZ 2107 bumper
We drill the future windows around the perimeter with a small diameter drill and cut them out using a jigsaw or a regular hacksaw blade.
Cutting out a window for a fog light
We bring beauty with a file, constantly trying on the headlight. It should fit freely, but there should be no noticeable gaps that spoil the appearance.
Finishing the window under the PTF with a file
All that remains is to attach the fog lights to the bumper. This can be done in any way. The author of the photo used a standard bracket, drilling two holes for countersunk bolts. The gap between the bracket and the bumper can be eliminated by installing a spacer of a suitable size or even regular washers. The bolt caps on the outside will be covered with a chrome plate, so the appearance will not be spoiled.
Installation and connection of PTF on VAZ-2107 on brackets
Hello everyone, today we will tell you about the option of properly connecting and installing fog lights on a VAZ-2107. There are quite a lot of different articles and discussions on forums about where to install and how to attach the PTF on the seven, but they all have some shortcomings. In the variants where the PTFs are inserted into the bumper, they are almost impossible to adjust and the bumper cannot be restored; the option above the bumper is also far from the best - the PTFs are too high and close to each other. The most competent installation option is under the bumper, but in most cases, on sevens, the PTFs are attached directly to the plastic bumper, so they will inevitably shake with it, because plastic is plastic, and many have a front bumper that is not secured on the sides. In our case, we eliminate this drawback using a homemade bracket, it looks like this:
Here is a complete drawing of this bracket so you don’t have to reinvent the wheel:
This is how it is attached to the bumper and the PTF is already attached to it; by the way, the PTF is located flush with the bumper, which reduces the risk of damage.
This is how you can see that they are even slightly recessed:
Here is the general view of the PTF installed on the car:
Attention! We recommend stretching all the wiring to the PTF in a corrugated form and fastening it to the bumper with zip ties, drilling holes, so that later the wires do not sag and if caught, they can then be easily torn off:
You can place the button for turning on the foglights wherever it is convenient for you, usually the free space in the “beard” is used for this:
The connection diagram for the PTF on the VAZ-2107 is standard, there is no need to invent anything new - here it is:
Well, that’s all, whether this is a good option for installing a PTF or not is up to you to judge, but we like it! Good luck on the roads!
Requirements of regulatory documents and legislation
Since there are no standard places for installing fog lights on the VAZ 2107, you need to select them (places). In order not to have problems with traffic police officers in the future and to pass a technical inspection, when choosing, we will be guided by GOST R41.48-2004, paragraph 6.3. There is no point in citing it verbatim, but the general gist is this:
- The distance from the side of the car to the edge of the fog lamp is no more than 400 mm.
- The distance between the headlights from their inner edges is at least 600 mm. Can be reduced to 400 mm for vehicle overall width less than 1300 mm.
- The height above the ground surface is not less than 250 mm and not more than 1500 mm.
- PTFs should not be located above the headlights.
General requirements for installing PTF according to GOST R41.48-2004
Price list
- Special offers
- KAMAZ spare parts
- Spare parts KAMAZ-5490
- Spare parts MAZ, YaMZ
- ZIL spare parts
- Spare parts ZMZ, for GAZ vehicles
- Spare parts for Volzhanki cars
- Spare parts for Gazelists
- Spare parts for trucks Lawns
- Spare parts for GAZ-71 caterpillar
- Spare parts UAZ, UMZ
- Spare parts KrAZ, BelAZ
- Spare parts URAL
- Spare parts BUSES
- AMAZ spare parts
- IKARUS spare parts
- KAVZ spare parts
- LAZ spare parts
- LIAZ spare parts
- NEFAZ spare parts
- PAZ spare parts
- Other buses
- Tractors, computer equipment, attachments
- Tractors and walk-behind tractors
- Municipal vehicles
- Attachments and trailed equipment
- Spare parts for TRACTORS and SPECIAL EQUIPMENT
- JCB - spare parts for special equipment
- Truck crane (KS-3577, KS-4517, etc.)
- AMZ (A-01, A-41, D-440, D-442, D-447, D-461, D-467)
- Amkodor (TO-18, TO-28, TO-30, etc.)
- ATZ (T-4A, TT-4M)
- VgTZ (DT-75)
- VMTZ (D-120, D-144, D-130, D-145T)
- VTZ (T-25, T30A-80, VTZ-2048)
- LTZ (T-40, LTZ-55, LTZ-60)
- MKSM, UNC, DETVAN
- MTZ - spare parts for tractors
- OTZ (TDT-55)
- PTZ (K-700/701/702/703/704)
- KhTZ (T-150, MT-LB)
- ChTZ (T-130, T-170, B-10, B-12, B-170, T-10M, DET-250)
- YuMZ - spare parts for tractors
- Other special equipment and tractors
- RVD - high pressure hoses and sleeves
- MMZ spare parts and engines
- Spare parts for MMZ engines
- MMZ engines: D-242, D-243, D-245, D-246, D-260
- VAZ spare parts
- Spare parts OKA VAZ 1111
- Spare parts VAZ classic 2101 - 2107
- Spare parts VAZ front wheel drive
- Spare parts VAZ Granta and Largus
- NIVA spare parts and all-wheel drive
- Spare parts Moskvich, IZH
- Spare parts for Korean trucks
- Spare parts for Starex, H-1
- Spare parts for Porter, H-100
- Spare parts for HD65,72,78, County
- Spare parts for HD120, AeroTown
- Spare parts for HD160,170, . ,700,1000
- Spare parts for HYUNDAI, KIA buses
- Spare parts for Korean passenger cars
- Spare parts DAEWOO, CHEVROLET
- FOREIGN CAR spare parts more
- BMW spare parts
- DAF spare parts
- FIAT spare parts
- FORD spare parts
- Spare parts HONDA, ACURA
- IVECO spare parts
- MAN spare parts
- MAZDA parts
- MERCEDES spare parts
- MITSUBISHI spare parts
- Spare parts NISSAN, INFINITI
- OPEL spare parts
- Spare parts PEUGEOT, CITROEN
- RENAULT spare parts
- SCANIA spare parts
- SHAANXI spare parts
- SSANGYONG spare parts
- SUZUKI parts
- Spare parts TOYOTA, LEXUS
- VAG spare parts: VW, AUDI, SEAT, SKODA
- VOLVO spare parts
- Other foreign cars
- Trailers and semi-trailers
- SEMI TRAILERS foreign
- Domestic SEMI-TRAILERS
- TRACTOR TRAILERS
- Passenger TRAILERS
- Towbars and spare parts for passenger trailers
- Car audio and navigation
- Antennas
- DVRs
- Automotive video equipment
- Memory cards, flash drives
- Speakers, subwoofers, acoustics
- Accessories
- Radio tape recorders
- FM modulators, MP3 players
- Navigation, parking systems
- Radar detectors, antiradars
- Radio stations and accessories for them
- Sound amplifiers
- Auto chemical goods, filters
- Car cosmetics, paints, care products
- Auto chemicals, liquids, additives, antifreeze
- Household chemicals, gas
- Oil
- Lubricants, liquid wrenches
- Other means and fuels and lubricants
- Filters and elements
- Rechargeable batteries
- Batteries for motorcycles (up to 30 A/h)
- Batteries for cars (up to 125 A/h)
- Batteries for trucks (from 125 A/h)
- Accessories and tuning
- AvtoLady - products for women
- Breathalyzers
- First aid kits, fire extinguishers, emergency signs
- Car racks
- Gas equipment
- Car mirrors and elements for them
- Air ionizers
- Carpets, trunk mats
- Steering wheels, covers and gear knobs
- Compressors, pumps, hoses
- Seats, cushions, belt adapters
- Literature, catalogs
- Organizers, luggage securing
- Alarms, blockers, sirens
- External tuning
- Tuning internal
- Car refrigerators
- Anti-skid chains
- Seat covers, headrests
- Windshield wiper blades and strips
- Velo, moto, quad bikes
Connecting fogs
All necessary actions should be carried out strictly according to this scheme.
At the end, we install the power button on the dashboard inside the car, and also check how everything works.
As you can now see, the installation did not take much time, and the result exceeded all expectations.
Thank you all very much, who helped in choosing the fog lights ;-)!
And so, I bought a fog lamp from the company “Wesem”, as well as a kit for connecting to the VAZ 2107 from the company “Autoelectronics”.
Dimensions of fog lamps: 120h48h65. Price of fog lights: 29.90 Euro + shipping 7 Euro. The price of the complete set for connection of antifog headlights: 14.79 Euros + 7 Euros. Halogens: H3 / 12V / 55W (can be supplied by others from the company “Osram”)
Photographs of the fog lights and the connection kit are attached.
Thank you very much for the help!
ASSESS, COMMENT, DO NOT BREATHER!
Well, if you liked it, click on the “button” “I recommend”, this one is that lower
Installation process and connection diagram for WESEM fog lights on a VAZ
So, finally, I fulfilled my dream and instead of the lousy, worthless and generally no Chinese fog lights, which, by the way, I have already replaced several sets of, because some had glasses that burst from the temperature, others had darkened reflectors, others I broke myself, in general, I bought myself fog lights flashlights of a higher class, from the Polish manufacturer WESEM, here is a link to the manufacturer’s website with a description of this model in Russian. You can also download the description and technical characteristics of this model of fog lights from this site in *.pdf format. The issue price is approximately 22 USD.
Here is a general photo of what these lights look like in the packaging:
The kit does not include light bulbs, so we purchased 2 Philips H3 light bulbs. 50w + 30% (they consume 50 watts and the light is even more powerful by 30 percent, what the hell has technology come to)
For installation we also need a standard 4-pin relay, the type used for a signal or for headlights (low/high), several meters of wiring, female chips, electrical tape and a button to turn on the fog lights. I took one like the one in the photo below.
So, first you need to decide on the location of the headlights - I decided to hang them under the bumper in approximately the place where I had the Chinese “guano” hanging before them. Below is a photo of the bumper, where I indicated what’s what:
So, circled in red are the holes from the screws that were used to fasten the old fog light to the bumper. Since I decided not to change their location, between these holes a blue cross marks the place where I subsequently drilled a hole for the bolt that secures the fog light mount itself. The orange stripe indicates the distance that I measured from the beginning of the opening for the number on the bumper to the center of the fog lamp. I have it 15 cm - this is optimal in my opinion - firstly, the “fangs” of the bumper do not interfere and at the same time the lights are not too widely scattered. I’ll tell you straight away - I have a relay that powers the lights located on the right under the hood (here is a photo, the fog light relay is circled in blue)
Then I screwed this harness using hard copper wire through these holes to the bumper from the inside so that it would not “show off” anywhere, this is what happened:
And now the view from the driver’s seat (most likely from the door) with only the fog lights on:
But with the low beams on.
https://7vaz.ru/tjuning/protivotumanki.htmlhttps://provaz07.ru/tyuning/tumanki-na-vaz-2107.htmlhttps://www.vazzz.ru/kak-podklyuchit-tumanki-na-vaz- 2107-osobennosti-ustanovki-kakie-luchshe-vybrat-shema-podklyucheniya/https://semerkavaz.ru/ehlektrooborudovanie/ustanovka-protivotumannykh-far/https://vaztaz.ru/vaz-2107/kak-podkliuchit-protivotumanki- na-vaz-2107-samyi-vernyi-sposob.htmlhttps://www.semerkainfo.ru/node/30
Installation Guide
Installing fog lights on a VAZ 2110 or even installing xenon in PTF is a completely reasonable solution, because these optics can perfectly cope with the problem of illuminating the road in fog. If a car owner has never encountered such a problem before, then he will probably be interested in learning how to connect fog lights on a VAZ 2110 on his own. We will tell you more about this below.
LED fog lights for VAZ 2110
Tools and materials
- The headlights themselves, which can be purchased at any store. Domestic stores can supply headlights in two variations - for old-style center consoles it is optimal to use PTF for “ten”, but if your car is equipped with a new torpedo, then you will need optics for the VAZ 2115. In this case, the difference lies in the buttons for turning on the optics.
- Multimeter for measuring voltage.
- Indicator light with wire.
- Insulating tape.
- Heat shrink packaging.
If you decide to use xenon in fog lights, then you will also need an additional xenon kit.
Connection diagram
How to properly connect fog lights to your car:
- First you need to open the fuse box and unscrew one screw, after which the device itself needs to be unfolded. The wires that will need to be connected additionally are marked in green in the photo. The number 1 marks the cable that transmits a positive charge, which can be checked using a test lamp. The connection of this wire is made from the relay to connector 20, as for the wire numbered 2, this is also a plus and it needs to be connected to the relay on pin 87.
- Next, you need to connect wires to the safety elements, which will subsequently split into the left and right lights. The wiring is installed, and the corresponding wire (also with a female output at both ends) is connected to the output with a double “female” contact, the length of which should be 30 cm.
- After these steps, you need to insert the cable with single female contacts into the white connector on the block. As for the double female connector, it must be removed from the block and connected to the male output, which is located behind the trunk opening button.
- Next, the black cable, which is marked with the number 3 and comes from output 87, should be routed from the top of the power supply; this wire is a minus. Here you can see the wires that were installed at the factory; they are connected under a nut that can be opened with a 10 key. The cable, which is marked with the number 4, ensures activation and deactivation of the optics.
There are several options where you can lay the foglight control cable:
As an option - from the side lights directly, without using a switch. In this case, the fog lights will automatically turn on along with the side lights.
- Another option is from the same side lights in a sequential manner, but using a switch. In this case, when the side lights turn on, voltage will be supplied to the fog light switching regulator. However, the optics will only turn on if the button is pressed.
- Another option is from the ignition system via a switch. That is, when the driver turns on the ignition, there will be a plus on the optics switch. As in the previous case, the lights will turn on only after the switches are activated.
Which ones to choose?
As we have already said, fog lights are not only an important part of the car, but also its decoration. Thus, their choice must be approached responsibly
First decide on the design and color of the light. You can choose round or square, yellow light or white. A wide range is offered by such companies as Osvar, Wesem, Hella, Catz and Osram.
The pricing policies of these brands are different, but you should assume that the more expensive the headlights, the better they are
Please note that the larger its surface, the brighter it will shine. That is why it is best to choose the largest size models from all those presented in the store.
In addition, we advise you to immediately purchase bulbs for them of the required category (H1, H2, H3, H7 or others) with a power of no more than 55 watts, so as not to blind drivers of oncoming cars and not to overheat the relay.
What it is?
Already from the name it becomes clear that these headlights were invented specifically so that motorists could clearly see the road in fog or, for example, snowfall. The fact is that they are located very close to the road surface, where the fog is not very thick. Thus, they can easily penetrate it with their light and improve visibility around. They are not afraid of the most unexpected vagaries of nature, so those who often drive a car simply need them.
It is worth noting that such headlights will not only improve your car, but will also make it look different from other VAZ 2107, since fog lights were not intended by the manufacturer as standard elements on this car. Such tuning greatly decorates the car and makes it noticeable.
