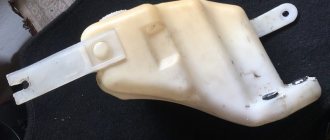
Purpose of the windshield and rear glass
Glass is a transparent shield that is mounted in front of the car and protects passengers from air flow while driving. Additionally, this element affects aerodynamics and the final drag coefficient.
Front and rear windows increase torsional rigidity and retain heat in the cabin.
There are types:
- multilayer;
- hardened
A shield with several layers is called triplex and is installed in the front of the car. A transparent film is glued between the layers of the part, which firmly holds large particles in the event of an accident or a large object. The multi-layer shield ensures the safety of passengers and the driver, eliminating serious injuries from fragments.
The hardened part consists of one layer. It is used for side arrangement and rear shield. The temperature effect increases the strength of the part and prevents the formation of large fragments in the event of an accident. After hardening, high-quality parts are broken into small particles with rounded edges that are not capable of causing injury. You can strengthen the rear panel using a tint film, which will hold the fragments in case of complete cracking.
The evenness and transparency of the glass surface ensure the safety of the driver while driving, and models with protection from ultraviolet rays prevent the interior from quickly heating up in countries with hot climates.
How to start repairing the windshield frame
Repairing the windshield frame must be carried out in a closed and dry room without drafts. The car needs to be washed thoroughly first and given time to dry. Prepare the tools and materials necessary for repairs. Then remove from the windshield all devices that will interfere with operation. These include the blades and wiper panel, as well as other elements. After this, you can begin to dismantle the windshield frame.
The procedure for dismantling is as follows:
- Prepare wooden or foam supports approximately 5 cm thick, which will be placed between the removable top and the body of the car. This will provide access to the top frame mounting bolts on the front of the car.
- Select wrenches with heads 10 and 12, as well as two containers for removable plugs, bolts, nuts and other small parts that will be needed during assembly. One container is intended for elements of the middle and rear parts of the machine, the second - for the front part.
Inside the car:
- Remove the right and left trims along the sides, which will free access to the internal hidden mounting bolts, four on each side.
- Remove the plastic covers covering the rear corner bolts of the removable top. For each corner there are two bolts that are connected by special metal corners.
- Remove the plastic plugs on the center arch of the overhead console. They cover the four top mounting bolts.
- Open all the clips and plugs that cover the bolts on the front of the car connecting the windshield frame to the removable plastic top. The moldings and trims of the lower section of the frame can be left untouched.
- Unscrew all exposed bolts inside the machine.
What is required for the work
To replace a defective element on a VAZ 2022 with your own hands, you need to prepare the following tools:
- degreasing and cleaning agent;
- clean cloth;
- a cord with a cross-section of 4-5 millimeters and a length of at least 5 meters;
- assistant, since some operations are performed only by two people;
- new sealing rubber;
- molding.
You need to thoroughly wash and degrease the new product before starting work. This will prevent it from accidentally slipping out of your hands, and will also ensure a tight grip in the rubber groove.
All work should be carried out in a warm, windless place, observing safety precautions when using degreasing chemicals.
How to choose
Don't buy cheap copies. Products with a suspiciously low price are either made of low-quality materials or are sold as disassembled parts. An inexpensive consumable will require replacement after just six months of use.
It is advisable to find an original spare part. It will definitely fit the car, and the quality will be higher than that of its analogue.
Inspect the part carefully. The surface must be smooth, without scratches, even and transparent. The reflection must be clear and clear. If it is cloudy, do not rush to shell out money.
Check markings, manufacturer and type. Information must be clearly written. Blurred markings are one of the main signs of a fake.
The price of consumables ranges from 1000 to 3000 rubles.
Economy segment
Xyg (China) - the best Chinese parts on the market. Pass ultraviolet rays. The material is not of the best quality: poor visibility, the image is distorted. Weak structure. This consumable will have to be changed twice a year. Overall, the price is reasonable.
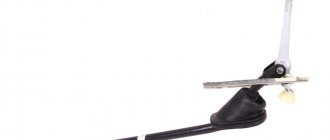
Dismantling the lobovukha
Replacing the windshield on a VAZ 2107 will require dismantling the interior decorative trims, as well as the rear-view mirror.
To dismantle a part from a VAZ:
- Wash the car at the car wash and drive it into a warm garage.
- Bend the wiper blades.
- Use a screwdriver to pry up the windshield lock, which is located in the lower frame.
- Remove the wedge molding around the entire perimeter of the glass.
- Gently press on the corners from the interior side to press out the shield, holding it from the outside.
- When dismantling, you need to press the seal with a screwdriver, squeezing it out.
- When removing, it is important to be careful and not to fumble when pulling the part out of the groove. Do not press on the shield as this may cause the part to crack and cause injury to your hands.
Unusable VAZ consumables should be placed on a soft cloth or rubber mat. This will prevent chips in the corners and the appearance of potholes that could cut your palms during subsequent transportation.
Windshield frame repair cost
How much it will cost to repair a car windshield frame depends on who is doing the repairs. If it is carried out in-house, the costs will consist of the costs of purchasing the necessary materials, and possibly tools. When involving third-party organizations, the final price of repairs will depend solely on the complexity and volume of work performed, including replacement of defective areas, as well as the cost of materials used. It may depend on many factors, but not the most complex repair of the windshield frame with materials, putty and painting can cost about five thousand rubles. It needs to be clarified before the start of repairs.
Forget about fines from cameras! An absolutely legal new product - Traffic Police Camera Jammer, hides your license plates from the cameras that are installed in all cities. More details at the link.
- Absolutely legal (Article 12.2);
- Hides from photo and video recording;
- Suitable for all cars;
- Works through the cigarette lighter connector;
- Does not cause interference to radios and cell phones.
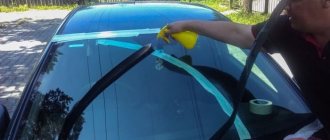
Self-installation
Installing a windshield is not a difficult, but responsible process. Before starting work you need to do the following:
- Wash the surface of the frames and inspect for chips, rust, and abrasions.
- Degrease the surface.
- Place the cord in a new elastic band. The ends of the rope are located along the bottom edge in the place where the lock is located.
- Prepare a new part.
If pockets of corrosion are detected, clean the area with sandpaper, apply a primer and paint over it with enamel. The presence of rust in the contact area is unacceptable: this reduces the strength of the fastener, which is why water may enter the VAZ interior.
Before starting installation work, remove the side trims from the frames and the rear view mirror. This will make it easier to pull out the rope.
How to install:
- Put on the rubber seal.
- Lay down the rope.
- Carefully attach the part to the frame.
- One person adjusts the position from the outside of the VAZ, and the second carefully pulls the rope into the interior. It's better to start from the bottom edge.
- When pulling out the rope, an assistant adjusts the part and presses slightly towards the seal.
After the seal is in place, the shield will take its position. The windshield frame on the VAZ 2107 is installed in the reverse order. This is where a flathead screwdriver with a large handle comes in handy.
When going around the bottom corners, be careful not to scratch the panel with the cord. After installing the seal on the glass, you can put the rear view glass and decorative trim on the pillars back in place.
To replace the windshield of a VAZ yourself, you will need one assistant, a minimum number of tools and 2-4 hours of free time.
Windshield installation
It is better to install the prepared installation kit into the car body together with an assistant and do it in the following order.
- Attach the kit with the seal to the outside of the frame. Pass the free ends of the mounting cord into the vehicle interior.
- Start installation from the middle of the bottom contour of the frame. While your assistant holds the kit pressed against the frame with its bottom edge, you begin to carefully pull the mounting cord into the interior.
- The cord carries along the inner leg of the letter “H”. Due to deformation, it goes over the side of the frame and, as the cord is pulled out, it takes its normal position on the interior side. In this case, the outer leg remains outside, and the side of the frame, as expected, is placed between them.
- Carry out the installation symmetrically, with small movements, alternately pulling out one or the other end of the mounting cord. The assistant should constantly push the installed glass into place with light blows of his palm.
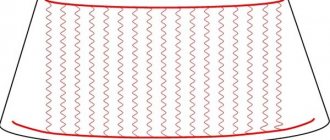
Rear window replacement
The rear window of the VAZ 2107 can be heated or without it. Structurally, the parts are the same, with the exception of contacts that are disconnected before removal. The sizes and shape are the same.
Dismantling:
- Using a screwdriver, remove the locks that are installed in the lower corners.
- Remove the wedge cover.
- Press out the glass from the inside.
- Remove the old shield from the posts.
If the shield is firmly in place and is not squeezed out from the inside, you should use a screwdriver to knead the molding along the contour and repeat the dismantling again. Removal is done with an elastic band, this will protect your hands from damage.
Rear part installation:
- Clean and degrease the surface of the frames.
- Install new locks and seals on the glass.
- The rope is inserted along the contour of the elastic band and overlaps at the bottom.
- The glass is applied to the frame and pressed down.
- Carefully pull out the rope, which must be inserted into the rubber edging.
After installation, the locks are latched with a screwdriver and the molding is mounted. All elastic bands and retaining clips are changed completely: this will increase the strength of the fastening.
Types of damage
There are 2 main types of damage to car windshields: chips and cracks. Chips are small, most often located at the edges, areas of destruction of one of the triplex glasses (usually the outer one). You can operate a car even if there are a large number of chips without urgently replacing the glass.
VAZ 2114 windshield chipped
In turn, cracks are through-cut damage that has a longitudinal or branched shape. They can appear even from a small pebble, but, regardless of their size, they pose a serious threat. Thus, over time, cracks in the glass can increase, gradually occupying an increasingly larger area, which can ultimately lead to a weakening of the glass surface and its complete loss.
Considering that this can happen even while driving, it is worth understanding that the only solution when cracks appear should be to replace the windshield (and, if necessary, replace the rear window of the VAZ 2114).
Crack in the windshield of a VAZ 2114
It is worth noting that in some cases (for example, when the crack occupies a small area), temporary measures can be taken to prevent its increase, which will allow you to use the car for some time without replacing the glass.
Such measures include:
- drawing 5 mm lines using a glass cutter in front of all ends of the crack;
- drilling small holes in front of each end of the crack using a pobedit or diamond drill;
- contacting a car service to seal (seal) the crack.
All of the above measures should be temporary, because even if the crack stops spreading or is not visible at all (as a result of sealing), the surface of the glass will still remain damaged, as well as the risk of it falling out over time.