Many drivers have to deal with traffic accidents that make windshield bonding necessary. Due to accidents, stones and foreign objects, chips and cracks appear on the windshield of the car. Such damage is also caused by poor-quality car service, due to which it can simply come off.
- Types of car glue
- Popular brands
- Which glue to choose?
- For chips
- Cracks
- Sealants
- Instructions for replacing a car windshield
- Tools and materials
- Work algorithm
- Drying time
- Basic mistakes when gluing glass
- Useful tips
To work, you need to choose an adhesive sealant for gluing glass on a car. With this tool it is easy to achieve the desired result. In this case, you need to follow the exact algorithm of actions and know how much time it takes to adhere the materials.
This article is devoted to the rules for gluing a windshield. It will cover:
- types of glue for cars;
- what glue to choose for car glass repair;
- popular brands of adhesives;
- How long does it take for glass sealant to dry?
- instructions for replacing the windshield;
- main mistakes when gluing;
- and other recommendations for proper operation.
How to remove an old windshield
Replacing the shield yourself is not difficult, but you will need special tools, chemicals and an assistant.
Before starting work you need:
- purchase a new part;
- find a clean room with a positive air temperature;
- prepare all the necessary tools;
- devote at least 5-6 hours to work.
Before going to the store, you need to measure the luggage compartment and understand whether the part will fit in size or not. If loading is not possible, you should arrange a delivery truck in advance.
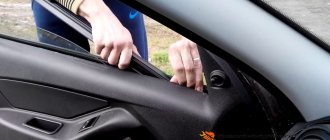
To dismantle the part, you need to disassemble the decorative trims on the racks, remove the mirror, DVR and additional accessories.
Why replacement is required
You need to re-stick the windshield if you find any defects:
- leak;
- crunching, squeaking when driving;
- the appearance of long cracks or large defects;
- complete destruction of the shield by airbags in an accident.
Replacing and installing auto glass is a responsible and labor-intensive task. You should not start work without reading the instructions and preparing the necessary materials.
Bottom line
If it suddenly happens that the windshield of a motorist’s car was damaged in one way or another, he should not be upset and count the money that needs to be allocated for the services of car service specialists. All the work can really be done independently, and it does not require a lot of time and nerves, and does not require the motorist to have experience in such work. You just need to stock up on a couple of assistants, all the necessary materials and tools, and you can get to work. The main thing is to adhere to the plan and work rules, to show accuracy and some meticulousness. If you approach the work responsibly, the result will definitely be no worse than in even a very good car service center.
5/5 — (4 votes)
Tools and materials
To remove the shield from the car struts you will need:
- screwdriver;
- spanners;
- small diameter steel cable;
- suction cups for easy replacement;
- textile.
As an additional safety measure, it is necessary to use fabric gloves with rubber fingers, a respirator and goggles when working. This will help protect your eyes and respiratory organs from small fragments, and gloves will protect your hands and prevent slipping.
Auto glass replacement tool:
- knife for cutting glue from racks;
- degreaser and primer for preparatory work;
- glue gun;
- a high-quality glass gluing kit from a trusted manufacturer, for example 3M;
- Lightning equipment;
- adhesive tape for gluing glass or masking tape;
- sandpaper.
If corrosion is detected on the racks, the area will need to be cleaned, degreased, and painted over with enamel using a sponge or brush.
If left unattended, the source of corrosion will lead to leaks and a loose fit of the shield to the landing pads.
Scope of application of glass adhesives
Glass glue is commonly used both for joining components of household items and on an industrial scale.
In most cases, transparent glass adhesive is used - the best option for working with materials that do not have color. To answer the question of how to glue glass to glass, you first need to decide on the type of work. You can glue parts of an ordinary thin aquarium or home vase, which do not require a special composition. For other subtypes of material, for example, tempered glass, window glass, reinforced or coated with dyes, you will need to choose a more reliable option for the particles to be glued.
Watch the video to find out more:
Small parts, such as beads and decorative glass fixtures, must be firmly fixed to the surface, so a non-marking adhesive applied to the material with a brush is suitable for such purposes.
How to replace a windshield
Replacing a car windshield includes the following operations:
- dismantling the interior racks and removing all accessories from the inside of the part;
- removal of plastic frill and cleaner brushes;
- cutting off the adhesive base by machine;
- extrusion of the shield;
- inspection of sites;
- cleaning and degreasing;
- corrosion removal;
- padding;
- applying the composition;
- installing the part in place;
- inserting a rubber seal;
- Reassembly of the interior and purifier system.
New glass comes with a seal. If it is missing, you will need to purchase an additional elastic band. The old part negatively affects the appearance and does not adhere tightly to the surface.
Step-by-step instruction
Preparing a new windshield
1. Unpack the new glass and inspect it. Attention! When removing the glass, try not to touch the surface where the glue will be applied with your fingers. 2. Clean the glass. Use a special detergent
2. Clean the glass. Use a special detergent.
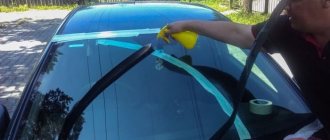
3. Apply activator. It is included in the adhesive kit. The activator will re-preserve the windshield with a pre-applied primer. The mixture is applied around the perimeter of the windshield. After this, wipe the glass dry and let it dry for 10 minutes. It should be noted that the primer is not applied to all glass, so be careful.
4. Attach the suction cups. You must first turn the glass over.
Removing the old windshield
1. Lower the front side windows. 2. Remove the wiper holders. 3. Open the hood and remove the plenum cover. 4. Remove the molding that runs along the bottom edge of the windshield. 5. Cut approximately 6 meters of wire (this is approximately 6 turns). 6. Install the wire removal tool from the bottom edge of the windshield.
7. Sit in the driver's seat and push the tool through the layer of glue. It may be difficult to install the tool. In this case, it is necessary to heat the tool, but not too much - 100 degrees will be enough. If the tool is heated too much, smoke may come into contact with the glue. At this stage, be sure to use a mask!
8. Pass both ends of the wire through the hole at the end of the tool. 9. Bend the ends of the wire at a distance of approximately 1 cm. 10. Pull the wire into the driver's cab approximately behind the sun visor.
11. Remove the ends of the wire from the tool. The ends should not move freely around the driver's cabin, they must be fixed.
12. Pass the wire around the perimeter of the windshield. The idea is to place the wire around the perimeter of the windshield like a loop. After the wire penetrates inside, it will cut the adhesive layer and release the glass.
13. Pull the remaining wire into the driver's compartment. 14. Attach one winch to the corner of the windshield.
15. Take the longer end of the wire and secure it in the winch. 16. Install the handle into the winch. 17. Pull the wire until it is at 90 degrees to the winch. If the wire makes it difficult to retract, then this also indicates that it is time to loosen the wire and move the winch.
18. Loosen the wire slightly. 19. Move the winch, holding the wire so that it does not come off. 20. Secure the winch to the ceiling.
21. Pull the wire taut and continue retracting 22. Retract the wire and move the winches until you have gone all the way around the perimeter and the ends of the wire intersect. 23. Install the transport suction cups and remove the windshield.
Installing a new windshield
1. Blow dirt and glass pieces out around the perimeter where the adhesive will be applied. 2. Wipe the dashboard clean. 3. Inspect the surface to be glued. It should be smooth. Otherwise, you need to use a scraper and cut off the glue layer.
4. Wipe off the old adhesive layer with isopropanol. 5. Treat the old layer of glue with the activator. 6. Place glue in a special gun. 7. Install the catalyst into the gun. 8. Apply glue to the windshield or car. The gun must be positioned at 90 degrees relative to the glass so that the layer of glue is the proper height and shape. The glue must be applied as evenly as possible. At the junction of the ends of the glue strips, you need to slightly overlap one layer on top of the other - there should be no gaps.
9. Install a new windshield
This operation must be completed within 10 minutes. Two people will be required to install the glass in place. Lift it to the desired position and press it into the layer of glue. Use adhesive tape to secure.
Rear window replacement
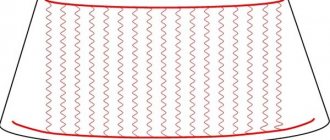
Replacing a car's rear window is no different from removing and installing a windshield. If the part is equipped with heating, then before removal you should disconnect the contacts and move them to the side.
Installation of the shield requires special care, since the hardened part is very fragile and easily crumbles upon impact or pressure. Before applying the sealant, do not forget about treating with a special primer, which increases adhesion and protects the frames from corrosion.
Which glue to choose?
When choosing adhesive for car glass, drivers are faced with a variety of these products and do not know how to navigate it. It should be taken into account that such compositions have different viscosities, which affect the final characteristics of the material. Reduced viscosity helps the composition flow into all chips and cracks without drilling, and high viscosity ensures greater sizing strength.
Universal adhesive for car glass – polymer. It has medium viscosity. Therefore, craftsmen use it to solve various issues: from filling cracks to gluing materials.
For chips
Chips and cracks are damage of a slightly different nature. The method for eliminating such flaws is also different. For example, some brands produce glue for repairing chips, the composition of which is designed to solve such problems.
To seal a chip, you can use any automotive sealant with a medium viscosity level. It will ensure high strength of the seam in the repaired area. If the pothole is very large, we recommend choosing the thickest compounds. When working with them, follow the manufacturer's instructions to make the seam neat and invisible.
Cracks
When repairing cracks, the main thing is that the repaired area should not be visible. Mostly, the cracks are thin and small, which means that to eliminate them it will be enough to simply fill them. A composition that is too thick will not penetrate thin cracks, so craftsmen choose liquid sealants or products with medium viscosity.
Application should be done carefully to avoid spilling residue onto adjacent areas. Excess can be removed until it hardens completely, until it is firmly connected to the treated area.
Replacing side shields
Door windows do not contain the film that is used in windshields for strength and to help glue broken pieces together. Therefore, when performing work, you must be careful and avoid impacts.
Auto glass replacement:
- Remove the negative terminal from the battery.
- Remove all visible screws and retaining bolts.
- Carefully pry up the trim and remove it.
- Disconnect the window lift power supply.
- Unscrew the guide rod and move it away.
- Unscrew the 2 bolts directly on the shield.
- Spread the velvets around the entire perimeter.
- Pull out the window.
Many brands of cars are equipped with technological holes through which the latches are visible. In this case, you need to connect the lift chip and lower the window to the desired position. When the guides are unscrewed, you should not slam the car doors, this can damage the structure and deform the rods.
To insert the glass into the frame, you need to bend the velvets and place the part at an acute angle into the door cavity. After this, install it in the grooves and tighten the retaining screws.
Important points
Gluing a windshield with your own hands is a process that needs to be approached with all responsibility and where it is important not only to strictly follow the instructions, but also to choose a high-quality part.
It is almost impossible to glue glass that is deformed at the factory. In this case, it is better to supply another part and return the defective one to the supplier. The original windows are inserted tightly without forming large gaps. However, the cost of the original often exceeds 90,000 rubles and is inaccessible to the average driver.
The result of replacing car glass in a garage is no different from the work of professionals, if there were no gross violations of technology in the process.
Drivers often make mistakes:
- do not follow recommendations for applying sealant;
- they do not get rid of old adhesive well;
- ignore the restrictions specified in the instructions;
- turn on the music after pasting and wait for the composition to harden;
- They begin to actively drive after replacement, not allowing the glue to set.
Severe violations negatively affect the crystallization of the glue, which dries completely only after a day. In this case, as a rule, the result is not the best, and you won’t have to wait long for rust, leaks, or squeaks to appear.
If there is room for replacement, but there is no assistant or any tools, then you can order the installation of auto glass with qualified employees on site. Professionals will check the correctness of the preparatory work and indicate where to change the rubber band or add primer.