02 September 2015 Lada.Online 26 586 0
The windshield of a car is replaced if it becomes scratched, scuffed or cracked. The process is not complicated, but requires knowledge of certain skills. Replacement of fixed body glazing for all Lada cars (Granta, Priora, Largus, Kalina, Niva 4x4, Vesta or XRAY) and foreign cars is similar, the only difference is in the requirements for glue.
Replacing the Priora Door Lock Electric Drive
Remove and install back door lock Lada priority
- Lock, pulls and handles black entrance
- 1 - Pull the outside handle
- 2 - external handle
- 3 — intermediate rod lock lock
- 4 - intermediate locking lever
- 5 - Pull the lock button
- 6 - internal handle
- 7 — pull inner handle
- 8 - internal lock
- 9 - external lock
- 10 — overlay plate
Lock, traction drive and rear door handle.
You will need: "8" wrench, flat-blade and cross-blade screwdrivers, pliers.
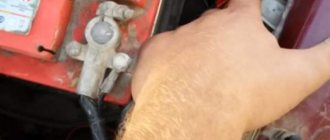
- 1. Disconnect the cable from the negative terminal of the battery in advance.
- 2. Replacing the rear door lock. Owner's story of Lada Priora ›Replacement of electric door lock, turn. How to Remove and Install a Priority Sin Window, Primer Door Lock Replacement and Adjustment Guide, Power Window Repair. Trim of the rear door of the VAZ 2170 (see “Removing and replacing the rear door trim”).
3. Squeeze the lock...
4. ... and disconnect the cable block of the door lock gear motor.
5. The lock on the car door has stopped working. Up to dozens of replacements. Remove the three screws that secure the interior handle.
6. Slide the handle from the inside of the door tab panel.
Replacing the side glass on a Prior
We carry out the work when replacing the front door glass and when removing the power window mechanism. Remove the front door trim (see “Removing the front door trim”) and the exterior mirror trim (see “Removing the exterior rear view mirror”).
We pry off the inner glass seal with a slotted screwdriver, placing a rag under it...
...and remove the seal by pulling it up. Having connected the power window control unit, set the glass to the upper position.
Holding the glass, use a 10mm head to unscrew the two bolts securing the glass holder to the slider of the window lifter mechanism.
We remove the glass from the door by lowering it a little and turning it forward. If the glass purchased to replace the broken one does not have a holder, then clean the old holder from glass shards and old rubber strips. Using a marker, mark on the new glass the dimensions for installing the holder.
Dimensions for installing the holder on glass: A - 25 mm, B - 85 mm. We soak a strip of new raw rubber in gasoline and install it on the glass according to the marks. Leaning the glass on a soft base...
Replacement of the electric window regulator of the front right LADA Priora. Illustrated report
This illustrated report on the installation of a front right electric window on a LADA Priora was prepared by our buyer Ivan Igorevich Fokin from Moscow, as part of participation in our promotion.
There was a problem in our Priora, specifically - the glass of the front right door stopped opening. All that was left was the sound of the motor running. It was decided to order a new window regulator and replace the old assembly.
Let's start step by step:
LADA Priora
Window lifter-donor JSC "Lepse" for VAZ-2110 front right.
Tools and more: shaped screwdriver, star screwdriver, 10mm head, plastic tool, tape, electrical tape, scissors.
We unscrew the screws according to the numbering - black arrow. Take a tool for plastic and also according to the numbering - red arrow.
Using tools, pry the sockets and door lights in the direction of the same arrow, turn off the chips, and put them aside. Again, use this tool to remove the door panel, starting from the lower right corner, moving in a counterclockwise direction, unfasten the panel clips - the blue arrow is where the clips are.
Unfasten the panel with clips and lift it up. The panel has been removed.
Unscrew the two screws and remove the handle.
We connect the donor to the chip and check the operation of the window regulator.
We remove all the insulation so that it does not interfere. Unscrew the nuts.
We lower the glass a little in order to remove the rail from the door body mounted on the bolt.
Raise the glass to its highest position and secure it with tape.
We remove the engine bolts and racks from their mounted places and pull out the window regulator through the upper right corner.
Don’t forget to remove the engine holder from the original and place it on the donor.
In the reverse order, we insert the window regulator (donor) and, first of all, install the engine onto the bolts with the nuts.
Perform subsequent manipulations strictly in reverse order.
Thank you, Ivan Igorevich, for the prepared photo report. We will transfer the promised prize to your mobile phone account.
Buy
steklopodem.ru
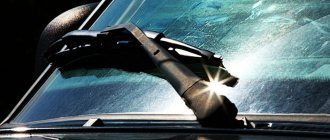
Instructions for removing and replacing trapezoidal wipers on a Priora without air conditioning
Once all the tools are ready, you can begin the actual process. First you need to disconnect the negative terminal on the battery. You don't need to remove the hood of your car, but if you do this, you will make the job about 30-40% easier. If work is carried out without removing the hood, then it is better to close it. The need to open it will arise when you remove the left side of the frill. To remove the trapezoidal wipers with a motor on a Priora without air conditioning for the purpose of repairing or replacing it, you should perform the following steps:
Initially, the leashes or levers are dismantled along with the wipers. This is necessary in order to remove the frill. To do this, remove the plugs and use a “13” key to unscrew the fastening nuts. Next, remove the lever. Before removing, squeeze the leash, and only then remove the lever. Use a screwdriver to pry off the three plastic plugs, under which the frill fastening screws are located. Use a Phillips screwdriver to unscrew the frill fasteners. Open the hood. Move the rubber hood seal aside. Using a Phillips screwdriver, unscrew the four screws securing the sound insulation of the engine compartment from the top. And one screw from the bottom, which is located under the brake system reservoir. Loosen the clamp of the hose coming from the passenger compartment to the expansion tank. Disconnect the hose from the tank and move it to the side. Remove the frill by pulling it towards you. Remove the expansion tank from its seat. It does not have fasteners. To remove it, you need to unfold it and pull it towards you. After this, we remove the hose through the hole in the sound insulation, which was previously disconnected from the expansion tank. Remove sound insulation. To dismantle the trapezoid of the wipers and the motor, it is necessary to first dismantle the platform (platform) on which the expansion tank is located. It is secured with two bolts and two nuts. The photo below shows the location of the bolts on the hood side. The platform mounting nuts are located on the wheel arches on the wheel side. Remove the platform and set it aside. Having gained access to the wiper trapeze with the motor, you can begin to dismantle it. To do this, you need to unscrew the two nuts on the “10” fastening of the trapezoid. They are located in the area where the wiper arms are mounted (near the rods). Below is shown the first trapezoid mounting nut on the Priora. And the second nut for the “10” trapezoid mount on the Priora. The motor is secured with a “10” bolt, which is located underneath it. It also needs to be unscrewed. We remove the trapezoid and disconnect the motor power supply. To remove it, you need to twist it in different directions until you get out of the niche.
It is important to note that the wipers do not need to be moved to the vertical position first. This will not make it easier to dismantle the trapezoid with the wiper motor on the Priora. This completes the process of dismantling the windshield wiper trapeze assembly with the motor on the Priora
Further actions depend on the reasons for the need for dismantling. If you need to replace the trapezoid along with the motor, then we install new elements instead of the removed ones. If you need to repair a motor or trapezoid, then we disconnect these parts and perform the appropriate actions. To disconnect the trapezoid from the motor, unscrew the nut to “10” or “12” (depending on the model of the gearmotor), as well as the three bolt connections to “10”. Before disconnecting the trapezoid from the wiper motor, you should mark the location of the trapezoid relative to the motor. To do this, we use a marker and use it to outline the location of the trapezoid (or make notches with a screwdriver). This is necessary so that after assembly there is no need to adjust the operation of the wipers.
This is interesting! After installing the trapezoid with the motor in place, do not rush to install the frill. First, turn on the wipers and let them work for one cycle. Then reinstall the wiper arms and check how they work. If everything is in order, then you can continue assembly. If operating defects occur, for example, they do not wipe or start moving down and then up, then they should be adjusted first. The adjustment is made by changing the position of the plate, which is shown by the arrow in the photo above.
This completes the expert instructions for removing and replacing the trapezoid and wiper motor on a Priora. The assembly process is performed in the reverse order of removal. Below is a video clip that details the process of dismantling the trapezoid and wiper motor on a Priora without air conditioning.
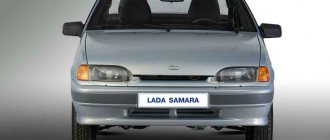
Instructions for replacing headlights and adjusting their light on a Lada Priora car
Optics on a car is one of the components of the safety of the driver and passengers; visibility on the road depends on its quality. Like any car part, the optics on a Lada Priora car sometimes require replacement. The article describes the reasons for replacing optics, how to properly replace and adjust the headlights on a Priora.
In what cases is it necessary to replace and adjust headlights?
The main reason why optics are replaced is their failure and the inability to perform their functions: high-quality road lighting. In addition, the lamps in the lanterns are changed. Bosch lamps are in demand. Bosch brand xenon produces better quality light and has a longer service life.
Optics should be changed for the following reasons:
- the headlight sweats, its ventilation is impaired;
- cracks, chips on glass;
- reflector malfunction;
- faults in electrical connectors;
- defects in fasteners;
- tuning
During the replacement process, you can not only restore the functionality of the flashlight, but also improve its performance characteristics by replacing halogens with xenon. Using xenon in lamps, the driver receives better lighting. At the same time, tuning of the headlights is also carried out: lens glass is installed, black headlights look impressive. LED lamps are installed in the parking lamps, as well as in fog lamps.
To make your car tuned, you need to know how to remove the front and rear optics.
Replacing headlights from A to Z
The toolkit for the procedure for replacing headlights on a car consists of:
- socket wrench to “10”;
- Phillips screwdriver;
- flat screwdriver.
Replacing a headlight on a Priora begins with disconnecting the negative terminal of the battery (the author of the video is the channel In Sandro's Garage).
Before removing the headlight on a Priora, you need to remove the bumper. Then you need to remove the headlight covers from above. Next, pressing the latch, the block with wires is disconnected. When the headlights are removed, you can change the bulbs, for example, with Bosch xenon ones. The glass version of the optics can be replaced with a lens one.
The rear lights of Priora 2 are removed in the same way. The upholstery is dismantled and the wires are disconnected. Now you can remove the rear lights of Priora 2.
To disassemble and replace the headlight glass, you will need the following materials and tools:
- industrial dryer;
- thin screwdriver;
- new glass;
- new lamp;
- sealant.
Before disassembling the headlights on the Priora, you need to place them on a clean, dry surface. Then heat the glass until the sealant begins to melt. Next, the glass should be pryed off with a screwdriver and separated from the body. The next step is to remove the old sealant.
Before changing the light bulb and replacing the headlight glass, the seat must be lubricated with a fresh layer of sealant. Then the glass is carefully placed and pressed firmly. After 12 hours you can assemble the lantern.
Features of headlight adjustment
To adjust the optics, the machine must be placed on a flat horizontal surface.
It is advisable to place an assistant in the driver's seat or place a load weighing about 75 kg. The vehicle's tires should be well inflated and the tank at least half full to bring its weight closer to the weight at which it is driven daily.
The adjustment is carried out on a vertical wall or stand on which markings are applied. To correctly adjust the optics, it should be possible to move away from the wall at a distance of 5-10 meters. This makes it possible to create an imitation of lighting on the road.
To apply markings, you need to place the car closer to the wall and turn on the low beam. Then you need to alternately mark the center of the trace from each headlight and the centers of their symmetry. By connecting these points, we get a horizontal line. Then, below, two more lines should be drawn in parallel. The second is at a distance of 5-12 cm, and the third is at a distance of 22 cm from the first. In addition, you need to draw vertical lines through the center points of the car and the lights.
After turning on the light, you need to ensure that the top point of the light is on the second line. The adjustment is made using an electric headlight adjuster. The adjusted light will illuminate the road well and will not blind oncoming drivers.
By learning how to remove, disassemble and adjust optics, you can save on maintenance at a car service center.
Video “Universal headlight adjustment”
This video demonstrates how to adjust the headlights on a car with your own hands (the author of the video is an inquisitive person).
Sheathing fastener diagram
The fasteners on the rear and front doors of the VAZ-2170 are located in different ways, so the procedure for dismantling the trim will be slightly different. In order to easily remove all the decorative elements of the door, you need to study the principles of their fastenings.
Front door fasteners
Before removing the door trim, you need to understand what parts it consists of. To do this, take a look at the diagram.
the front doors of the Lada Priora consist of several elements
- Front door trim trim.
- Front door trim.
- Front door trim.
- The screw is self-tapping.
- Front door trim insert.
- Front door trim pocket.
Pay attention to where the trim fasteners are located.
location of the fasteners that hold the door trim
Eight clips that hold the trim in place are located at the top of the door, as well as on both sides. They hold tightly enough so that nothing dangles while the car is moving. However, removing the trim is fairly easy once you have removed all the other screws and trim.
Rear door fasteners
The structure of the rear door of the car is slightly, but different, from the front.
rear doors of Lada Priora consist of several elements
- Front door trim trim.
- Front door trim.
- Front door trim pocket.
- The screw is self-tapping.
- Upholstery trim.
The rear door trim is also held in place with clips. Several more lower ones were added to the side and top pistons.
location of the trim fasteners on the rear doors of the Lada Priora car
Thus, the design of the car involves 18 clips on each side, to which the door trim is attached.
Explanation: digital symbols on glass
Auto glass receives the following designations:
- ASI M461 DOT 183 - the product complies with the ANSI Z1 standard adopted in the USA.
- E2 43R 001207 – the product has successfully passed tests according to the standards of UNECE Regulation 43.
- ....8 - the number of dots indicates the month, the number - the year (in this case - 2022 or 2008 - this can be determined by the type).
The heated windshield of a Priora car should work correctly. To check this, the following connection diagram is proposed:
https://www.drive2.ru/l/2646887/ - I got the diagram here
A “+” wire must be drawn from the battery to the mounting block, then placed inside the relay block. At the top of the car glass, connect the contact to the negative wire. Route the wires under the casing. From the relay, run the brown wire to the alternator warning light (white wire).
Continue connecting according to the diagram - everything is simple.
Glass for Lada Priora
Priora is a family car. The safety of the car is always a priority for both designers and owners. The Priora is also positioned as a budget car, so cost plays an important role in the matter of repairs.
The cost of replacing the windshield on a Priora, as well as the rear and side ones, depends on several factors:
- Manufacturer. Original glass is supplied either directly from factories or through a distribution network. They are more expensive than non-original ones, but noticeably better quality. But in fairness, it should be noted that non-original glass is also manufactured in compliance with the technical standards approved for these products.
- Characteristics of glass. The strength and properties of the material directly depend on the production method. The most common today are double-glazed windows and silk-screen printing. Also, if the client wishes, it is possible to install double glass on the Priora; this is especially important in Moscow - in addition to strength, sound insulation increases.
- The work of a master. Experienced car enthusiasts know that the most profitable way to replace the side, rear and windshield of a VAZ 2172 in the South-Western Administrative District is through the trusted company XL General. There are highly qualified staff and the most reasonable prices.
By contacting us, you are guaranteed to receive a high-quality windshield replacement for your Priora, the price of which will be the most favorable.
Glass types
Previously, the Volzhsky Automobile Plant installed two types of windshields. This is about:
- hardened;
- triplex.
How are they different from each other? The latter is made, in fact, from two layers of glass and a film located between them. Its disadvantage is less transparency. The hardened one does not have this defect, but it is single, and therefore it is easier to manufacture, therefore, the price of this option is lower, as well as the quality.
As practice shows, most car owners still prefer triplex, and at the first opportunity they try to install it instead of hardened ones. Why is this happening? The thing is that the cheaper option has an extremely unpleasant property - when destroyed, such glass simply disintegrates into many tiny fragments. If this happens while the car is moving, then they all end up in the cabin and often cause injuries to both the driver and passengers.
Installing rear door lifts
Electric windows are a necessary element of comfort. But with Priora everything is not so simple. Standard wiring (unless, of course, you have a luxury version) is not enough to install lifts in the rear doors. And the first thing you have to do is stretch the necessary wires from the control unit to the doors. Moreover, this is not the only difficulty. On some versions without rear ESPs, relays for them are installed, and the control unit has only 2 buttons. Thus, in order to install the lifts back, you need to change the control unit to a four-button one.
When replacing the unit, problems may arise with the immobilizer of the standard anti-theft system. It must either be deactivated or reprogrammed. It depends on whether you want a factory alarm. In general, the procedure, which in itself is not too complicated, becomes more and more complicated in Priora trim levels other than the luxury one.
In order to install electric windows on a Priora, you will need a set of keys, the lifts themselves and a screwdriver. Time spent from 15 minutes on the door without taking into account fiddling with the immobilizer. In some cases, up to five hours of work will be required.
But even a seemingly correct installation does not guarantee that the Priora’s power windows will immediately start working.
The Priora has a rather complex wiring diagram, especially for those who have not done any manipulations with it before. And if there are no relays in the rear doors yet, you will have to purchase and install them.
By the way, it’s easy to check their presence: when you use the window regulator on the front door, quiet clicks will be heard in the rear ones. These are working rear relays, quite suitable for installing non-standard ESPs compatible with your car. There is some information on this issue on car forums.
You also need to know how to remove the lift to replace or repair it. Everything is simpler here, we take out the glass, disconnect the electric motor connector, use a ten key to unscrew the fasteners and pull out the mechanism itself through a specially provided hole. And so with every door. The casing must be removed before starting work.
The window regulator on the Priora in the Norma configuration is installed in its regular place. Next, you need to connect the rear door buttons, taking into account that each of the buttons has 3 contacts (for power, ground and common wire). The wires from contacts 1 and 3 must be led independently to the control unit under the dashboard. The common wire is connected to one of the wires coming from the controller. After these operations, we connect each Priora lift with an electric motor.
To connect an electric drive to the lift, you first need to remove the power connector from the controller. There are just two empty nests in it. You just need to remove the clamp to easily connect the wires necessary for the operation of the lifts. You also need to run the wires into the corresponding connectors of the rear doors (their colors are red and black). The easiest way to stretch them is along the original wiring of the VAZ Priora. The blog drive2.ru has detailed instructions on this point with photographs. In general, Priora window regulators are quite simple to install and dismantle.
Types of compatible window regulators
One of the most common models on the aftermarket is the window regulator for the Priora Forward. This model of electric lift is made in a combined arrangement of the drive and the actual rack-and-pinion lifting mechanism, compactly combined with the glass guide. Lifts of this model are characterized by increased reliability and ease of installation on Priora.
Garnet is the second most popular system. Under this name there is not even a single model, but a whole family, each modification of which is intended for a specific car. The mechanism is also rack and pinion type and has earned many good reviews from car enthusiasts. This type of lifts is characterized by uninterrupted operation, fast speed of raising/lowering the glass, and low noise.
It has already been said above about glass closers. In the luxury package they are available on all doors, but their performance leaves much to be desired. It is necessary to resort to replacement with other similar devices. One of the available alternatives is the Master system. It allows you to automatically raise the windows when the anti-theft system is turned on, and even control them within half an hour from the moment the ignition is turned off. The device itself looks like an electronic board with connectors connected to the standard Priora wiring.
The master is not very expensive (from 700 rubles), and its installation does not affect the door trim in any way. The whole procedure consists of removing the rear door sill trims, bending the sound insulation and connecting the door closer to the connector.
For the front doors, the Master will by default raise and lower the windows without ignition, and for the rear doors you need to install a slightly different version, called Master Plus. There are no differences in installation, the main thing is not to forget to disconnect the negative battery before starting work. The wizard has many other useful functions, for example, it automatically turns off the radio when the car is armed.
Types of windshields
The dimensions of the windshield, standard, and sensor-equipped windows are the same. Additional features and prices will vary. The most convenient way to select is by article number.
Standard
The most common glass without additional options. Installed on the factory rubber seal. The cost of the original glass model is approximately 2.5 thousand rubles; replacement will cost 2 thousand rubles if the work is done in a workshop.
Standard glass for Lada Priora may have a blue or green tint. The cost is 400 rubles higher.
Front windshield on Priora with rain sensor
The rain sensor automatically turns the windshield element and sometimes the washer system on and off. The essence of the operation of the unit is the refraction of an IR light beam. It passes through snow, mud, and water drops, coordinating the operation of a special photocell. The sensor can be rearranged after replacing the glass. The price of one product is from 5 to 9 thousand rubles, installation will cost 2 thousand rubles.
Heated
A product with a heating function can have different versions:
- heating of the entire working surface;
- warming up the working instrument area.
The principle of operation of the system is to heat thin filaments inside the glass. The unit operates automatically and switches off periodically, saving battery power and preventing overload of the on-board network. The ice crust thaws quickly in winter, providing good visibility and protection from fogging. Price – 6–10 thousand rubles, installation usually costs 2 thousand rubles.
There are combined models - with heating and a sensor; their installation will cost about 8-15 thousand rubles.
What glass color should I choose for replacement?
It would seem a strange question, especially against the backdrop of the ongoing discussions of traffic police (state road safety inspection) fines in the area of fines for tinting the windshield. But it's not that simple! The car owner should know that they are fined for window tinting applied using film, but the one produced by the factory with a certain amount of darkness is allowed! And this is a very useful thing, especially when driving in places with bright lighting. This protection also helps with sudden glare at night, reducing the risk of an accident. Therefore, moderate factory tinting, and even if it is a color close to the car’s paint, will not only not harm, but will also be beneficial on the road.
Diagram of window regulators on a VAZ-2107
On the automotive goods market for old mechanical VAZ models there are sets of electric windows from different manufacturers, the most popular of which are “GRANAT” and “FORWARD” rack-and-pinion type. The window lifter rack is a housing in which the glass movement device is located - a toothed chain drive. A stationary electric motor is already attached to the rack, driving the entire mechanism to work.
To connect power windows, you need to determine the place where you will get the power from. In the VAZ-2107, this is most conveniently done from the cigarette lighter. If this option is not suitable, then the electrical wiring will have to be done from the battery.
Removing the internal lock, lock cylinder mechanism and outer front door handle of the Lada Priora
We carry out the work when replacing the lock, its cylinder mechanism and the outer door handle.
Remove the front door trim (see “Removing the front door trim”).
Use a slotted screwdriver to disconnect the rod from the cylinder mechanism of the lock.
Use a slotted screwdriver to pry up the mounting bracket for the cylinder lock mechanism...
...and remove the bracket.
We take out the cylinder lock mechanism along with the rubber sealing ring. Disconnect the lock rod from the outside door handle.
Using a 10mm socket, unscrew the two nuts securing the outer door handle...
...and remove the handle.
Using a slotted screwdriver, unfasten the clamp securing the wiring harness of the electric locking drive.
By pressing the latch... ...we disconnect the wiring harness blocks of the electric locking drive.
Using a Phillips screwdriver, unscrew the three screws securing the base of the inner handle...
...and the screw for securing the internal lock. Remove the external lock (see.
"Removing the outside door lock").
We remove the internal lock of the front door with rods and an electric drive for locking the lock through the technological opening of the internal door panel.
Front door lock with electric locking, external and internal door handles
Use a slotted screwdriver to disconnect the rod end of the outer handle from the lock lever.
In the same way we disconnect the rod of the cylinder mechanism of the lock.
Using a slotted screwdriver, we open the spring bracket that secures the rod of the inner handle...
...and remove the bracket. There is a spring washer under the bracket; remove it, and then the rod.
Using a slotted screwdriver, press out the plastic locking rod lock of the lock button, turning the lock around its axis.
In the same way we remove the locking electric drive rod.
Using a Phillips screwdriver, unscrew the two self-tapping screws securing the electric drive to the lock bracket and remove the electric drive.
We remove the rod from the hole in the electric drive rod of the lock.
Front door internal lock mechanism
We install the internal door lock, the lock cylinder mechanism and the external door handle in the reverse order.
Before installing the door trim, we check the functionality of the door lock mechanism. If the outer door handle or lock cylinder mechanism does not work correctly, the length of the rod should be adjusted by rotating the plastic tip of the rod.
Video on the topic “Lada Priora. Removing the internal lock"
Replacing the outer and inner door lock on VAZ 2110, 2111 and 2112 HOW TO REMOVE THE DOOR MOTOR ON A PRIOR Removing and installing the door lock Source
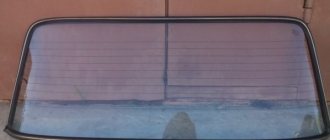
Replacement of windshield and rear glass
| You will need: a screwdriver, an awl, a knife, a set for gluing glass. |
| This is what the kit for gluing glass looks like. It consists of a tube of glue, a tube tip, an activator/cleaner and a primer. |
| There may be slight differences in the instructions for kits from different manufacturers. In this regard, when performing this operation, refer to the instructions for the kit you purchased. |
| Recommendation |
| To remove glued glass, it is convenient to use a steel wire. |
| 1. Lower the front door windows. |
| 2. Remove the front pillar trims (see “Body pillar trims”). |
| 3. Remove the hood (see “Hood”). |
| 4. Remove the windshield frame trims (see “Windshield frame trims”). |
| 5. Remove the two adjusting wedges (one shown, left). |
| 7. Use a screwdriver to pry off the edge of the side windshield trim... |
| 9. Remove the second cover in the same way. |
| 10. Remove the windshield seal and thoroughly clean it of dirt and sealant. If the seal is damaged or has lost elasticity, replace it. |
| 12. For ease of work, you can attach screwdrivers to the ends of the string, which will serve as handles. |
| 14. ...and remove the glass from the car. |
Attention: Take safety precautions when working with glass. If the glass is damaged, it may break unexpectedly
| 15. Cut off the old seam, leaving a thin layer of glue (1.0–2.0 mm). |
| 16. Install the seal on the new glass. |
| 17. Apply activator... |
| 19. Apply primer around the perimeter of the glass... |
Attention: Do not apply primer to old adhesive residues.
| 21. Apply glue evenly to the window opening (layer thickness 0.5 cm) and around the perimeter of the glass. |
| At the bottom of the windshield frame, two rubber pads are glued to the body, preventing contact of the glass with protruding body elements. Check their presence, otherwise the new glass may be damaged. |
| 22. Install the glass assembly with the seal on the car. |
| 23. Using adjusting wedges, achieve uniform gaps between the glass and the opening around the entire perimeter of the window. |
| 24. Press and secure the glass in any available way (for example, using masking tape). The glue polymerization period is at least 2–3 hours. During this time, the car should not be exposed to any external influences. Even abruptly closing the door can lead to an increase in air pressure in the cabin and, as a result, to tearing off the glass. It is advisable to start operating the car no earlier than 24 hours after gluing the glass. |
| 25. Replace the rear glass and side glass in the same way. |
Body MalfunctionsWindshield frame liningsSoundproofing of the engine compartmentFront bumperRear bumperFendersFront fenderSill platesHood (removal)Hood lockHood lock cableTrunk lidTrunk lid lockFront door trimFront door lockDoor opening limiterFront door glassFront window lifterFront door removalRear door trimRear door lockExternal New rear door handle Rear door glass Rear window lift Removing the rear door Removing the seats Replacing seat belts Outside mirror Rear view mirror interior Sun visors Handrails Steering column trim Floor tunnel linings Body pillar linings Luggage compartment shelf Sill linings Removing the dashboard Disassembling the dashboard Heater Removing the heater Heater radiator Replacing the windshield and rear window How to polish the body Anti-corrosion treatment
Replacing the windshield on a Prior
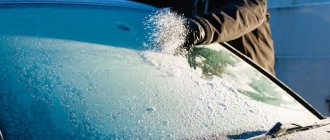
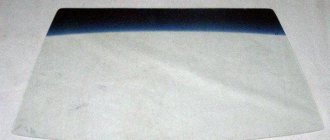
Welcome! The windshield is constantly subjected to heavy loads, the main loads that go on the windshield are wind and bumps, because of bumps, for example, the windshield can crack (If there is a strong collision with a hole), this especially applies to cars of the tenth family and Lada Prioras, because the windshield on them is load-bearing and we can say that when the body is deformed, it is subjected to no less loads (Especially in a frontal collision, the glass in this type of car provides less deformation of the body than if it is absent), in addition, when driving in All sorts of stones fly into the glass, break it and it becomes covered with cracks, in connection with this, during the entire period of operation of the car (Provided that the car has been in use for a long time), the windshield has been replaced at least once with a new one.
Note! To change the windshield, you will need: A special kit for gluing windshields, as well as screwdrivers, a knife, an awl and a thin steel string. After reading this article in full, you will understand why it is needed!
In what cases is it necessary to replace car windshields?
Rear glass types of Priora Sedan, Station Wagon, Hatchback or frontal models must be purchased taking into account the dimensions. The main part of the glass is standard, but there are deviations. Main reasons for replacement:
- deformation as a result of mechanical damage, constant contact with hot air;
- cracks (can also be on headlights);
- significant damage.
It’s not difficult to do the work yourself, the main thing is to work according to the scheme.
The main enemies of car glass are stones flying off the road and hail.
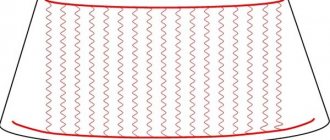
Heated windshield
Glass with a heating function on the Priora comes in two options: with heating of the entire surface of the glass; with heating of the working area of the windshield wipers.
The principle of heating is to heat the thinnest filaments inside the glass, similar to the elements of the rear window of a car. The heating works automatically, with periodic shutdowns, to save battery charge and protect the on-board network from overload.
The benefits of heated glass are very rapid thawing of the ice crust in winter, protection from fogging and good visibility. Heated glass has a cost of approximately 5,500 - 10,000 rubles, with installation work, about 7,500 - 12,000 thousand.
There are glasses that combine heating and a rain sensor; the cost of such glass will be approximately 8,000 - 15,000 rubles, depending on the material, manufacturer, heating options and weather sensor, and retail chain markups.
Video about how to replace a windshield on a Lada Priora:
Anyone who has read the main page to the end knows that my car is equipped with a heated windshield.
Installing a windshield using suction cups
It is best to treat the inside of the glass on which the glue will be applied with white spirit. It is best to mark the glue using a swab dipped in primer. You will use this to mark a strip for the adhesive composition. You need to treat the entire frame of the opening at once and leave for 10-15 minutes.
If you use suction cups, then there will be only one fundamental difference in the work - the glue must be applied to the glass itself using a special gun. Before doing this, it should be heated, then the composition will be distributed throughout the opening and will set better. The thickness of the adhesive layer should be about 1 centimeter. Before applying it, grab the glass from the outside in the center with suction cups.
Glass installation is carried out according to the instructions:
- Roll down the front door windows and open the hood.
- Place your partner in the cabin so that he can help control the process and direct the windshield into the frame on his part.
- Take the glass by the suction cup handles and press it to the frame.
The good thing about using holding devices is that you can quickly press the glass evenly against the frame. You will not need to install the bottom part first and then the top. Make sure that the glass fits tightly into the frame.
Replacing Priora headlight glass
In the previous post: Polishing headlights: the first damn thing is lumpy. I coated the headlights with varnish and polished them. The right headlight was left without a protective coating and cracked under the influence of solvent from a can.
In general, I recently noticed that the headlight, which was left without a protective coating, began to turn yellow. Not only is it cracked, but also yellowed
This won’t work. I looked for used headlights on Avito, but found nothing. There were options, but for 2500, which is expensive for a used one, in my opinion. Therefore, I decided to change the glass. This is the cheapest option. I removed the headlight. I found a suitable cardboard box and placed the headlight in it. I made a hole in the box and put a soldering gun in it. You can use construction. It turned out to be an improvised oven.
I closed the box and sealed it with masking tape. Turned on the hairdryer. I found experimentally that a temperature of at least 100 degrees must be created inside the box, otherwise nothing will come off. First, I removed the rubber plugs and pulled out the bulbs.
We will show you how to quickly and easily disassemble the headlight and replace the glass in a LADA Priora car with your own hands. The reason for this repair is that the headlight is sweating, most likely water is getting in from somewhere. Ideally, a hair dryer is needed for this work, but since we do everything at home, we will make do with improvised means.
READ Where is the cabin filter on a gazelle?
The headlight needs to be wrapped in some kind of cotton fabric, in the video this role is played by ordinary underpants, and put it in an oven preheated to 170 degrees for 15 minutes. First, we take out the staples and cover the glass with masking tape so as not to scratch it. We take the headlamp out of the oven using gloves, as it is very hot. Then, using a regular flat-head screwdriver, we begin to dismantle the glass. As you can see in the video, it can be removed quite easily. Then we will put the same glass on the sealant.
Backup video: analysis of the Lada Priora headlight block, glass replacement:
The headlights on the Lada Priora are non-separable, so to replace glass or a light bulb you need to buy a new one or somehow disassemble the old one. The second option requires effort, time, and some experience. Headlights for these cars are also manufactured by Bosch.
The headlight block consists of 2 parts, held together with strong sealant or glue. To disassemble the Priora headlight, you will need a household hair dryer, which can be used to heat the glued joint and melt the sealant. Thanks to this, you will be able to separate the 2 parts of the headlight unit.
How to make a replacement on a Priora yourself
To install a windshield on a Priora with or without heating on your own, you will need to buy an element, prepare accessories, and tools. When choosing a glass product, look at the markings and silk-screen printing. All factory-made products have certificates of conformity.
The windshield must be taken strictly new, preferably original, with molding and wedges for adjustment included.
Required materials and tools
You can buy a ready-made kit for replacing Priora windshields or assemble it yourself. You will need:
- activator;
- primer;
- knife or string for sealant;
- mounting gun;
- sharp knife with spare blades;
- degreaser;
- construction tape;
- flat thin screwdriver;
- emery;
- glue for mirror and plate.
It is best to work with gloves; a respirator and mask are also useful.
How to cut off a damaged part
Before dismantling the old glass, the car is prepared - decorative panels, trims, pillar trims, and rear-view mirrors are removed. The panels in the cabin and the dashboard can be covered with any material with a scratch protection function. The windshield wipers are removed using a type 13 socket wrench. When this is done, the windshield itself is removed.
Be careful not to break the product
After installation is completed, carefully cut off the remaining old glue. Constant replacement of blades will speed up the work process
You need to cut the sealant not to the metal, but to about 2 mm. This will improve the adhesion of the new material.
After cutting off the old adhesive layer, you need to inspect the surfaces for defects and corrosion. Rust, if any, is thoroughly cleaned off.
The next stages of work are fitting the glazing, setting optimal gaps, and attaching marking strips. The cleaned areas are degreased and primed. The old layer is not covered with a primer - an activator is used instead. When it dries, a glue seam is formed. It is recommended to warm the sealant a little before applying.
Installing a new
The new product is attached with a seal along the adhesive tape markers prepared at the previous stage. It is advisable to enlist the support of another person - this will allow you to place the glass very carefully to maintain the integrity of the seam. There is no need to press the part too hard; it falls into place normally under its own weight.
You need to act quickly, as the primer hardens quickly. You have no more than 15 minutes to do everything. After completing the work, leave the car for at least 10 hours.
Basic glass faults on Priora
The operation of a Lada Priora car involves constant monitoring of its condition. The heated windshield is no exception. This element on the Lada Priora is located directly in front of the driver and it is difficult not to notice at least one of the following malfunctions:
- Traces of scratches from a bad wiper. The arcuate “frosted” stripes covering the auto glass slightly obscure the view. This is unpleasant, and at night it can get in the way if oncoming traffic blinds you with high beams.
- A chip is a small pebble hitting the glass, especially the windshield of a Lada Priora car, which is difficult to predict, much less avoid. The mark from a stone hit is a small crater, which can sometimes be quite difficult to notice. In an unfortunate coincidence, the sun hits it and is reflected directly into the driver’s eyes.
- A crack is a more serious problem, which may be a natural continuation of a chip. It will increase over time - this is a sure sign that the windshield needs to be replaced sooner.
- The wipers don't turn on as soon as it starts to rain. This means that you should check the sensor and the section of the electrical network that is connected to it - you should not refuse this convenient option.
The glass heating does not work. There may be several reasons for this. For example, this is a heating relay.
For Lada Priora there are options for replacing the windshield:
- Asahi Glass Company (AGC) (transparent windshield glass with a blue stripe on top on Priora) article (Eurocode) 4503ACLBL, price - 3,638 rubles.
- Asahi Glass Company (light sensor, rain sensor, silk-screen printing of Lada Priora, green with sun protection) Eurocode 6962902, price - 5,500 rubles.
- Benson (green) Eurocode 2110-0520601605, price – 3,300 rubles.
- Benson (green with green stripe) Eurocode 4503AGNGN – 4,500 rubles.
- Pilkington (green with blue stripe) Eurocode 4503AGNBL – 4,800 rubles.
- Pilkington (green, with rain sensor) Eurocode 4503AGSM1B – 4,900 rubles.
- XYG Eurocode 2110 LFW/X - 3,800 rubles.
- XYG (green with blue stripe) Eurocode 4503AGNBL – 4,500 rubles.
Priora. .
| Priora : 3060 . |
| 4503A |
| XYG |
| LADA (110-SERIESS) PRIORA 99- |
| ∨ |
| ∧ |
| Priora : 3060 . | |
| 4503A | |
| XYG | |
| XYG-: | 2111 SW/RH/X |
| LADA (110-SERIESS) PRIORA 99- | |
| ∨ | |
| ∧ |
| Priora : 3060 . | |
| 4503A | |
| XYG | |
| XYG-: | LOGAN FD/RH |
| LADA (110-SERIESS) PRIORA 99- | |
| ∨ | |
| ∧ |
| Priora : 3060 . | |
| 4503A | |
| XYG | |
| XYG-: | 2110 LFW/X |
| LADA (110-SERIESS) PRIORA 99- | |
| ∨ | |
| ∧ |
| Priora : 3060 . | |
| 4503A | |
| XYG | |
| XYG-: | PATRIOT RW/H |
| LADA (110-SERIESS) PRIORA 99- | |
| ∨ | |
| ∧ |
| Priora : 3060 . |
| 4503A |
| XYG |
| LADA (110-SERIESS) PRIORA 99- |
| ∨ |
| ∧ |
| Priora : 3060 . | |
| 4503A | |
| XYG | |
| XYG-: | LARGUS RW/LH/X |
| LADA (110-SERIESS) PRIORA 99- | |
| ∨ | |
| ∧ |
| Priora 1995- : 3770 . |
| 4503AGNBL |
| XYG |
| 1995- |
| 1428×862 |
| WS2110GB 2110, 2111, 2112/PRIORA ( ) (1995-) //EURO: 4503AGNBL |
| ∨ |
| ∧ |
| Priora 1995- : 4320 . |
| 4503AGN |
| 1995- |
| 1428×862 |
| WS2110G 2110, 2111, 2112/PRIORA (1995-) //EURO: 4503AGN |
| ∨ |
| ∧ |
| Priora 1995- : 5080 . |
| 4503AGNBL |
| Pilkington |
| 1995- |
| 1428×862 |
| WS2110GB 2110, 2111, 2112/PRIORA ( ) (1995-) //EURO: 4503AGNBL |
| ∨ |
| ∧ |
| from Priora 2005- : 5140 . |
| 4503AGSM1B |
| Pilkington |
| 2005- |
| 1428×862 |
| () |
| WS2110GSM 2110, 2111, 2112/PRIORA (2005-) //EURO: 4503AGSM1B |
| ∨ |
| ∧ |
| Priora : 5360 . | |
| 4503A | |
| XYG | |
| XYG-: | 2110 FD/LH |
| LADA (110-SERIESS) PRIORA 99- .. | |
| ∨ | |
| ∧ |
| Priora : 5360 . | |
| 4503A | |
| XYG | |
| XYG-: | LARGUS RW/RH/X |
| LADA (110-SERIESS) PRIORA 99- .. | |
| ∨ | |
| ∧ |
| Priora : 5360 . | |
| 4503A | |
| XYG | |
| XYG-: | ST-2112 LFW/X |
| LADA (110-SERIESS) PRIORA 99- .. | |
| ∨ | |
| ∧ |
| Priora : 5360 . |
| 4503A |
| XYG |
| LADA (110-SERIESS) PRIORA 99- .. |
| ∨ |
| ∧ |
| Priora : 5360 . | |
| 4503A | |
| XYG | |
| XYG-: | LARGUS RD/LH |
| LADA (110-SERIESS) PRIORA 99- .. | |
| ∨ | |
| ∧ |
| Priora : 5360 . |
| 4503A |
| XYG |
| LADA (110-SERIESS) PRIORA 99- .. |
| ∨ |
| ∧ |
| c , Priora 2005- : 11100 . |
| 4503AGSHM |
| 2005- |
| 1428×862 |
| () |
| WS2110GSM Hz 2110, 2111, 2112/PRIORA (2005-) //EURO: 4503AGSHM |
| , |
| ∨ |
| ∧ |
. 2014.https://fix-glass.ru
Removing and replacing front doors on a Priora according to instructions
To remove the front door on a Priora and replace it, you must perform the following steps:
- Using an 8/10 socket wrench (depending on the car modification), unscrew the bolts securing the opening limiter. To avoid damaging the paintwork on the bolt heads, you should first cover them with masking tape.
- Next, you need to release the rubber protective cover from engagement with the car body, inside of which there is a wiring harness to the power window console and rear-view mirrors. To do this, pry off the cover using a flat-head screwdriver.
- Unscrew the two screws securing the plastic threshold. The photo below shows their locations on the threshold. You need to remove the plastic threshold in order to get to the place where the connection for the power supply wires is located.
- Under the soundproofing mat there is a chip that needs to be disconnected.
- Disconnect the chip from the terminal block by prying off the tab with a flat screwdriver and pulling the chip up.
- Now the disconnected bundle of wires must be inserted through the opening in the car body, having first removed the rubber plug.
- After this, you can begin to unscrew the two bolts that hold the hinges on the Priora.
- When unscrewing the bolts, you need to call an assistant who will hold the door. After all, it is quite heavy, and in order to eliminate the possibility of damage during dismantling, it is better not to risk it and turn to a neighbor for help.
This completes the process of removing the front door on the Priora. All that remains is to perform the necessary manipulations with it, and then install it back. If a door is replaced on a Priora, the installation process is performed in the reverse order of removal. You must first rearrange all the parts (glass, door lock, map, side mirror, etc.). You can clearly see how to remove the front door on a Priora in the video below.
Installation of rear windows on Lada Priora. Complete instructions
Car owners of the model of the same name would do well to know what it means to install rear windows on a Lada Priora
– more precisely, to have at least general information about the complex of works united by this concept. We will try to describe the process in detail, noting some related points that will undoubtedly bring practical benefits to domestic car enthusiasts. Installing rear windows on a Priora has a number of specific features. But first things first.
The concept of "power window"
Window lifting mechanisms (or, using the more familiar word “window lifters”), as the name suggests, are designed to raise/lower windows.
In the variant under consideration we mean an electric window lifter.
(although in a number of models only mechanical ones are provided for the rear windows), that is, manipulations with the side windows are carried out using electrical energy.
It is convenient and practical, creating additional comfort for the driver and passengers
It is pleasant to note that domestic manufacturers paid due attention to this indicator
Design features
The steps described below are focused on the removal/installation of electric lifts, which does not exclude the use of this text:
- manuals for mechanical joint ventures;
- The mechanism is placed inside the door (there are, however, modifications with special subframes, as well as mounts on the car body).
The window regulator consists of:
- about what includes a unit consisting of an electric motor, gear and worm gear;
- mechanical regulator for raising/lowering windows;
- control unit.
Raising or lowering the glass is done by pressing the corresponding key. Note that on the Lada Priora, three types of electric windows (hereinafter referred to as ESP) are used: rack and pinion, cable, and strip. Various configurations are used - this applies to both a specific design solution and electric motors.
The latter vary over a fairly wide range - a number of models use various imported electric motors. The noise depends on the quality of this part
, produced by the device, the speed of raising/lowering the glass, resistance to external influences.
Installation of rear ESP
The need to replace the ESP may arise for a number of reasons. The most common ones are:
- the corresponding fuse has blown;
- poor-quality connection of wires and, as a result, lack of contact;
- failure of the electric motor.
In any of the above cases, replacement (or repair) of the mechanism is necessary. Let’s make a reservation right away - for most amateurs, self-repair is a difficult task, so it will not be considered here. We will simply describe the process of removing the mechanism - accordingly, installation is carried out in the reverse order.
At the first stage
We get access to the ESP. To do this, you need to remove the decorative edge. The process is quite simple and does not require additional description. Let us remind you that the windows must be pre-fixed in the “closed” position.
Next stage:
unscrewing the mounting bolts. We use a 10mm socket. Then we turn out the elements with which the ESP is attached to the door. Here you will have to deal with three bolts (we use an “8” head). Armed again with a “10” socket, we unscrew the nuts securing the ESP guide.
This completes the dismantling. As already mentioned, installation is done in reverse order.
video: Installing a power window mechanism on the rear left door of a Priora Luxury.
As you can see, installing rear window regulators on a Priora is not difficult: you just need to unscrew the corresponding bolts. Please remember that this process requires care.
, proportionate application of force to avoid the danger of the heads falling off. As for the unit being replaced, specialists will have to deal with it.