The linkage is an important component of the VAZ 2109 gearbox. If it fails or does not work satisfactorily, the linkage can be easily replaced or repaired.
Appearance of the device
Kinds
There are two types of scenes:
- Short stroke;
- Long-stroke.
There is no fundamental difference between the two types of units. The advantage of a short-throw is that it provides faster gear changes for a fraction of a second.
Do not believe those who claim that a short walk has a positive effect on dynamics. There is no connection between the rocker and the dynamics of the car. But the short walk has its advantages.
Replacement kit
Reasons for replacement
There are several situations when the owner of a VAZ 2109 has or wants to get into the design of the gearbox and specifically work with the rocker:
- Oil is leaking due to a damaged rocker seal. It must be replaced;
- The old drawstring was out of order;
- I would like to exchange the long-stroke for a short-stroke in view of its advantages.
Now to the question of when replacing or repairing the backstage is a necessary measure.
- The backlash of the gearbox selector has increased significantly.
- Gears change with difficulty, and when changing speed, extraneous sounds appear.
- It is possible to change gears, but with a lot of effort.
- Speeds change incorrectly. Instead of one, a completely different one turns on.
- It is impossible to turn on all or part of the gears at all.
Even if the resulting play is still insignificant, it is advisable to immediately begin repairs or completely change the drawstring.
Replacing the oil seal
If you find that the oil in the gearbox is gradually disappearing, you can suspect the rocker seal. There is nothing else left to do but change the element.
- First, buy a new shift rod seal. It costs about 70-100 rubles.
- Drain the oil from the box, having prepared a clean container in advance. This is in case you refill the same oil. Although this is an excellent reason for you to change the transmission lubricant at the same time.
- To make sure the oil flows out better, first unscrew the filler plug or remove the speedometer gear. After draining the oil, screw the cap back on.
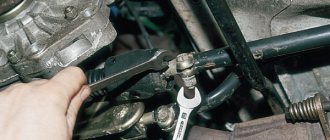
- We climb under the car and disconnect the fasteners of the gearbox lever driveshaft.
- Pull the boot off the cardan, unscrew the bolts securing it to the gearshift rod. Problematic fasteners that you will have to tinker with.
- After removing the cardan shaft, remove the rod boot.
- We remove the damaged oil seal using an awl or suitable available tools. The main thing here is the stock itself.
- We install a new one in place of the old oil seal and press it with a tube of the appropriate diameter.
- Put the boot back in place and rotate the driveshaft.
- Please note that the bolt securing the cardan to the rod is an adjustment bolt. Therefore, screw it in exactly the same way as before dismantling. Otherwise, some speeds may not turn on.
Stuffing box
After the work done, do not forget to check the result.
Replacing the cardan
Practice shows that if problems arise with the slide, it is not at all necessary to completely change it.
Kardanchik
The instructions for replacing the cardan are as follows.
- Using two 13mm spanners, unscrew the clamp that relates to the speed switch drive rod.
- Pull the boot off with a screwdriver, moving towards the box. If you want, remove it completely. So it definitely won’t interfere with the repair process.
- Using a 10mm wrench, unscrew the fixing bolt on the cardan.
- Apply several gentle, not strong blows with a hammer to knock the cardholder off the shaft. Remove the boot to the side if you have not done so before.
- We replace the old cardan with a part from Kalina. It is more reliable, efficient and durable.
- For reassembly you will need the help of a friend. Do not rush to tighten the clamp immediately at the end.
- The assistant will set the position of the gearshift lever at the optimal points from inside the cabin. First you need to catch the center, then move the lever a little to the right while you tighten the clamps from below.
- Check if the gears engage well. If yes, then we continue assembling the unit and check the updated gearbox under real road conditions.
The experience of VAZ 2109 owners shows that when there are problems with the rocker, the essence often lies in an unsuccessful factory cardan. By replacing it with an analogue from Kalina, you will be able to get rid of discomfort and continue to confidently operate your car. By replacing the cardan shaft, the design of the gearbox will improve significantly.
Adjustment
After changing the link or cardan, you should definitely adjust the operation of the unit.
- Engage reverse gear, loosen the clamp tension.
- Set the gearbox selector to the position in which it should ideally be located when engaging reverse.
- Tighten the clamp back.
- A similar operation is performed with other speeds.
There are situations among VAZ 2109 owners when difficulties arise when engaging reverse gear. This is where adjustment can help.
- Set the gear lever to first gear;
- Loosen the rocker clamp;
- Turn the rocker drive counterclockwise;
- Turn the drive until the selector is pressed against the plastic stopper for the reverse gear. You will feel this without any problems;
- Resting against the stopper, tighten the clamp under the bottom. That's it, the adjustment is done.
Adjustment process
Backstage adjustment
There is nothing complicated in the procedure; you can do it yourself, but you will have to run from the pit to the salon.
Yes, it is advisable to do this work in a pit or overpass. You need to act approximately according to this principle:
- Loosen the nut on the clamp.
- Set the gearshift lever to the reverse gear position.
- Set the box rod to the reverse speed position. This is difficult to achieve, so adjustments will have to be made.
- Check how the gears shift. If the rear one is too far to the left, loosen the clamp and turn the cardan counterclockwise. If the fifth speed (including reverse) has gone too far to the right, then the cardan rotates clockwise.
Short walker
Many people are still wondering whether it is worth changing their standard factory long-stroke linkage to a short-stroke one.
Short walker
Make your decision purely on the basis of individual reflections and do not “be fooled” by statements regarding a significant increase in dynamics with the transition to a short-stroke.
The real difference between short-stroke and long-stroke is shown in the table.
Draw your own conclusions from here - do you need such a drawstring or not. There is nothing complicated in terms of replacement. The only question is the purchase.
Is the shift rod seal leaking? How to replace the rocker seal?
Today we will figure out how to change the oil seal with our own hands and we will be able to save N amount of money. There are only two ways to replace the rocker seal of the VAZ 2108, 2109, 21099, 2113, 2114, 2115. The first is to replace the rocker seal in the inspection hole by knocking out the bushing along with the seal. The second method does not require an inspection hole, but will require you to have a certain manual dexterity, body flexibility and the presence of one (two) long self-tapping screws.
We will need: - two 13mm wrenches, - a 10mm wrench, - a wrench or screwdriver for knocking out the oil seal sleeve, - a small hammer, - a 22mm socket, - silicone sealant.
Spare parts: – gear shift rod oil seal – cardan shaft boot
Let's start replacing!
Using two 13mm wrenches, we loosen the clamp of the transmission control rod (the connection between the rod and the driveshaft can be marked in advance, so as not to have to deal with regulating the gear shift later) and disconnect the rod from the driveshaft. If it doesn’t unscrew well, spray everything with WD-40.
Pull the boot back and use a 10mm wrench to unscrew the bolt securing the cardan to the gearshift rod. Remove the cardan and boot. Using a screwdriver, knock out the bushing from the gearbox.
Using the same screwdriver, we knock the oil seal out of the bushing and with a 22mm head, press the oil seal in until it stops. Lubricate the bushing with sealant and press it into the gearbox with gentle hammer blows.
If you want to change the oil seal without knocking out the bushing, then you will need a long self-tapping screw.
We screw it into the oil seal. Next we pull the screw and here we have the oil seal in our hands.
We press in the new oil seal.
Reassemble in reverse order!
Good luck to everyone on the roads!
The result of our work!
My blog is found using the following phrases
- check direct fuel pump VAZ 2111
- Setting up locks on a VAZ 2107
- how to check the thermostat VAZ 2109
- buy vut 2109 sevastopol
- where is the fuse or relay for the fuel pump VAZ 2109i
- adjusting the vacuum brake booster VAZ 2109
My blog is found using the following phrases
- front support bearing VAZ 2109
- how to hit the road Brobeg Lada Kalina
- Lada Largus speedometer winding
- how to check mileage 2115
- how to check the mileage of a VAZ 2113
- VAZ 08 signal does not work
My blog is found using the following phrases
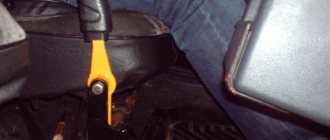
The short rocker for the VAZ 2109 is becoming very popular among VAZ car owners who love a variety of tuning and their car. At the same time, many people hate the gear shift lever, which has a long stroke; it simply “wanders” almost throughout the entire interior of the car when changing the desired gear. Therefore, the short-throw rocker for the VAZ 2109 is an excellent solution for them.
Advantages and disadvantages
Let's start with the pros, let's figure out why the short-throw rocker on the VAZ 2109 is good:
- The advantages of such a rocker compared to a standard rocker (this, at least, applies to the VAZ 09 and 10 families) is that, solely due to its size, it can significantly reduce the stroke of the lever when shifting gears on and off
- In addition, shifts become even clearer
However, there are disadvantages in any tuning, and this thing also has them:
- High price
- Increases effort to shift gears
Also check out
You need to find 2 fragments of the required size and diameter.
Cook everything. You will get a short-stroke link.
This completes its production.
Before installing it, you need to sand the weld with a grinding wheel and paint it black or some other color.
Worth checking out:
Operating principle and manufacturing method
The VAZ 2109 short-throw gearbox came from professionals in motor racing; you will agree what kind of sport it is if a lot of time is spent shifting gears. What does such a scene give:
- Thanks exclusively to it, switching becomes much more pleasant for you, and the lever stroke is significantly reduced by almost half, the result obtained from the installation is simply incredible
- Therefore, smart people picked up this “theme” and launched it into the “masses”
- It turns out that today the VAZ 2109 short-stroke rocker is sold in almost every auto parts store
- Of course, the price is significantly inflated, but this is not an obstacle for most motorists
- There is nothing surprising here, because the rocker is worth it, I myself, like many car owners, was ready to buy it, I liked the short rocker of the VAZ 21093 gearbox so much.
- However, as soon as I saw its design and understood the main point of tuning, I changed my mind about paying for it, because it is possible to make one with your own hands in just half an hour of work
- What I got - see for yourself. Now I’ll tell you in a few words about how the whole mechanism works, also see the photo
The diagram I have given will allow you to understand how the short-throw rocker on the VAZ 2109 works:
- The "O" - "F" line represents the low and high points of your standard lever set to neutral.
- In order for you to engage the gear, you will need to move the rod connected to the lever (point “B” is the point of their connection) to point “A”
- The handle of the gear shift lever will move to point “E”
- You understand that our task is to reduce the “E”-“F” switching distance that the handle travels
- And for this we need to increase the length of the lever to point “H”, which will allow us to raise the rod by the same distance (the segment “C”-“D” is equal to the segment “A”-“B”)
- It turns out that the lever that changes gears will have to travel a shorter distance; in this case, you won’t have to stretch or “search throughout the cabin” for the desired gear and its lever
Tuning the VAZ 2109 transmission
The classic transmission of all VAZs is manual. It is quite reliable, cheap to maintain and well suited for use on domestic roads.
Upgraded car
There are several popular types of tuning for manual transmissions. They appeared as a banal need to improve the performance of the car. The main work packages include:
- Replacing the backstage.
- Conversion from 4-speed to 5-speed.
- Installation of a sports row.
- Modernization of the pedal unit.
- Replacement of the main pair and differential.
Let's take a closer look at one of the tuning options. Replacing the rocker with a short-throw one is a useful tuning that will significantly simplify gear shifting. We all know that the lever of the “nine” and most other VAZ cars is absolutely inconvenient. It has a huge backlash, which simply has a terrible effect on the accuracy of gear shifting. If men with long hands can still cope with it without any critical effort, then women will have a very difficult time with it.
The easiest way out of the situation is to install a short-stroke cardan from the Lada Kalina on the 2109. Such tuning will cost you approximately 1,500 rubles. Along with the cardan, you will have to get a boot from the same model, because it won’t be original with it.
The necessary tools for work are a set of keys, a slotted screwdriver and a hammer. It will also be very good to have an assistant.
Let's get down to business
The short-stroke rocker for the VAZ 2109 requires the following tools for manufacturing:
- Grinder and cutting wheel for metal or, at worst, a hacksaw for metal
- A piece of pipe and a piece of flat metal
- Welding (welding machine)
- be sure to purchase a lever drive from Lada Kalina
- The photo shows the places where you will need to make an incision.
- Everything is quite simple: you will need to remove the rocker from the car
- Moreover, it is not necessary to remove everything (I admit, I did just that and regretted it a little - it’s a chore, it turns out) it will be enough to disassemble your ball joint (to do this, unclench the locking metal ring so that the plastic fastening tabs separate and the ball is released)
- Then loosen the clamp near the gearbox and turn off the traction
- After this, carefully pull the rod through the dirt cover and get out of the car.
- Now you need a grinder with a cutting wheel for metal, a familiar welder with a welding machine, or someone who has access to one (you have the machine and know how to weld yourself - generally a test)
- Next, use a grinder to cut the parts according to the marks in the top photo. Then we weld a piece of pipe (with a wall thickness of 2 - 3 millimeters) into the rod and a piece of sheet metal with a thickness of 5 - 6 millimeters
- These pieces must certainly have the same length, otherwise you will have an unpleasant distortion, which is not at all desirable and the drive will only work worse
- For myself, I lengthened it by only 2 centimeters
- However, the space in the cabin allows you to lengthen it by 3 - 5 centimeters
- At first two centimeters was quite enough for me, but then I got used to them and it seems not enough again
- By the way, regarding the pieces, welders have nowhere to put them; as a rule, finding a suitable one does not cause any problems
- The VAZ 2109 short-stroke rocker is installed in the reverse order of removal
- However, among other things, the hinge with a hook, which serves to prevent erroneous engagement of reverse gear, rises automatically and no longer fits into a special slot on the blocking plate
- In order to avoid this, either remove this plate completely (this is for the especially lazy) you can ride without it, or you should move it upstairs to the height to which the hinge has risen
When you have installed the rocker on the VAZ 21093 gearbox, all that remains is to replace the drive shaft to eliminate play in the lever
Why change the driveshaft?
On all VAZ 2108-2110 cars without exception, there is a strong play in the gearbox linkage, as a result of which we get unclear gear shifting:
- We can say with confidence that this is a disease or a deficiency of all cars of this brand
- The cause of this “illness” is the original gearbox driveshaft
- If you want to eliminate such a drawback, then our instructions will help you reduce the backlash of the rocker and increase comfortable gear shifting (especially since you achieved this by replacing the rocker)
- First you need to get to the car market and purchase there (or at a spare parts store) a short-stroke universal joint from a Lada Kalina car
- You should take it complete with a boot, because the boot does not fit on a standard cardan
Tools
After the purchase, we look in our arsenal for the tool necessary to replace the cardan shaft. I think there will be no problems with this, because this operation requires a minimum amount of tools:
- Two ring wrenches “13”, plus one wrench “10”
- Hammer
- Screwdriver
- To replace the universal joint, you need to drive onto a pit or overpass
- An assistant, preferably sober, will be useful to you at the end of the work, when you need to adjust the ideal position of the gear lever
- Using two “13” keys, loosen the clamp located on the gear shift drive rod and pull the drive off the gear shift rod
- Then use a screwdriver to pull the cardan boot towards the box; in principle, it’s better to remove it altogether so that it doesn’t interfere (after all, we won’t need it anymore)
- Then we take the key to “10” and unscrew the bolt that fixes the cardan
- Then we take a hammer and, with not very strong blows, knock the cardan from the shaft and pull off the boot (if you didn’t decide to remove it right away)
- And so, we’ve already done half the work, and if necessary, we can also change the oil seal on the gear selection shaft (as long as it’s convenient to get to)
- Pull the new boot onto the shaft
- After this, we install the cardan from Kalina, fasten it with a bolt, special attention should be paid so that the bolt exactly matches the special recess on the shaft
- Tighten the bolt, then pull the boot onto the driveshaft
- After this, we put the drive rod of the gear shift on the rod, but do not tighten the clamp
- If the thrust lever cannot be put on the cardan (usually a longer rod gets in the way), then file (shorten) the cardan rod, just do not overdo it
- It's time to invite an assistant who will sit in the cabin and set the gear shift lever to the optimal position
- To do this, first let him set the lever in the center, then move it a little to the right, and hold it in this position
- At this time you tighten the clamp
- Only after this it is necessary to check how the gears began to shift
We carry out replacement
Complete the assembly, here are all the nuances that should have been taken into account, additionally watch the video, if you do not understand something, we provide a table for clarity.
Lada 2109 COBETCKUu › Logbook › replacing the standard gearshift cardan with a Kalinovsky one
COBETCKUu68 last online more than 1 month ago
For this modification, we need the gearbox driveshaft itself from the VAZ 1118 Kalina; we purchase it complete with a boot, because The standard boot of the VAZ 2109 will not fit in size. We will also need wrenches 10 and 13, a hammer, a slotted screwdriver and an assistant, who will be useful at the final stage of work when adjusting the position of the gearshift lever. We loosen the clamp on the gear shift rod using wrenches 13 , and remove the hinge from the rod. Then remove or bend the corner of the boot, and using a 10mm wrench, unscrew the locking bolt on the cardan and knock it off the shaft with gentle blows of a hammer. This bolt is very reluctant to turn off, since it is mounted on a thread lock to avoid spontaneous unscrewing due to vibration. At this stage, you can also replace the gear selector shaft oil seal if oil leaks are noticed from under the old one. When the old part is dismantled, you can begin installation new. Having first put on the boot, we place the cardan on the gear selection rod (the one that comes from the box). In this case, the fixing bolt must, when screwed in, fall into a special recess under it on the rod. Then tighten the bolt and pull the boot onto the cardan. It is highly advisable to coat the bolt thread with a thread locker so that it does not unscrew due to vibration. Then we put the gearbox shift drive rod on the cardan rod, but do not tighten the clamp yet. Perhaps someone will have to shorten the rod of the Kalinovsky cardan by about 1.5 cm, since it is longer than the standard one. Now you need to adjust the position of the lever. To do this, we involve an assistant who sits in the driver’s seat and moves the gearshift knob to the optimal position for adjustment. Typically the lever is centered and moved slightly to the right. In this position of the lever, we tighten the clamp while the assistant holds the lever in this position. Now it remains to check the correct operation of the gear shift lever, and if something is not satisfactory, carry out the adjustment again.
In most cases, the feeling from such a modification is as if the box had been replaced: the lever does not dangle, the free play is minimal. But even more positive changes are noticeable on the go. Now the choice of gears occurs more comfortably and clearly, almost like in foreign cars! You can see everything in the photo below.
Comparison of gearbox joints for VAZ 2109 and Lada Kalina
1 — fixing bolt (10); 2 — clamp bolt (at 13); 3 — standard VAZ 2109 gear selection joint; 4 — boot
