The standard door trim on the VAZ-2107 is not very attractive and often spoils the whole picture of the interior. Many owners of “Sevens” tune their cars, and one of these types of modernization is replacing the door trim. The VAZ-2107 car is equipped with cheap materials that are not reliable and begin to wear out over time. Let's pay attention to the question of how to replace the door trim on a VAZ-2107 car, what is needed for this, as well as how to dismantle the standard door panels.
Salon VAZ 2105 - description
The interior of the VAZ “five” has an angular shape that follows the contours of the body. The differences between the model compared to the VAZ 2101 and VAZ 2103 are minimal:
- the dashboard is equipped with basic control devices that provide information on coolant temperature, oil pressure, speed, fuel level, on-board voltage and total mileage;
- The seats are installed from a VAZ 2103, but are additionally equipped with headrests.
In general, all controls are intuitive and do not raise any questions:
- the steering column switch is in its standard place, as in other Zhiguli models;
- heater control is located in the center of the front panel;
- buttons for turning on the dimensions, heater, heated rear window, and rear fog lights are on the dashboard;
- Air supply deflectors to the side windows are located on the sides of the front panel.
Photo gallery: VAZ 2105 salon
Interior trim
The interior decoration of the VAZ 2105 does not stand out in any way. The main materials are hard plastic and low-quality fabric, which wears out quite quickly, which indicates the budget category of this car. However, today the situation can be corrected and something new and original can be introduced into the boring “five” interior by using modern finishing materials. The most popular of them are:
The choice of materials for upholstering the interior directly depends on the wishes of the car owner and his financial capabilities.
Seat trim
Sooner or later, the finishing material of the seats deteriorates and the chairs take on a rather sad appearance. Therefore, the owner is thinking about replacing the casing. A slightly different option is also possible - changing the seats to more comfortable ones, but such a procedure will cost much more. The following materials can be used for finishing the chairs:
The combination of various materials allows you to realize the most daring and interesting ideas, thereby transforming the interior of a boring Zhiguli interior.
Having chosen the material, you can begin updating the seats. The work is carried out in the following sequence:
- We dismantle the seats and disassemble them into parts (back, seat, headrest), after which we remove the old trim.
Video: how to reupholster the seats of a Zhiguli car with your own hands
Door trim
Door cards can also be finished with one of the materials listed above. The work consists of the following steps:
- We remove the door elements, and then the trim itself.
Video: replacing door card upholstery
Rear shelf trim
If the decision was made to update the interior of the “five”, then you should not ignore the rear shelf, which is also called the acoustic one. For upholstery, the same materials are used as for other interior elements. The sequence of finishing actions is as follows:
- We remove the shelf from the interior and clean it of possible contamination.
Floor covering
Choosing the right floor covering for a car is not only about beauty, but also about practicality. The most common material for these purposes is carpet, the main advantage of which is its high wear resistance.
For floor finishing, it is better to choose short-pile carpet made from polyamide or nylon.
Before starting work, it is necessary to measure the floor area and purchase material with reserve. The remainder can be used in the future to partially replace the carpet. We lay the material as follows:
- We remove seats, seat belts and other elements from the floor.
- We remove the old floor covering, clean the surface from corrosion and treat it with a rust converter, then prime it, cover it with bitumen mastic and let it dry.
Video: how to lay flooring in a Zhiguli salon
Features of dismantling the casing
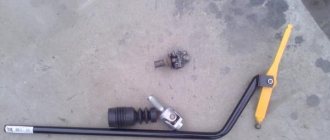
Equipment with fasteners will help you remove and then fix the cladding. Required:
- screwdrivers;
- knife;
- key to 8;
- clips;
- hardware.
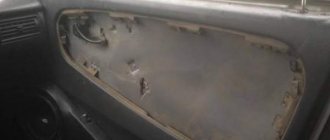
If replacement of the skin was required because the inner panel was deformed after an accident or cracked, then you can replace it with a piece of plywood. The main thing is to cut out an identical layer. Instructions on how to quickly remove the door trim on a VAZ 2106:
- The handle is removed. To do this, two bolts are unscrewed: lower and upper.
- The bracket that holds the window regulator is pulled out.
- The speakers are removed (if any).
- A knife is used to remove the clips holding the cladding panel.
- The trim is removed from the door card.
It’s easy to install a new element using the same algorithm, just in a different order.
Soundproofing of the VAZ 2105 interior
The interior of classic Zhiguli cars is not particularly comfortable, and over time more and more extraneous sounds appear in it (creaks, rattles, knocks, etc.). Therefore, if you want to make your stay in the cabin more pleasant, you have to worry about its noise and vibration insulation, for which appropriate materials are used. In addition to reducing noise, they at the same time improve the thermal insulation of the interior, since cracks and cracks through which cold air penetrates from outside will be eliminated. The list of tools and materials used may vary depending on your needs and wishes:
- knife;
- roller;
- heat gun;
- marker of any color;
- scissors and tape measure;
- putty knife;
- solvent “646” or acetone;
- vibration absorber, for example, Vibroplast;
- sound absorber (felt, Accent);
- anti-creak (Madeline, Bitoplast).
Sound insulation of ceiling and floor
In the interior of the VAZ 2105, the noisiest places are the wheel arches, the transmission installation area, the cardan tunnel, and the sill area. Both vibrations and noise penetrate through these areas. Therefore, materials of greater thickness should be used for them. As for the ceiling, it is treated to reduce noise from rain. The work is carried out in the following sequence:
- We disassemble the interior, dismantling the seats and other elements, as well as the ceiling upholstery.
We soundproof the luggage compartment in the same way.
Soundproofing doors
The doors on the “five” are soundproofed to eliminate extraneous noise, as well as to improve the sound quality of the speaker system. The treatment is carried out in two stages: first, the material is applied to the inner surface, and then to the panel facing the inside of the cabin. The sequence of work is as follows:
- We remove all door elements from the inside (armrest, handle, upholstery).
- We clean the surface from dirt and degrease.
- We cut out a piece of vibration insulation according to the size of the internal cavity and apply it to the surface.
With high-quality sound insulation of doors, the noise level should decrease by up to 30%.
Soundproofing of the engine partition
The engine shield must be treated with sound-absorbing materials, since vibration and noise from the engine penetrate through it. If you soundproof the interior and neglect and ignore the engine partition, then the noise of the power unit against the background of a general reduction in noise will cause discomfort. The partition is processed as follows:
- We remove the front panel and factory sound insulation.
- On the inside of the torpedo we apply a layer of Accent. We glue Madeline to the places where the panels come into contact with the metal, which will avoid the appearance of squeaks.
- Thoroughly clean and degrease the surface of the shield.
- We apply a layer of vibration insulation, starting from the windshield seal, and then move to the floor. We completely cover the entire shield with the material, avoiding gaps. Brackets and stiffening ribs do not need to be processed.
- We seal all the holes in the body leading to the engine compartment.
- We cover the entire surface of the engine partition with noise insulation.
Video: soundproofing the engine shield
Sound insulation of the hood
The hood is treated with the same materials as the car interior:
- We cut out templates from cardboard according to the size of the depressions on the inside of the hood.
- According to the templates, we cut out elements from Vibroplast or a similar material and apply them to the hood.
Bottom noise insulation
It is also recommended to treat the outside of the car, thereby reducing the level of noise penetrating through the bottom and wheel arches. For such work, liquid sound insulation is excellent, which is applied using a spray bottle, for example, Dinitrol 479. The process consists of removing the fender liners, washing the bottom, allowing it to dry completely and then applying the material. It is recommended to treat the bottom of the body in three layers, and the arches in four.
Before installing the fender liner, they are covered with a layer of vibration insulation on the inside.
Coating the bottom with liquid sound insulation not only eliminates excess noise, but also improves the anti-corrosion resistance of the body.
Materials for upholstery
When choosing fabric, you need to take into account quality, wear resistance, price, and color. The fibrous structure should stretch, this will allow the fabric to be securely fixed to the panel. Possible varieties:
- Genuine Leather. It looks beautiful, but is expensive. Creates sound insulation and withstands humid and harsh climates. The ease of care is dictated by the fact that the fabric does not absorb dirt and does not deteriorate when using aggressive detergents.
- Eco-leather or substitute. It has high wear resistance and is durable. The characteristics are identical to the natural base, only the substitute does not tolerate the effects of chemical detergents. With improper care, microcracks appear, which are then filled with dirt.
- Alcantra. Consists of thin and viscous fibers. The material has a high rate of moisture rejection, so it does not shrink. After the Alcantura is stretched on the panel, it will take the shape of the structure and will not sag over time. There is only one minus - the low level of sound insulation.
- Vinyl and leatherette. They provide strength and durability, and they are also very convenient for reupholstering. The material transmits sound well, so you will need to install an additional layer of insulation.
- Carpet. This is an artificial automotive fabric. This lining will last for many years. It withstands temperature changes, repels dirt, cleans quickly, and blocks the growth of fungus.
Front Panel
The standard front panel of the VAZ 2105 interior is far from perfect and many owners are not satisfied with it. The main nuances boil down to the dim illumination of the instruments and the constantly opening glove compartment lid. Therefore, we have to resort to various modifications using modern materials and devices.
Dashboard
By making changes to the dashboard, you can improve the readability of instruments and increase its attractiveness. To do this, replace the standard backlight lamps with LEDs or LED strip. It is also possible to install modern instrument scales, which are applied on top of the factory ones.
Glove box
The glove box on the “five” copes with its functions, but sometimes this product causes inconvenience. With minimal financial and time costs, the glove compartment can be modified, increasing its reliability.
Glove compartment lock
To prevent the glove compartment lid from opening randomly and knocking on bumps, you can install a small furniture or post lock.
Another solution to this problem is to install magnets from computer hard drives. Power is supplied to the magnets through a limit switch.
Glove compartment lighting
From the factory, a backlight is installed in the glove compartment, but it is so weak that when it is turned on, almost nothing is visible. The simplest modification option is to install an LED instead of a standard light bulb. For better lighting, the glove box is equipped with an LED strip or a suitable lampshade from another car, for example, a VAZ 2110. Power is connected from the factory lamp.
Glove compartment trim
Since the glove box is made of plastic, the objects in it rattle during the trip. To correct the situation, the inside of the product is covered with carpet. Thus, you can not only eliminate extraneous sounds, but also make this element of the front panel more attractive.
"A" seats
The inconvenience and low reliability of the VAZ 2105 factory seats prompts many owners to think about replacing or modifying them.
Which seats are suitable?
To make it more comfortable to drive a Zhiguli, preference should be given to seats from foreign cars, but initially you need to check whether they will fit into the cabin in terms of dimensions.
The installation procedure will require modifications, which boil down to adjusting the fasteners. The choice of seats is quite varied: Toyota Spasio 2002, Toyota Corolla 1993, as well as SKODA and Fiat, Peugeot, Nissan. A more budget option is to install seats from a VAZ 2107.
Video: installing seats from a foreign car onto a “classic”
How to remove headrests
The seat headrest is a simple element in the design of the seats, sometimes requiring its dismantling, for example, to replace, restore or clean the upholstery. There is nothing difficult to remove: just pull the product up and it will come out of the guide holes in the back of the seat.
How to shorten the seat back
If there is a need to make the seat backs shorter, they will have to be dismantled, disassembled and the frame cut to the required distance. Then the foam rubber and upholstery are adjusted to the new size of the backrest, the product is assembled and installed in its original place.
It is convenient to change the design of the seats simultaneously with their reupholstery.
How to replace a door trim
The factory facing of Zhiguli is made of leatherette or leatherette. The first stage of work is the selection of material, only then begins the study of the instructions in order to understand how to disassemble the doors of a VAZ 2107 and replace the facing fabric. The canvas is measured, a list of necessary tools for dismantling, adhesive, and fasteners is compiled. Spare clips are also purchased, because when removing the old coating, the plastic elements break.
Rear seat belts
Seat belts today are one of the main elements of safety for the driver and passengers, both front and rear. However, there are VAZ “fives” without rear belts. The need to install them arises when fixing a child seat, as well as when passing a technical inspection. To equip you will need belts RB 3\RB 4. Installation is carried out in the corresponding threaded holes:
- belt reels with a bracket are mounted under the rear parcel shelf;
Interior lighting
There is no lighting as such in the interior of the VAZ 2105. The only light source is the lampshades on the door pillars. However, they only signal that the doors are opening and nothing more. To improve the situation, you need to purchase a lamp from a modern car, for example, from Lanos.
The product is built into the ceiling lining, for which a hole is first cut in it. Connecting the lamp does not raise any questions: we connect the ground to the fixture of the lamp, plus it can be started from the cigarette lighter and another contact is connected to the limit switch on the doors.
The process of manufacturing and installing a door card with trim
Making a door fragment with trim is no more difficult than dismantling the old one. To do this, you will need a standard set of tools, as well as: glue, soundproofing products, and a drill with attachments. First, a piece for covering is cut out from the purchased fabric, and an old piece of material is used in the form of a pattern. If measurements are taken from a panel structure, then you need to leave an allowance of at least 1–2 cm at the edges. It is important to immediately cut holes for the handle, speakers, and fasteners. Manufacturing instructions:
- The fabric is stretched, folds are straightened, holes for fastenings are drilled.
- The fragment is cut out with an allowance of 1 cm, then fixed with glue to the plywood.
- The finished element is mounted in the door using clips.
For cladding, it is better to use a solid sheet; otherwise, you need to make sure that the fasteners do not get into the joints.
Interior fan
The interior heater of the model in question, like other “classics,” adequately copes with the functions assigned to it, if you do not take into account the high noise level. However, in the summer it is not very comfortable to be in the cabin, since there is no airflow. In this case, some modifications need to be made. To do this, you will need a ventilation device from the “seven”, which is built into the torpedo instead of the heater control levers. Additionally, the part is equipped with computer fans, thereby providing forced ventilation.
The fans are turned on via a button located in an easily accessible place for control. As for the heater levers, they can be moved to the ashtray.
The VAZ 2105 today is an inconspicuous car. If the goal is to make this car comfortable and attractive, you will have to spend a lot of money on various improvements and modifications to the interior elements and the interior as a whole. With a competent approach to the work carried out, you can get an end result that will bring only positive emotions.
Source