When you may need to replace headlights
Sooner or later, every owner of a LADA Priora car faces the need to change headlights.
There can be many reasons for this:
- damage to optics in an accident;
- the need to replace internal parts: reflector or corrector;
- to eliminate a phenomenon such as fogging (in this case, sizing is required).
What tools will you need?
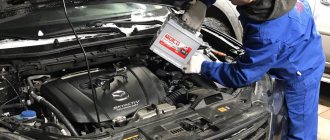
Headlights play an important role in the design of LADA Priora. Therefore, when removing a headlight for its subsequent replacement, it is necessary to know well the sequence of disassembly and assembly of the structure. To remove the headlight block on a Priora, many go to a service station. However, this procedure is so simple that if you have certain tools, you can handle this task yourself.
In this case, the following tools will be required for work:
- wrench 8 or 10 mm;
- ratchet;
- a screwdriver with a cross-shaped blade;
- extension.
Adjusting the headlights
To adjust the light of car headlights, you need to choose a suitable place and prepare the following tools:
- Phillips screwdriver;
- round screwdriver;
- screwdriver;
- ruler;
- pencil.
The car, fueled and with inflated tires, must be placed in a garage or other place where there is a vertical wall for marking. The main condition for correctly adjusting the headlights is the ability to drive away the distance required by the adjustment process, 5-10 m. The point of the procedure is to create in a static mode an imitation of the operation of the lenses as if the Priora was moving along the road.
To adjust the headlights, you need to park the car close to the wall and turn on the low beam mode. After this, you should alternately mark the centers of the traces of the two headlights and the centers of their symmetry. Connect the dots to form a straight horizontal line. The second line should be drawn parallel to the first, but with an interval of 5-12 cm, and the third - at a distance of 22 cm from the first. In addition to horizontal lines, it is necessary to draw a strictly vertical line through the center points of the headlights and the car.
When the light is on, the top point of the light should be at the level of the 2nd line, and the position of the inclined beam should extend from the intersection point of the vertical marking corresponding to the center of both headlights and the 2nd horizontal line. If deviations are detected, it will be necessary to make adjustments with special screws using tools in order to establish the correct position of the headlights, in which the points of light will coincide with the specified values.
An example of adjusting headlights on a Lada Priora
Then the car must be driven to the distance indicated in the passport and the headlights must be turned on again. You can look at the passport and check the correct angle of the light beam. It is recommended to adjust the headlights one by one by twisting the screws. If anything from the marking description remains unclear, the presented photo will clearly show how to do it correctly.
Loading ...Home / Catalog / Lada / Lada Priora / VAZ 2170 / 2171 / 2172 / 2173 since 2007, repair book in electronic form / ...Show book contents
Content
Introduction
Emergency procedures
How to pay and download
Step by step guide
Removing a headlight on a Priora is a simple process, but it has some features that you should familiarize yourself with in advance.
- To completely detach the headlight from the existing mounts, you first need to remove the bumper. In order not to unscrew extra nuts and bolts, you can try to partially remove the bumper. After removing the bumper, you need to unscrew the fastening bolt from above, and then from below.
- The third headlight mount is located on the side. To remove the headlight from this mount, you need a Phillips screwdriver.
- After working with a screwdriver, all that remains is to unfasten the block and the harness from the headlight itself. To make removal easier, you can pry the lock with a thin screwdriver.
- After all the above steps, you can easily pull out the headlight; nothing will hold it in place.
You will need to install the headlight back in the reverse order.
Additionally, we recommend reading our specialist’s article on how to replace a low beam light bulb.
We also recommend reading our expert’s article, which describes in detail how to change the low beam bulb on a Priora.
You can learn how to adjust the headlights yourself from the detailed material from our specialist.
How to remove a headlight without unscrewing the bumper
The second option for removing the headlight is provided for those cases when there is no need to remove the bumper. It will only need to be moved from the side where the headlight is located. Before removing the headlight on a Priora, you must disconnect the battery.
You may also be interested in an article by our specialist, in which he talks about how to remove the front bumper on a Priora.
The tools needed for the job are the same as in the previous method:
- first you will need to remove the headlights using a screwdriver;
- Next you need to unscrew the top bolt securing the headlight;
- then unscrew the lower fastening bolt;
- Reinstallation also takes place in the reverse order.
Often the headlights on a Priora are removed for subsequent tuning or replacement. In this case, the requirements of current legislation must be observed. Blue or green headlights are not permitted. Also, do not install more powerful lamps on headlights. They will greatly dazzle other drivers.
At the same time, high-power lamps become very hot, which can cause clouding of the reflector, which is why you will have to completely change the headlight.
Removing and installing the front headlight of Lada Priora
Note
: The following describes how to remove and install the front headlight assembly on the right side. Removal and installation on the left side are carried out in the same way.
1. Disconnect the wire from the negative terminal of the battery.
2. Remove the front bumper.
Note
: If the headlight unit is removed only from one side, then the entire front bumper does not need to be removed. You only need to unscrew the fastenings of the front bumper on the side from which the headlight will be removed so that you can move it a little to the side and gain access to all the fastenings of the headlight.
3. Now we proceed to removing the headlight unit. Using a screwdriver, pry the lock from the inside...
... and disconnect the electrical connector from the front headlight.
4. Using a 10 mm socket wrench, unscrew the upper...
... and the lower bolts of the front headlight assembly.
5. Use a Phillips screwdriver to unscrew the remaining side screw securing the front headlight. When unscrewing the screw, hold the headlight with your other hand so that it does not fall.
6. Remove the front headlight from the car.
7. If necessary, replace the lamps with new ones.
8. Installation is carried out in the reverse order, and the following must be observed: when connecting the electrical connector block to the headlight, a characteristic click should be heard.
How to remove a taillight
Removing the taillight on a Priora is much easier than removing the front one. You don't have to remove the bumper to do this. Before starting work, you must disconnect the battery. You need to act in the following sequence:
- First, you should carefully bend back the luggage compartment trim;
- release the fasteners that secure the wire block and then disconnect them;
- Next you will need to unscrew the bolt that secures the headlight;
- then you need to unscrew the wing nuts that are attached to the mounting studs;
- All that remains is to pull the headlight out of its mounting location.
Reassembly must be done in reverse order. It is important to disconnect the wire when doing this. Otherwise, the harness may be damaged or completely disassembled, which often causes a short circuit in the vehicle wiring.
We also recommend reading our expert’s article, which describes in detail how to remove the headlight on Kalina.
Polishing headlights on Priora
As their service life increases, sand, small stones, dirty water, and road chemicals negatively affect the light conductivity of the outer glass of lighting fixtures, and overall efficiency decreases. The solution will be restoration and polishing of the glass surface. When you decide to polish glass, thoroughly study the technical side of the process, materials, stages of work - everything affects the result. If you are not confident in your abilities, it is better to entrust the work to professionals, otherwise the result of the work done may be worse than the original result. If, nevertheless, you decide to polish the optical devices of your car, first remove the entire module, remove dirt, and protect surfaces that cannot be treated.
For polishing use:
- Abrasives;
- Sandpaper (1000 - 4000 units);
- Circles: felt, fabric, foam rubber;
- Polishing pastes.
First, a rough layer of plastic is removed with a depth equal to the depth of chips and scratches. As a result, the protective layer of varnish applied by the manufacturer will be erased, which must be restored after polishing. Applying a special varnish is a rather technically complex process. Another option is to stick a protective film, otherwise the result of your work will disappear in a couple of months. Change the sandpaper to finer sandpaper every 2 - 3 minutes. We monitor the removal of traces left by the previous number of abrasives. After each change of sandpaper, you must thoroughly wash the surface. The dried surface is ready for polishing.
Using polishing wheels, we bring the glass surface to the desired shine. Polishing is often carried out due to varying degrees of wear on the vehicle's optical devices, for example, one headlight was damaged in an accident and was replaced with a new one.
How to understand that the headlight is faulty
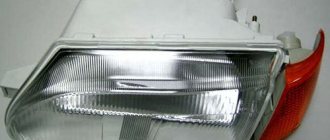
The headlights of the Lada Priora often fail, resulting in poor road illumination. Replacing Priora front headlights may be required if the following defects are present:
- the headlight mounting elements are broken;
- headlights constantly fog up;
- reflector malfunction;
- faulty electrical connectors.
The Lada Priora headlights have a non-separable design. Therefore, for tuning, replacement or repair, you will have to remove the headlight completely.
Useful tips
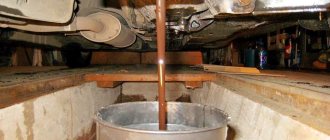
Car owners often encounter such a problem as fogging headlights on a Priora. In this case, lighting technology does not provide high-quality lighting on the road. It is necessary to modernly eliminate this malfunction. Its reason lies in the fact that in this part of the headlight unit there are small channels.
You need to find them and clean them with a thin wire.
In this case, there is no need to change the headlights. There is no need to completely remove the headlights even if a crack appears in the glass. In this case, it is necessary to carefully seal it with sealant.
Headlight breakdowns
There are several different typical failures of Priora headlights, such as:
- Fogging;
- Cracked protective glass;
- Damage or burnout of the reflector;
- Broken headlight mount;
- Polishing, etc.
Let's look at each of the reasons.
Fogging
Over time, almost every prior driver is faced with the problem of sweating headlights on a Priora. This is due to the fact that the tightness of the headlight is compromised due to aging of the sealant or loose sealing of the protective rubber covers on the rear side of the headlight.
This problem can be eliminated by dismantling the headlight and gluing the glass, as well as replacing the rubber covers.
Cracked protective glass
When operating a car, it is exposed to various types of influences, both mechanical and thermal, as a result of which damage to the headlights themselves is possible. For example, in the event of an accident, the protective glass of the headlight may break, or if the power of the lamps is incorrectly selected, the glass may melt.
This problem can be resolved by removing the headlight and replacing the glass with a new one. The cost of glass starts from 200 rubles per piece.
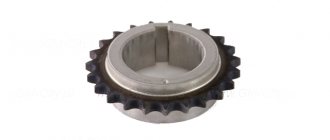
Burnout and damage to the reflector
Over time, with intensive use, the headlight reflector can lose its reflective properties or even burn out, which will worsen the luminous flux emitted by the headlight. Also, in the event of an accident, the reflector mounts may break.
The problem is eliminated by replacing the headlight or replacing the reflector, depending on the nature of the breakdown.
Broken headlight mount
This problem occurs in most cases due to traffic accidents. In this case, this problem can be eliminated by gluing the headlight mounts or replacing it with a new headlight.
Polishing
After a run of 100 thousand km. On a Priora, quite often the headlights begin to become cloudy and yellow, which leads to their unsightly appearance and ages the car. In this case, you can restore the headlights using regular polishing.
As you can see, for all reasons for headlight breakdowns, they must be dismantled.
Below are step-by-step instructions for removing a headlight from a Lada Priora car.