Replacement
If the steps described in the previous paragraph did not help you, then, apparently, you need to replace the element yourself.
What will you need?
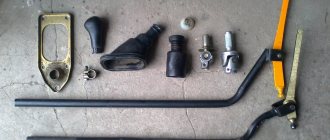
In order to replace the backstage, you will need to prepare everything that may be required to complete the work:
- directly new rocker for VAZ 2110;
- screwdriver;
- side cutters;
- set of wrenches;
- ratchet;
- lubricant "Litol-24".
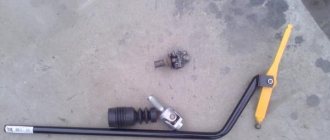
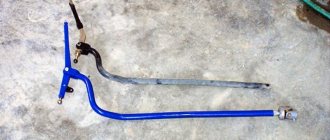
New rocker for VAZ 2110 transmission
Flat head screwdriver
Side cutters - you will need to use them to cut through the clamp
Prepare a set of wrenches - you will need different sizes of wrenches
Ratchet for loosening bolts
Lubricant "Litol-24"
Step by step instructions
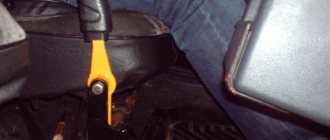
- Sit in the interior of your VAZ 2110 and use a screwdriver to dismantle the decorative cover of the gearshift lever. Pull the gear selector up and remove it along with the protective cover.
- Take a 10" wrench and unscrew the two fastening nuts one by one, as well as the bolt securing the rear gear lock bracket trim.
- Next, take a “13” wrench and unscrew the nut securing the gearbox lever axis. Then unscrew the screw securing the axle. This is where you may need a ratchet.
- Dismantle the axle. Then remove the set of bushings from the gearbox selector (so as not to lose them during the replacement process).
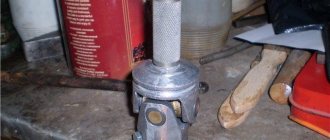
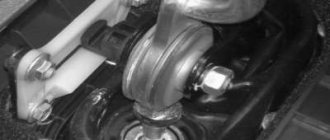
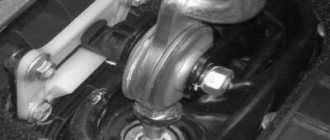
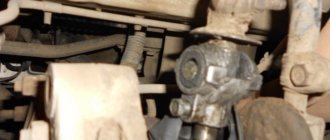
- After this, you need to dismantle the jet thrust from the rocker pad. To do this, take a spanner wrench with which you will hold the nut on top, and using the “13” wrench, unscrew it, as shown in the photo.
- Then you need to remove the facing part of the floor and the plastic console - otherwise it will not be possible to dismantle the backstage. To do this, unscrew all the bolts around the perimeter of the console. After removing the top of the console, do the same with the bottom. Be careful not to damage the electrical wires.
- Next, unscrew the four screws securing the gearbox selector to the car body.
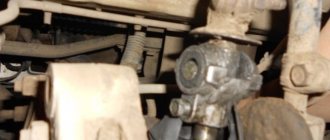
- Get under the bottom of the vehicle and, using a 13mm wrench, unscrew the nuts of the rocker pad bracket, and then remove the bracket itself.
- Dismantle the rocker assembly with the gearshift lever. Carefully visually inspect all elements of the device. Perhaps only the cushion has worn out, and the drawstring itself has not yet reached the end of its service life. Then replace the pillow and install the element in place.
- If the transmission component itself has failed, that is, mechanical damage is clearly visible on it, for example, the ears have broken off, then the link should be replaced with a new one. Before doing this, lubricate all rubbing elements, including the gearbox lever, with engine oil or Litol-24 to avoid squeaks.
1. Using a screwdriver, remove the gearbox protective cover.
2. Unscrew the nuts and screw securing the reverse locking device bracket.
3. This is what the reverse gear locking device looks like when disassembled.
4. Unscrew the bolts securing the rocker to the VAZ 2110 body with a wrench.
5. Dismantle the backstage through the bottom of the car.
6. This is what a failed link with cracked mounting lugs looks like.
This completes the replacement of the VAZ 2110 backstage with your own hands. Reassemble all components in reverse order.
Replacement instructions
Before starting work, we advise you not only to purchase a new spare part, but also to watch training videos on replacing the slide. The procedure is not very complicated, but a visual aid will never be superfluous. Especially if you do not have much experience in repairing a car and transmission in particular.
Replacement procedure
The process involves performing several sequential steps.
- Remove the housing from your gear shift knob.
- Raise the car using a jack. In some cases, an inspection hole will do, if you have one in your garage.
- Now you should dismantle the console, which will give you access to the backstage.
- The element is held in place by six bolts, which can be removed using a regular 13 mm wrench.
- But it's not that simple. You won’t be able to unscrew the top two bolts with a wrench, so don’t even try. They are specially planted as tightly as possible, so to dismantle them you simply need to cut them down with a grinder.
- Now you can safely remove the remaining two bolts in the lower fastening of the rocker, for which your effort and a 13 key will definitely be enough.
- The next step is to remove the clamp and move the boot. You will need to remove the hinge. At the same time as replacing the link, we recommend changing the hinge. It would be a good idea to replace the oil seal and cardan shaft. These elements have a limited service life, and since you decide to change the slide itself, there are objective reasons to do everything as efficiently as possible.
- After this, install the new unit in place of the old one. Act carefully so that the rubber bands of the slides fall on the welded bolts, which you previously sawed off using a grinder.
- The assembly is now reassembled, operating in the opposite sequence to disassembly. It is not necessary to seat the top mounting bolts tightly, but try to tighten them firmly.
Gearbox slide: what it is, signs of wear, how to adjust it yourself
Not all motorists have any idea what the name of this or that part in their car is. In this case, we are talking not only about the mechanisms “hidden” in the engine, but also about the devices with which they interact literally every day. One of these parts is the gearbox linkage.
Please note: The name "slide" is not official for this mechanism, but it is generally accepted. In fact, this part is called the transmission control rod
1. What is a gearbox rocker 2. Signs of gearbox rocker wear 3. Adjusting the gearbox rocker
What is a gearbox rocker?
Many drivers mistakenly believe that the rocker refers to the gear shift lever, but this is not entirely true. If we are talking about a gearbox rocker, we mean a composite mechanism whose task is to connect the gearshift lever and the rod. That is, the driver cannot see the backstage, much less touch it. This element is located between the lever and the gearbox itself, and it is located under the bottom of the car, near the driveshaft, and in some cases under the gearshift lever itself.
As can be understood from the description, the rocker regularly has to deal with serious loads, so this element must have good strength. Despite this, the slide is susceptible to damage. If it does not contain enough lubricating components, drops of water, dust or other “debris” have entered it, there is a high risk of part failure.
Please note: On some cars, the rocker can last 200-300 or even more than thousands of kilometers without replacement. But, if we take the average result, the gearbox usually fails after 100 thousand kilometers of operation
Signs of gearbox wear
The driver must pay attention to possible failure of vehicle components, including knowing the characteristic signs of wear on the gearbox linkage in order to take timely action to replace it. Despite the fact that the mechanism is quite reliable, you should be aware of the following “symptoms” of its imminent breakdown:
- Increased play at the gearshift knob. This can be noticeable both when the handle is in neutral and in one of the gears;
- Difficulty shifting gears. For example, one or more gears are difficult to “stick”, or maybe a crunching noise occurs when the lever moves in their direction;
- It feels like changing gears has become more difficult, as if the lever has become much heavier;
- Gears are engaged incorrectly, for example, instead of fifth, third is engaged or vice versa.
Drivers often ignore the appearance of play in the gearbox, believing that this is a normal situation. In fact, if backlash occurs, it is imperative to diagnose the gearbox, and, if necessary, adjust or replace the linkage. The fact is that a slight play is already a fairly serious symptom of a faulty gearbox linkage.
If it “breaks” while the car is moving, this can lead to serious consequences for both the car and the driver, since in such a situation there is a high risk of getting into an accident.
That is why, if you notice problems with gear shifting, be sure to contact a service center for diagnosis and repair of the linkage, if necessary.
Adjusting the gearbox rocker
It is not always necessary to completely or partially replace the scenes. Quite often you can limit yourself to simple adjustments. At the same time, it is possible to adjust the link with your own hands, without contacting a service center. There are two ways to adjust:
- In reverse gear. In order to adjust the rocker for reverse gear, you need to loosen the clamp on it, and then move the gearshift lever to the position that corresponds to the ideal engagement of reverse gear. After this, the clamp is tightened, and the work is considered completed;
- On the first transfer. If it is not possible to engage reverse gear, you can adjust the gearbox rocker in first gear. To do this, engage first gear, and then loosen the rocker clamp. Next, rotate the rocker drive counterclockwise until the gearshift lever stops in the plastic reverse speed lock, and then tighten the clamp.
It is worth noting that the general processes for adjusting the gearbox rocker are described above.
It is important to say that the process may differ depending on the car, so before starting work it is recommended to read the instructions specifically for your car model
The VAZ 2109 gearshift lever is loose, what needs to be changed? | Topic Author: Taichi
In general, the problem is this... the fact that the gearbox lever dangles, I can’t control the speed... at any speed the lever dangles like in neutral... but I can’t catch 5 at all... I only drive in 4 all the time... what do I even need to change?? clip? backstage? cardan, or does something need to be changed there in this rubber band at the bottom (where is the cardan)? What needs to be changed..so that the gearbox and speed are turned on normally? ! help me please
Roman (Dhruv) is also loose on my tweeter (I changed the ball joint of the lever, it didn’t help!!!). On the new ones it’s also loose!! it's a disease!! I read an article, a guy from the inside under the lever casing stretched the usual rubber bands from his underpants, the lever stopped hanging!!! Nikita (Borys) had the same problem. I changed the backstage. and everything seems to be fine now Tima (Husam) installed a driveshaft from the viburnum, half an hour of work and everything is fine) but before it was also loose, the rear from first and fifth were generally difficult gears. Vladimir (Philipi) change the rocker Evgeny (Hawa) you need to change the choice Viktor (Aldonza) Nikolay, Exactly the same for me on 9. I installed a Kalino cardan, nothing has changed. Most likely the linkage needs to be changed. Danil (Oceanus) First, check it, put it on the lift and see, maybe the nut that secures the rocker is just loose, I had this happen, take the key to 13 and tighten it, judging by the symptoms, it is, but you need someone to hold the gearshift lever Oleg (Ebrilla) +1 The bolt on the driveshaft often comes loose, the symptoms are exactly the same, I had it on both the Pyatakh and Kalina, you pull the cover off the driveshaft and turn it to 13 with the key. For 2 minutes. Stanislav (Eris) Change the gearbox hinge and install from the viburnum Pavel (Melisenda) the linkage needs to be changed! ) Dimka (Kadin) my drawstring is the same crap Nikolay (Gavriella) should I change the assembled drawstring and everything will be fine? Vyacheslav (Maurizia) change the link, there is a bolt on the crosspiece that is constantly unscrewed and the shaft on the box may come loose Alesha (Dashratha) Nikolay, the link is assembled =) the price of the issue is less than a thousand... )) Danil (Oceanus) So, first check what you mean I wrote to you, why don’t you immediately throw away the money? Nikolay (Gavriella) the nut on the rocker is normal... I already looked at Mikhail (Setara) I just tightened the bolt on the cardan and everything stopped Stanislav (Eris) My bolt securing the gear shift mechanism and the rod inside the box has come loose. It was also dangling until it completely unscrewed :) Vladimir (Philipi) I have the same problem ((in any gear like in neutral, replacing the rocker didn’t solve the problem!!!! I just started catching gears a little better, but I feel like I’ll tear the hell out of everything there soon because that you shift from 3rd gear to 1st, and the same 3rd gear gets stuck, you panic, get nervous, and there is such a crunching sound, in short, it’s scary, what should I do????? Thanks in advance, I’m a newbie with the pelvis)
Do-it-yourself short-throw scaffold
A similar device can be installed on any VAZ car (both classic and front-wheel drive) with your own hands; below are examples of how this is implemented.
Short-stroke link for classics
For production in this case you will need:
- a piece of pipe with a diameter of fifteen millimeters;
- nut from a classic ball nut;
- RPP from 2108;
- backstage repair kit 2108 (axle and two bushings);
- cardan from the steering mechanism 2104, 2105 or 2107.
The work is performed as follows:
- The ball from the bottom is cut off from the RPP;
- The lower part is sawed off so that a pipe can be inserted into it and scalded;
- The nut is welded to the pipe from below;
- The ball is placed in a convenient place;
- The cardan is attached to the gearshift lever.
The described process is illustrated by the following photographs:
Short-stroke rocker VAZ 2109
One of the main parts will be a cardan from Kalina, which will help avoid play in the lever.
Next you need to complete the modification, as shown in the photographs:
Then two pieces of metal are welded
After finishing the work, you need to clean all the seams and paint them in the desired color.
The short-throw shifter, which you install yourself on many VAZ car models, has its pros and cons, but it allows you to reduce gear shifting time and makes it easier to control the car. Whether to do it or not is everyone’s personal choice, but it cannot be denied that such a modification is perceived by many as necessary and useful.
Rate the usefulness of the article!
- Why do brake pads squeak when braking and what to do about it
- Replacing engine mounts on VAZ and other cars
- Car rental: what you need to know when choosing
- What does the braking distance depend on and what formula can it be calculated by?
- How well do you understand car emblems?
- How to remove the outer CV joint and replace a torn boot
- How to independently replace the internal grenade on VAZ cars
- Wheels for rotating the car in place 360 degrees
- In 3 years, diesel engines will become a luxury
- Review of the most expensive Hyundai Solaris ever
- Test drive Lamborghini Huracan from Mikhail Petrovsky
- Electrical equipment
- Engine
- Brake system
- Other
- Steering
- Transmission
- Suspension
- Tuning
VAZ 2110
- Other
- Engine
- Steering
- Electrical equipment
- Transmission
- Brake system
- Suspension
- Tuning
Making a knot yourself
If you wish, you can make a CC yourself, and it will be perfect for any car, including the VAZ 2114. To work, we will need the following:
- a small tube with a diameter of exactly 15 mm;
- RPP from the VAZ 2114 model;
- ball nut;
- steering cardan;
- VAZ 2114 axle and bushings (repair kit for backstage).
The work takes place in several stages. First, you need to cut off the ball from the RPP and adjust the lower edge so that you can then install a pipe here. Scalding is carried out. A nut is attached to the pipe from the bottom edge and welded. Then comes the installation of the ball. The cardan is mounted to the gearbox lever.
Having carried out such an operation once under the supervision of an experienced car mechanic, you will understand that in fact there is nothing impossible or complicated here. The entire process of manufacturing the CC takes about two hours and is almost the same as replacing the rocker seal. And every second car owner performs such work almost with his eyes closed.
The CC device is quite simple. Easier gear shifting is achieved by reducing the lever travel, and this depends on how long the lever is. In order for the standard rocker to become short-stroke, you just need to lift the fastener of the “piece of iron”, which extends from the gearbox towards the lever. In this case, you do not have to dismantle the standard rocker, which allows you to significantly save both time and effort.
Is it difficult to change the slide yourself?
In order for the short-stroke rocker to feel the beauty of the absence of play and vibration in the lever, it must be installed correctly. If the installation is carried out in a car service center, you don’t have to worry, but if you replace it yourself, you should take this with full responsibility. The whole procedure is reminiscent of replacing the rocker seal - almost half of car owners face this operation. The need to replace the oil seal is very eloquently indicated by the characteristic crunch that is constantly present when switching gears.
If we analyze the process of self-installation of a short-stroke rocker in more detail, we can highlight the following main stages of work.
- The interior cover of the lever along with the handle is removed with a simple sharp jerk upward.
- Using a 13 key, the clamp is loosened and the lever rod is removed from the propeller shaft.
- The reverse speed locking ball is released, for which you will need to remove the ring blocking it.
- The retaining ring and lever are removed along with the ball and spring, located in a separate housing.
- Now it will be possible to remove the lever along with the rod through the interior. If necessary, they can be previously disconnected.
- Next, the cardan is removed, from which the boot is first pulled off and the bolt located on the left side is unscrewed.
- The new cardan is lubricated with lithol; when tightening the fastening, you should not be too zealous.
- The rod is also mounted from the interior. It will be much more convenient to carry out this work together.
Further assembly is also not difficult. The rod is put on the cardan rod, after which it will be necessary to assemble the reverse gear locking mechanism. It is better to lubricate its ball first. After this, before the final tightening of the mounting clamp, the final adjustment of the lever and the reverse gear locking system is carried out - in some cases the mechanism often does not coincide with the plate, then it will have to be removed and the existing hook adjusted. The process of installing a short-throw rocker on a Priora can be seen in the video:
Most car owners who, for one reason or another, decide to replace the standard linkage with a short-throw one, remain satisfied with the speed and clarity of gear shifting
If we take into account the very low cost of such an upgrade, which can also be done with your own hands, the advantages of a short-stroke rocker increase
Even if the driver does not particularly care how long it takes to engage the gear, the almost complete absence of extraneous noise and play is inevitably noted by every driver
Price issue
If you decide to replace the rocker seal at the same time as installing the rocker itself, this can be considered absolutely the right thing to do. Additionally, replacing the driveshaft will not cost much, but the efficiency of such a comprehensive repair will be much higher.
Short walker
Actions on your own, you only have to purchase the necessary parts and ordinary consumables. If you contact a car service, the minimum cost of the service will be 800-1000 rubles. That is, the savings are obvious.
The curtain itself costs about 400 rubles. From here it becomes clear why we did not advise buying a repair kit, but rather completely replacing the part. There will be no savings as such, but the difference as a result of the repair will be significant.
Short-throw slides for "nine"
Such designs were developed exclusively for sports models, but are widely used in production ones. Advantages of the VAZ-2109 short-stroke rocker over the standard one:
- Easier gear shifting.
- The backlash of the gearshift lever is reduced, especially when using a cardan from Kalina.
- You need to either buy it or make it yourself.
- It takes a lot of force to change gears. Despite the smaller stroke, this type of backstage is more suitable for people who are not only strong in spirit.
But you don’t have to buy a VAZ-2109 rocker in stores; you can make a short-shifter from a regular one with little welding skills.
To do this, cut the old rocker in two places and weld pieces of a metal plate to lengthen the arms. The main thing is for the new drawstring to fit into place, so first carefully study the drawing, which shows the locations of the cuts.
The VAZ 2109 is known as the most successful car of the Volga Automobile Plant after the collapse of the Soviet Union. It is still widely popular among domestic drivers. At the moment, production of the VAZ 2109 and its modifications has been suspended. In addition to 2109, its direct successor 2114 is often found on the roads of our country, as well as the successor to the “eight” 2113, and the “tens” - 2115.
How to replace the universal joint
In most cases, it is not the rocker itself that fails, but the cardan. Due to its displacement, even a small one, a failure occurs in the gear shift mechanism.
Standard VAZ-2109,2114 scenes are rarely installed during repairs; similar parts from Lada Kalina are used. The replacement looks like this:
- Using two keys set to “13”, unscrew the clamp securing the cardan to the rod.
- Using a screwdriver, pull the boot towards the box housing. If desired, you can remove it completely, and if it has cuts or other damage, replace it with a new one.
- Unscrew the fixing bolt with a “10” key.
- Knock down the cardan with a hammer, strike carefully so as not to damage anything.
- The Kalinovsky universal joint is much more durable and reliable, so install it instead of the standard one.
- Reassemble the entire structure in reverse order. But do not rush to tighten the bolt on the clamp - adjustment is necessary.
Sports
We noted that for the VAZ 2114 you can install a sports short-throw rocker. Outwardly they are quite similar, but the difference in work is felt immediately. On a sports unit, gears shift faster and smoother. It's all about the design of the backstage itself. Unfortunately, it is precisely because of this that the process of independent replacement becomes almost impossible.
Sudden changes in the weather? Is it uncomfortable to drive on winter tires? Find a quick replacement where they sell used tires.
Nobody argues that it is better to own a new car. Everything is good, it works well, all the functions included in this car by the manufacturer are present, nothing rings, does not knock, etc….
But after a few years of active use, problems begin, small at first, then more and more. But today, I would like to talk about such a thing as play in the gearbox of a VAZ car. This “disease” plagues cars of the entire front-wheel drive family. For a more convenient location of the gear shift lever you have to pay by adding new parts to the design of this unit, and accordingly more parts means more breakdowns :).
For VAZ models of the classic family, the gear shift lever is installed directly on the gearbox, or more precisely on the drive mechanism of the gearbox forks. This option eliminated any play in the backstage, since it was not there at all. In models with front-wheel drive, such a gearbox arrangement was impossible, so a rocker mechanism was used. It allows you to move the gear shift lever during design, which is a big plus in designing the comfort of a car.
How to adjust the gearbox rocker on a VAZ-2110: photos and videos, algorithm
The gearbox on the VAZ-2110 sometimes starts to act up. If you neglect the care and maintenance of this part of the car, you can get many problems with the operation of the gearbox. As a rule, these are inaccuracies in gear shifting, characteristic “knocking out” of the gear, crunching and clanging when manipulating the gearbox lever. Some car owners believe that all these symptoms indicate a gearbox failure.
Why do you need a gearbox slide?
In fact, most often the gearbox is in good condition, but the rocker may fail.
You can replace the unit with a new one, or you can get by with proper adjustment of the rocker. Adjusting this element will help troubleshoot problems and make sure that the problem is related specifically to the gearbox linkage. It happens that a car owner simply begins to change one component after another without understanding the problem, wasting money and time to no avail.
The gearbox itself is designed to prevent gears from switching spontaneously. It happens that due to incorrect or erroneous adjustments, the entire transmission system begins to work incorrectly and may even fail. Therefore, you need to be able to adjust the gearbox rocker with your own hands, especially since this procedure is not complicated.
When does the rocker need adjustment?
Gear shift mechanism.
The procedure for adjusting the gearbox linkage is recommended in the following cases:
- After the transmission on the car has been replaced or removed.
- When loosening the fixing clamps.
- If the cardan was changed.
- If the link starts to rotate on its hinge.
Although visually it may seem that the rocker is in place, even the slightest movement of the rocker can lead to incorrect operation of the gearbox. It happens that it is enough to tighten the link to the cardan by 1 mm, after which all functions of the gearbox will be restored.
Preparing to adjust the rocker
On an old car, it is better to lubricate the linkage mounting assembly with a penetrating compound in advance.
Before starting adjustment work, you need to prepare the place and carry out the following preparatory measures:
- The car needs to be parked in a pit.
- The handbrake must be tightened all the way.
- It is mandatory to install wheel chocks.
For a faster and better adjustment process, it is better to perform all work with an assistant. The process itself can occur in several ways.
First adjustment method
To adjust, you need to loosen the clamp connecting the rocker drive to the cardan.
This method is the simplest. In this case, the gearbox linkage is adjusted according to the rear speed. First of all, you need to loosen the clamp, after which the reverse gear is engaged. Then you need to position the lever in the position you need. After this, the clamp is tightened and the operation of the entire mechanism is checked.
If you don't succeed the first time, you need to listen for knocks and crackles when switching. They must either decrease or increase. In accordance with this, you need to position the lever in the desired direction. If all manipulations do not lead to the desired effect, you need to resort to another adjustment method.
Second adjustment method
The gear shift lever should rest against the locking plate (in the photo it is made of light plastic).
This method is used if the first one did not lead to the desired results. When using it, you can more clearly position the gearshift lever. This method is as follows:
- The gearshift lever switches to first speed.
- The backstage clamp is completely loosened.
- Next, you need to turn the drive of the rocker itself counterclockwise until the lever rests against the reverse speed stop.
- The backstage clamp is tightened. We tighten the nut securing the clamp, excluding the shift of the rod during operation.
- The operation of the gearbox is checked.
It happens that some VAZ-2110 cars do not have a plastic limiter retainer, so the adjustment in this case is carried out not in first gear, but in neutral.
