Before directly connecting and connecting the signaling system, you should first find out how the lock itself works. After this, find the access points that are shown in the instructions on the transport. Alarms are mostly universal. They are installed on turbocharged, diesel or gasoline Niva Chevrolet engines.
Further actions:
- Before installation, you need to remove the protective structure from the steering wheel , remove five self-tapping screws with two screws. Then unscrew the panel screws that cover the mounting block and pull out the block.
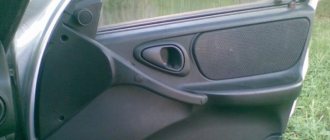
- Remove the instrument panel trim and remove all screws. Unfasten the dashboard.
- a siren with a temperature sensor and a hood limit switch in the car engine compartment.
- Connect the antenna unit in the upper corner of the windshield. Place the LED type indicator on the left pillar.
- Attach the shock sensor to the steering wheel bracket , and place the service button in a hidden but easy to access place.
Connection steps
- Connect the topmost yellow conductor to the contacts of the relay power coil. Insert the closed electrical contacts of the relay into the place where the power supply to the ignition coil is interrupted. Cut the cable connecting the relay power coil to the ignition switch. Connect the ends that were formed after the cut to several relay contacts. Then connect the wire that comes from the ignition switch to the wire of the coil relay.
- Connect the black wire to the negative terminal of the battery. It is important to disconnect the battery before connecting to avoid damaging the electrical wiring of the vehicle.
- Connect the brown wires to the right and left side turn signals, respectively.
- Connect the pink conductor to the red contact. Black connect to the housing or to the battery negative pole.
- Connect the red wire to the positive terminal. The yellow and black central locking wires should be connected to it.
- Connect the green conductors or the negatives of the trunk opening to the power coil with an additional relay.
- Connect the white conductor to the ignition switch, the contact that closes when turning the key and the supply voltage, and the blue conductor to the door limit switch.
Also interesting: VAZ-2121 technical specifications
Where to begin
The installation procedure for Tomahawk alarm models TW 9010, TZ 9020, 4000, 9030, 9000, 7010, 9031, 9100, 9011, 5000, 7100 is the same and consists of the following points.
- First, remove the steering column protective cover by unscrewing five self-tapping screws and two screws. Then unscrew the screws of the panel covering the mounting block and pull it out.
- Remove the instrument panel trim by unscrewing all screws. Unfasten the instrument panel.
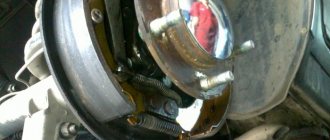
- Install the siren, temperature sensor, hood limit switch in the engine compartment of the car.
- Connect the antenna unit. The most suitable place is the upper corner of the windshield. Place the LED indicator in the left rack.
- Attach the shock sensor to the steering wheel bracket.
- Place the service key in a hidden but easy to access place.
Car alarm connection points for Chevrolet Niva October 2016 (base)
Door switches - white/black (via a diode) on the driver's pillar Trunk switch - white/black on the ceiling light (via a diode) Pull the hood switch
Turning - blue and blue/black at the driver's threshold
Central locking like on a VAZ 2115 - on the central locking unit: blue (opening) and brown (closing), minus.
Driver's door – white/blue Passenger's door – yellow/black Rear doors – white/black trunk – white/red hood – green/black All limit switches are negative
Turns – blue and blue/black
Central locking block behind the mounting block. Central lock (-) – closing – 7th leg, opening – 2nd leg. To control the central locking, you need to solder to the block.
On this car, the first press of the standard key fob opens the driver's door, the second press opens the passenger door. One of the well-known sites has connection points using an additional relay. But I don’t think this method is the best. That's why I offer mine. The central locking unit on the Chevy Niva is from Kalina.
The pulse duration on it must be set within 0.8. The default value is 30 s, and guess what this means in this case. Chevrolet Niva and Starline A91 Source: Chevrolet Cruze alarm installation Failure or incorrect operation of the unit itself.
Here is a slightly modified diagram from his page: In other words, its main function is to lock the car doors, but if someone tries to break into the car or the auto alarm on a Chevrolet Niva, the driver will not know about it.
There is a white-blue wire for the driver's limit switch, pin 14, and a white-black wire for the remaining doors, pin 33. And yet, our forum is technical, not political. Alarm harnesses with auto start on a Chevrolet Niva alarm system should be laid where the standard car harnesses go. In addition to the usual one, you can also use LED control here. Incorrect connection of the Alarm on a Ford Focus1 This is a diode, a very important electronic component, it passes current only in one direction.
Diodes are used not only in generators, see Normally closed relay - switching contact 30 and contact 87A are closed. A normally open relay is open contacts 30 and As a rule, there is always some potential at one end of the relay winding, suppose: But to turn on the relay, you need to apply a minus to the other end. Chevrolet Niva81 l.
The relay can be controlled either by plus or by minus. The activation duration is 30, which allows the car owner to detect signals in a timely manner.
We combine two different alarms
So, let's say that one alarm system in the Niva-Chevrolet is already installed (from the factory). This means that we will use the wires connected to its module initially. There are limit switch taps and ground, as well as central locking control wires.
The lock is controlled by two wires - yellow-blue and blue. In addition, you will need to find another cord that powers the passenger door actuators.
The cable we are talking about is a power cable and is usually covered with yellow insulation.
Additional alarm connection diagram
To control all locks, and not just the driver’s actuator, you need to implement the following connection option:
Let's list the features of this option:
- The relay contacts built into the main unit are connected to the breaks in the signal wires (see figure);
- The normally open contact of the locking relay is left free. In “Shnivy”, closure occurs when the cord is “in the air”;
- The duration of the control pulse is set to “0.8 seconds”;
- The control output is programmed to be activated during unlocking. This output controls another, third relay.
Let's talk about why an additional relay is needed here. If we remove it, we will see that the passenger locks cannot be opened from the key fob. In principle, this option is also acceptable: except for remote unlocking of three doors, everything will work.
The 15 Amp fuse shown in the diagram is in series with the cable leading to the actuators.
Connecting without using a fuse is strictly prohibited. At the same time, it is not necessary to protect the relay windings with a pre-flask. The same applies to the signal wires, that is, to the normally open contact of the unlocking relay. In principle, fuses can be added to all three circuits. And also, the winding of the “lower” relay can be powered from the 87th contact.
Practical implementation of the scheme
Surely the reader knows where the fuse box is installed in the Niva-Chevrolet. This block must be dismantled by unscrewing one screw from the top.
A plastic box will be secured under the indicated block. She is exactly what we need.
There are three “important” cords on the connector of the module shown here: blue, blue-yellow, yellow. Taps from the three break points are extended to the installed signaling, as well as to an additional relay (see diagram). Particular attention should be paid to the connections of power wires.
You can make an additional relay module yourself. A current not exceeding 8 Amperes will flow through the contacts here, so there will be no difficulties:
The diode shown in the main diagram can be anything (its characteristics are not so important). The main thing is that it is there, otherwise you can burn out the control output to which the switched winding is connected.
Remember the main thing: you can carry out any installation work only when the negative terminal is disconnected from the battery.
It is better to connect power cables by twisting, but knowing how to do it correctly is an entire art. All connection points must be isolated. But this will not be enough: in places where the metal touches, the cord is protected with heat-resistant insulation. This is how you can protect yourself from unforeseen consequences.
Cool features from Tomahawk
Correct installation of the Tomahawk alarm system on Chevrolet Niva 868 mhz, CL 700, SL 950, X3, D 900, X5, Z3, Z5, 434 mhz frequency, CL 500 allows you to use a large number of functions.
- New design, allowing convenient use of the equipment. Remote central locking control. “Panic” mode, instantly notifying the car owner of danger.
- Disabling the security system, activating “Valet”. This action can be carried out using a personal code.
- The vehicle is in security mode with the power unit running.
- Measuring the temperature inside the vehicle.
- Informing the owner about emerging alarming situations.
- Increased ergonomics of use thanks to a user-friendly interface.
- Reduced electrical energy consumption.
- Operation with two digital buses if necessary.
- The operation of equipment to service sixteen security zones, providing a high level of vehicle protection.
- The alarm is compatible with the clock, guaranteeing its accurate operation.
- The presence of an engine auto-start timer allows you to start the engine automatically at a set time.
- Protecting the device from attacks by intruders using the anti-scanner function.
- Protection of equipment from hacking by the presence of a two-stage disabling of the security system.
- Possibility of connection to a mobile phone, simplifying management.
- Advanced dynamic code that provides reliable vehicle protection.
- Indication of security zones, providing ease of use of the alarm system.
- Automatic unlocking of car doors when the ignition is turned off, guaranteeing the comfort of its control.
See the review of the Tomahawk CL-700 alarm system.
Checking the system operation
The next step is to check the anti-theft system in action. To do this, you need to arm the car using the standard machine device. Then set the protective mode using the alarm key fob.
Alarm testing is a mandatory stage of system installation. Without checking, you cannot be sure that your car is fully protected.
The next step is to conduct an initial test of the anti-theft system's functions.
- Arm the car using the car's standard device.
- Then set the protection mode from the alarm key fob.
Reassemble all components in reverse order, using a screwdriver to tighten the screws. Only correct installation of all components guarantees 100% security of the car.
Comments and reviews
Or we put the ring included in the lineman’s kit onto the lock and connect it with a standard connector. We connect the thick yellow signal wire to the ignition wire from the lock.
We break both starter wires under the lock. We connect the thin black and yellow signal wire from the side of the lock. Thick black and yellow - further into the bundle. We break the black wire of the ground ring in accordance with the choice of manual transmission. We make settings in the signaling: Duration of cranking by the starter - 3.6 seconds.
Engine control - tachometer. Specifically for the shnivy, you can also set the engine type to diesel with a starter delay of 6 seconds.
StarLine A93 + i95 and Chevy Niva
So that the pump has time to pump up pressure in the fuel system. This is all that is written in the instructions. But autorun will not work like that. Tue Feb 01, Constant plus If the alarm system has auto start, then I take this plus from the battery terminal. If it’s a simple alarm, then the thick pink wire is on Ш3.
Chevrolet Niva central locking – Auto workshop online
Every modern car must be equipped with a reliable anti-theft system that will prevent break-ins and theft of the vehicle. Since standard anti-theft installations are not particularly reliable, car owners have to install alarms on their cars themselves.
Depending on the configuration, the Niva's electrical circuit can be supplemented with a standard alarm system, which, in essence, is a central locking system. If there is a lock, the system is controlled using one module - a block, which represents the alarm system.
Since this post is a standard one, it does not have a notification function.
- Installing an alarm system on a Chevrolet Niva car, Chevrolet Niva connection points
- How to disable the immobilizer on a Chevrolet Niva yourself
- and reviews
That is, unlike a traditional signaling system, a standard anti-theft installation is not equipped with a siren.
Repeatedly, the problem with the central locking being inoperable was the wiring.
Some versions of the Niva-Chevrolet are equipped with central locking. If there really is a standard central locking system, it is controlled by a single module. It should be noted that this same module acts as a standard signaling device. It turns out that an alarm system with central locking is installed in the Shniva from the factory, but you can always connect an additional alarm to it, that is, to the standard module. One of the options for such a connection is discussed further.
Where and how to connect the central locking to the alarm (Niva Chevrolet) Then you need to find what type of ECU is installed on the car, and in. The engine of a Chevrolet Niva car is blocked when you try to start it with a key other than the one and how to connect the signaling correctly - find out from this what the central locking is.
Depending on the configuration, the Niva's electrical circuit can be supplemented with a standard alarm system, which, in essence, is a central locking system. 5/5(3). · By the way, for those who do not have any protection at all in their car, and the ignition switch is still working, you can bite off the red wire from the ignition switch (from terminal 50 plus to the starter solenoid relay) and assemble the proposed circuits.
We combine two different alarm systems. Additional connection diagram.
Every modern car must be equipped with a reliable anti-theft system that will prevent break-ins and theft of the vehicle.
Since standard anti-theft installations are not particularly reliable, car owners have to install alarms on their cars themselves. Depending on the configuration, the Niva's electrical circuit can be supplemented with a standard alarm system, which, in essence, is a central locking system.
Also interesting: Niva Chevrolet where is the starter relay located?
Features of programming the new signaling
Let's say the scheme discussed above was implemented without errors. At the second step, as you might guess, you need to correctly program the alarm. Otherwise, there is a possibility of burning out the actuators installed in the passenger doors. The advice is simple: you cannot make a control pulse longer than one second. However, the default value is 0.7 or 0.8.
The signal output used must also be programmed correctly (it must be activated at the moment of unlocking). An alternative method is to use the 2-step unlock output. The pulse duration on it must be set within 0.7-0.8 s. The default value is 30 s, and guess what this means in this case.
Installation instructions
Attach the alarm control unit to the right side of the Niva instrument panel. Connect the ground wires. The connection is simple, shown in detail in the instructions.
Next, wire the turn signals. Then - the wires going to the tachometer. The next step is to connect the systems:
At the end of the alarm installation, configure the shock sensor and autostart parameters of the vehicle engine.
Let's look at the connection points for the anti-theft system on the 2013 Chevrolet Niva:
- the pink wire +12 goes to the ignition switch;
- ignition - blue/black;
- starter - red wire;
- turn signals – blue, blue/red;
- for the handbrake - brown/blue;
- tachometer – black/blue.
Alarm connection points for the Niva Chevrolet October 2016 of the basic configuration.
- The door switches have a white/black wire on the driver's pillar (via a diode).
- Trunk limit switch – white/black on the lampshade (via a diode).
- Connect the hood limit switch with your own wire.
- The turn signals are blue, blue/black in the driver's threshold.
- Central locking: blue - opening, brown - closing, stretch the negative wire.
Connection diagram for the Tomahawk security complex on a Chevrolet Niva:
Comments and reviews
If it is lost or the immobilizer breaks down, you will need to replace the control unit with a power unit. Therefore, it is recommended to keep this key separately from the working one. A training key can be cracked more easily than a working one.
The worker has higher cryptographic security. Information from the training key takes longer to read than from the key for everyday use.
When the Chevrolet Niva battery is discharged, difficulties arise in starting the car's engine. When you turn off the ignition with a key with a red insert, the immobilizer automatically goes into learning mode, thereby disorienting the car owner. To increase the reliability of alarm management, it is possible to train and configure a spare working key.
Installing PTF Chevrolet Niva - Do-it-yourself car repair
When connecting Tomahawk models 10.1, 9.7, 7.1, 9.9, 9.5, 7.2, 9.3, CL 550, LR 950 LE, LR 1010 LC, Q9, S 700, G 9000, Z1 to a Chevrolet Niva in a new body, pay attention to the following points.
- Divide all installation work into several parts and consider them separately.
- Connect the alarm control unit to the shock sensor, LED and Valet button.
- Conclusions of the security system are the most time-consuming and responsible part. Step by step, connect the wires to the relay coil, battery terminal, turn signals, siren, trunk release button, parking brake limit switch, ignition switch, door limit switches, hood, trunk.
- Having connected the entire system into one, choose a place to place it in the car. You will find a more detailed description of each stage in the operating instructions.
The light from a xenon lamp pierces even thick fog due to the intensity of the flow. F4 10 A - backup fuse.
% discount on spare parts and accessories for foreign cars in Academy Plus stores.
F18 25 A - heater electric motor and its switch.
The power button is located in the Shnivy's cabin and looks like a headlight with arrows pointing down. Chevrolet Niva fog light relay new fuses and relays in the reverse order of removal. If, when operating the window regulator, the window goes down but does not go up, or vice versa, check the button on the door.
The fuse diagram itself and the number of elements on it may vary depending on the configuration and year of manufacture.
If any of the listed lamps do not work, check this fuse and the lamps themselves, their connectors and wiring. F2 7.5 A - low beam in the left headlight.
F3 10 A - high beam in the left headlight, indicator lamp for turning on the high beam headlights on the dashboard. F4 10 A - backup fuse. F5 30 A - electric windows of the front doors and their relays.
If, when operating the power window, the window goes down but does not go up, or vice versa, check the button on the door. When lowering and raising, the polarity and direction of rotation of the motor are different. It could also be a problem with the window lift mechanism. To get to it, you need to remove the door trim.
If one or more doors stop opening, check this fuse.
Also interesting: How to tension a Chevrolet Niva alternator belt
Unscrew the four screws securing the instrument panel. Remove the decorative protection under the dashboard. Then we connect the door open alarm wire to the trunk end switch. Open the hood and install the engine temperature sensor on the engine itself.
Renault Logan installation of Alarm StarLine B9 installation map. Install an Alarm Car alarm in Riga - installation,
Signals from the door and trunk switches are located on the wires in pins 30 and 40 of the green insert of the black BCM connector. Wires must be laid in dry places. Following the instructions for a specific alarm system, any owner can install security on a Renault Logan.
The wires are located in the black insert of the white BCM connector. They are located on the door, in the passenger compartment and in the trunk. Unscrew the four screws securing the instrument panel. Remove the decorative protection under the dashboard.
We remove the decorative protection under the torpedo - on the left there is a clip. We remove the decorative protection under the torpedo - on the right there is a clip. We remove the decorative protection under the torpedo - there are 3 clips in the center. We unscrew the screw and remove the BCM unit. Work under the hood. Attaching the siren to the screw and M6 nut. General view of the siren. Install the hood end cap, cut off 3 division.
The hood switch is installed. We lay the wire under the hood through the standard rubber band on the driver's side.
Response to deviations
It happens that the standard Niva alarm is not activated even if the door locks are closed. In this case, you should open the safety switch “3” using the key “2”. The switch itself is located in a glove-type box.
It also happens that the hazard warning lights do not work when turned on. This may indicate that the trunk lid, hood or one of the doors is open, in parallel with the perimeter control function being disabled. In this case, you should close the doors and trunk lid tightly. After this, the emergency lights will flash, indicating the activation of the perimeter control mode.
When the battery is completely discharged, the standard Chevrolet alarm system is characterized by continuous operation for no more than five weeks.