Many car enthusiasts have thought about installing an audio amplifier in their car and thereby improving the sound quality in the car.
On our Radiochipi website we will tell you in more detail how to connect the amplifier yourself and save on the services of professionals. This work is not difficult to complete, so even an ordinary motorist who has never installed audio devices before can handle it.
For this work we will need:
- Fuse with bulb.
- Wire for powering the amplifier.
- Wire for connecting the amplifier to the head radio.
- Fasteners and plastic clamps.
To power the stereo audio amplifier, you will need to run a power cable from the battery. Calculate the minimum possible cross-section of the wire, which will avoid overloading and heating while listening to music in the car.
To correctly calculate the wire cross-section, you will need to take into account the maximum current consumed by the amplifier. In our particular case, the total amplifier power was 400 W. Remember to consider the total power across all channels. The efficiency of the amplifier in most cases does not exceed 85 percent, so it is necessary to add another 15 percent to the value of its total power, as a result we get 470 W. This is an indicator of the amplifier's current consumption from the vehicle's on-board network.
Having data on the supply voltage and amplifier power in hand, it is not difficult to calculate the voltage in the on-board network. In our case, we have a supply voltage of 14 Volts. We divide the total power indicator of 470 W by 14 Volts and get 33.6 Amperes. This is exactly the current that our amplifier will consume.
Based on the calculations obtained, we select the cross-section of the power wire. To do this, we will use a special table. For a power wire that must withstand a current of 33 Amperes, it is necessary to use a wire that complies with the international standard 15AWG with a cross-section of 1.6 millimeters square.
It is recommended that the positive and negative wires be led from the battery. At the same time, you can get a minus from any metal element of the body. You just need to ensure a high-quality connection, for which you use durable fasteners. We may also recommend that you use different colored positive and negative wires to ensure that your amplifier is correctly connected to the power supply.
Fuse
The choice of fuse used directly depends on the previously calculated value of the maximum current. For us this figure is 33 Amperes. Install the fuse in a transparent plastic flask. In rare cases, heavy-duty glass is used. Remember that the fuse size should be slightly higher than the maximum current. Currently, standard fuses with operating current values from 30 to 100 Amperes can be found on sale. We will use a 40 amp fuse.
The fuse in the bulb should be installed as close to the battery as possible. If the fuse is installed at a considerable distance from the radio, or the car owner completely neglects to install it, a short circuit may cause the wiring to catch fire, which is fraught with dire consequences.
Signal cable (interconnect)
The amplifier is connected to the radio using a signal cable. In this case, it is recommended to use high-quality interconnect cables, since the sound level and its detail directly depend on their quality. Pay attention to the insulation of the wire and the quality of the connectors. This way you can choose a high-quality cable, which will have a positive effect on the sound in the car.
We can recommend that you refrain from purchasing inexpensive signal cables, of which there are many on the market. For example, the widely advertised inexpensive cables from the Mystery company are of mediocre quality and therefore quickly fail, while the sound quality of the radio does not stand up to criticism.
Keep in mind that your amplifier can handle anywhere from two to five channels. You should familiarize yourself with the specification of your amplifier and, depending on this, choose a cable with a similar number of channels. Only after this can you lay the cable and make the connection. As a rule, there are no difficulties with this.
Turning on the amplifier
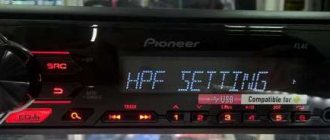
By applying 12 V voltage to the Remote input, you can connect an amplifier. Switching on can be done either with a button on the amplifier, or using the radio if it supports control of external devices. Note that control from the button is convenient in cases where a subwoofer is also connected to the amplifier. When controlled from the radio, the automation automatically turns the amplifier on and off when the radio is turned on and off.
To connect control from the radio, you need to connect a blue wire to the radio from the Remote output. If the amplifier is turned on by a button, it does not have to be located on the amplifier. This is often inconvenient when the amplifier is located in the trunk. You can easily make such an external button, one of the closing contacts of which is connected to the Remote output, and the second to the positive in the on-board network. We can recommend taking the plus from the cigarette lighter.
How to connect an amplifier in a car yourself
It will be “quieter” to some extent in volume, but there will be a significant gain in quality with less distortion because it will be easier for the amplifier to cope with the load. It is routed from the battery to the amplifier. For less powerful models, it may not be used. How to properly connect an amplifier in a car There are three main problems related to the layout of car audio equipment. A car amplifier is called a car amplifier because it is designed for this low voltage in the car. The tape recorder is turned off, the amplifier is turned off, when the mafon is turned on, it “wakes up” the amplifier saying, “Are you sleeping, your Lucy, I already want to listen to music:” and it actually listens to it if it is in good condition, otherwise the protection indicator, usually red, may light up and is called as an individual named Protect.
These are sold at any auto supply store. Wires found on sale are marked according to the international standard and designated as xxAWG where xx is a digital designation. In practice, if you do not “drive” the amplifier to maximum mode, ordinary wires with a cross-section of 1.5 - 2.5 mm2 will do. We also connect the power cable.
In addition, it must be equipped with a fuse; Next, the amplifier wire is connected to the radio.
In this article I will try to tell and show in an accessible and simple language that connecting a car amplifier is actually a simple matter.
Therefore, not everyone will be able to find a suitable power supply for 12V and a current of 30 - 40 A: But to power the car amplifier, a computer power supply in AT and ATX format will do. To prevent a short circuit in the amplifier's power supply circuit, install a fuse. Interconnect cable. Sound from the radio is supplied to the amplifier using an interconnect cable. We choose loud speakers up to 2000 rubles!
Wiring and connection
The wires to power the amplifier from the battery must be routed through the engine compartment and then through the interior to the place where the amplifier is installed. In most cases, you have to run the wires into the trunk, where the amplifier is located. To protect the wires from mechanical damage, we recommend using corrugated tubes. When laying, do not pinch the wires, and try to make maximum use of the available technical holes.
So, for example, through the engine compartment into the passenger compartment, wires can be routed through numerous technical holes and then laid inside the car. When passing through the technical hole, it is recommended to additionally protect the wires from chafing. To do this, you can use electrical tape or large-diameter rubber cambria.
The wires are connected as follows:
We initially connect the red positive wire to the amplifier. You will need a terminal block that has three contacts. The positive contact on the amplifier is labeled Batt or simply a + sign. We connect the black negative wire to the contact marked GND or the - icon.
Having connected the wires to the amplifier, you can begin connecting them to the battery. Accordingly, we connect the black wire directly to the minus on the battery, and initially connect the red plus to the fuse and only after that make the connection to the positive terminal on the battery.
Signal or, as they are also called, interconnect wires should initially be connected to the corresponding outputs of the radio and only then connected to the amplifier. On the radio, the outputs are marked as Front, that is, front speakers, and Rear, which means rear speakers. The white connector corresponds to the left channel, and the red connector corresponds to the right channel.
In the same way, observing the sides, the wire is connected to the amplifier. Just remember that you need to connect the control wire, for which the corresponding wire from the radio is connected to the Remote terminal directly or through the power button.
Features of Chinese car radios
2 din radios differ significantly from smaller devices. These multifunctional modules with a 7-inch diagonal LCD screen allow you not only to listen to music, but also to watch videos. The size of the radio exceeds the dimensions of a 1din device, which immediately catches your eye. Users note their stable operation and high-quality sound.
Most often, Chinese 2 din format radios are equipped with a GPS module. With such a car player, there is no need to purchase a navigator. Additional gadgets can be connected to a Chinese head unit (GU) of this format: multifunction steering wheel, rear view camera, GPS antenna. This slightly modifies the connection diagram of the car radio, because new wires appear that were not on the standard chip.
In most cases, the audio device comes with ISO connectors and wires. Otherwise, you will have to buy an adapter to connect the purchased car player. Switching the device with a source of electricity will not be difficult, since the pinout of radio tape recorders of both formats is identical.
The yellow DC +12V wire is connected directly to the battery through a safety device.
The red control wire is connected to the ignition switch. It is desirable that when the key is turned to the ACC position, there are no other consumers besides the control unit. This will reduce the load on the battery. It is better to connect the black wire (“ground”) to the negative terminal of the battery, and not to the car body, since a 2 din radio is an energy-intensive device.
The GU has the ability to reduce the brightness of the backlight of the buttons and screen when the side lights are turned on. This makes it possible not to blind the driver at night. Power is provided by the wire marked ILL. Terminals KAY1 and KAY2 are responsible for connecting the remote control for the car radio (multi-steering wheel).
Connecting speakers
Connecting the speakers to the amplifier is done using a bridge and linear connection circuit. With a linear connection scheme, each channel is routed to its own speaker. With bridge connection technology, the power from two channels is summed up. Note that a bridge circuit is used in cases where the system additionally uses a subwoofer.
The connection is made to the appropriate terminal block on the amplifier. On the amp, the channels are labeled CH1, CH2, CH3, and so on. Each channel has two contacts - negative and positive. The wires from the speakers are connected to the amplifier in full accordance with the polarity.
At this point, all work on connecting the amplifier to the car audio system is completely completed. All you have to do is configure both the sound amplifier itself and the radio.
Acoustic cable
The speaker cable must be thick and copper. For most systems, a cross-section of 4 mm² is sufficient.
For powerful subwoofers, you can use 6 mm², but you need to see if the terminal on the speaker will allow you to insert such a wire.
By the way, by trying speaker wires of different thicknesses, you can feel how the thickness affects the sound quality. The thinner the wire, the worse the bass will be.
If the amplifier is placed in the trunk, near the subwoofer, then you need a little speaker wire, 50-100 cm.
Four connection diagrams for amplifier and acoustics
First scheme
The head unit has only one output to the rear or front. In this case, you need to connect only front or rear speakers. The tweeter can be connected to the mid-range speaker in parallel through a capacitor.
Second scheme
The head unit has two linear outputs for the rear and front. We connect front or rear speakers. The tweeter is connected to three-way speakers and a mid-range speaker for the front. It is advisable to connect everyone to their own channel.
Third scheme
The head unit has two linear outputs. Front or rear speakers and a subwoofer are connected. The tweeter is connected to the mid-frequency speaker. The acoustics are connected to their own channel, and the sub is connected to the two remaining channels in a bridged version.
Fourth scheme
There is only one line output. We connect a subwoofer and acoustics from the rear or front. Using RCA splitters we connect the second input on the amplifier. The sub is connected to free channels in the bridge.
Setting up or how to make a case
How to properly set up an active subwoofer in a car
In order for a subwoofer speaker to function normally, it is necessary to make a high-quality housing for it. Its further sound depends on the quality of the subwoofer box:
- If the displacement of the box is incorrect, the speaker will not play. It will make sounds similar to wheezing.
- With a flimsy subwoofer box, it will be impossible to achieve clear bass. On the contrary, it will always be difficult to hear.
- It is necessary that the housing has the correct shape, otherwise “standing waves” may form inside it, affecting the sound quality.
Some of the best cases are those that are made to order. The manufacturer needs to provide the dimensions of the speaker or itself. Due to this, all the subtleties and nuances of the device will be taken into account, so the sound will not be primitive.
How to set up a subwoofer yourself
Active subwoofer how to set up
acoustic system Therefore, now we will discuss how you can set up a subwoofer yourself:
You must purchase a special disk. It will allow you to identify shortcomings of the entire speaker system, including the subwoofer itself. A special melody is recorded on this disc, which allows you to hear even minimal defects.
Special disk for setup
- It is necessary to adjust the active subwoofer until the sound of this disc is ideal for the user.
- What exactly is a setting? This is a sequential switching of three buttons: Bass, Tribble, Sub.
As you can see, installing a subwoofer and setting it up in a car can be done easily with your own hands. It should be borne in mind that such a process is impossible without primary preparation. So, initially you should look at photos with a similar theme. Perhaps you will find some instructions on the Internet that will also not be superfluous. A video on this topic will also come in handy. The price of installation and configuration in a car service can vary: installation of an active subwoofer starts from 3,500 rubles.
Three connection diagrams for amplifier and acoustics
First scheme
The head unit has one output on the front or rear. You need to connect front or rear speakers. There is also a mid-range speaker and a tweeter. We connect the tweeter through a capacitor in parallel with the mid-range speaker.
Second scheme
There are two line outputs. It is necessary to connect the front and rear speakers. Pancakes are used at the rear, and tweeters are connected at the front. At the back, the pancakes are connected to their individual channels.
Third scheme
There are two linear outputs at once to the front and rear. Acoustics and subwoofer are connected. Rear or front speakers require the use of individual channels, and the sub is connected to the remaining channels.
Conclusion
Now you have enough knowledge to go to a specialized store yourself and go through all the procedures: purchases, consultations, connections and settings - on your own. If you are not burdened with financial difficulties, it would be better to purchase an active type device, and then you will not have questions about how to connect a subwoofer to a computer. However, if you want to save money, or the hidden talents of radio electronics have awakened in you, you can safely purchase components at a reasonable price and create a full-fledged speaker system with your own hands. In any case, with a subwoofer you are guaranteed a life with rich bass, a lot of pleasure and the indignation of your neighbors.
Tags: battery, sconce, type, choice, generator, house, , capacity, sign, cable, like, computer, capacitor, , magnet, installation, power, load, voltage, setting, nominal, connection, polarity, potential, rule, wire, start, , work, size, regulator, relay, garden, network, system, connection, resistance, ten, type, current, installation, filter, photo, shield, effect
Power connectors (power supply).
Three contacts marked - +12V.
Power is supplied from the positive terminal of the battery. The supply wire should not be thin. It is advisable to install a fuse at a distance of 40 cm (or less) from the battery (pictured). It is designed to protect the vehicle's electrical wiring.
The control wire from the head unit (radio tape recorder) is connected. The interconnect wire usually has a third thin wire, which is used as a control wire. It is needed so that the amplifier turns on and off together with the head unit.
GND (ground), connected to vehicle ground.
The wire must have a cross-section no smaller than the supply one and be as short as possible.