Different manufacturers use different types of fasteners:
- Using fixing elements on the side of the device;
- Using elastic latches;
- Using bolts or screws.
With clamps, a frame is used that is inserted into the “shaft”. The side walls of the car radio have special recesses, and there are tongues on the frame.
To dismantle the head unit you need keys. With them you can easily straighten the tabs or bend them. But this type of fastening has a drawback - the frame can become deformed.
The second type of fastening is more reliable - it involves the use of elastic latches. They can be seen on the side and top walls. These latches fit into special seats in the frame, the simplest and most reliable way to mount the radio.
In some car models, in order to ensure reliable fastening of the multimedia system and to eliminate the risk of failure due to vibrations, installation is carried out to the dashboard, or rather to the power elements. The dashboard is held on the pipe using metal corners. Such fasteners are used in premium cars Mazda and Toyota.
The option of installing a radio in this way is considered additional, but car audio installers often remove the corners, and installation is carried out without fixing elements. This option is not reliable.
Single- or double-din radios are mounted in the dashboard tunnel without any additional fixation. It is customary to mount the device on the center console.
The media system is latched with ordinary plastic latches. This is a screwless fitting - you can see this even on the Lacetti.
With this installation, the radio simply hangs and is not able to withstand even minor shock loads. There are holes on the sides of the device, but most motorists do not know what they are for.
It turns out that these holes are made for reliable installation of the device to the dashboard using corners.
This is a factory fastener that complements the standard fastener.
Features of removing a generator on a car with air conditioning
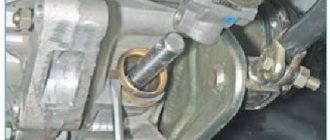
In a Lada Priora car with air conditioning, the air conditioning compressor and generator are driven by one belt. The design feature is such that it is impossible to dismantle the generator without removing the compressor. You must first disconnect the air conditioner pump from the bracket. This is the first difficulty encountered.
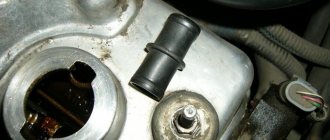
Generator Lada Priora from Bosch
A possible second problem awaits at the lower mounting of the generator. If the bolt is installed with its head towards the engine, it will not be possible to completely remove it . It is so long that it rests on the engine mount, and it is impossible to remove the generator. To remove the bolt, you need to jack up the engine and unscrew the mount. We advise you not to use this method. It’s easier to buy a new bolt and cut off the old one with a grinder. When installing the generator, install a new bolt, but with the head facing outward. This way you will save 10-15 minutes of your time in the future.
How to properly remove the standard radio on a Lada Priora
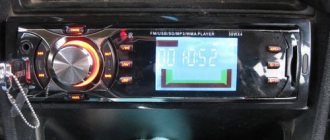
The control panel of the standard radio is represented by the following buttons:
- On off. Receiver.
- Instant mute.
- Selecting the operating mode.
- Scanning tracks, frequency range, and sequential station tuning.
- Disc eject button and others.
To select the operating mode on this tape recorder, you need to click on “Mod”. This button is in the menu; it allows you to select the type of device you want to listen to: a flash drive, a radio, a memory card, or information coming from a navigator. Many users were satisfied with the luxury tape recorder that was installed on this machine by default by the manufacturer. At the same time, many other car enthusiasts are not satisfied with the sound and operation of this device. This device is quite solid and has rich functionality. The main disadvantage of this radio lies in the low power of its built-in amplifier. Also, on this device you will not find any sophisticated sound settings, since it is designed for the average listener. Those same drivers, for whom the high-quality sound of the receiver in the car is extremely important, have to remove the standard radio and replace it with improved models. Below are step-by-step instructions on how to do this without keys.
Where can I get firmware for the Lada Priora radio and other car models?
Today it can be obtained from a technical service center, as well as downloaded on the Internet on various sites for a fee or free of charge. Be sure to check the reliability of the source, because... Many installation files in the form of archives can be compiled manually by specialists whose skill level cannot be trusted.
It is better to search on trusted forums and websites, where various firmware versions are given in lists along with instructions and descriptions of the process, as well as recommendations and tips. Be sure to study the contents of the archives, and also check the downloaded files for viruses.
What possibilities does flashing the Lada Priora have? Depending on the firmware version you choose, it may include:
- improved audio and video player;
- output to rear view camera via MMS;
- modified radio; electronic speedometer;
- sound notification of malfunctions in the vehicle;
- reflection of fuel consumption indicators;
- mileage metrics and other improved features.
As a bonus for the driver, the new firmware may have an improved, attractive interface with a clearer, more intuitive control panel. You must have the official stock firmware on your computer, in case difficulties arise during the flashing process and you have to return it to factory settings.
Firmware for the standard radio of Lada Priora 2 is performed in the following way:
- copy the firmware to the root folder of the SD card;
- remove the flash drive from the USB port;
- insert the card into the multimedia system (MMS);
- reboot the device by holding down the power/volume button for 15 seconds;
- wait for the device to load to the desktop level;
- enter screen calibration mode;
- We reboot the radio without removing the SD card.
The firmware consists of system files Chain, NK, TINYNK, which must be loaded onto the root folder of the SD card, turning it into an installation disk for downloading and activating the program.
Technical characteristics of the radio
Kalina's standard audio system
Technical characteristics of the standard radio in the Kalina “Lux” configuration:
- 2DIN touch screen;
- presence of stereophonic radio;
- ability to play multimedia files;
- ability to synchronize with a cell phone;
- work with bluetooth.
Device development - WindowsCE 6.0. RAM - 128 MB. Fifth generation central processing chip. These characteristics cannot but please fans of AvtoVAZ products, because now the car has become much more pleasant to drive.
Radio tape recorder Kalina: technical characteristics in the “Norma” configuration differ from the “luxury” one in the absence of a touch screen, Bluetooth connection and synchronization with a cell phone. The size of the radio is 1DIN, removable panel. Some configurations have 4 speakers and an antenna. The radio receives wide range radio waves, can play discs of different formats, and work with USB drives and SD cards.
It is also good that cars with radios have passed all special tests before being released to the masses. They were tested at extremely low and extremely high temperatures, electromagnetic compatibility was checked with modeling of the radio interference spectrum.
Removing the car's standard radio
Before you begin the removal procedure itself, you need all the tools that you will need during the work. You can use removable keys or two plates from frame wipers. Next, the selected instruments must be inserted at a slight angle into the spaces under the TA and Scan keys until you hear a characteristic click. Afterwards, you should move the keys slightly apart and take out the tape recorder.
If you use plates for this purpose, then they also need to be moved apart and brought back to the center, and only then pulled towards you.
Before installing a new device, it is important to disconnect the negative contact from the battery. Next, you need to remove the plastic pocket-plug from the opening for this device. On the reverse side there are two special connectors - brown - for the rear and front speakers, and gray for power connections. If the connectors of the transport and receiver match, then they can simply be connected using adapters, or according to the diagram. Then the box with the device is reinserted into the panel and the “Reset” button is pressed.
The diagram for connecting a new radio to the car:
- the terminal is yellow, pin A4 constantly gives 12 V;
- blue cord, contact A5, output to the car antenna +12 V;
- red wire, pin A6, gives +12 V when connecting ACC;
- black cord, A8, ground;
- purple terminal, pin B1, + from the right rear speaker;
- black-violet cord, B2, - from the right rear speaker;
- gray wire, B3, + front right speaker;
- black-blue cord, contact B4, – front right speaker;
- white wire, pin B5, + speaker left front;
- black and white cord, B6, – speaker left front;
- green wire, pin B7, + rear speaker on the left;
- black and green cord, B8, – rear speaker on the left.
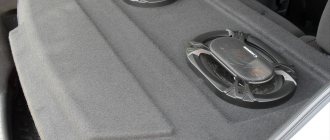
At the same time, in order to fully form the entire acoustic system, speakers should be installed. In order to install the rear ones, you need to remove the mesh cover using a screwdriver and connect the contacts through adapters. Next, you need to insert metal eyes into these holes, which are secured with self-tapping screws, and then install the speakers into the corresponding connectors, putting decorative covers on them.
As for the front speakers, to install them, first unscrew the self-tapping screw below the door handle. Then remove the rubber mat from the closing handle. Next, you need to unscrew the two screws and press the latches. This will allow you to remove the power window control panel. Having done this, you need to remove the cap from the pin on the lock lock together with the decorative rim, get rid of the casing and connect the speakers to their installation locations.
Alternative options
If the car owner is not satisfied with the standard MMC device on the Veste, they recommend using a 2DIN radio. Retail chains offer the following options for multimedia systems:
- Chinese 7010B, 7021G, 7023B, AD-UNI707, C1060706A, MEKEDE MKD, RK-A701.
- Russian multimedia system PROLOGY DVU-750.
- The devices PROLOGY DNU-2630, SWAT AHR 4180, NAVIPILOT DROID4, DVM 2117 IQ have also proven themselves well.
Some models of 2DIN devices require an adapter frame, without which it is impossible to install a new audio device.
Do-it-yourself installation of a radio in a Lada Priora
In the first case, we consider the installation of a 1 DIN type audio player, which does not involve changing the shape and parameters of the plastic base of the console. Before installation, turn off the power to the vehicle by disconnecting the negative terminal of the battery.
It is recommended to divide the installation process of a standard audio player into several stages in the following sequence:
- 1. Preparing the hole for installation. To do this, remove the plastic cover covering the niche provided by the manufacturer for installing the audio player;
- 2. Determination of connectors for connection. In the hole for installing the audio player there are several sockets: for power connections in gray and for speakers in brown;
- 3. Connecting the player to car connectors. If the connectors of the audio player and the machine comply with the ISO standard, it is necessary to make the connection according to the diagram or through an adapter;
- 4. Installing the radio in the standard hole. Remove the magnetic frame and install the housing into the standard hole in the car console. When locked correctly, there will be a slight click;
- 5. Activate the player by pressing the “Reset” button.
Installing an audio player of type 2 DIN is more labor-intensive due to the formation of the appropriate hole size in the Priora console. The installation process is similar to the 1 DIN installation system, the connection is made according to the same principle.
Connecting a new
Installation of a new audio device is carried out in the standard mounting hole. When using alternative equipment that has a different configuration of the front part, transition frames are used to allow the unit to harmoniously fit into the interior of the car. For switching, adapters are used to ensure compatibility between the wiring harness on the car and the connector on the player body.
On Priora 2 cars, the standard configuration did not include a standard radio; in its place there was a trapezoidal pocket that could accommodate a 1 din head unit. But additional sealing of the resulting cracks or the manufacture of a decorative frame is required.
Many owners place the radio in place of the plug located below the standard mounting socket. Algorithm of actions:
- Remove the rubber mat in the niche located below the climate control controls. Remove 2 screws.
- Pry up and remove the decorative cover of the gear shift knob, under which there are 3 more screws.
- Remove the lower part of the console, providing access to the lower mounting points of the front cover of the instrument panel console.
- Remove the plastic cover above the control buttons, under which there are 2 more screws.
- Remove the decorative frame.
- Remove the cover and modify the seat to a size sufficient to install the guide shaft.
- Install and secure the shaft in the console, and then insert the radio into it.
After installing the shaft, it is necessary to mount all the removed parts in the reverse order. The same scheme is used to replace the original radio on Priora 2 cars.
Removing and installing the standard radio on a Priora
Of course, one of the most recognizable models of domestic cars today is the Lada Priora. Its reliability and reasonable price attract the attention of many future and current car owners.
Most drivers prefer to create their own style inside the vehicle. Like any other car, Priora has some design features that are recommended to be studied before creating this very “own style”.
One of these features is related to the radio. Owners of this car model often ask the question “How to remove the standard radio on a Priora?” Dismantling the radio takes place in several stages:
Types of tuning of the Priora central console
Below are some of the most popular examples of console modifications by Prior owners.
Painting
Painting is carried out in several stages. To begin work on modifications, it is necessary to dismantle the console and remove all attached electrical equipment from it, such as a clock, climate control unit and media system.
Then the factory paintwork on the plastic is sanded, primed and painted.
Pros and cons of this method:
Pros:
Minuses:
- The impossibility of returning everything to its original appearance;
- Long and expensive work process;
Pasting with film
This type of modification is the most popular and widespread due to its speed and low cost. With such modification, as well as with painting, it is necessary to dismantle the center console and all attachments. After removal, the console is treated with a degreaser and a film is glued to the degreased surface and, using a hairdryer, stretched over all convex areas.
Pros and cons of this method:
pros:
- Cheapness;
- Rapidity;
- The ability to return to its original appearance;
Minuses:
- Not durable, the film quickly begins to sand and crack;
Installing a 2DIN radio
This modification involves sawing off excess parts of the console, which may interfere with the installation of a large two-din radio. Practically no modifications will be required if you install such a radio in the center console of a luxury Priora, since a larger multimedia system is installed there from the factory.
Preparation and necessary tools
It is more convenient to remove the generator on a Lada Priora on an overpass or inspection hole. Before you begin dismantling, prepare the following tools:
- locksmith's crank;
- extension;
- cardan from the tool kit;
- heads for 10, 12, 13, 17;
- spanners for 10, 12, 13, 17.
- WD-40 product.
When driving onto a pit or overpass, do not forget to install chocks under the wheels so that the car does not roll spontaneously. Then disconnect the negative terminal from the battery. Apply WD-40 to the mounting areas of the generator and air conditioning compressor. Wait 10-15 minutes for the product to take effect.
Instructions for removing the standard radio on a Priora in luxury configuration.
We insert the second plate into the slot under the “TA” button.
The plates need to be inserted at a slight angle until they hear a characteristic click.
We bring both plates towards the center of the radio, while simultaneously pulling the radio plates towards us.
If the plate suddenly falls off, don’t despair, we make the hook again and pull out the radio.
Insert the keys all the way.
Then we move them to the side and pull them towards us.
The radio can be easily removed.
Note: This method is suitable for removing standard radios of both the 1st and 2nd generation.
Tags: how to remove the standard radio on a Priora, plates for removing the radio on a Priora, removing the radio on a Priora
How to disassemble the outside mirror on a Lada Priora
Volgov signals on Priora
Be the first to comment
Leave a comment Cancel reply
You must be logged in to post a comment.
Removing the device according to the instructions
The algorithm for removing the radio if you have the keys is outrageously simple. It is worth considering in order to understand how to act if they are lost. The order is as follows:
- Remove the front panel of the player and the decorative plastic frame, prying it up with a flathead screwdriver if necessary.
- Insert the first key into the gap between the housing and the mounting frame, located at the end. You should feel slight resistance as the tool bends the latch.
- Repeat the same action with the second key.
- Grasp the radio with your hands by the protruding parts on the sides of the case and carefully remove it from the niche.
Decoding problems
The main pitfall of the described procedure lies in the security code embedded in the memory of most radio tape recorders. The bottom line is this: disconnecting the music center from the external power supply for 10-15 minutes will lead to the fact that the next time you turn on the car radio, it will require you to enter a security code (usually a four-digit one), without which it will not function.
Advice. Removing the device to replace it with a new one is not a problem, unless you plan to use the old player on another machine. In any case, try not to disconnect the battery for a long time.
The device requests a code after connecting to the on-board network
If the card with the code is lost or missing, the issue can be resolved in several ways:
- when it comes to a standard device, for a certain fee they will help you find the code at a dealership that sells cars of your brand;
- there are companies and individual specialists dealing with these problems;
- the free way is to search for code using various programs.
Serial number location
Regardless of the method chosen, you will have to remove the radio from the socket to find out the serial number. It is printed along with a barcode on a tag glued to the side or top of the case. After taking out the device, rewrite these numbers, and then try to calculate the PIN code using them using various online calculators on the Internet. If it was not possible to determine the required code using this method, then remove the music center and take it to specialists in this field and prepare to pay for their services.
Important point. If you do not know the PIN code of the radio, then when searching on your own, do not enter combinations of numbers more than 3 times! Otherwise, the device will be blocked, and in this state, decoding it will cost much more.
The issue of removing a car radio from its socket is not very difficult and will not require much time. But the consequences can be unexpected for an unprepared motorist. Hence the last piece of advice: find the lost pin code before turning off and removing the player in order to save your time and nerves.
In order to remove a standard car radio from a car, no special skills are required. All that is required is a set of special keys supplied with the device. But what if there are no keys? In this case, is it possible to remove the radio from the niche without breaking it? This is what we will discuss in today’s article.
Possible problems
When removing the standard radio, it may be difficult to select a tool and disengage the latches.
The size of the dismantling plates used must correspond to the size of the slots between the buttons.
Otherwise it will be impossible to insert them. It is better to choose steel hooks that will not deform from the applied efforts.
The result of the work performed will depend on the correct location of the removable keys. To release the latches, after clicking, bring the plates towards each other, otherwise it will be impossible to disengage the locks. Not everyone succeeds in this operation the first time. If unsuccessful, the attempt must be repeated. If, as a result of repeated attempts, it was not possible to dismantle the radio, then you need to replace the removable keys and repeat the work.
It must be remembered that you can completely remove the head unit only after disconnecting the antenna cable.
What kinds of mounts are there for radio tape recorders?
Different manufacturers use different types of fasteners:
- Using fixing elements on the side of the device;
- Using elastic latches;
- Using bolts or screws.
With clamps, a frame is used that is inserted into the “shaft”. The side walls of the car radio have special recesses, and there are tongues on the frame.
To dismantle the head unit you need keys. With them you can easily straighten the tabs or bend them. But this type of fastening has a drawback - the frame can become deformed.
The second type of fastening is more reliable - it involves the use of elastic latches. They can be seen on the side and top walls. These latches fit into special seats in the frame, the simplest and most reliable way to mount the radio.
In some car models, in order to ensure reliable fastening of the multimedia system and to eliminate the risk of failure due to vibrations, installation is carried out to the dashboard, or rather to the power elements. The dashboard is held on the pipe using metal corners. Such fasteners are used in premium cars Mazda and Toyota.
The option of installing a radio in this way is considered additional, but car audio installers often remove the corners, and installation is carried out without fixing elements. This option is not reliable.
Single- or double-din radios are mounted in the dashboard tunnel without any additional fixation. It is customary to mount the device on the center console.
The media system is latched with ordinary plastic latches. This is a screwless fitting - you can see this even on the Lacetti.
With this installation, the radio simply hangs and is not able to withstand even minor shock loads. There are holes on the sides of the device, but most motorists do not know what they are for.
It turns out that these holes are made for reliable installation of the device to the dashboard using corners.
This is a factory fastener that complements the standard fastener.
Types of radio mounts
To choose a method for removing a car player, you need to understand how it is fixed inside the panel. The following types of fastenings exist:
- on 2 side clamps;
- on 4 latches located on the side and top of the case;
- fastened with self-tapping screws or screws to the brackets.
Example of mounting a standard head unit
Note. The last method of fixation is typical for standard devices that are supplied to the car by the manufacturer.
Latch on mounting frame
The principle of fastening with latches (clamps) is that the body of the radio is enclosed in a metal mounting frame, and is not directly built into the panel niche. This intermediate part, which has special petals with protrusions or grooves (depending on the brand and model of the device), is securely fixed in the niche. The player body is equipped with mating latches that engage when the player is inserted into the socket.
The counterpart of the latch on the body
To unlock the latches and remove the car radio, keys of various shapes are used, supplied by the manufacturer complete with music for the car. They are lost over the years of car operation, since they are used extremely rarely. As a rule, the key is a shaped strip of metal or a handle inserted into 2 pairs of holes located on the front panel of the device.
This is what most car radio removal keys look like
The mountings of standard radios are most often made with bolts, screwed to brackets and hidden under the front plastic panel. Here you cannot do without a minimum set of tools to dismantle this panel and unscrew the mounting screws or bolts.
Handle key for unlocking 4 latches
Reference. All of the listed intricacies with hidden latches and special keys were invented by manufacturers with one goal: to make it as difficult as possible for thieves to steal the car radio when the car is broken into.
Location of key holes
How to properly remove a radio without special keys
Many motorists face the problem of removing the radio in their car. Some people cannot remove the standard device installed at the factory, others inherited the music along with the car, and others simply lost special keys. There are also plenty of reasons for dismantling - from repairing wiring to buying a new stereo system. Hence the demand for information arose on how and with what help you can carefully remove the car radio without damaging the plastic of the front panel. And although the operation is primitively simple and can be easily performed with improvised means, there are pitfalls in it that you need to be aware of.
How to remove the radio without keys?
If standard keys are lost, you need to make homemade ones, focusing on the shape of the slots. To see them, remove the device’s removable panel and plastic frame. Here is a list of available tools with the help of which owners of various cars manage to unlock the latches:
- thin steel strips 6-15 mm wide;
- stationery knives;
- plastic clamps for electrical wiring;
- nails and straight wire - for round holes;
- thin screwdrivers and other similar items that fit the shape of the cracks.
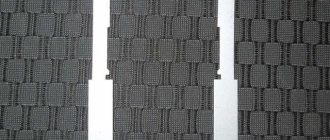
These steel strips can be used instead of keys
Reference. In many radios, the mounting slots are visible from the outside, so there is no need to remove the front panel and plastic frame.
The first step is to remove the front panel of the radio.
To remove the car radio, use the same algorithm:
- Insert first one and then a second strip of thin metal (or a utility knife, thin screwdriver) into the technological opening. Feel each latch unlock.
- If the turntable is supported by 4 clips, insert four instruments.
- Slowly remove the radio from the niche at the same time as the improvised keys.
The strips need to be inserted into the side slots
Advice. When using steel strips to open latches, be sure to wear cloth gloves to avoid cutting your hands on the sharp edges.
The music center is removed along with the strips
How to remove the standard radio on a Priora
Some modifications of the VAZ Priora use standard Ural or Supra radios. To replace with high-quality multimedia centers, you need to dismantle the old head unit. Removing the standard radio on a Priora is not difficult. However, there are nuances, without knowledge of which the dismantling process can cause some difficulties.
Keys for removing radio Ford Focus 2
The keys for removing the Ford Focus 2 radio are similar in size to those used for other Ford car models. The diameter of their hole is two centimeters, and the length is four and a half centimeters. As for other characteristics, the instrument is silver in color and made of metal. This is a durable and reliable material that has a high wear resistance, so it can last for a very long time.
It is worth paying attention to the purpose of the tool. It is intended only for dismantling the stereo. Helps get this job done quickly and easily. As practice shows, such keys are also suitable for other cars. For example, Mondeo 3, Transit and others.
Required Tools
In order to remove the radio, you must have special keys designed for this purpose. Users often use the Sony or Pioneer MMC editing tool. But if there are no such keys, then you can use improvised means. In most cases, a frame from windshield wiper blades is used. There are slots at the ends of the metal plates that engage with the latches of the car radio.
If there are no such devices, then you can remove the standard head unit from the Priora using nail files. The size of the tool must be such that it fits freely into the existing slots. In the case when the standard unit is replaced with a 2-din radio, you will have to remove the decorative panel. To do this you will need a screwdriver or socket wrench.
Important points
- When removing the device from the niche, under no circumstances should you apply great force, as you can damage the wires located behind the radio.
- If steel strips are used to remove the device, they must be used only with protective gloves, otherwise it will not be possible to avoid cuts.
- Steel strips are far from the only handy tool that can be used to remove a radio. Very often, car enthusiasts use old ATM cards or thin plastic rulers, from which “keys” are cut out using ordinary scissors. And sometimes even barbecue skewers are used to remove the radio.
So, you can remove the radio from the niche without keys. This can be done using available materials; fortunately, there is no shortage of them. If we are talking about modern radio tape recorders, then preference should be given to “keys” made of plastic, since the cases of these devices in most cases are also plastic, and metal tools can leave deep scratches on them.
Step-by-step instruction
Step-by-step instructions for dismantling the standard radio:
- Before removing the Priora's standard radio, it is recommended to disconnect the negative terminal of the battery from the body.
- Carefully insert a thin steel plate into the slots located under the Scan and TA buttons. The tools must be placed at a slight angle to the side, being careful not to damage the plastic of the radio panel.
- The plates must be inserted until a click appears, indicating that the latches are actuated.
- Then you need to pull the head unit out of the cavity in the Priora instrument panel. To do this, turn the plates slightly to the sides and use them as levers for dismantling. If the tool comes off, it should be reinserted into the groove until it makes contact with the latch.
- Pull the equipment out of the shaft, carefully disconnect the power plugs, antennas and connections to the speakers.
Many owners cannot remove the head unit from a Lada Priora car using the given method, since the tool bends, but the latches do not come off. Instead of plates, it is allowed to use nail files or special keys used to remove Pioneer or Sony radios.
When removing an acoustic device, you should remember that the signal cables have a small cross-section; sudden jerks lead to damage to the elements.
Alternative dismantling method:
- Before removing the radio from the Priora using nail files, you need to completely open the glove box lid.
- Insert the file into the cavity of the right latch until it makes contact with the latch. Then turn the instrument slightly to the right, disengaging the tongue from the audio device body.
- Gently push the rear of the radio through the glove box. Since it is necessary to simultaneously hold the clamps and push the equipment out of the installation shaft, it is recommended to hire an assistant.
- After the body of the audio device extends 2-3 mm, you should move the latch on the left side.
- Continue pushing the radio until it comes out 30-40 mm from the mounting socket. Further movement is limited by the antenna coaxial cable, which is secured with plastic clamps along the lower edge of the instrument panel near the glove box. It is necessary to cut off the clamp and disconnect the connector located in this place.
- After the audio device is completely removed from the mounting socket, you should carefully disconnect the existing plugs.
Dismantling a standard music center
Often, standard head units (aka radios) are removed using the method described above, since they are attached to 2 or 4 clips. For example, the factory player on a Lada Priora car is held on by two latches, and to unlock them, thin steel strips must be inserted between pairs of radio channel switching buttons “2” - “3” and “5” - “6”.
Advice. Before you start disassembling the factory radio, find out about the method of its fastening, so as not to poke the pieces of hardware at random if you do not find technological openings.
In Priora, stripes must be inserted between the buttons
To remove car radios that are fastened with screws, you need to prepare a simple set of tools:
- thin flat screwdriver or knife;
- Phillips screwdriver;
- set of small sockets (from 6 to 10 mm).
With this mounting option, the factory turntable must be unscrewed using the heads
On different brands of cars, standard players can be mounted in different ways, but the principle is approximately the same: the device is screwed to brackets that are covered from the outside with a plastic lining. As an example, we propose to consider removing the radio on a Korean Hyundai Solaris car, performed in the following order:
- Use a flat-head screwdriver or knife to pry up the lower corner of the plastic decorative panel framing the stereo. Pull the edge and grab it with your hand.
- Gently pull it towards you and release the first latch, and then move around and unlock the rest.
- Holding the panel with both hands, remove it and, if necessary, disconnect the connectors located at the bottom.
- Unscrew the 4 mounting screws with a Phillips screwdriver and pull out the radio.
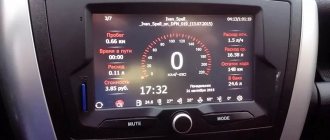
Connecting your phone via Bluetooth to the multimedia system
As you know, Russian engineers installed a modern multimedia system with a touch monitor in the new Kalina. It is worth noting that in addition to the functions of displaying video and playing music, it allows you to connect the driver’s cell phone via Bluetooth wireless technology. So, what actions do you need to take to connect your phone to Bluetooth on the new Kalina 2? 1) First, in your mobile phone’s Bluetooth settings, check the box above the “Visibility to everyone” option. After that, turn on wireless technology. Once the connection is activated, you can proceed to the next steps.