Replacing the gear shift rod oil seal for Lada Priora
We replace the gear selector rod oil seal when we detect an oil leak through it from the gearbox.
Remove the power unit mudguard (see “Removing the power unit mudguard”).
Having unscrewed the locking screw of the gear selector rod hinge with a wrench “10”, we move the joint assembly with the control rod off the rod and remove the protective cover of the gear selector rod hinge (see “Replacing the cover of the gear selector rod hinge”).
Using a powerful slotted screwdriver, evenly (from different sides) pry the oil seal race by the collar... ...and press the race with the oil seal out of the clutch housing socket.
With a suitable size mandrel...
...press the oil seal out of the cage. We clean the race and the seat under it in the clutch housing from the old sealant. We especially carefully inspect the surface of the hole in the gearbox. In case of large scuffing of this surface or a malfunction of the holder, the holder should be installed on a preparation of the “cold welding” type.
Having selected a mandrel (for example, a tool head) with a diameter close to the outer diameter of the oil seal...
...press the oil seal into the cage until it stops (the working edge of the oil seal must face the clutch housing). We apply a thin layer of sealant to the outer surface of the oil seal race, and transmission oil to the working edge of the oil seal.
We put the clip on the switch rod and insert it into the hole in the clutch housing. Leaning a mandrel of a suitable size on the collar of the oil seal...
...press the clip into the clutch housing socket. We carry out further assembly in reverse order.
Video on the topic “Lada Priora. Replacing the gear shift rod oil seal"
Lada Priora (LadaPriora) Changing the oil in the gearbox, replacing the rocker seal, replacing the rocker shaft, Replacing the oil seal and gearbox rod boot (glass) VAZ 2110, replacing the shift rod seal 2108 (all front-wheel drive VAZ)
Source
Repair or replacement
Before deciding whether repair, adjustment or replacement of the link is necessary, it will have to be disassembled.
- Remove the cover on the gear shift knob;
- The machine must be installed on a jack or on an overpass (pit);
- Remove the front console, which is bolted on;
- Remove the rocker by unscrewing 6 bolts.
During this procedure, carefully inspect all parts. You definitely need to bend the boot and inspect the condition of the support, cardan shaft, and oil seal.
It may be necessary to use a rem. kit, and perhaps a more complex repair is needed.
If the bushing is deformed, it needs replacement. If the cardan has play, as well as if the hole in the lever axis is worn, a complete replacement of the link and repair belt is necessary. the kit clearly won't help.
It happens that the rocker pad is to blame for the rattling noise when changing gears. Replacing a pillow is a simple operation, but can be beneficial.
Replacing the gear selector rod oil seal on a VAZ Priora
- To the beginning of the forum
- Forum Rules
- Old design
- FAQ
- Search
- Users
What is Auto tuning for you?
- Hanging plastics, casting, fashionable antennas, xenon, raised rear [ 2 ] 1%
- Engine boring, sports camshaft, 6-speed gearbox, direct-flow muffler [ 21 ] 19%
- Improvement within reasonable limits of all components and assemblies. Elimination of deficiencies and childhood diseases [ 83 ] 78%
Total votes: 106
It’s getting wet in the area of the gearbox rod seal. I’m going to change the oil in the gearbox, but already at +5 I felt it shifting hard, the oil was black. I'm afraid I'll fill it up and it will leak through the seal. The book doesn't say how to change the oil seal, do I need to disassemble the box or not? How heinous is all this? tell!
As a reminder: - Unscrew the rocker - Push forward the protective cover of the gear shift mechanism rod - Unscrew the bolt securing the hinge to the rod and remove the hinge - Remove the protective cover of the gear shift mechanism rod - Then carefully knock out the guide bushing with the oil seal from the box body - Take out the oil seal from there - Press it in new - Coat the bushing with sealant and press it back into the gearbox housing - Then the cover, hinge, rocker and adjust (by the position of the rocker) the position of the gear shift lever.
It seems like everything, damn tired, forgot to add oil. Good luck
Source
How to change the oil seal on the backstage of a Priora?
Many car owners have encountered this problem when the top of the gearbox and the gearshift rod are in oil. This occurs against the background of the fact that the rod seal has become unusable. It is clear that this is not an extreme measure, but still such an oil leak cannot be called the norm. Along with the oil seal, you will also have to change the rod, which is interconnected with the gear shift mechanism, as well as the axis of the rod, which has a spring lock. You can purchase a gasket in advance that is installed under the gear shift cover. Replacing the rod and oil seal of the mechanism can be done in parallel, along with repairing the gear shift drive
Leaking oil seals is not the most pleasant thing. This problem is the same for both the engine and the gearbox. In this article we will analyze a situation that is standard for front-wheel drive cars - leakage of the gear selector rod oil seal. First, you need to understand what a gear selector rod is, and only then understand how to replace the gear selector rod oil seal.
How does the backstage work?
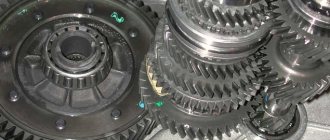
The principle of operation of any scene is the same: moving the manual transmission lever in two planes (forward - backward, left - right) through a system of levers and rigid or flexible rods leads to the movement of the corresponding forks inside the gearbox. In turn, the forks displace the clutches of one or another gear, due to which they engage with the secondary shaft, forming a full-fledged gearbox with a given transmission ratio.
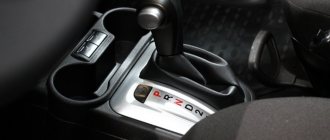
Backstage on the Priora
In first gear, the ratio of the rotation speed of the secondary and primary shafts is minimal, due to which 3-4 revolutions of the primary shaft account for 1 revolution of the secondary. In direct (fourth) gear, the rotation speeds of both shafts are approximately the same. But at the highest gearbox it turns from a reduction gearbox into a step-up gearbox, because for 2 revolutions of the primary shaft there are approximately 3 revolutions of the secondary shaft.
What is a gear selector rod and why is it needed?
Older cars had a classic layout, with the rear wheels driving and the gearbox located under the car's interior. The gearshift knob was brought into the cabin and made it possible to control the transmission directly. In front-wheel drive cars, there is an urgent need for a special mechanism that would allow control of the gearbox located under the hood, while sitting in the car's interior. This device is called the gear selector rod, or, as drivers are accustomed to calling it, the rocker.
This part is inserted into the gearbox and connected to the gear shift handle mechanism. Using special levers, the gearbox handle acts on the rod and changes its position, which leads to a gear change.
The rod is connected to the gearbox through an oil seal, since there is oil inside the box that is under constant pressure. To prevent pressure from squeezing the oil out, a system of seals is provided in all parts of the gearbox connecting to external mechanisms.
The oil seal is a round rubber product, inside of which there is a hole for the rod. The material used may vary. It all depends on the make and model of the car, although many manufacturers make oil seals of the same size but from different materials. They all differ in their properties, but they have the same function - to prevent oil leakage from the car transmission by increasing the tightness of the moving parts of the unit.
Backstage repair and adjustment
In this section we will describe the replacement of all consumables, as well as all the adjustments to the Priora gearbox that can be carried out on a particular transmission.
Backstage repair kit
To repair a Priora gearbox of any type, you will need:
- pit;
- overpass;
- lift;
- jack with safety stands.
In addition, you will need the following tools:
- a set of spanners and open-end wrenches;
- flat and Phillips screwdrivers;
- ratchet with extension and set of bits.
If you work from a jack, be sure to use safety stands. And after installing the car on them, shake it strongly in all directions. If it falls off the stands, it means you installed them incorrectly. But it’s better if the car falls while you’re not under it.
Installation of a short-stroke rocker on a Lada Priora
Installing a short-stroke rocker on the Lada Priora makes gear shifts clearer, and besides, the rocker stroke itself will be less, therefore making shifting more convenient.
How to install a short-throw rocker with your own hands:
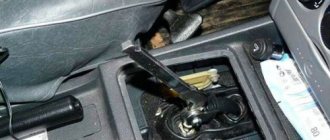
Remove the gearshift lever cover and knob. The knob on the lever is not attached in any way, it is pulled together, just apply some force.
We remove the gearshift lever rod from the cardan, having first loosened the clamp (you will need a key to “13”).
In order to release the lever, it is necessary to release the ball from the spring mechanism (necessary for engaging reverse gear with locking). To do this, remove the locking ring.
Under no circumstances should you pull up on the lever in an attempt to release it.
A little patience and the locking ring is removed.
Refinement, adjustment of the short-stroke gearshift link and replacement of the linkage bushing in the Lada Priora
I decided to start treating this painful problem - gearbox lever rattling.
At first I thought to disassemble and simply change the repair kit for the rocker, but that was not the case, there is no repair kit for my rocker anywhere (the car is 12 years old). I took a photo of the catalog number of the link bushings, maybe it will be useful to someone or someone will get confused and still find this repair kit somewhere.
And as far as I know, this type of slide like mine has been installed on Prioras since the middle of '11. Then it was decided to cut out round pieces from under the canister and place them on both sides of the iron washers, that is, to increase the thickness of this entire structure... It could have been done easier, just grind off the bushing that is there by 1.5-2.0 mm somewhere. But I didn’t really like this idea...
I cut out the round pieces, inserted them at the point of contact between the iron washer and the plastic bushing (mandrel) of the lever itself, and lubricated everything there with blue grease.
I assembled everything, and it took me three times longer to assemble the whole thing than it took to disassemble it and drove the car into the garage, into a pit, to change the torque linkage of the LADA Sport gearbox
.
Installing a short-stroke rocker on a Lada Priora - step-by-step instructions
5. We take out the lever together with the rod through the interior; for convenience, you can disconnect the lever from the rod, although you don’t have to do this.
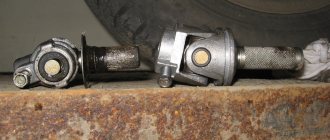
6. Remove the cardan. First of all, you need to pull off the rubber boot, then using a “10” wrench, unscrew the fastening bolt on the left side of the cardan.
7. As you can see in the photo, the cardan rods differ in length. The problem is solved by shortening the Kalinovsky rod; this must be done taking into account the type of short-stroke link. In some cases, the rod may not go in completely, as a result the gearbox lever will move towards the handbrake. If you also need to shorten, then know that you need to cut off about 1-2 cm.
8. So, we install the “Kalinovsky” cardan, having previously lubricated it with lithol from the inside. The bolt screws in easily because it has a cone shape, but do not overtighten.
How to check the support bearing on a Priora
Some causes of car malfunction:
- expiration of service life (mileage has exceeded 70 thousand km);
- excess axial loads on the racks (careless driving, accidents);
- moisture and dust getting under the hood.
To do this, do the following:
- Raise the hood.
- Locate and remove the protective cover of the upper support cup.
- Start rocking the car body from bottom to top, while keeping your palm on the cup.
- If you feel a knocking noise with your hand or hear grinding and rattling noises, you probably need to replace the bearing.
It is important to know:
The support housing itself is changed together with the bearing, and the support bearing is also changed separately. It depends on the degree of damage and wear.
Separate support bearing VBF for Priora, Kalina
Kit with upper front support housing
Algorithm for installing a short-stroke rocker on a Lada Priora
- To gain access to the bolts, the decorative cover must be removed from the knob box lever. The latter is not secured to the lever in any way; to remove it, it will be enough to pull strongly.
- We dismantle the gearbox lever rod from the cardan by loosening the clamp using a key set to “13”.
- To gain access to the lever, you must release the ball that blocks the engagement of reverse gear, which springs when engaged. Be careful! Do not pull the lever to get it released.
- The retaining ring is removed, then you need to remove the lever with the ball and spring inserted into the plastic case.
- Remove the lever with the rod through the interior. To make it more convenient, they can be separated.
- Remove the cardan. To do this, tighten the rubber boot with a “10” key. Then you need to unscrew the bolt that secures the cardan on the left side.
- It is noticeable in the photo that the cardan rods are different in length.
This problem can be solved by shortening the Kalinovsky rod, taking into account the type of short-stroke link. Sometimes the rod does not go in completely, so the gearbox lever moves towards the handbrake. If you need to shorten it, cut off 1-2 centimeters.
Signs of breakdown
In fact, it is not difficult to determine that the backstage is the culprit of all the troubles. After all, there are a number of characteristic signs that indicate this.
Source: https://td-ama.rf/rukovodstvo/zamena-opory-kulisy-priora.html
How is the rod seal replaced?
First of all, the malfunction must be diagnosed. To do this, check the oil level in the gearbox. If it has become noticeably lower, drive the car onto an inspection hole or overpass. Pay attention to the junction of the rocker and the gearbox; if traces of oil are found there, the oil seal must be replaced.
First you need to purchase all the components. These include: the oil seal itself (you choose the material of manufacture yourself; there is no significant difference between them, but the difference in price is noticeable) and the boot of a small cardan. In most cases, this boot is either torn or will be damaged during dismantling. That is why it is necessary to purchase additional spare parts in advance so as not to open the hood again.
How to change the rod seal - Video instructions
- Make a mark of the position of the rod and cardan so that after assembling the parts you do not have to adjust the gear shift. Then use a 13mm wrench to loosen the tie rod clamp.
- After this, pull the boot off the cardan. Unscrew the 10mm bolt used to secure the cardan to the gear selector rod. The cardan must be dismantled along with the boot.
- Now drain the oil from the gearbox. This is done so that after removing the oil seal, oil does not pour on you. Screw screws of sufficient length directly into the oil seal. After that, grab them and pull them towards you with all your strength. The seal should come out. As soon as it comes off, take a new oil seal and lubricate it with a special sealant.
- Let the sealant sit on the part for a while. After this, take a tube of the same diameter and use it to press the new oil seal into the gearbox. Oil can only be refilled after 24 hours, depending on the type of sealant chosen.
- Now change the boot on the cardan and install it. Reassemble the parts in the reverse order according to the marks made. After assembly, do not forget to fill the gearbox with oil.
This completes the replacement of the gear selector rod oil seal. The described instructions are suitable for all cars of the Samara and Samara 2 families. As you can see, this is not a complicated operation and is performed in a regular garage. Anyone, even an inexperienced driver, can handle it.
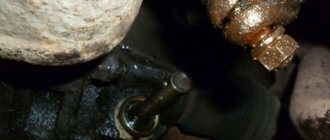
An oil leak from a VAZ-2110 car is a serious cause for concern. It is especially dangerous when oil begins to leak from the gearbox. As a rule, this problem is associated with wear of the rocker seal. If this problem is discovered, repair work must be carried out immediately.
Pulling out the internal grenade from the gearbox. Video
Therefore, it is better not to try to tear the grenade out of the box by pulling the brake disc, but to insert a prybar under the grenade and a tube under the prybar, try to squeeze the grenade out of the box if it was squeezed out perfectly. It happens that a grenade cannot be squeezed out, then it is knocked down with hammer blows.
Photo. Removed grenade from the gearbox.
But before squeezing out the grenade, place a container to collect the oil; it can be made from an old canister by cutting a hole. If the oil in the box is normal, then it will definitely flow out of the box.
Photo. It is shown how you can use a pry bar to squeeze the oil seal out of the gearbox.
The grenade has been removed, squeeze out the old oil seal from the gearbox.
Photo. Grenade seal location.
Remove the old oil seal, wait until the oil is gone, and wipe the oil seal installation area clean with a cloth. For greater confidence, the new oil seal can be coated with sealants, and with light blows of a hammer on the oil seal circle, it can be seated in place.
Photo. Clogging of the oil seal into the gearbox.
The seal was hammered in, all that remained was to insert the grenade into place. Aim the grenade at the box and push it into place. Then assemble in reverse order.
What’s good is that when replacing the grenade oil seal this way, the alignment and camber of the wheel will not be disrupted, so you won’t have to adjust it.
Photo. The arrow shows the oil filler plug bolt into the gearbox.
All that remains is to add oil to the gearbox. To do this, you need to unscrew the bolt plug, which is good, the bolt plug is also the oil level in the gearbox, oil is poured into the gearbox until it flows from the oil filler hole, as little as it starts to flow out means this is the oil level in the gearbox.
Photo. The arrow shows a watering can with a tube for pouring oil into the box.
There are many different methods and devices for pouring oil into a gearbox. I use a simple watering can and a tube, put the watering can on the tube, and insert the tip of the tube into the oil fill hole in the gearbox. But this method is not very fast, since the oil is thick, but if there is no rush, you can wait a little while the oil fills the box. Usually a liter of oil is enough to top up.
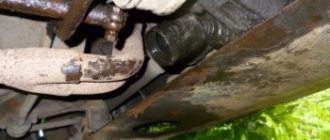
Replacement of wheel drive seals and gearbox rod seal of Lada Priora
The front wheel drive seals can be replaced without removing the gearbox.
We carry out the work on an inspection ditch or overpass.
Draining the oil from the gearbox
Remove the left and right front wheel drives (see “Removing the front wheel drives”).
Use an impact puller to press out the right drive oil seal.
Press out the left drive oil seal in the same way.
If there is no impact puller, you can press it out with a mounting spatula or a powerful screwdriver
The gearbox can be equipped with two types of oil seals: both with and without oil drainage notches.
Oil seals without notches are interchangeable for left and right drives.
Seals with notches differ:
at the left drive oil seal, the arrow on the housing points counterclockwise, at the right drive it points clockwise.
Using a mandrel of a suitable diameter, press in a new right wheel drive oil seal.
You can use the old oil seal as a mandrel when pressing. Similarly, press in the left wheel drive oil seal.
Apply a thin layer of transmission oil to the working edges of the oil seals.
Reinstall the drives of both wheels. Pour oil into the gearbox.
Replacing the gear shift rod hinge boot and rod seal
Move the protective cover off the gear shift rod hinge
Using a 10 mm spanner, unscrew the hinge locking screw.
We move the joint assembly with the control rod from the gear selector rod
Remove the protective cover of the hinge from the switch rod
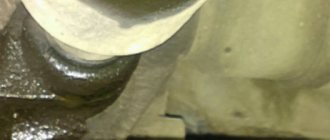
Using a powerful slotted screwdriver, pry the oil seal holder by the collar evenly from different sides.
Press the race with the oil seal out of the clutch housing socket
Using a mandrel of a suitable size, press the oil seal out of the holder (Fig.
We clean the race and the seat under it in the clutch housing from the old sealant.
Select a mandrel (for example, a tool head) with a diameter close to the outer diameter of the oil seal.
We press the oil seal into the cage until it stops (the working edge of the oil seal should face the clutch housing).
We apply transmission oil to the working edge of the oil seal, and sealant to the outer surface of the race.
We put the cage on the switch rod and press it into the clutch housing socket, resting it with a mandrel of a suitable size on the collar of the oil seal cage.
We carry out further assembly in reverse order. We replace the damaged hinge cover.
Before assembly, clean and degrease the threads of the hinge locking screw and apply sealant to the threads.
Before tightening the screw, we ensure that the holes in the hinge and the gear selector rod match.
The bolt securing the hinge to the rod differs in length and color. This bolt is cadmium plated (gold colored finish). Cannot be replaced with other bolts.
If the shank taper or thread is damaged, the bolt must be replaced with the same one. The bolt is fixed with TB-1324 glue.
If there is no such glue, then you can use another similar thread locker.
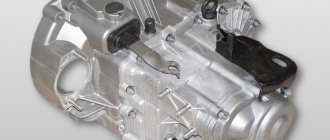
Replacement of gearbox drive oil seal VAZ-2108, 2109
The main task of the drive oil seal in VAZ-2108 and VAZ-2109 models is to ensure the tightness of the gearbox housing. More precisely, the part seals the gap between the gearbox housing and the drive shaft.
Today, several types of oil seals are used in the automotive industry - packings, collars or collars. But, regardless of the type, they are put on the shaft and installed in the place where the covers are grooved, and are also mounted in the recesses of the unit body. Replacing the drive oil seal on a VAZ-2109, 2108 involves installing new radial-type side seals into the gearbox housing (see video about replacing the drive oil seal on a VAZ, below).
Where to start: diagnostics, tools and purchase of an oil seal
Before starting work, determine the location of the leak, the presence of damage and the level of wear of the seals. The easiest way to diagnose the condition of parts is by the presence of oil leaks on the gearbox housing. If nothing is done, the stains take on the appearance of greasy dirt that never dries.
Before replacing the drive oil seal on VAZ-2108 and 2109 vehicles, perform a breather diagnostic. This is due to the fact that problems with ventilation in the gearbox are usually associated with high crankcase gas pressure. The latter, in turn, squeeze oil into the side cuffs.
To change the drive seals on the “eight” and “nine”, you will have to dismantle the drive and drain the oil from the gearbox. To do this, prepare the necessary tools - a pair of keys (for “thirty” and “seventeen”) with a long knob, a device for pressing the oil seal, a screwdriver, a container for draining oil (from 3 liters) and a mounting kit. In the absence of a pressing device, the use of a mandrel and a hammer is allowed.
Some craftsmen, to press in a new oil seal, use the body of an already removed cuff. But this is very inconvenient during installation. That is why it is better to choose a mandrel suitable for the diameter and do the pressing with its help. The simplest alternative is to use a pipe of a suitable diameter.
The next step is to purchase a new part to replace the drive oil seal.
And here it is important to know the specifics of the part in question. In the case of VAZ-2108 and 2109, the oil catch grooves inside the left and right oil seals are different
Many people do not know the benefits of such details. In fact, it's simple. The oil seal's job is to keep oil inside the device. The result is achieved due to two effects - reflection of the lubricant from the oil seal (due to notches) and tight contact of the inside of the part with the rotating shaft
This is why it is so important that the direction of the notches is identical to the direction of rotation of the shaft
To avoid problems with replacing the drive oil seal, on VAZ-2109 and VAZ-2108 vehicles, the manufacturer puts special markings in three options (shown by arrows in the photo):
- Drawing arrows on the inside of the part. If the oil seal should be installed on the right, the arrow points, on the contrary, to the left.
- Designations in the catalog number. The easiest way to recognize a cuff is by the number. If the last digit is even, then the part should be installed on the left, and if odd, then on the right.
- Made in different colors (typical for the Balakovo manufacturing plant). If the oil seal is intended for installation on the right, it is made in black, and if on the left, then in brown.
Two ways to replace the gearbox seal on a VAZ-2110
It is easier to change the oil seal with the gearbox removed.
Replacing an element that has become unusable can be done in two ways.
- The first of them is very labor-intensive , since it will be necessary to remove the gearbox. But replacing the oil seal will be much easier.
- The second method seems less time-consuming and labor-intensive , but in practice it is very difficult to carry out this procedure. Only experienced motorists who have repeatedly had to repair their cars can replace the oil seal directly on the car without removing the gearbox.
Troubleshooting
Experienced car owners know the visual reasons why they can determine the failure of the rocker seal. Naturally, for such reasons it is impossible to accurately determine the cause of the leak, but this gives a signal to carry out diagnostics, in which the cause of the oil leak can be accurately identified.
The most important sign is oil stains under the car, especially in the gearbox area.
An oily rubber boot indicates a malfunction of the rocker seal.
But these spots do not always indicate oil seal failure. It happens that this is due to the oil filter, which sometimes does not tighten properly. In any case, the driver is obliged to monitor for any oil leaks in the checkpoint area . To do this, you need to monitor the oil level. This is the only way to save the box from damage, which will certainly happen if it operates with a minimum amount of oil.