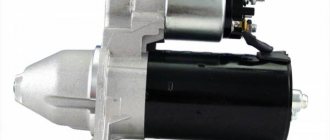
The Bendix or starter drive is a unit consisting of a clutch with a gear and a fork connected to a solenoid relay. The clutch is also called an “overrunning” clutch. Three types of starters were installed on Lada 114 hatchbacks: 29.3708, 423.3708. and also 5712.3708. The first two differ only in the shape of the fork, as well as in the design of parts not related to Bendix. And the starter 5712.3708 is a modern device equipped with a gearbox. The seating dimensions of all starters do not differ in any way. On any car, including the VAZ-2114, replacing the Bendix begins with dismantling the starter. We will look at this operation now.
The following video shows how a starter behaves with a faulty bendix.
We change Bendix on a VAZ-2114 with our own hands
The Bendix or starter drive is a unit consisting of a clutch with a gear and a fork connected to a solenoid relay. The clutch is also called an “overrunning” clutch. Three types of starters were installed on Lada 114 hatchbacks: 29.3708, 423.3708. and also 5712.3708. The first two differ only in the shape of the fork, as well as in the design of parts not related to Bendix. And the starter 5712.3708 is a modern device equipped with a gearbox. The seating dimensions of all starters do not differ in any way. On any car, including the VAZ-2114, replacing the Bendix begins with dismantling the starter. We will look at this operation now.
The following video shows how a starter behaves with a faulty bendix.
How to change bendix on the starter
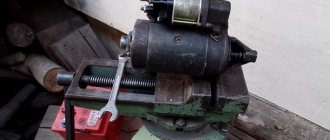
As a rule, in order to change the bendix, you need to remove the starter and disassemble it. Depending on the machine model, the procedure may have its own characteristics. We will describe the algorithm from the moment when the starter has already been removed and to replace the bendix it is necessary to disassemble its housing:
It is the starter that guarantees comfortable starting of the car engine through the ignition key. Being essentially an electric motor, the device requires careful handling. This is due to the fact that the design of the starter includes quite a lot of elements, and one of the main ones is the bendix (or overrunning clutch). Without it, starting the engine is impossible, even if the electric motor of the starting device is working properly. Restoring the overrunning clutch is not always advisable (but possible); the best option is to replace the bendix on the starter. Interestingly, this spare part is named after its inventor, Vincent Hugo Bendix: the American patented it in 1916.
Preparing to replace the bendix: removing the starter on a VAZ-2114
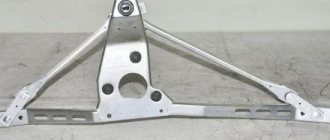
The starter can be accessed from above or from underneath. Let's consider the second option: roll the car into the pit and use the handbrake. Next, use a 10mm wrench to unscrew two screws from the bottom (photo 1) and two screws on the side members.
Finally, the screws on the cross member are unscrewed (photo 3) to remove the engine splash guard.
Disconnect the negative terminal from the battery - you will need a 10mm key.
On a VAZ-2114, you can replace the bendix in one way - remove the starter.
The location of the starter under the hood is marked with a red arrow.
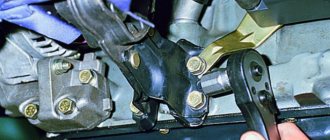
- Unscrew the nut securing the power wire to the starter (photo 1). Remove the terminal and also disconnect the block with the control wire (photo 2);
Installation is carried out in reverse order.
The appropriate key size is “13 mm”.
Performance evaluation
After completing the work, you should check how the engine starts. The starting engine should run smoothly, without knocking and grinding noises characteristic of a faulty overrunning clutch. This is a sign of a high-quality replacement of the Bendix on VAZ-2109-2115 cars.
In some cases, changing the bendix is not enough. Prolonged operation of a faulty clutch leads to wear and damage to the flywheel teeth. In this case, the symptoms of failure that existed before replacing the gear may become weaker, but do not disappear completely. In such cases, it is necessary to replace the flywheel.
Repair of starters 29.3708 and 423.3708
Use a screwdriver to unscrew the screws securing the solenoid relay. Then the relay is removed - its armature is disconnected from the plug.
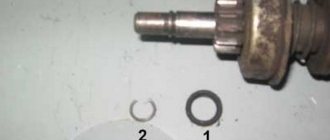
Taking a tube of suitable diameter, knock the upper retaining ring off the shaft. Then remove the lower retaining ring using special pliers. The top ring must also be removed.
The body is disassembled: the protective cover is unscrewed, the stopper and all washers are removed, then two nuts are unscrewed and the rear casing is removed.
Disconnect the rotor and stator
Next, being careful, dismantle both brushes and remove the brush holder. As a result, what remains is an “assembly” consisting of parts: rotor, front cover, bendix.
Now you need to remove the plastic fork stop from the cover. The rotor is then pulled back.
The Bendix assembly with the fork is easily removed from the cover. Installation of the unit is carried out in the reverse order.
How to disassemble the bendix itself
Remove the retaining ring - here you need pliers again. Then the disc and thrust washer can be easily removed. The result is shown in the photo.
Bendix parts separately
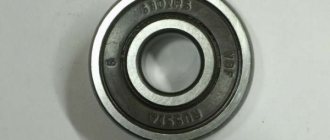
Finally, the coupling and fork are simply pulled off the bearing. There shouldn't be any problems.
When installing a new bearing or a new fork, you don’t need to skimp on lubricant. LITOL-24 is suitable here.
Update for starter 29.3708
Above we discussed how starter 423.3708 is disassembled. For the 29th model, everything looks more complicated:
- The relay is mounted on three screws, not two;
- The fork is fixed to the axle, and this axle is removed before knocking out the ring over the bendix;
- To remove the bendix, you need to separate the bearing and fork. To do this, bend the fork eye with a screwdriver.
Overrunning clutch repair
Is it possible to repair a Bendix starter with your own hands? Quite! One of the “folk” methods is as follows. Completely immerse the undisassembled starter in a suitable container of gasoline. Leave for 5-6 hours (can be left overnight). Without removing the device from the container, remove the overrunning clutch gear to better clean the grooves. Remove the starter and dry thoroughly. Sometimes this simple operation helps. But if this does not happen, the device will have to be disassembled. After removing the bendix, inspect the fork that pushes it: if the part is worn out, then you need to install another one. Check the clearance on the armature shaft: if there is play, it will not be possible to restore the mechanism - you will have to buy a new one. If there is no bumpiness, then we repair the Bendix.
The procedure begins by disassembling the housing to get to the springs and rollers. They need to be pulled out, cleaned, washed in gasoline and wiped dry. Usually these parts do not wear out and do not require replacement, but still look at the rollers more carefully: if they have lost their cylindrical shape, you will have to find normal ones (you need to replace them as a complete set).
However, most often the problem lies in tarry deposits on the inside of the clip that need to be removed. Also be sure to inspect the coupling body for cracks. If any, replace the part. You also need to inspect the gear teeth: if they are worn out, you will have to look for a new one or change the entire drive. Now assemble the bendix and check by holding it in a vice: a working device will rotate in one direction. Before installation, lubricate the restored mechanism with engine oil.
Quick repair of Bendix starter 5712.3708
If the starter has been removed, remove the solenoid relay from it by unscrewing the two screws on the housing. Then the four pins are unscrewed and the cover can be moved forward. Everything here looks simpler than in starters of “early” models.
The goal is to dismantle the drive with gearbox
Remove the plastic stop. Then we remove the drive assembly - here it consists of a bendix and a gearbox.
On starters of the “new” model installed on the VAZ-2114, the bendix must be replaced strictly according to the instructions: first remove the gearbox cover, then the three gears, and only then can you knock off the retaining ring.
Removing the gears from the gearbox...
The three axes of the gearbox must be located on a flat surface. Then, taking a hammer and a mandrel, carefully knock down the upper retaining ring.
Dismantling “extra” elements
Both the top and bottom rings will need to be removed from the shaft. Everything here differs little from the starters of the first models.
Finally, you need to remove the plug. The side fastening tab is bent with a screwdriver. This operation is difficult to perform - there is a risk of breaking the plastic.
Removing the plastic plug
There is only one operation left: the bendix without a fork is pulled up from the shaft. We wish you success.
Source
Some recommendations for repairing and installing Bendix
In any case, before installing the starter after installing the bendix, check the entire device. It is advisable to do this at a special stand in the workshop. If this is not possible, then connect the starter to a well-charged battery. There are other important points:
- when disassembling and reassembling, pay attention to the plastic washers: they must be intact;
- when buying a new Bendix, take the old one with you: the mechanisms may have small but important differences that are difficult to remember visually;
- If you are repairing an overrunning clutch for the first time, write down the disassembly process on paper so that you can later reassemble the device correctly.
In conclusion, it’s worth adding: if you want the Bendix to work for a long time, do not run the starter for more than 15 seconds (especially in winter) - give a break for at least a minute. And lastly: a properly repaired and assembled mechanism will last for several more years without problems.
Starter operating principle
Bendix VAZ 2114 is one of the main elements of the electric starter, which is an overrunning clutch with a gear, through which rotational motion is transmitted to the engine at the moment of starting.
The entire process of the starter operation looks like this:
- after turning on the ignition, power begins to flow from the battery to the starter and its solenoid relay;
- the relay moves the bendix forward and puts its gear in contact with the engine flywheel gear;
- at the moment of engagement, the starter’s electrical circuit is turned on, its electric motor begins to rotate and thus spins the crankshaft flywheel. This sets the engine pistons in motion, the working mixture begins to ignite, and the engine starts;
- after the engine starts running, the power to the starter and retractor relay is turned off, and the bendix, under the force of the return spring, returns to its original position, leaving the clutch with the flywheel.
Main symptoms of a malfunction
You can find out that the VAZ 2114 starter bendix has failed by the following series of indirect signs:
- the starter turns the flywheel, but its power is insufficient to start the engine;
- the starter works, but rotation is not transmitted to the crankshaft flywheel;
- The sound when the starter operates is different from normal, the engine starts with difficulty.
Reducer gears VAZ 2114
All these signs may indicate that the bendix itself or its gear is damaged and does not provide good adhesion to the flywheel gear, making it impossible to start the engine. In some cases (for example, with weak rotation transmission), both the bendix and the solenoid relay may be to blame. In order to establish the exact cause, as well as to eliminate it, you will need to dismantle the starter and completely disassemble it.
Starter repair
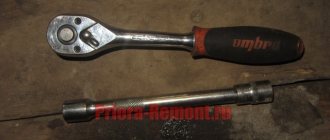
To remove the starter, you will need the following set of tools:
- slotted screwdriver;
- crosshead screwdriver;
- socket wrenches (or heads) for 13 and 10.
The replacement of the Bendix VAZ 2114 itself is carried out as follows:
- Disconnect the ground terminal from the battery.
- Using a 13mm wrench, unscrew the pair of mounting screws that secure the starter to the crankcase.
- Using the same key, unscrew the nut that secures the “positive” wire to the solenoid relay housing.
- Using a Phillips screwdriver, unscrew the pair of mounting screws located in the starter cover and holding it in place.
- Remove the starter cover.
- Using a 13mm wrench, unscrew the nut securing the contact of the solenoid relay coil.
- Using a flat-head screwdriver, remove the washer-bracket (this should be done carefully).
- Using a 10mm wrench, unscrew the pair of bolts holding the halves of the starter housing together, and then remove them.
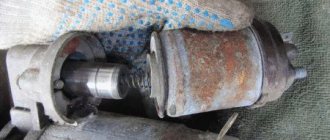
- Separate the starter housing into two halves (if you can’t do this by hand, you should stand it vertically and tap the lower part with an aluminum, rubber or wooden hammer).
- Using a flathead screwdriver, remove the bendix ears from the fork.
- Place the wrench on the shaft, then knock out the first locking ring with hammer blows.
- Remove the second retaining ring using a slotted screwdriver.
- Remove the bendix.
Dividing the starter housing in half during repairs must be done very carefully and without applying unnecessary force - otherwise it can easily be split, since it is made of a brittle alloy.
After the electric starter has been completely disassembled, you should inspect all its parts that are subject to active wear, namely:
- bushings;
- graphite motor brushes;
- Bendix gear.
If necessary (if they turn out to be very worn), they should be replaced with new ones. It is worth noting that when inspecting a Bendix, serious defects indicating its breakdown should be not only obvious chips of the teeth, but also their abrasion, loss of their original shape, which is one of the reasons for poor engagement with the flywheel gear.
In some cases, it will not be possible to visually determine the malfunction of the Bendix, since its breakdown can occur not only outside, but also inside. In this case, you should be guided by indirect signs indicating its breakdown and replace the part.
After all elements of the starter have been inspected and faulty ones have been replaced, it should be reassembled. It is performed in exactly the same order as disassembly, but in the reverse order (before reassembling, all dirt should be removed, oxides should be cleaned from the relay contacts, and moving parts should be lubricated).
How to check starter bendix
If the starter bendix does not turn, then you can check its operation in two ways - visually , by removing it from the car, and “by ear” . Let's start the description with the latter, as it is simpler.
As stated above, the main function of the bendix is to engage the flywheel and spin the engine. Therefore, if at the moment of starting the engine you hear that the starter motor is spinning, and characteristic metallic clanging sounds - this is the first sign of a Bendix malfunction .
So then it is necessary to dismantle the starter and disassemble the bendix in order to inspect it in detail and determine the damage. The removal and replacement procedure is described below.
And so, the bendix was removed, it is necessary to inspect it. In particular, check whether it rotates only in one direction (if it turns in both, it means it needs to be replaced) and whether the teeth are eaten. Also check to see if the spring is loose. You should also remove the fork from the Bendix, check its integrity, signs of wear, and if necessary, replace it. In addition, be sure to check if there is any play on the armature shaft. If this occurs, then the bendix should be replaced.
VAZ 2114 starter repair: do-it-yourself Bendix replacement
Further in the article we will talk about how to independently diagnose and repair the VAZ 2114 starter .
A faulty starter is characterized by the following indicators:
- A sharp drop in power due to insufficient starter rotation. You will probably have to repair the starter and replace the relay.
- Voltage surges occur.
- Idle rotation of the starter (without engine rotation). The retractor starter will need to be repaired.
- Starter disconnection is delayed.
- The starter does not operate when the ignition key is turned. This symptom is the result of damage to the bendix; to restore operation, it will need to be replaced.
- The starter turns, but the engine does not start.
Causes of Bendix failure
There are several of them, but the main one is to turn the clutch gear both to the left and to the right. This may be a consequence:
- Reducing the size of the rollers in the Bendix housing due to a long service life. It is necessary to purchase new rollers of exactly the same dimensions. Some car enthusiasts are trying to adapt drill bits: but this does not solve the problem - it is better to still make a purchase.
- A flat surface appears on one of the rollers. Here the situation is the same as in the case described above.
- Wear of the surfaces of the drive and (or) driven race in areas of contact with the rollers. Here restoration is impossible: the workings cannot be removed. Therefore, you will have to purchase a new overrunning clutch.
It is worth noting that restoration of a Bendix is often impractical. The thing is that all its components wear out almost simultaneously. If for some reason there is a problem with one part, then others will follow suit. That is, repairing the device will become your permanent occupation.
Algorithm for repairing a VAZ 2114 starter
- Disconnect the negative terminal from the battery.
- Using a “13” key, remove the 2 upper mounting screws connecting it to the clutch housing. Usually there is no third bolt, but if there is one, you will need an inspection hole to remove it.
- Moving the starter forward, remove wiring No. 1 from the connector on the starting relay.
- Using a “13” wrench, remove the fastening nut of the wire, which is the connector of the starter traction relay output to the “+” terminal of the battery.
- Assess the condition of the flywheel teeth.
- Use a Phillips screwdriver to remove the 2 starter cover mounting screws.
- Unscrew the nut that secures the output of the starter winding to the solenoid relay. Use the key to “13”.
What is Bendix, and in what cases is it required to be replaced?
Bendix is a clutch used to engage the starting electric motor and flywheel when starting the engine. Externally, the element is an oblique gear and is located on the starter shaft. At the moment it is triggered, it moves forward with the help of a solenoid and connects to the flywheel.
When the power supply stops, the gear returns to its place, disconnecting from the flywheel. The amplitude of movement of the clutch is about 10 cm. The bendix is protected from excessive displacement by locking rings.
Signs of a malfunctioning clutch are clearly visible, so the question of how to check the starter bendix usually does not arise. The “symptoms” of a malfunction include:
- a grinding noise in the flywheel area when trying to start the engine;
- the starter rotates idle, without transmitting torque to the flywheel;
- a characteristic knocking sound at the moment the solenoid relay is activated, after which the shaft does not rotate.
» alt=»»> A faulty gear is usually not repaired, but replaced. Repairing the element is possible, but such actions are not justified in terms of financial and time costs. Therefore, if the coupling breaks, it must be replaced. If you still want to repair it, a detailed video will be at the end of the article.
Note: if the part extends, but does not engage with the flywheel, proceed as follows: put the car in 2nd gear and manually shift it a couple of centimeters. The position of the flywheel and helical gear changes, after which starting the engine becomes possible. Before attempting to start, the car is removed from gear.
This method is not a repair method, but it allows you to start the engine and get to your home or auto repair shop.
Also check out
- Using a 10mm wrench, unscrew and remove 2 long coupling bolts.
- To separate the starter housing, strike the lower part of the housing several times. To do this, you can use a rubber or wooden hammer. Assess the condition of the brushes.
Worth checking out:
Take a new bendix (overrunning clutch) and install it in place. Clean and lubricate parts as necessary. Perform assembly. After this, the repair of the VAZ 2114 starter can be considered complete. All that remains is to put the starter in place, connect the battery, and start the engine.
How to check the overrunning clutch
If you are not in a hurry to change the Bendix, then it is worth testing it. To do this, clamp the body of the overrunning clutch, already removed from the starter, through a soft gasket (for example, a rag) in a vice to prevent damage. Try scrolling the bendix left and right. It should only rotate in one direction, because when you try to rotate it, the working part will lock. If the overrunning clutch turns, this means that it will not engage with the teeth and the starter will “thresh” idle. You can determine the serviceability of the gear visually: you will see the “eaten” teeth immediately. But if the starter is stuck, then you can understand this only by disassembling it. In this case, all the “internals”, including the gearbox, must be cleaned of dirt, dried grease and washed with clean gasoline. Next you will have to decide whether the bendix can be repaired or whether you will need to purchase a new one.