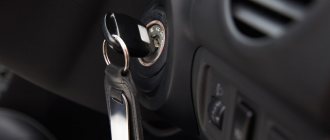
Any driver, getting into his car, turns the ignition key to start the power plant. This simple action leads to the fact that electricity from the battery begins to be supplied to the starter and it begins to rotate the crankshaft until the power unit starts.
Such a seemingly insignificant detail as the ignition switch provides one of the most important actions for the successful start of the engine - it supplies the vehicle’s on-board network with electricity. Indeed, in addition to the starter, the ignition switch provides power to the ignition system, instrumentation, light and sound signaling devices, etc. And after stopping, it completely de-energizes them.
If we look at it in a simple way, the ignition switch is an element that does not allow the battery to discharge due to the constant supply of electricity to the on-board network, but ensures its availability only when the car is in use. Thus, the battery retains its charge for a long time.
Next, we will consider the diagram of the VAZ-2101 ignition switch, its main faults, methods for eliminating them, dismantling and installing a new lock on this car. This car was chosen because subsequent models belonging to the classic VAZ models, up to 2107, used identical ignition switches.
Pinout of the ignition switch VAZ-2101 VAZ-2107
The ignition switch on these cars is located to the left of the steering column. It is fixed directly to it using two fixing bolts. The entire mechanism of the device, except for the upper part in which the keyhole is located, is hidden by a plastic casing.
On the visible part of the ignition switch housing, special marks are applied in a certain order, allowing inexperienced drivers to navigate the lock activation mode when the key is in the hole:
- “ ” – a mark indicating that all systems, devices and instruments that are turned on using the lock are turned off (this does not include the cigarette lighter, interior lighting, brake light, and in some cases the radio);
- “I” is a mark informing that the vehicle’s on-board network is powered from the battery. In this position, the key is fixed independently, and electricity is supplied to the ignition system, to the electric motors of the heater and windshield washer, instrumentation, headlights and light signaling;
- “II” – engine start mark. It indicates that voltage is applied to the starter. The key does not lock in this position. If you release it, it will return to the "I" position. This is done so as not to subject the starter to unnecessary loads;
- “III” – parking mark. If you remove the key from the ignition in this position, the steering column will be locked with a latch. It can only be unlocked by inserting the key back and turning it to position “0” or “I”.
The ignition switch has five contacts and, accordingly, five terminals, which are responsible for supplying voltage to the desired unit. All of them are numbered for convenience. Each pin corresponds to a wire of a certain color:
- “50” – output responsible for supplying current to the starter (red or purple wire);
- “15” – terminal through which voltage is supplied to the ignition system, to the electric motors of the heater, washer, and instrument panel (double blue wire with a black stripe);
- “30” and “30/1” – constant “plus” (pink and brown wires, respectively);
- “INT” – external lighting and light signaling (double black wire).
Precautionary measures
Nuances that must be taken into account when replacing the lock and adjusting the ignition timing:
- All repair operations are performed with the battery disconnected. Otherwise, you may cause the contacts to short-circuit, which will lead to equipment failure.
- If the engine is warming up in the garage, be sure to open the door. In an enclosed space, high-quality ventilation must be implemented.
- Do not touch the crankshaft while the engine is running, especially if work is carried out while wearing a shirt. The sleeves of clothing must be rolled up to prevent it from being caught by the pulley.
- When disconnecting the wires from the distributor, the contact elements cannot be connected to each other; the same applies to the battery. This will lead to serious problems in the on-board network, as well as breakdown of electrical devices.
Replacing the ignition switch contact group on VAZ 2110 and 2112. When you need to start the first time
- Remove the cover from the steering column. To do this, you will need a Phillips screwdriver;
- Disconnect the connector with wires from the ignition switch;
- The next step is to remove the lock itself. Some difficulty arises here; for safety reasons, the manufacturer made the heads of the bolts securing the lock break off. Therefore, you can’t just unscrew them. To do this, take a thin chisel and, pushing it towards the unscrewing side, tear the bolts out of place. Then you can unscrew them using simple pliers;
- Remove the mounting bracket and the lock itself from the steering column.
- Now you can repair this part. Replacing the contact is done as follows:
- Unlock the clamps using a screwdriver;
- Extract the contact group.
AutoFlit.ru
piston markings
The bottoms of different models used on VAZ engines are shown in the figure. The pistons of the VAZ 21213 and VAZ 21230 are distinguished by their markings.
The marking is applied to the surface next to the piston pin hole.
The numbers “213” are printed on the piston of the VAZ 21213, and “23” on the VAZ 2123 model.
Models VAZ 21080, VAZ 21083, VAZ 21100 have the corresponding markings - “08”, “083”, “10”.
The piston 2108 has a diameter of 76mm, models 21083 and 2110 - 82mm.
The pistons of the VAZ 2112 and VAZ 21124 are marked accordingly - “12” and “24” and differ in the depth of recess for the valve.
Models 21126 and 11194 differ in diameter.
Changing the contact group
Exploded view of the lock
Based on price considerations, replacing one contact group is less expensive:
- All our actions are repeated in principle, as in the case described above with removing the lock, you will have to remove the casing, and so on
- To avoid the widespread problem associated with mixing up contacts, it is recommended to number them before disconnecting (or mark them in some other way)
- This measure will save your nerves and time.
- Some models of locks have a locking ring in their contact group, and here we need an awl to pull it out
- It’s important not to forget to stick it in place later
- Then everything is put back together and screwed to the control column
(K) Replacing main bearings without removing the crankshaft | Topic author: Lavana
When heating up, the oil pressure was low, I changed everything and came to the conclusion that the liners were covered... is it possible to change them (I'm interested in the main ones) without removing the shaft elbows? how to knock it out and how to put it in? (I went through the whole engine but it was removed....I know everything...
Mikhail (Carese) I only ask stupid questions like *are you sure these are liners* or *is this an oil pump* etc. don't ask
Dmitry (Astra) No way. In any case, the crankshaft needs to be pulled out. And it’s better to change all the liners at once. If necessary, bore the crankshaft.
Elnur (Ceinfryn) Just like that))) You disconnect the right support, remove the receiver. Raise the engine (who knows, I use a lift) remove the pan (as you understand, the oil has been drained) Unscrew the support, knock out the liner that is in the block with a screwdriver, don’t worry about the grooves forget, there is only the 3rd one without it (well, you know in short). Troubles can also arise with the pipes when hanging - they start to drip/leak, the engine rose, but the radiator remained. I didn’t have this, some people had dripping - see for yourself .
Dmitry (Astra) You can replace the knee without removing it! my friend and I changed it, only on a chisel... there you just remove one at a time and just to rip the liner out of place, you move it around the crankshaft (we did it with a wire....) and the half rings also just pull out... by the way, take the half rings separately from the set of liners, so that they are bronze and not aluminum ! as they are in the set...
Mikhail (Carese) Elnur That_The Same Gashimoff Well, I’m putting a jack under the box….thank you, I’ll try…
Mikhail (Carese) Dmitry Samokhvalov ok thank you))
Yury (Malony) It’s possible, but wouldn’t it be easier to remove the engine?
Mikhail (Carese) Well, what can I say, the master is the boss.
It means this: 1) remove the front cover. 2) the tray. 3) remove the chain. 4) change the connecting rods (stock up with a head and a universal joint) 5) unscrew all the main caps (under 5 thrust half rings), it’s better to change them. 6) use a thin and flexible plate to knock out the liner. 7) putting everything in place.
Alexey (Giannella) I think this is not reasonable
Sasha (Hajime) Everything changes very easily. It is necessary to loosen the fastening of all main journals, or better yet, remove them. Everything is clear with the lower one, but you need to make a special attachment for the upper liner. It is done very simply by cutting out a strip of soft sheet metal to fit the width of the liner. The length of the strip should be longer than the liner. You place this strip of tin on the top liner on the side opposite to the lock and knock out the liner. Because the sheet metal is soft, it will make the shape of the liner itself. You also install it by lightly hammering the liner. Don't forget to lubricate the new bearings with oil during installation.
Mikhail (Carese) Thanks, I changed it a long time ago, I just forgot to unsubscribe
Vladislav (Elsbet) on our ships, on large engines, so as not to pull the crankcase. there is a special device)
Andrey (Cary) the question is the following, maybe not entirely on topic, but still. The crankshaft had become unusable, in stock there was a triple engine with a seemingly similar crankshaft in diameter, after installation with the same liners with which it was installed on the other engine, it turns out that it is clamped; no manipulations with it help, maybe there are some nuances about which I don't know?
Vitalik (Gidgiddoni) Andrey, for the purpose of mating the crankshaft with the block, you need to turn the cap after each tightening, and also the connecting rods, if by chance the lock of the liner is slightly warped, you will have to look for it.
Denis (Ienipa) Just explain, the inserts can be installed without any difference
Denis (Ienipa) Except for the third
Evgeny (Innochka) Andrey, most likely the connecting rod moved and thereby clamped the shaft.
Ivan (Palaka) Mikhail, has your blood pressure become normal?
Replacing the ignition switch on a VAZ car
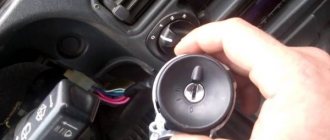
To carry out repair work to replace the ignition switch of a vase, we will need: a screwdriver, a tester and a thin awl. Once you have everything you need, you can begin the repair. On all classic VAZ cars, the ignition switch is located at the bottom, on the left of the steering column. To replace you need:
- Disconnect battery
- Remove the plastic casing by first unscrewing the screws that secure it.
- Then unscrew the two screws securing the ignition switch to the bracket.
- We insert the key and set it to position 0 to disable the anti-theft device.
- Insert the awl into the hole in the bracket and press the latch. Then we take out the lock itself.
- After removal, it is recommended to mark the contact wires so that nothing is mixed up the next time you connect.
Removing the ignition switch on a VAZ-2106 begins with disassembling the steering column casing. We unscrew the five bolts and remove its halves. Before you begin disassembling the electrical part of the lock, it is very useful to disconnect the battery by removing the negative terminal or unscrewing the switch bolt. After this, remove the spring retaining ring from the back of the lock body and remove the contact group. We move it to the side so that it does not interfere, and we begin to remove the lock itself.
It is secured in the steering shaft bracket with two bolts, after unscrewing which nothing happens. It is useless to try to remove the lock from its socket if you do not know about the special stopper. It is located on the lock body under the bracket. We press this stopper into the lock with a thin screwdriver through a small hole in the bracket. Further, according to all the instructions, the lock should be pulled out freely, but this does not work.
Precautionary measures
Nuances that must be taken into account when replacing the lock and adjusting the ignition timing:
- All repair operations are performed with the battery disconnected. Otherwise, you may cause the contacts to short-circuit, which will lead to equipment failure.
- If the engine is warming up in the garage, be sure to open the door. In an enclosed space, high-quality ventilation must be implemented.
- Do not touch the crankshaft while the engine is running, especially if work is carried out while wearing a shirt. The sleeves of clothing must be rolled up to prevent it from being caught by the pulley.
- When disconnecting the wires from the distributor, the contact elements cannot be connected to each other; the same applies to the battery. This will lead to serious problems in the on-board network, as well as breakdown of electrical devices.
Replacing the lock cylinder itself or the contact group
Read
Replacing the VAZ 2109 lock cylinders requires the following tools:
In case of any breakdown, it is not necessary to completely replace the lock; if the cause of the malfunction lies in replaceable parts, then a partial repair of the lock is carried out and replacing the lock cylinders on the VAZ 2109 makes sense when the key stops spinning freely in the keyhole. Another option for partial repair is to replace the contact group; this requires a minimum of tools and little understanding of the device.
Our summary will help you understand the device:
- Nothing and no one forbids you to change the entire lock every time, and even go to a service station if you are satisfied with the price
- After removing the casing, access to the switch lock is revealed.
- In principle, the lock cylinder can already be removed at this step
- Therefore, we pull out the side pin that holds it in the lock
- This is easy to do with a narrow screwdriver (clockwise) while tapping it with a small hammer
- If the pin cannot be pulled out this way, then try to carefully drill out the cylinder using a narrow drill
- If it is more convenient for you to pull it out first, pull out the ignition switch, before you start replacing the cylinder, to do this you need to unscrew the bolts securing the ignition switch to the control column
- This must be done using a hammer and chisel because these bolts have sheared heads.
- You need to loosen them a little with a chisel, and then unscrew them with pliers, as in the photo below
We purchase the necessary materials
To ensure that the doors of your car no longer close with a roar and grinding noise, we will install silent locks on it. To do this, we purchase the necessary kit in the amount of two pieces. Each box has two locks.
Well, the second set that we need is a central locking kit. The universal kit traditionally includes four motors, a control unit, all the necessary wires and several strips.
After purchasing the main components of the upcoming work, we prepare the necessary tools:
- Drill and various drills;
- Hammer;
- Screwdrivers, Phillips and hexagonal, screwdriver;
- Additional wires;
- Protective tubes for wiring;
- Well, and some other little things: a knife, glue, alcohol, etc.
We install silent locks
The first stage of the work is the installation of new and dismantling of old locks. To ensure that you do not have to remove the door trim, this process must be performed carefully and carefully.
To begin, unscrew the bolts one at a time so as not to drop the internal lock. In the same way, screw on the new silent ones in reverse order.
The second point is to replace the old bolt that holds your lock with a new one.
We apply this scheme to all remaining doors. Having completed the installation, we perform a check. If any problems arise, for example, the door does not close well, then try to push the lock deeper. Although, by choosing the option of silent locks without a “flag”, such situations should not arise.
Pinout of lock VAZ-2108, VAZ-2109, VAZ-21099
Pinout according to the old type
Pinout of the VAZ-2109 ignition switch with unloading relay:
- comes +12V in position I, II, III (parking)
- comes +12V in position I, II, III (parking)
- comes +12V in position III (parking)
- position I, +12V goes out after turning on the ignition (contact 15/2), disappears at start (II);
- position I, +12V goes to the starter (pin 50);
- position I, +12V goes away after turning on the ignition (pin 15), does not disappear when starting II;
- +12V comes from the battery (pin 30);
- comes +12V constantly.
New pinout type
Pinout of the new VAZ-2109 ignition switch:
- comes +12V constantly
- comes +12V constantly
- +12V arrives after turning on the ignition (pin 15), does not disappear when starting II;
- +12V arrives after turning on the ignition (contact 15/2), disappears at start (II);
- position I, +12V goes to the starter (pin 50);
- +12V arrives after turning on the ignition (pin 15), does not disappear when starting II;
- +12V comes from the battery (pin 30);
- comes +12V constantly.
Exactly three switched contacts
One line through which current is supplied, and only one ignition circuit - this solution is typical for all VAZ cars, if we talk about the “2110”, “2170” and later families. Even in Grants, produced since 2012, the additional ignition circuit did not appear. In general, with the transition to the “Ten” family, three “significant” terminals of the lock remained:
- Contact "30";
- Terminal “15” (can be designated as “15/1”);
- Terminal "50".
The ignition switch circuit looks trivial, even if we talk about the Lada 2110.
The Tens connector has 8 terminals. And in Priora, as well as in Grant and Kalina, this number is reduced to three (Fig. 2).
Of the 8 terminals available in the VAZ-2110 connector, the 7th and 8th simply duplicate each other. Two more are connected to the button, and another pair of terminals are connected to the lamp.
The lock connector of all VAZ models, starting from “2170”, is equipped with only three contact terminals. And the additional connector, which is equipped with a pair of terminals, is connected to the immobilizer in these cars.
The “3” mark has disappeared from the “Tens” lock cylinder. And until now, VAZ produces just such locks, where the key can be installed in one of the following positions:
- "Turned off";
- "Ignition";
- "Start".
The presence of the “Parking” mode, as you can see, is not provided here.
The structure of a car ignition switch
- Locking rod
- Frame
- Roller
- Contact disc
- Contact sleeve
- Block
- Protrusion of the contact part.
The lock mechanism is connected to many wires. They continue from the battery, connecting all the electrical devices of the car into a single chain. When you turn the ignition key, the electrical circuit is closed from the “-” terminal of the battery to the ignition coil. As a result, the current passes through the wires to the ignition switch, through its contacts it is directed to the induction coil, after which it returns back to the “+” terminal. As electricity passes through the coil, it generates high voltage, which it transmits to the spark plug. Therefore, the key closes the contacts of the ignition circuit, thereby starting the car engine.
Pseudo-patriotism
Now I don’t remember exactly, but somewhere around 2015-16, our president said: import substitution. And hysteria and obscurantism began. Well, at least in the technical industries. Let me explain on bearings. There were about 40 bearing factories in the USSR. Now, by the standards of the full production cycle, there are 5-7 left. And several more industries that assemble bearings from Chinese components, like a Lego set. What am I talking about? Moreover, a countless number of products appeared in stores, manufactured in unknown ways, but with the inscription “made in Russia” on the boxes. The quality of truly Russian bearings can vary from high-class to “let it work” until a high-quality spare part arrives. Moreover, this also applies to the well-known VBF plant (Vologda), whose products complete the AvtoTAZ conveyor. When I got tired of this “worse than bitter radish”, I turned to imports of both high and medium quality.
What are axle shafts, why are they needed and how are they designed?
Axle shaft design
The axle shaft is an all-metal shaft made of steel. At one end there is a flange for attaching the wheel disk, and at the other there are splines for engagement with the gearbox gear. If we consider the axle shaft assembly, then in addition to the shaft, its design also includes:
- oil deflector;
- sealing gasket;
- oil seal (cuff);
- bearing. In addition to the shaft, the design of the axle shaft also includes an oil deflector, a gasket, an oil seal and a bearing.
Each of the axle shafts is installed in the corresponding (left or right) rear axle housing. An oil deflector with a gasket and an oil seal are used to prevent lubricant from leaking out of the casing. The bearing is designed to ensure uniform rotation of the axle shaft and distribute shock loads coming from the wheel to the rear axle of the vehicle.
1 — oil deflector; 2 - gasket; 3 - seal; 4 - oil seal; 5 - axle shaft; 6 - casing; 7 — bearing mounting plate; 8 — brake shield; 9 — bearing; 10 — fixing sleeve
Removing the locking ring
Removing and installing the axle bearing lock ring must only be done using a hydraulic press.
1. Use the half rings of tool A.74108/R to surround the bearing and install the half shaft vertically so that the half rings rest on the thrust ring.
2. Place axle shaft 2 under the press and apply gradually increasing force to the splined end of the axle shaft until the bearing lock ring is removed (1 - tool A.74108/R).
Do not reuse the axle bearing lock ring, but replace it with a new one.
3. Check whether the seating surface of the axle shaft has any marks or damage; if necessary, replace the axle shaft with a new one.
Decarbonization of piston rings
If the engine starts to smoke, there is a possibility that there are rings stuck in the piston grooves. Nowadays, there are many different modern means for decarbonizing piston rings, and many drivers use them to restore engine performance. Among the most popular compositions are:
- Nitrox Power;
- LAVR ML-202;
- Titanium;
- LIQUI MOLY;
- WYNN'S.
Motorists believe that if the engine starts smoking, you need to use a decarbonizer, and the engine will work as before, without oil consumption and without smoke. Indeed, sometimes these remedies help, but only in cases where the motor has stood motionless for a long time (for example, after winter), and moisture has accumulated in it. If the car is subject to long-term preservation (put in a garage for winter storage), you should remove the spark plugs and pour oil into the cylinders, and plug the spark plug holes with plugs. With such prevention, the spark plugs will not become damp and rust will not accumulate on the sleeves.
But if, after all, a forgetful car owner has not taken preventive measures, you can use a decarbonizer. We get rid of rust in cylinders as follows:
- pull off high-voltage wires;
- unscrew all spark plugs;
- rotate the crankshaft so that all pistons are in the middle position;
- pour 45 ml of liquid into each cylinder, install spark plugs;
- leave the cylinders to “soak” for 6-7 hours;
- why do we turn out the spark plugs, turn the starter a few revolutions so that all the dirt flies out of the engine;
- We put the removed parts back in place and start the engine. At first it may smoke a lot, but then the smoke will go away.
Car owners should remember that decarbonization is not a panacea for all ills, and if the piston rings are worn out, then only replacing them will help.
As a rule, in Zhiguli cars with an age of more than 150,000, the wear on the piston group is already quite significant, and if you are also the owner of, to put it mildly, a little used “penny” that is being repaired by someone unknown and when, then in 90% of cases you will have to replace the piston with a VAZ 2101.