Removing, disconnecting, connecting or replacing the battery - these tasks are performed by each car owner at a certain stage of vehicle operation, and are considered easy to carry out, which allows any person to cope with the task independently, even without specific knowledge and skills in working with equipment.
Despite the ease of implementation, incorrect manipulations can result in a number of problems related to the car and personal safety, which provokes the need to figure out how to properly disconnect, remove and install back the car battery so as not to harm the battery, the vehicle and yourself, which is what I’m talking about will be discussed later in the article.
Possible consequences of incorrectly disconnecting the battery
The reasons for the need to disconnect the battery can be different: from the banal need to replace an “outdated” battery with a new power source, to the need to turn off the power to the car while carrying out complex repair work. Often, questions related to battery removal are asked online, since the procedure is considered by many to be harmless and so elementary in execution that it is even “shameful” to say it out loud. In practice, a careless attitude towards the battery replacement process can result in very serious problems of various etiologies.
The task of removing the battery is indeed an easy one, and its execution requires only basic skills in working with a wrench and knowledge of the procedure, however, incorrect actions by the performer can cause unpleasant precedents, and even serious problems, with consequences such as:
- Battery failure or mechanical damage.
- Self-injury when performing careless actions, including when working without protective gloves and goggles, especially when spilling liquid in battery cans, which is classified as a toxic substance.
- A short circuit, as a result of which not only the vehicle’s wiring can be damaged, but also expensive on-board electronics, devices and accessories powered by the network.
The existing risks of harming the car or themselves oblige each car owner, before removing the battery, to study the technology of the procedure and strictly follow the work regulations established by the vehicle manufacturers.
Which terminal to remove first?
To understand which terminal needs to be removed first, you need to remember your school physics course. The “ground” is connected to the negative terminal of the battery, which is the metal elements of the car - the body, frame, engine, etc. All energy consumers in the car are connected to the positive terminal - the starter, lighting, headlights, audio system, etc.
When any terminal is removed, the circuit opens, so formally the order of removal is not important. However, if the removal procedure is incorrect, there is a risk of a short circuit. In this case, not only the elements of the car can be damaged, but also the person performing the manipulation.
If you remove the positive terminal first, and then accidentally touch the positive contact of the battery and the metal part of the car (ground) with a metal object, for example a wrench, then a strong short circuit will occur. If you remove the negative terminal first, the mass will be de-energized, so further removal of the “plus” will not lead to a short circuit even with careless actions.
Therefore, the sequence of actions when removing the battery is as follows.
- First, the standard battery mount is unscrewed.
- The nut securing the negative contact is loosened.
- The negative terminal is removed.
- Then the nut securing the positive contact is loosened.
- The negative terminal is removed.
- The battery is removed from the stand.
Car battery removal technology
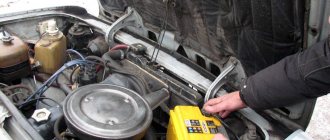
Before you begin to understand the nuances of how to properly remove the battery from a car, you need to find where the battery is located in a specific car model. In the vast majority of cars, the battery is located in the engine compartment, to the right or left of the engine, closer to the windshield, however, such placement of the battery is not an established rule, and in some models it may be located in the luggage compartment, under the seats in the cabin or other, even unexpected “niches” of the car. You can find out where the battery is located by studying the owner's manual for the vehicle, by visually inspecting the car when instructions are not available, or by finding the answer on car forums if the first two options do not produce results.
The technology for dismantling the battery is almost identical for all brands and models of cars, however, in order to properly disconnect the battery, it is necessary to initially prepare the car for the procedure, as well as all the necessary tools and materials.
Preparing the car for the process of removing the battery consists of the need to turn off the engine, turn off all devices in the car that operate on voltage, remove the keys from the ignition and take them out of the car with you, in order to avoid the inability to get into the car if the lock is accidentally activated during the process of removing the battery.
Installing the battery in the car
The reverse procedure, namely, the correct connection of the battery to the car after work has been completed or if it is replaced with a new unit, also requires compliance with the regulations. The first thing that the work contractor should take into account when installing the battery in a standard seat is its polarity: it is important to place the battery correctly in the car so that the positive “side” of the battery corresponds to the positive wire. It is worth noting that it will not be possible to connect the battery if it is installed inappropriately, since the negative terminal is much smaller than the positive docking mechanism; however, incorrect initial installation is an unnecessary and irrational waste of precious time and effort.
Do I need a replacement?
Making your own battery charge indicator controller
Before you run to the store for a new battery, you should understand whether the battery needs to be replaced. It may well be that the battery is simply discharged from frequent engine starts and short trips. Then a real charge from a network charger will be enough to bring it back to life.
If, when starting the engine, the starter barely turns the crankshaft, try charging the battery first, rather than rushing to get a new one. Here, of course, it is necessary to take into account the age of the battery. The service life of modern batteries is on average 3-4 years. If the age of your battery has already approached this value or exceeded it, then you can think about replacing it. Especially if difficulties with starting the engine appeared before the onset of cold weather.
Of course, before replacing the battery, you need to make sure that the car’s ignition system is working properly. Since if something does not work or malfunctions, then even with a one hundred percent working battery there will be problems with starting the engine. To accurately assess the condition of the battery, a device such as a load fork is used.
Restoring the on-board computer
When the car is de-energized, which occurs after the battery is disconnected, some vehicle models may simultaneously undergo zeroing of all electronic sensors and systems. A similar precedent is relevant for cars equipped with modern on-board computers, the settings of which are lost when the battery is removed, which calls into question the further functioning of the car in standard mode.
To resume on-board settings you will have to perform the following simple manipulations:
- After installing the battery, according to the regulations, turn on the ignition and warm up the engine to operating temperature.
- Remove the negative terminal for a few minutes, then fasten it back.
- Start the engine again and let it run for about fifteen minutes, which will allow the electronic systems to record information about the operation of the base sensors.
- Save the recorded information by simply turning off the ignition.
- Start the car again and check its operation in all operating modes. For this purpose, it is enough to perform a short “test drive” in safe conditions, with a gradual increase in speed, sharp acceleration and stopping, and then turning off the ignition, which will be the final stage of setup. Computer systems will automatically record the data obtained as a result of the test ride.
At this point, the restoration of on-board settings is considered complete, and the vehicle can continue to be operated in normal mode.
How to put on terminals correctly
Most questions arise about connecting wires to terminals.
But before this procedure, you should definitely inspect them for the presence of defects, dirt, and oxides. Contamination of the terminals is one of the reasons for the deterioration of engine starting, and drivers often blame the battery itself. So we clean the terminals from dirt, and if there are traces of oxidation, we use medium sandpaper to remove them. We apply the same procedure to wire clamps. It is better to treat the screws holding the clamps with lubricant to make them easier to unscrew.
Now let’s look at the order in which the terminals need to be connected when installing the battery in the car:
- First we put the red wire on the terminal with a plus sign at the end;
- the second is a black wire, connect it to the terminal with a minus sign;
- tighten the clamping bolts, but without fanaticism;
- tighten the fastening of the pressure plate - you may have to move the battery in several directions to get into the grooves.
If an alarm is installed on the machine, a characteristic click will be heard when the negative contact is closed. To check the operation of other devices, you need to turn on the ignition.
Experienced drivers, after each connection of the battery, start the power unit, let it warm up for several minutes at idle, then increase it to 2500 rpm and let it run in this mode for about 2 minutes. And only after that they make a test drive to make sure that all the main consumers of electricity are working.
Removing the battery on modern cars resets some settings and errors accumulated by the electronic control unit. There are models for which such discharges cannot be ignored.
What to do to prevent the terminals from sticking
To ensure that the connectors do not stick due to oxidation, and the car does not suddenly fail, it is necessary to carry out the following mandatory work:
- inspect contacts once a month;
- wipe the surface of the battery dry;
- Every month in the summer, monitor the electrolyte level in the serviced batteries;
- if white deposits are found on the contacts, check the battery tightness;
- before the start of cold weather, you need to check how hot the contacts are when starting the engine; with slight heating, you need to check the contacts and carry out additional processing.
The most effective way to remove deposits on terminals is mechanical cleaning.
IMPORTANT! Whatever means are used to protect the terminals, they must be cleaned mechanically every six months. Especially before the season changes.
To do this, you need to remove the terminals, moisten them with an alcohol-containing liquid or a solvent diluted with water, and wipe them dry. A soda solution (a tablespoon of baking soda per glass of water) will help remove any remaining acid.
A soda solution is used to remove acid residues.
IMPORTANT! You cannot use WD products to clean the terminals, which contain, in addition to oil, conductive substances that are harmful to electrical contacts.
Do not use acetone because it corrodes metal. Sandpaper or a wire brush is suitable for cleaning. The result of the work should be a shiny surface, even if not perfectly smooth.
To keep your contacts shiny, you need to protect them from aggressive substances. The use of lithol, grease and other lubricants will help protect the clamps. Before using the lubricant, you need to remove any remaining material.
Silicone lubricant has proven itself to be excellent, retaining and repelling aggressive media. The disadvantage of the lubricant is its fluidity, it flows out quickly, and it is necessary to inject it regularly. The sprays have proven themselves to be excellent not only in quality, but also in ease of use.
Sprays have proven themselves to be excellent
The idea that graphite lubricant is suitable for contact processing is misleading. The lubricant contains conductive substances.
IMPORTANT! Graphite grease should not be used to treat terminals.
How to tighten terminals correctly?
When tightening the terminals, do not use excessive force. A terminal that is too tightly tightened can lead to the appearance of microcracks around the current leads, through which the electrolyte will subsequently evaporate. This means that the terminals will face inevitable oxidation.
At the same time, simply throwing terminals onto the current terminals, as motorists sometimes do, is also not enough. In this case, the contact between the current lead and the terminal will be unreliable. This will lead to heating of poorly contacted elements. And when driving on an uneven road, a poorly tightened terminal can jump off and short to ground.
Therefore, the terminals should be tightened using only moderate amounts of force to ensure secure but not excessive tightening.
Dilapidated wires or structural elements.
If the car's wiring has been modified, there are twists, additional wires and other non-standard structural elements, dismantling the battery can be seriously difficult. Sometimes installing a battery is completely impossible without first replacing certain parts with new ones.
Note: At the customer's request, work to replace the battery can be carried out despite the difficulties indicated by the courier. In this case, the client takes full responsibility for any consequences (destruction, breakage, damage, etc.) by default.
Summarizing
The information presented in the article will allow anyone, even a novice driver, to safely replace the battery, subject to all regulatory requirements for the procedure and the correct approach to performing the task.
If your car belongs to the category of elite class transport, is equipped with “complex” modern “brains”, then it is better to refrain from replacing the battery yourself, entrusting the work to specialists from car service stations, or, when the car is under warranty, contact an official service representative. Such a precaution will avoid the risk of “breakage” of the on-board computer, the cost of repairing which is far from being considered budgetary waste.
What will be required and safety measures?
The battery replacement operation is simple. As a tool, you will need a pair of open-end wrenches: 10 for the terminals and in most cases 13 for the battery mounts (there may be a different size depending on the car).
Be sure to wear gloves to protect your hands. If there are electrolyte leaks on the battery body, work with it wearing rubber gloves. Remember that the electrolyte is a solution of sulfuric acid. This is a caustic substance that may harm the skin and eyes.


