The thermostat is responsible for maintaining the temperature balance of the power plant. It determines in which circle the coolant will circulate and how much of it will enter the radiator. If it fails, the motor temperature rises above the recommended range. As a result of engine overheating, thermal destruction of the oil occurs, carbon deposits form on the cylinders and accelerated wear of the internal combustion engine occurs. Under the most unfavorable conditions, the pistons may jam and the engine will completely fail.
Removal and replacement instructions
To replace the Chevrolet Lacetti thermostat, you can contact a qualified mechanic or replace it yourself.
Performing the procedure requires compliance with certain rules and sequence of actions. You must first study the technical documentation.
Preparatory work before removal
Before dismantling, it is necessary to carry out a number of preparatory measures:
- Repairs are carried out only after the engine has completely cooled down. The antifreeze in the cooling system is hot and can cause burns.
- Prepare a set of tools - pliers, a 5-liter container, a thin hose with a diameter of 10 mm and a length of 1.5 meters, wrench No. 12.
- Remove dirt from the surface of the engine and adjacent components. Foreign objects entering the cooling system can cause irreparable damage to the engine.
Dismantling and installation
The replacement process looks like this:
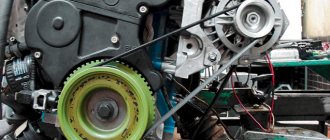
- Remove the protective plastic from the internal combustion engine.
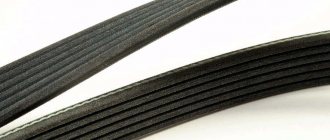
- For safety, it is necessary to cover the generator belt with a waterproof cloth or polyethylene. Antifreeze causes belts to slip on pulleys.
- Unscrew the cap of the expansion tank. This is necessary to relieve pressure in the system.
- Loosen the clamp and disconnect the pipe to drain the liquid from the system. Then install a pre-prepared drain hose in its place.
- Wait for the antifreeze to drain. Additionally, you can start the engine for 10-15 seconds so that the pump expels liquid from the system.
- Disconnect the inlet pipe.
- Remove the element from the seat.
Installation of the new unit is carried out in the reverse order.
After completing the work, it is necessary to check the operation of the cooling system. Air pockets may form in the lines, which need to be expelled and antifreeze added to the tank.
Until the engine temperature reaches 87°, the radiator pipes must be cold. After 87°, the pipes and radiator should warm up. For complete control, you need to make sure that the cooling fan turns on at the desired temperature.
Video
The video clearly shows the entire process of replacing the Chevrolet Lacetti thermostat.
How to fix an antifreeze leak
In this situation, it is enough to tighten the plug along the thread. It can pull itself up half a turn, one turn. And sometimes there are up to two revolutions.
You can also drain the coolant and install these plugs on the sealant. But usually just stretching helps.
For these purposes we will need a 12 mm hexagon
Next, we remove as much deposits as possible by hand and change the oil. It is also advisable to flush the cooling system and replace the antifreeze.
Why doesn't the car heater heat up well?
Insufficient heater performance can be blamed on:
- Air conditioning control unit dampers. Modern cars do not have valves that shut off the circulation of coolant to the heater radiator, as in older models. Here, the coolant constantly circulates through the heater radiator, and the temperature is regulated by dampers that block the air flow through the heater radiator. If they are broken or incorrectly adjusted, then cold air will enter the cabin.
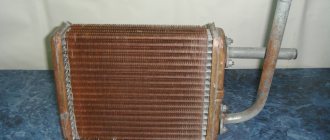
- The heater core is clogged. Therefore, the coolant circulates poorly through the heater radiator and, accordingly, the efficiency of the heater decreases
- The thermostat does not close properly. Therefore, coolant constantly circulates through the cooling radiator. Because of this, the engine does not warm up to operating temperature and, as a result, the heater gives off little heat.
In our case, the thermostat is the first to come under suspicion. Because, according to the owner, the heater heats up the worst on the highway.
It can be assumed that the thermostat does not close and the coolant is constantly circulating through the cooling radiator. And the higher the speed, the more the coolant in the radiator is cooled. And, naturally, it becomes colder in the cabin.
What happens when the thermostat breaks down?
If the thermostat breaks down, the fluid overheats, and, accordingly, the entire engine compartment . Next, an effect occurs that is known to many - “the engine boils.” The device does not work even at peak times, which means it’s time to make a small upgrade to our Lacetti, replace the thermostat.
In addition to the fact that the engine constantly overheats, some additional unpleasant moments arise:
- fuel consumption increases;
- additional carbon deposits appear in the cylinders;
- the engine may jam;
- There is poor heat flow into the cabin.
Change process
The lack of a stable temperature regime under the hood leads to the fact that, sooner or later, the thermostat cannot continue to function normally
It doesn’t matter if periodic overheating occurs or vice versa - the engine does not warm up enough. Deviation from the norm is critical for the mechanism of this part
To begin the replacement, it is worth collecting the necessary tools, a standard set of heads is enough, as well as a new product and coolant. When everything is assembled, we proceed directly to the replacement process:
- Disconnect the negative terminal from the battery.
When checking the thermostat on a car after starting a cold engine, the lower hose leading from the radiator should remain cold for some time. In this case, the thermostat valve is closed, and the liquid circulates in a small circle, bypassing the radiator. Once the fluid temperature reaches 87 °C, the lower radiator hose should begin to heat up quickly, indicating that the coolant has begun to circulate in a large circle. Drain the liquid from the engine cooling system.
- We unscrew the drain plug on the engine and drain the coolant until the level is below the thermostat.
Using sliding pliers, we compress the ends of the clamp securing the radiator supply hose and slide the clamp along the hose. Remove the hose from the thermostat cover pipe. Remove the hose from the thermostat cover pipe.
- Disconnect the thermostat heating element wiring. Using pliers, we compress the ends of the clamp securing the fluid supply hose to the throttle body heating block and slide the clamp along the hose. Remove the hose from the thermostat housing fitting. Using a 12mm socket, unscrew the two bolts securing the thermostat housing to the cylinder head.
- Unscrew the throttle valve heating pipe.
Remove the housing with the thermostat cover.
- Unscrew the four thermostat mounting bolts. Remove the cover from the thermostat housing. Remove the thermostat from the housing. Remove the rubber gasket from the thermostat.
- We take out the body. The connection between the thermostat housing and the cylinder head is sealed with a rubber ring. If the gasket and O-ring are damaged or have lost their elasticity, they must be replaced with new ones. To check the thermostat, lower it into a container with coolant. We heat the vessel, simultaneously stirring the liquid and monitoring the beginning of the valve opening with a thermometer. The valve stem should begin to extend at a temperature of 87 °C, which is indicated on the thermostat flange. At a liquid temperature of 102 °C, the valve must open completely - the stroke of the rod is at least 7 mm. When installing the thermostat, insert it into the housing, oriented as shown in the photo.
- We change the thermostat along with the seal.
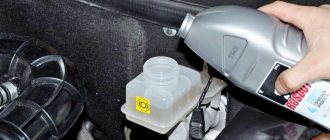
Fill the system with coolant to the level. Let's let the car run. After the air has been bled out, you can add liquid again. For the first 30-50 km, you should monitor the coolant level and prevent the car from overheating.
Operating principle
This thermal valve works very simply. When the wax melts under the influence of hot coolant, it will begin to expand - its state will change from solid to liquid. When the wax ball melts and expands completely, pressure will be created. Under the influence of this pressure, a metal pin will be squeezed out of the metal body, which will open the valve, thereby allowing antifreeze access to the radiator. When the liquid in the radiator begins to cool, the wax will again take a solid state, its usual shape, and the thermal valve will close - the coolant will again circulate in a small circle.
Due to the bypass valve, liquid can only move along the line to the radiator. The outlet pipe of the pump is connected to the radiator pipe. The bypass valve is a structure consisting of a disc and a return spring.
Thus, thanks to the thermostat, the car warms up faster, since the valve prevents the circulation of cold liquid in a large circle. Antifreeze does not enter the radiator and does not cool even more. And when the liquid is fully heated (up to +85 degrees Celsius or more), the valve begins to slowly open. The standard element opens at +85-87 degrees. But they put the thermostat on the Lacetti at 92 degrees. Usually they replace the factory element with a non-standard one so that the car warms up faster. However, as practice shows, there is not much difference in this. If the factory valve is working normally, there is no need to change anything in the cooling system.
DIY thermostat replacement
So, first of all, drain the coolant. How to do this is shown in detail here - Replacing the coolant
Note. If you have not changed the coolant for a long time, then it is better to drain it all and after replacing the thermostat, add fresh one. And if the coolant in your car does not require replacement, then you can only drain about three liters. This is enough to replace the thermostat. And then just add these three liters.
Now we cover the belt of auxiliary units with a bag or oilcloth so as not to smear it when disconnecting the pipes
Place a rag on top to absorb any spilled coolant.
Note. Since we have no electricity in the city, the work had to be done in daylight outside under wet snow. That's why wet spots are visible in the photo.
We wear rubber gloves so as not to come into contact with the coolant.
Unclench the clamp and disconnect the small pipe from the thermostat.
Note. This car does not have the original clamp installed, but a worm clamp. It can be seen in the photo.
We do the same with the large pipe.
Now unscrew the two thermostat mounting bolts. One at the top
And the second one below
With a little effort, pull the thermostat towards you and remove it
Wipe the thermostat seat thoroughly. Especially if someone put sealant there before you
Unpacking the new thermostat
Don't forget to put a new gasket on it
Carefully install the thermostat on the engine. We tighten the two mounting bolts. We mount the pipes and fill the coolant into the expansion tank.
After replacing the thermostat, the engine temperature returned to normal. You can see a test drive with the new thermostat in the video
Where does antifreeze go?
Therefore, it is very important to independently monitor the condition of the cooling system and periodically check the coolant level.
Note. It is necessary to monitor the coolant level on a cold engine.
If the level gradually decreases, then it is necessary to look for the cause, and not tempt fate by adding coolant and hope for chance.
There are many options for invisible antifreeze leaks. This includes the cylinder head gasket, the heater radiator in the cabin, and other hidden places. But there are also less obvious reasons, but they happen even more often than the obvious ones.
One such reason will be discussed further.
Which thermostat is better to install on a Chevrolet Lacetti engine 1 6
The standard thermostat opens at a temperature of 87°C. It is located in the hottest place, at the outlet of the cylinder head, where the coolant temperature is approximately 5°C above the average (measured by the temperature sensor).
Therefore, the motor temperature according to the sensor is 82°C
, and does not rise higher in motion - the huge radiator does not.
After opening the thermostat, cold antifreeze enters the engine from the radiator, T again drops to 75, and fluctuates for a long time around the lower limit of the engine operating range ( 75-82°C
), the stove additionally cools it. During this time, many manage to complete the trip, and their engines are often constantly cold.
Reduced engine temperature mainly affects fuel consumption, because... The ECU prepares a richer mixture, as well as the intensity of interior heating and carbon formation.
In order to eliminate these problems, the standard thermostat (87°C) was replaced with a “hotter” one, with an opening temperature of 92°C. As a result, the engine immediately warms up 5°C more, fluctuations during warming shift to the normal operating range ( 80-87°C
). This modification does not change the permissible and design thermal conditions of the engine: at 98°C, when the radiator fan turns on, both thermostats are open.
What is the result of such a replacement?
The cabin is warmer, the combustion chamber, spark plugs and valves self-clean better, fuel consumption in winter is slightly lower (by 0.5-1 l/100 km). On the highway at -15°C the temperature stays within 85-86°C, in the city 88-90.
I would like to draw your attention to the fact that all alterations are done at your own “peril and risk”! All of these can cause warranty issues when you go to the dealer. In hot regions with warm winters, it may be better to leave the stock thermostat for more cooling headroom. There are no cases of overheating with a working cooling system recorded on the forum
There are no cases of overheating with a working cooling system recorded on the forum.
What is needed for replacement?
Two types of thermostats are installed on the Lacetti: plastic (96460002) non-separable, and aluminum (96835286) collapsible. The type of case can be determined by its appearance: aluminum - silver, plastic - black.
Option 1
: Your car has a thermostat with a collapsible aluminum housing. Then you need to buy: 1). Thermocouple VERNET 4898.92
(sold for Opel, price about 200 rubles).
It does not have a bypass hole; thermocouples with a bypass hole slow down engine warming up. 2). Thermoelement sealing ring - 94580530
3).
O-ring of the thermostat housing - 96143112
.
You can use the original gaskets (O-rings) if they are in good condition. VERNET 4898.92J (with the letter J) is distinguished by the presence of gaskets in the kit. Of these, you can only use the thinner one, with a slot that fits onto the thermoelement. The thick one, intended for installation under the body, cannot be used! It is MANDATORY to place only the original ROUND gasket (96143112) under the housing!
Installing a SQUARE SECTION gasket from the VERNET 4898.92J kit under the thermostat housing can lead to breakage of the housing ears, since it does not compress well when tightening the bolts.
Option 2
: You have a non-separable plastic thermostat. Then you need to additionally buy a collapsible aluminum case ( 96835286
), it is sold with a standard thermoelement (87C), the price is about 1000 rubles, and replace the thermoelement in it with
VERNET 4898.92
. In this case, you also need to stock up on new bolts; the old bolts will not fit due to the washer under the head. You can use old ones if you sharpen (remove, remove) the washers.
__________________ On 1.4 and 1.6, change the thermostat to 92C and turn off the EGR!
Source
Antifreeze leaves the reservoir
Every liquid cooled engine has a cooling jacket. These are the channels inside the block and cylinder head. These channels have technological holes that are closed with plugs. They can be pressed or threaded.
Here's a real example. If you remove the valve cover (how to do this is shown here), we will see two such plugs
Let's take a closer look at them. Here's the left one
It has smooth and clean edges, which does not cause any suspicion.
As we can see, there are black deposits and black smudges around it. This is antifreeze mixed with oil and successfully stuck to it. In the video below you can see how significant these deposits are.
Also, with such a leak, the noise of the hydraulic compensators may increase! This is one of the indirect signs of coolant leakage into the oil.
You can also pay attention to deposits on the bolts on the right side
Most car enthusiasts will see this as the oil's fault, although the oil has absolutely nothing to do with it. These are all the consequences of an antifreeze leak.
On the left side there are fewer or no such deposits
Chevrolet Lacetti Replacement Thermostat 87 To 92 ~ VESKO-TRANS.RU
A thermostat in a car is needed to regulate the thermal parameter of the unit. When its valve is closed, coolant circulates in the engine block, creating a small circle. And when the valve opens, the antifreeze moves into the radiator for maximum cooling.
The standard thermostat on the Chevrolet Lacchetti opens slightly at a temperature of 85 degrees Celsius. Maximum opening occurs at a temperature of 102 degrees Celsius. The fan starts working already at 97 degrees Celsius.
Under the hood we see a fairly large radiator, so even if the thermostat opens partly, the liquid is perfectly cooled. In addition, the location of the thermostat is not far from the cylinder head, where the thermal parameter is above average.
Therefore, when driving, the engine temperature is about 82 degrees, and when parked - 94.
To eliminate this problem, the standard thermostat is replaced with an analog one, where the opening temperature is 92 degrees Celsius. This upgrade does not affect the operation of the motor.
Changing the Chevrolet Lacetti thermostat yourself is done in 8 main steps.
Please note that you carry out all the modernization of the car without the help of others, therefore you are responsible for it. The work is carried out on a cooled engine due to safety and the inability to destroy threaded connections.
Step 1 Remove the unit protection. We prepare a container for draining the cooling water and a pipe with a diameter of about 1 centimeter.
Step 2 Using film or a plastic bag, close the belt to prevent cooling water from entering.
Step 3 To reduce the system pressure, open the container with coolant.
Step 4 Carefully remove the pipe that serves to drain the cooling water with pliers, first squeezing the clamp fasteners. Step 5 Quickly replace the previously prepared pipe for draining into the container with a drain hose
A rag placed earlier will absorb any spilled liquid. We wait until it completely drains into the drainage container. Now the film or plastic bag and rag can be removed. To drain the largest amount of water, you need to start the engine. Let it work for 15 seconds
Step 5 We quickly replace the previously prepared pipe for draining into the container with a discharge hose. A rag placed earlier will absorb any spilled liquid. We wait until it completely drains into the drainage container. Now the film or plastic bag and rag can be removed. To drain the largest amount of water, you need to start the engine. Let it work for 15 seconds.
Read also: Replacing the Outer CV Joint Golf 2
How to change the thermostat on a Chevrolet Lacheti 1.8
Step 6 Remove the fastening from the huge pipe, as well as from the small one, and move it to the side.
Then disconnect the hose from the thermostat.
Step 7 There is an O-ring near the thermostat. If it is in good condition, there is no need to touch it. If the engine is not new, then a replacement will be needed. Comes with a new thermostat.
Step 8 Connect everything in reverse order. We check everything again and pour antifreeze into the container. The liquid is poured 1 cm above the highest level.
The air will then come out and there will be less water. We start the car and check for leaks. If they are not found, install motor protection and enjoy the work done.
Replacing the thermostat on the Chevrolet Lacetti is completed.
Description of replacing the thermostat on a Chevrolet Lacetti
In order to replace the thermostat on a Lacetti, you must follow the instructions below.
Remove the engine protective cover.
Cover the generator drive belt with polyethylene.
Relieve pressure in the circuit. To do this, unscrew the coolant reservoir cap.
Remove the clamp.
Quickly remove the thin pipe and in its place put on a hose through which the coolant will be drained. It is also advisable to start the power plant and let it run for 15-25 seconds.
Dismantle the second pipe.
Unscrew the thermostat mount.
Remove thermostat.
- Install the new thermostat into the seat.
- Reassemble everything in reverse order.
- Check the operation of the cooling system.
<
Required Tools
In order for the replacement of the thermostat on a Lacetti with a 1.6 liter engine to be successful, the tools shown in the table below are required.
Table - Tools and materials required to replace the thermostat.
| Name | Note |
| Pliers | Can be replaced with pliers |
| Hose | 1.5 meters long |
| Head "12" | Preferably with an L-shaped tubular wrench |
| Vorotok | With ratchet |
| Extension | For comfort |
| Tara | 3-6 liters |
Replacing the Chevrolet Lacetti thermostat in auto repair shops in Moscow
36 car repair companies
- TTS Motors
- Pyatnitskoe highway, 2
- +7 (495) 24… show all
- The site of the company
- Lexus on the market
- Master MB
- Master motors
- Lorant
- Wilgood
- Wilgood
- Auto-rad
- Wilgood
- Wilgood
- Reliauto
- Remacpp
Popular companies
Thermostat
Removal
Attention! To prevent personal injury, do not remove the expansion tank cap when the engine and radiator are hot, as heat maintains system pressure. Hot liquid and steam may escape under pressure and cause burns.
Drain the coolant. Loosen the upper radiator hose clamp on the thermostat housing. Disconnect the upper radiator hose from the thermostat housing. Loosen the clamp on the bypass hose. Disconnect the bypass hose from the thermostat housing.
increase notation
Remove the mounting bolts holding the thermostat housing to the cylinder head. Remove the thermostat housing from the head. Remove the O-ring from the head. Check the valve seat for foreign objects that may prevent the valve from seating correctly. Check the functionality of the thermostat. Clean the thermostat housing and cylinder head sealing surfaces.
Installation
- Apply lubriplater to the sealing surface of the new O-ring.
- Install a new O-ring into the recess of the cylinder head.
- Secure the thermostat housing to the cylinder head with the mounting screws.
Tighten the thermostat housing mounting screws to 20 N•m (15 lb-ft).
increase notation
Connect the upper radiator hose to the thermostat housing. Tighten the upper radiator hose to the thermostat housing with a hose clamp. Attach the bypass hose to the thermostat housing. Tighten the bypass hose with a hose clamp. Charge the engine cooling system.
Thermostat (1.8L DOHC)
Removal
Attention! To prevent personal injury, do not remove the expansion tank cap when the engine and radiator are hot, as heat maintains system pressure. Hot liquid and steam may escape under pressure and cause burns.
Remove the engine cover. Drain the coolant. Disconnect sensor connector ect. Disconnect the upper radiator hose. Disconnect the throttle body inlet hose. Remove the thermostat housing and the thermostat itself.
increase notation
Installation
- Install the thermostat housing to the cylinder head.
Note: Apply lubriplater to the sealing surface of the new O-ring.
Tighten the thermostat housing mounting screws to 20 N•m (15 lb-ft).
Possible options and components.
Two types of thermostat housings are installed on the Lacetti: plastic (96460002) non-dismountable and aluminum (96835286) dismountable (complete with a standard thermocouple). Therefore, in the case of a non-separable case, it is best to replace it with a standard collapsible analogue, replacing the sensitive element with a hotter one.
For reference, the dimensions of the original plastic non-separable case (measured by Alspav):
center-to-center distance between mounting holes 75 mm,
the outer diameter of the pipe entering the inside of the engine block head is 39 mm,
length from flange to end is 18mm
the diameter of the large radiator pipe is 35 mm,
the diameter of the small pipe for heating the throttle valve is 10 mm,
the angle between the pipes is 60-70 degrees.
2.1. Options for reusing the standard plastic case.
For those who want to save money, there is the possibility of using a “non-separable” case, if it is carefully disassembled into two halves with a knife and a hammer. The body is glued together with a fairly hard but elastic compound (see photo, PKM). Then, having cleared the grooves of any remaining compound, you can install a new thermostat and re-glue it
Option 1 (Alspav).
The housing can be reassembled using tightening washers and bolts or tightened with a suitable clamp, coating the joint with sealant. Realization in the photo.
Option 2 (PKM).
The original thermostat and the new thermoelement can be glued together. The new thermoelement was placed on gasket silicone sealant (~50 rubles) and a standard rubber ring, and a “bead” of sealant was also applied on top along the edge. I mixed two-component epoxy glue (100 rubles), added a filler for elasticity (powder sealant for cooling systems, ~50 rubles). Quickly (the “lifetime” of the composition is about 4 minutes) I filled the grooves in the base and lid of the case so that when compressed a little protrudes out, I squeezed both halves first with my hands, then with pre-made staples (made in 10 minutes from improvised rubbish). I removed excess glue from the outside. I checked it today - it is holding firmly. The housing is sealed. When installing, I think I’ll leave the “technological” brackets for peace of mind. J
2.2. Collapsible housing option.
The advantage of a collapsible housing is greater reliability, ease of repeated replacement of the thermoelement, and, most importantly, the easy ability to return to the standard version in case of contacting service.
As noted above, it is best to use a standard aluminum collapsible housing 96835286 (complete with a standard thermoelement) in which you can simply change the sensitive element (Photo by Alfio, GanZa). In this case, you need to stock up on new bolts; the old bolts will not fit due to the “washer” under the head:
But other options are also possible, although this will also require replacing the upper radiator hose. A thick hose from a VAZ-2101 (Z-shaped) is suitable. This is necessary due to the different angle of the outlet on the collapsible housing compared to the original one.
Option 1.
The following set can be used as a collapsible housing:
1. Adapter (housing) - code 96130992
2. Thermostat cover - code 96180615
3. Thermostat sealing rubber - code 90096383, 94580530
Option 2 (Jewel).
Aluminum thermostat housing 96407677 for AVEO with the ability to replace the thermoelement.
2.3. Thermostats are sensitive elements.
The most suitable thermoelement option is VERNET 4898.92J at 92°C from Opel. This thermostat does not have a bypass hole, which allows the engine to warm up faster.
It is also possible to use a “holeless” thermoelement ENP00764 at 92°C, but the quality of work is not up to par (RKM find).
The third option (worse) is the Wahler 3017.92D2 thermostat with a bypass hole.
The lower photos show the option of plugging the hole with wire (Alex48). The wire should be quite rigid, about 2 mm in diameter, the end should be filed off to half the section, because There are only half holes there. The wire is held under a spring. Possible corrosion due to unsuitable wire material. The wire must be bent outward from the hole so as not to interfere with the movement of the thermostat element. The bend should be such that when the thermostat is opened, the wire does not go anywhere, either to the side or back and forth.
The following “holeless” thermoelements can also be used:
— Dello 01-3013380052-A with engraving 92-107С (in a nondescript small box without inscriptions);
— Quinton Hazell QTH118 — at 92C
If you decide to replace it, you need to stock up on a tube wrench for 12. You can use regular heads, but it is extremely inconvenient.
Description of the thermostat and problems with it on the Chevrolet Lacetti
The thermostat determines whether liquids circulate in a large or small circle. The cooling intensity of the power plant depends on this. On a Chevrolet Lacetti, the flow of liquid into the radiator begins when it reaches 85-87 degrees. Full opening of the thermostat occurs at 102°C. In this case, all the coolant begins to circulate unhindered in a large circle.
If the valve is not closed tightly, coolant constantly flows into the radiator. As a result, the engine warms up longer. In winter, the power plant may never reach rated operating temperature. A loosely closed thermostat reduces the life of the power unit, requires a long time interval for warming up and causes increased fuel consumption.
Valve jamming leads to the fact that the liquid continues to circulate in a small circle after reaching the operating temperature and exceeding it. Further heating leads to boiling of the power unit. This causes warping of main components and parts, jamming of pistons and thermal destruction of oil and rubber products. Therefore, it is extremely undesirable to allow the Chevrolet Lacetti to be operated with a jammed valve.
Another thermostat problem is a coolant leak. If there is significant leakage, a critical decrease in the coolant level is possible, which will result in overheating of the power plant.
Hot or Cold Thermostat: What's the Difference?
The standard Chevrolet Lacetti thermostat is designed for an opening temperature of 87 °C. This is the optimal threshold for ensuring minimal fuel consumption and reducing harmful emissions into the atmosphere.
The disadvantage of high-temperature options is the rapid wear of lubricants and the power unit.
Some users change "hot" to "cold". The replacement is due to the fact that when the damper opens early, the temperature decreases by an average of 10-20 °C. This makes it possible to extend the life of the engine oil and the power plant as a whole.
The procedure also has a downside. A “cold” valve provokes an increase in fuel consumption, resulting in an increase in harmful emissions into the atmosphere.
To summarize : a “hot” thermostat saves fuel, but wears out oil, gaskets, and seals faster. “Cold” allows you to extend the life of consumables and oil, but at the same time fuel consumption increases.
Signs of breakdown
Signs of a malfunction of the Chevrolet Lacetti thermostat may include the following factors:
- Prolonged engine warm-up (more than 3-5 minutes under normal conditions). This means that the coolant always circulates in a large circle.
- As the engine warms up, the temperature of the incoming radiator pipe increases.
- When driving in moderate mode, the engine quickly heats up and overheats. The cooling fan runs constantly. This means that circulation occurs only in a small circle, switching to a large circle does not occur.
- After warming up the internal combustion engine above 95 °C, the radiator pipes do not heat up.
If one or more of the above problems are detected, operation of the vehicle is not recommended until the problem is completely eliminated.
Symptoms of thermostat problems
Symptoms that your thermostat may need to be replaced include:
- reduction in the warm-up rate of the power plant;
- when starting a cold engine, heating of the large circle pipe is observed until the internal combustion engine reaches operating temperature;
- a sharp increase in temperature during movement or its significant excess of the nominal value;
- a visual inspection revealed that the gasket or housing had leaked;
- When the engine temperature is high, the large circle pipe remains cold.
If any of the above problems are identified, further operation of the car is not recommended until the problem is eliminated. Otherwise, a significant reduction in service life or complete failure of the power plant is possible.
Chevrolet service
- Pre-sale diagnostics of any Chevrolet model using special equipment using modern software.
- Carrying out scheduled maintenance with a mandatory check (or replacement if necessary) of the engine oil level, spark plugs, brake pads, timing belt, transmission fluid, air and fuel filters, fuel lines, etc.
- Passing a state technical inspection and obtaining a GTO coupon.
- Overhaul of any complexity of the engine, steering, clutch, gearbox (automatic/manual transmission), rear and front suspension, brake system, etc.
- Local or complete body repairs to straighten the geometry or paint bumpers, doors, trunk, hood, car roof.
- Mechanical repairs to replace any failed car part with an original spare part (trunk lock, rearview mirrors, etc.)
- Official Chevrolet service for installing additional equipment: TV tuner, hood deflector, parking sensor, etc.
Sign up for the service
Chevrolet service repair work
Service station "Autocenter City" in Moscow The most in demand are the following works of body and mechanical shops:
- Repair of engine, generator, starter; muffler replacement.
- Repair of trunk button, stabilizer strut; replacement of the front bumper, fuse box; installation of alternative optics, body kit, spoiler; changing the automatic transmission oil; (service for Chevrolet Cruze).
- Replacing the timing belt; clutch (service for Chevrolet Lacetti).
- Engine overhaul (service for Chevrolet Orlando).
- Automatic transmission repair (service station for Chevrolet Tahoe).
- Repair of fuel pump, steering rack, front suspension, ; replacement of muffler, engine oil (service station for Chevrolet Lanos).
- Diagnostics; repair of steering rack, suspension; replacement of the engine control unit, engine oil (service for Chevrolet Aveo).
- Local body repair, protection installation, tire fitting (standard maintenance for all Chevrolet models).
Find out the cost of repairs
Features of replacing the thermostat on a Chevrolet Lacetti: article numbers
If you know exactly the article number of the damaged device, then finding exactly the same one on the seller’s websites will not be difficult. Thus, thermostats are divided into the following types of material for manufacturing body parts:
- metal – article number 96835286;
- plastic – article number 96460002.
In addition to ready-made options, you can purchase new internal elements to make it cheaper overall. So, on a metal thermostat (article 96835286) you can save a little if you purchase only the internal filling and consumables. It will look like this (the article number is indicated in brackets):
- internal thermocouple (96143939) ;
- internal seal (94580530) ;
- housing seal (96143112) .
Buying internal parts will be slightly cheaper than buying complete equipment. There is no reason to buy the filling for a plastic device separately. Original spare parts have an advantage over any others, although their price will be higher.
Checking the thermostat for failure
There is a small chance that our unit is faulty and the overheating problem is caused by other factors. It is impossible to determine this accurately without removing the thermostat. We will discuss the sequence of this procedure a little later. Still, if we removed the device, is there a way to check it? The unit will need to be cleaned of dirt and boiled.
You can check the functionality of the thermostat by boiling it in water.
You will have to heat the water in the pan along with the test specimen to 87 degrees and see if the damper opens. Bring everything to a boil, watching the mechanism open further. At 100–102 degrees, the opening should reach its maximum. You can throw the removed element into scrap metal and urgently buy a new one when nothing happened during cooking.
Article numbers of original spare parts and analogues
Original
The original thermostat for Chevrolet Lacetti 1.6 and 1.4 liters is designed for an opening temperature of 87 °C. Part numbers differ:
| Manufacturer | vendor code | average price | Note |
| General Motors | 96460002 | 920 | Plastic, not collapsible, 87 degrees |
| General Motors | 96835286 | 1566 | Metal, collapsible, 87 degrees |
| General Motors | 92062728 | 2856 | Metal, collapsible, 87 degrees |