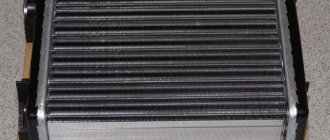
Cooling radiator for VAZ cars
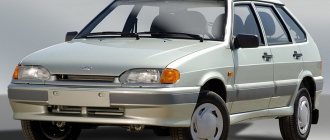
VAZ 2114 is considered one of the most striking examples of success of the domestic automobile industry. This model is a modified version of the VAZ 2109 and differs from it in the design of the front part of the body, updated headlights and hood, radiator grille design, as well as plastic moldings and spoilers. However, as it became known, the car is susceptible to radiator failures, which can lead to overheating, and as a result, to engine failure.
Possible problems after replacing the engine cooling radiator
After replacing the radiator, problems sometimes appear. They may be associated with incorrect actions of the master. The features of the part are also taken into account. When using non-original spare parts, the risk of failure increases.
Common problems:
- increased vibration;
- engine overheating;
- coolant leak.
If the above malfunctions are detected, you must have the car inspected or perform independent diagnostics.
Preparatory operations
Attention! Be sure to let the car cool down!
- Remove the engine protection.
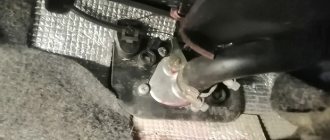
- Drain the antifreeze. I remove the pipes from the heater tap in the engine compartment, having previously placed a special trough for clean antifreeze. This allows you to drain as much coolant as possible from the heater radiator. Just remember to open the stove tap. As soon as the antifreeze has stopped flowing, unscrew the two 10-point nuts securing the stove valve (if you are going to change it!).
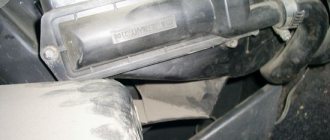
Heater valve fittings in the engine compartment.
Engine overheating after radiator replacement
If the engine gets hot after replacing the cooling radiator, the technicians give clear advice. Most often the problem is with the impeller. When using low-quality Chinese spare parts, the blades simply stop.
To rotate the element, a certain pressure is required, which is created by the pump. When the impeller stops, the element runs idle.
Other options:
- belt failure;
- pump problem;
- broken fastening.
If the pump is faulty, coolant will not circulate. After some time, the engine cylinders heat up and everything boils. The thermostat, which is supposed to regulate the temperature, breaks down much less often. If the thermostat fails, engine overheating is guaranteed.
Let's summarize
In general, repairs are quite accessible for doing it yourself, but you need to immediately prepare for a significant time investment. Work can last for 2-6 hours. When replacing the radiator, it is necessary to change the coolant. Work with 8-valve and 16-valve engines is carried out in the same way. If the car has air conditioning, you will have to remove and install it during the repair, but not on all models. It is advisable to replace the bushings at the same time. The work is completed by checking the functionality of the engine and the condition of the coolant. Namely, whether it is boiling.
Correct replacement of the radiator using the example of the VAZ 2114 model
Before replacing the cooling radiator in a VAZ 2114 car, you need to make sure that it is faulty; sometimes the signs are obvious. Looking under the hood, you can see that liquid is leaking in the pipe. If the coolant drips, you won't be able to get rid of it with regular insulation. Drivers are also concerned about engine overheating.
Algorithm for replacing the radiator:
- Draining liquid.
- Removing the air filter.
- Unscrewing the top bolts.
- Holding the fan.
- Removing the crankcase protection.
- Unscrewing the nuts.
- Pressure plate retraction.
- Removing the fan.
- Releasing the radiator.
To work, you will need a set of keys, a hammer, and lubricant. Since it is necessary to work with fasteners, they often do not give in, so you have to knock them out and clean them. Next, to replace the engine cooling radiator, it is important to pay attention to the upper bolts, which are fixed on the sides. They are most often attached to the fan via a washer.
To avoid damaging the pipes, it is better to disconnect them in advance. The elements use a screw connection, so the tubes are rotated counterclockwise. Holding them by the ring, you need to hold the tube. Otherwise, it is easy to break the thread.
Installing a radiator will not be possible, since in addition to the fan, hoses will have to be changed. If the pipe does not budge, you need to move the fan. When this plan does not help, the previously prepared lubricant will come in handy.
By adding a couple of drops to the back wall of the radiator, you will be able to free the tubes. After this, access to the lower bolts, which are located on the left and right sides, opens. The nuts should be released gradually and not completely.
You need to make sure that the fan is not being held down. Once the bolts are removed, it is easy to move the pressure plate aside. To raise the engine cooling radiator, it must be tilted slightly towards the engine.
Required spare parts
First of all, you need to select a new radiator. It is better to purchase an analogue of what is on your car. You can also make a choice by article number: 2108-1301012, 21082-1301012, RO2108-01, LRc 01082.
The average price of a new unit is 1,750 rubles. Copper models will cost more.
Attention ! It is better not to purchase painted radiators, since there is a risk of an unpleasant odor appearing in the interior, and the heat transfer of these models is lower.
Replacing the engine cooling radiator using the example of Lancer 9
In the Lancer 9, the sore spot is the cooling radiator. Drivers know that standard fasteners are no good and often specialists solder an additional strip. If the issue of replacing the engine radiator is urgent, you should follow the instructions:
- Releasing the clips.
- Removing the air intake.
- Removal of the control unit.
- Removing the pipe.
- Antifreeze drain.
- Unscrewing the top bolts.
- Release the lower fasteners.
- Removing the radiator.
In more detail, the most important thing is to release the air intake clips. They fit tightly to the body; they need to be pryed off with something. A wrench or screwdriver is suitable for this. If there is no rust, you can remove the air intake. Since the fan control unit is located under the radiator, it will have to be moved to the side.
To replace the fan, the pipes from the expansion tank are disconnected. You need to start from the top tubes and then move to the bottom. After the procedure, you will be able to drain the antifreeze. The next step is to release the top mount that holds the radiator. After replacing the part, you must repeat the procedure in reverse order.
Installation procedure
Installing a new radiator occurs in the reverse order. The fan, first of all, is attached to a new part, and only then is installed in its seat. Installation is carried out in the same way as removal - at an angle to the engine. Next, place the pipes on the outlet and inlet openings, securing them with clamps at the joints. Place the radiator in the correct position, at an angle of 90 degrees. Install the pressure plate and secure it with bolts.
Now, you can fill in the coolant and check the new part for integrity. It is necessary to fill the antifreeze through the upper hole located under the filler cap. At the same time, the expansion tank cap must be open to avoid air locks. After the coolant reaches the required level, fill the expansion tank with antifreeze to the MAX mark. Now, close both covers and start the engine. Check the cooling system for leaks, especially at the connections. If there is no leak, then you can safely operate your car. If, upon inspection, you find drips, then the new radiator is most likely defective.
Expansion tank
Some useful tips
- To drain the coolant, you need to unscrew the plugs on the radiator, on the expansion tank and on the engine cylinder block.
- If the cooling system is not functioning well, the culprit may be a liquid cooling pump whose shaft bearings or seals have failed. It needs to be repaired or replaced with a new product.
- The cause of failure of the cooling system may be improper operation of the thermostat, which must be repaired or replaced.
- It is more convenient to remove the radiator together with the fan. The fan can be removed later if necessary.
You can check the tightness of the removed radiator as follows:
- fill the bathtub with water;
- lower the product into water and apply pressure of approximately 0.2 MPa;
- bubbles will show where leaks have appeared.
Sometimes, to bring the radiator into working condition, it is enough to rinse it with water. It's done like this. The antifreeze or antifreeze is drained and clean distilled water is poured in. The engine starts and runs at 3000 rpm. The temperature should be monitored. They turn off the car and after 7-8 minutes drain the water. If it is not completely clean, the procedure can be repeated. If the fluid has changed color, it needs to be replaced.
The coolant should be changed: antifreeze - after 2 years, antifreeze - after 5 years. The best choice for cooling fluid is antifreeze. The standard cooling system fan is quite noisy. Therefore, it makes sense to replace the original four-blade impeller with a new eight-blade one. When purchasing an impeller, you need to remember that the shaft for its attachment can have a landing thread of 8 mm and 6 mm.
Refilling a new radiator
Finally, “Tosol” or antifreeze should be poured into the expansion tank of the new radiator. Basically, approximately 5-8 liters of liquid are poured into the new cooling system to cool the engine. After filling with antifreeze, the car must be started and left running for a few minutes so that the thermostat opens and the antifreeze goes into the engine cooling system. Replacing the 2114 radiator, like any other VAZ model, should be carried out in a warm room or in the summer season.
Reasons for removing a cooling system element
When a car breaks down, some reasons lead to the need to remove the radiator. The main ones:
- various types of mechanical damage;
- individual radiator tubes are clogged with dirt, deposits in the form of scale and rust;
- getting a car into an accident.
Replacing the device in question is not always required. Sometimes it can be repaired, washed, soldered. Modern radiators often have an aluminum core and a plastic tray. Such models are very difficult to repair.
To eliminate the malfunction or replace it, you will need to dismantle the device. You need to take this work very seriously and do it carefully. In order for the process to be carried out efficiently, you need to at least briefly know what parts the radiator assembly consists of. It includes:
- device body;
- expansion tank;
- Electrical engine;
- engine casing;
- impeller (fan);
- rubber cushion;
- drain plug;
- various hoses;
- a pump that is powered by a drive belt.