The starter in a car is designed to start the engine. A short-term charge is supplied from the ABC to the starter, which in turn rotates the flywheel at high speed. The Daewoo Nexia starter is reliable, although it has its own resource, so it also requires maintenance and repair. In the article we will talk about the causes of the malfunction, selection of a starter and replacement and repair procedures, as well as the manufacturer’s recommendations.
Video
The video will tell you how to replace the starter on Nexia
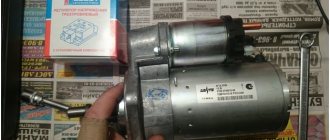
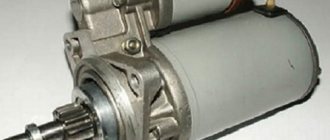
Starter for Daewoo Nexia
Analogue produced by .
The basic design of the starter has remained virtually unchanged throughout the production of the car - it is a 4-pole electric motor with 4 DC brushes, combined with a solenoid electromagnetic relay.
8 valves
On 8-valve engines of early years of production, starters were installed without a planetary gearbox, and therefore less power.
In good weather conditions, the difference in performance between the two starters was practically not felt, but as soon as frost hit, the old starters for eight-valve engines could barely cope with their work.
Their power (for example, Delta autotechnik A17120 ) ranged from 0.7 to 0.9 kW .
16 valves
Starters for 16-valve 1.6-liter engines began to be equipped with a planetary gearbox and, accordingly, the electric motor power increased to 1.3 kW.
This affected both the torque of the electric motor and its ability to start a larger engine even in cold weather. For example, EAI 11510 already produced 1.4 kW. Also on sale you can find 1.2 kW units with a planetary gearbox from Achim with catalog number 96469963 made in Korea.
Their price is about 4 thousand rubles.
What is the difference?
On the left is an old starter without a gearbox, on the right is a new starter with a planetary gearbox.
Visually, they differ from starters for a 1.5-liter eight-valve engine by the presence of studs for mounting the planetary gearbox . Otherwise, the process of dismantling the old and new starters is no different, as we will now see.
Removing the starter for Daewoo Nexia
A little trick: it’s more convenient to unscrew the starter mounting bolt from above using short keys.
Regardless of the starter model, the process of dismantling it is practically the same.
This happens as follows:
- It is more convenient to carry out the work on an inspection hole or overpass. We install the car and secure it with the parking brake.
- First of all, we remove the negative terminal from the battery, thereby de-energizing the electrical system.
- Turn off the starter power. To do this, use a 13mm head to unscrew the nut securing the positive terminal on the starter.
Unscrew the fixing nut of the “positive” tip.
- We remove the terminal.
- Using a 10mm socket, unscrew the nuts securing the control wire terminals on the solenoid relay and remove the wires from the terminals.
Unscrew the nut of the “control” wire.
- Now disconnect the starter ground wire. It is screwed to the upper stud securing the starter to the clutch housing and for this we use a 13mm socket with an extension wrench.
From below, the ground tip nut is almost invisible. It is easier to unscrew from the top with a short 13mm wrench. - Unscrew the two bolts securing the starter to the clutch housing.
Unscrew the lower starter mounting bolt. - We remove the starter from its seat.
After removing the starter, we also check the condition of the flywheel teeth.
Conclusion
We diagnose, replace or repair the starter, and install the unit in place in the reverse order. Good luck to everyone and start the engine with a half turn.
Before installation, clean the terminals. Lubricate the tips with lithol to prevent corrosion.
Video on how to independently check the performance of the starter
Source: https://carfrance.ru/snimaem-starter-na-daewoo-nexia/
Fuse diagram
The base of the block is no different for cars produced in 2000 and 2011. Also, the eight-valve version and the sixteen-valve engines are protected by the same fuses.
The standard electrical circuit is deciphered as follows:
- F1 – ECU system, protects the power cores of the device;
- F2 – system of dimensions;
- F3 – not used;
- F4 – head optics high beam mode fuse;
- F5/6 – low beam, correction of the right and left headlights, respectively;
- F7 – fuel system;
- F8 – turns in operating mode, emergency lights and stops;
- F9 – wipers;
- F10 – protective element of the electric lock of the windshield lid;
- F11 – air conditioning compressor;
- F12 – low rotation speed of the stove fan;
- F13 – fuse F13 is multifunctional, the element is responsible for the cigarette lighter, instrument panel, and works as an auxiliary element of the generator circuit;
- F14 – horn and heater fan;
- F15 – interior lighting of the interior, glove compartment and cargo compartment;
- F16 – power supply for electric door windows;
- F17 – comes into operation when the tape recorder is powered from the ignition switch;
- F18 – central locking, radio power supply from battery, luggage compartment lid lock drive.
There are also several relays here.
- Maximum operating mode of the stove fan.
- Turn signals in blinking mode.
- Fuel pump switch relay.
- Front and rear fog lights.
When installing powerful optics, the foglight switch often burns out or fails to cope. To unload the element, users install an auxiliary unit and energize the rear lights to it.
The additional part contains a small number of fuse links:
- F20 – climate control;
- F21 – standard fog lights.
Drivers deal with a constantly burning element in the same way as with a relay. A separate line is drawn and powered through a common switch.
Removing the starter on a Daewoo Nexia 2008 car
We carry out the work on an inspection ditch or overpass. Disconnect the negative cable terminal from the battery terminal.
Using a 13mm socket, unscrew the nut securing the tip of the starter positive wire...
...and disconnect the wire tip.
Using a 10mm socket, unscrew the nut securing the tip of the traction relay control wire...
...and disconnect the wire tip . Using a “13” socket with an extension, unscrew the nut securing the tip of the “mass” wire to the special bolt of the upper fastening of the starter and disconnect the tip of the wire.
Using a “13” socket with an extension, we unscrew the two special bolts securing the starter... ...and, moving the starter, remove it from the hole in the cylinder block.
We remove the starter . Use a screwdriver to turn the drive gear . The gear should only rotate in one direction. Otherwise, replace the drive with a new one.
Use a screwdriver to move the drive gear with the freewheel on the starter shaft . The gear should move easily on the shaft splines.
We connect the positive terminal of the battery with the control terminal of the traction relay with wires for “lighting”, and the negative terminal with the “ground” (starter housing) . In this case, the anchor of the traction relay should push the gear with the overrunning clutch into the window of the front cover. A faulty traction relay must be replaced.
We connect the positive terminal of the battery to the lower contact bolt of the traction relay, and the negative terminal to ground . In this case, the rotation speed of the starter armature should be 2800-3000 min-1 with a voltage at the wire terminals of 11.5-12.0 V. Otherwise, repair of the starter is necessary. ( 6
Source: https://daewoo.biz/remont-daewoo/nexia-2008/remont-avtomobilya/elektrooborudovanie/starter/snyatie-startera/
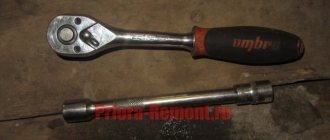
Required Tools
To replace the starter on a Nexia, you need a list of tools, which is presented in the table below.
Table - Tools required to replace the front strut
| Name | Note |
| Head | "at 10", "at 13" |
| Extension | Preferably with a ratchet |
| Short open-end wrench | "at 10", "at 13" |
| Screwdriver | With cross and flat blade |
| Socket wrench | “at 7”, “at 8”, “at 10”, “at 13”, “at 15” |
| Rags | To clean dirt |
To remove and install the starter, access is required from the bottom of the vehicle. Therefore, when carrying out operations, it is important to have an inspection hole, overpass or lift.
This is interesting: Xenon on Mitsubishi Lancer 10: do-it-yourself installation
How to remove the starter on a Daewoo Nexia? Replacing the bendix and solenoid relay
The service life of the Daewoo Nexia is around 100,000 (km) mileage .
A starter with a planetary gearbox (rated power 1.2-1.4 kW) is more reliable . This starter was equipped with 16-valve models . The Daewoo Nexia with 8 valves was supplied with a gearless starter (rated power 0.7-0.9 kW).
It is worth noting that the Daewoo Nexia maintenance regulations provide for the repair of the starter unit by replacing a worn starter with a completely new analogue .
But the price of the simplest starter is around $50 . And for many drivers there is no other choice but to carry out major repairs of the starter .
In this way you can reduce the financial costs of repairs up to 10 times !
The weak points of the Daewoo Nexia starter unit are the bendix (drive gear) and the solenoid relay . In this review, we will look at how to dismantle the starter and replace the above-mentioned components .
The process of removing and repairing the starter
- The master cannot do without an overpass or inspection hole. We drive the car into a pit/overpass, turn off the vehicle and apply handbrake lever
- Open the hood and remove the negative terminal from the battery .
- We look under the car and unscrew the engine protection (if provided).
- We find the starter unit , it is located on the gearbox .
- We unscrew the fastening of the positive terminal on the starter and fold the wire to the side. This way we de-energize the starter unit.
- Remove the solenoid relay control wires . You need to unscrew the nuts (2 pcs) and move the wiring to the side.
- Disconnect the starter ground wire . It is secured with a nut on the stud securing housing to the mounting site on the gearbox.
- We unscrew the fasteners of the starter housing to the mounting pad on the gearbox. The starter is held in place by 1 bolt and 1 locked pin.
At this stage, you can also inspect the gearing on the flywheel..
Starter unit repair
It is worth noting that the bendix and the solenoid relay are far from the only possible causes of starter failure . The starter assembly is still subject to wear: brushes, rotor, stator, bushings .
Before repairing the starter, it is imperative and absolutely necessary to carry out a comprehensive diagnosis of the starter assembly . This work can only be carried out efficiently by a highly qualified specialist who is specifically engaged in repairing starters.
Replacing the retractor and bendix is carried out in the following order:
- Remove the power wire of the solenoid relay . It is secured with a nut.
- Unscrew the fasteners of the solenoid relay . You need to remove 3 screws (or on some modifications 2 bolts ).
- Removing the solenoid relay.
- Remove the outer starter cover . It is held in place by 2 tightening bolts and 1 fastener with a TORX E5 (E7) head. On the Nexia there are no 16 valves with tightening bolts, instead there are 3 ordinary bolts (they secure the planetary gear housing).
- We remove the solenoid relay plug from the Bendix . The fork is secured with a pin.
- Use a puller to remove the locking ring .
- simply take out the worn bendix and put a new one in its place .
- We assemble the unit in the reverse order.
- When installing a retractor relay, we install a completely new retractor instead of a worn one.
- We put the starter in place.
- We do a test drive.
What was used in the renovation process?
- Set of keys (with TORX head E5 (E7))
- Screwdriver Set
- Retaining Ring Puller
- Multi-measurement tool
New components will also be needed, such as a bendix and a solenoid relay.
Where did the spark go for Nexia?
WHERE THE SPARK WENT AT NEXIA
WHERE THE SPARK WENT AT NEXIA How the insidious defect was diagnosed and ultimately overcome, says the head of the company’s technical center in Kazan.
The problem of “starting or not starting” has probably existed since the invention of the automobile.
With the advent of reliable and relatively inexpensive Nexias from Uzbekistan, the owners of Zhiguli and Samara cars who moved to them finally felt like people, but at the same time they realized that their Zhiguli experience was of little use for a new car. And if something happens, there is only one way - to a car service center.
The first time we encountered an Uzbek Nexia, which sometimes refused to start, was in the fall of 1997. According to the owner (I mean “words”, since I had a chance to see with my own eyes a car whose engine would not start much later), the car put him in an awkward position a couple of times, but after a few minutes (obviously, while the owner was wiping the headlights, windows and kicking wheels) started up as if nothing had happened. That case turned out to be not an isolated one. In cars suffering from a similar illness, the engine could refuse to start at any moment - after a long or short stay, in bad or good weather, in a garage or in the fresh air. Just as unexpectedly, he could quit fooling around and work normally for a week, a month, and then it all started again. It happened that the Nexia was towed to us, the master got behind the wheel, and... the engine started, as they say, with half a kick! This problem drove the owners to white heat; they began to be afraid of their cars.
In short, we were dealing with a typical “floating” defect - one of those that can make a car service specialist doubt the correctness of his choice of profession. Extensive (by that time three years) experience in working with Daewoo cars from Korea could not help - they never encountered such a defect, they always started.
Repairing such cars (how can you repair a working car?) had to be guided by the principle that “electronics is the science of contacts,” that is, by disconnecting and connecting electrical connectors, cleaning, blowing. Sometimes it helped, more often it didn’t. But statistics, the greatest of sciences, did its job - the overall picture began to emerge. The engine of the defective cars did not start due to the lack of a spark on the ignition coil, and “plus” was supplied to it, that is, pulses were not formed in the primary winding. If you try to start the engine “from the pusher” at this moment, it starts instantly. These two factors were a necessary and sufficient condition for the subsequent recommendations to be applied. But first, a little theory.
A schematic diagram of the Nexia ignition system is shown in the figure. The distributor housing contains a magnetoelectric pulse sensor (not to be confused with a Hall sensor) and an electronic module (switch, if you like). The pulse sensor consists of a magnetized rotor, integral with the distributor shaft, and a stator, which includes two pairs of poles and an induction coil in which an electromotive force (EMF) is induced with a frequency in the starter mode of 8 Hz and an amplitude of about 2 V. The electronic module converts these pulses are rectangular with an amplitude of 12 V and supplies them to the primary winding of the ignition coil. After starting the engine, the ignition system also switches on the electronic control unit (ECU), which controls the change in the ignition timing depending on the engine operating modes.
It was most logical to assume that the cause of all the troubles was in the module. After all, the word “switchboard”, pronounced with the appropriate epithets in the company of motorists, immediately gives rise to sympathetic nods of heads and a sea of sad memories. However, replacing switches on problem cars with a promise to return the money if the defect does not disappear, led to the return of money and counter questions: well, what next? But really - what if the electronic module, the ignition coil, and the ECU are checked and working normally, what remains? Is it really a sensor? No, I don’t even want to think about it, because it is primitive to the extreme. The only part in it that can fail is the induction coil, and even that is a plastic coil with a copper wire with a diameter of 0.1 mm wound around it. To check the performance of the coil, the Nexia car repair instructions require measuring its resistance, and if it is in the range of 500–1500 Ohms, then everything is in order. We measured this resistance in dozens of coils, and it was always in the range of 750–800 Ohms.
Replacing the Nexia starter: instructions, photos, videos, description
The starter in a car is designed to start the engine. A short-term charge is supplied from the ABC to the starter, which in turn rotates the flywheel at high speed.
The Daewoo Nexia starter is reliable, although it has its own resource, so it also requires maintenance and repair.
In the article we will talk about the causes of the malfunction, selection of a starter and replacement and repair procedures, as well as the manufacturer’s recommendations.
Video
The video will tell you how to replace the starter on Nexia
Starter replacement
Replacing a starter is quite a difficult procedure, especially for those who have never done it before. But don’t worry, it will seem easy enough. Let's move on to the replacement process itself.
- We dismantle the motor protection.
The master cannot do without an overpass or inspection hole. We drive the car into a pit/overpass, turn off the vehicle and apply the handbrake lever. Open the hood and remove the negative terminal from the battery.
- Unscrew the power cable nut.
We look under the car and unscrew the engine protection (if provided).
- Disconnect the contact relay.
We find the starter unit, it is located on the gearbox assembly site.
- Unscrew the traction relay.
We unscrew the fastening of the positive terminal on the starter and fold the wire to the side. This way we de-energize the starter unit.
- We remove the wire.
Remove the solenoid relay control wires. You need to unscrew the nuts (2 pcs) and move the wiring to the side.
- Unscrew the mass nut and remove it.
Disconnect the starter ground wire. It is secured with a nut on the stud securing the starter housing to the mounting site on the gearbox.
- Unscrew the starter mount.
We unscrew the fasteners of the starter housing to the mounting pad on the gearbox. The starter is held in place by 1 bolt and 1 locked pin.
- We dismantle the starter.
We get the starter. At this stage, you can also inspect the gearing on the flywheel. It is worth noting that the bendix and the solenoid relay are far from the only possible causes of starter failure.
The starter assembly is still subject to wear: brushes, rotor, stator, bushings. Before repairing the starter, it is imperative and absolutely necessary to carry out a comprehensive diagnosis of the starter assembly.
This work can only be carried out efficiently by a highly qualified specialist who is specifically engaged in repairing starters.
- Now, you can either repair it or replace it with a new one.
Starter selection
96208781 - original catalog numbers of the Daewoo Nexia starter manufactured by Daewoo with a cost of 10,000 rubles. In addition, there are a number of analogues that can be used:
Starter.
| Name | vendor code | Price |
| Magneti marelli | 943205191010 | 4000 |
| Nipparts | J5210905 | 5000 |
| Mando | EX96952005 | 7000 |
| Fenox | ST31123 | 7000 |
| Valeo | 438183 | 8000 |
| Valeo | 838026 | 10000 |
| Bosch | 0 986 014 860 | 10000 |
Causes of starter malfunctions
Before you begin the repair or replacement process, you need to know the reasons for the unit malfunction. They are quite familiar to many car enthusiasts. There are quite a few reasons for the Daewoo Nexia starter not working, but let’s look at the main ones:
- The battery does not work;
- terminal oxidation;
- traction relay closing;
- open circuit of the traction relay;
- inoperability of contact ignition;
- anchor jams;
- wear and sticking of brushes;
- ignition circuit break;
- clutch is faulty;
- drive gear wear;
- the gear does not fit on the flywheel teeth;
- armature bearing wear.
These are some of the reasons for the impossibility of starting the starter, and therefore the engine.
Conclusion
Considering everything that has been said, it is worth emphasizing that repairing the Daewoo Nexia starter is not that difficult and can be done with your own hands without any problems. But if it needs to be replaced, it is worth paying attention to the fact that the selection should be carried out by determining the catalog number, which can be found on the starter itself or using online catalogs.
Source: https://koreanautoreview.com/daewoo/nexia/zamena-startera-neksiya.html
Good to know…
How to completely or partially change the daewoo nexia and matiz ignition switch (cylinder, contact group)? If you want to save money and buy only the cylinder itself, and at the same time have only one key left, then there is another option that is useful to know about. It will consist in the interchangeability of secrets between the old and new ignition lock cylinder.
- Turn the cylinder, or rather its inner part, until the lock stops, press it with a screwdriver and disengage it. Be very careful when performing this procedure as the retainer and spring may come loose and become lost. There is also a locking tab on the opposite side of the larva; you should also keep an eye on it and protect it from loss.
- By analogy, it is necessary to take the same actions with a new larva.
- Compare the sizes of the secrets with each other.
- If the secrets are the same, you can start replacing them. Change each secret in turn and make sure not to confuse the location of each of them; if the position of at least one is incorrect, the cylinder key will no longer turn.
- If the secretions of the new larva differ in size, then you will have to replace it using one of the methods described earlier.
Daewoo Nexia 1.5 replacing starter retractor relay, photo and video instructions
We have a Daewoo Nexia car under repair, produced in 2001, with a 1.5 liter engine, mileage 368 thousand km, we need to replace the solenoid relay here. We'll show you how to do it yourself, as quickly and correctly as possible.
The engine on this car was replaced, after the replacement the retractor refused to work normally, until you hit it with something, it does not work. Open the hood and disconnect the negative terminal from the battery. It is most convenient for us to carry out the work from below, so we lift the car.
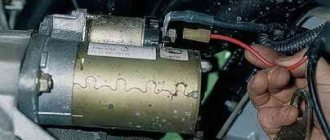
Here is the starter that needs to be removed there:
It is secured with two bolts, under a 13 socket. Two wires come to it, positive (unscrewed with a 13 socket) and excitation (unscrewed with a 10 socket). We dismantle it and begin disassembling, unscrew the nut:
Unscrew 3 screws on the case:
We have new solenoid relays from PMC, order number PXPECB-002. On the new retractor we need to remove the plug, since it will be inconvenient to tighten it, this can be done using pliers:
We screw the new solenoid relay to the starter. During assembly, an unpleasant detail came to light, but the Partsmall retractor was not threaded! This is a warranty case, you can take it straight back to the store, but we didn’t bother and cut it ourselves, and we already managed to break the plug.
After the assembly we install it on the car, put the head on the top stud and start it together. We assemble in reverse order.
Video replacement of the solenoid relay Daewoo Nexia 1.5
Backup video on how to replace the solenoid relay in Daewoo Nexia
Read times: 518; Today: 1
Source: https://remontautohelp.ru/dehu-neksiya-1-5-zamena-vtyagivayushhego-rele-foto-i-video-instrukciya/
What was used in the renovation process?
- Set of keys (with TORX head E5 (E7))
- Screwdriver Set
- Retaining Ring Puller
- Multi-measurement tool
New components will also be needed, such as a bendix and a solenoid relay.
Additional information
A malfunction of the retractor relay is indicated by the absence of a characteristic click when the ignition key is turned to the “starter” position.
A malfunction of the bendix may be indicated by the absence of rotation of the flywheel when the starter is turned on . Most often the fork breaks off. But it is customary to change the Bendix along with it, since its gear wears out over time, and the Bendix body itself becomes filled with abrasive.
Source: zaz-shop.com.ua
Problems with the starter of Daewoo Nexia, Matiz and Lanos cars
The Daewoo car is one of the most successful options for budget cars. Like any other car, Nexia models are equipped with many different mechanisms that interact with each other. Read below about what the Daewoo Nexia starter is and what malfunctions are typical for this device.
The design of the starter mechanism on Daewoo
On Daewoo cars, including Matiz and Lanos models, the starter performs a fairly important function. In particular, when the driver turns the key in the lock, the battery begins to transmit voltage to the device.
The starter turns at the moment when a magnet begins to act on it, as a result of which it begins to connect with the power unit. The engine starts as a result of ignition of the fuel-air mixture.
If you look at the starter of a Daewoo Matiz or any other car model, you will see that it visually looks like a four-pole electric motor. The unit itself is combined with a planetary mechanism, as well as an electromagnetic two-winding relay.
Interaction of parts with each other
Bendix starter on Nexia
As stated above, when you turn the ignition key on a car, that is, when the key moves to the third position, voltage is supplied from the battery to the traction relay. The relay is equipped with a so-called armature, which moves the drive lever. As a result, the clutch gear meshes with the gear element of the power unit flywheel. At this moment, the armature also closes the power contacts and the electric motor of the unit begins to transfer charge to the battery. Next, the rotor of the device will turn the crankshaft of the motor through the placental gearbox.
Of course, for normal operation, the node should not have a too high frequency, as this can lead to its breakdown.
After the start is carried out, when the speed of the gear is higher, unlocking occurs, as a result of which the freewheel comes into operation. This entire procedure is carried out within ten seconds.
If the air temperature is negative, the unit can operate for no more than fifteen seconds (the author of the video about repairing the solenoid relay is Alexander Movchan).
Basic starter malfunctions
So, what to do if the car does not start and what to do if the starter does not turn? First, of course, you need to understand the main malfunctions of the unit.
- It is impossible to start, although the ignition key is in position III, but the driver does not hear a characteristic click, and the unit itself refuses to turn. As a rule, such a breakdown is associated with a failure of the solenoid relay. However, first of all, you still need to make sure that the battery in the car is charged and working. In this case, it is not superfluous to check the terminals on the battery - if they are oxidized, they will need to be cleaned. Sometimes a similar problem occurs when the ground cable is poorly secured to the car body; the wire itself may be damaged. If everything is in order with this, you will need to make sure that voltage is supplied to the contact of the relay of the node itself. Diagnostics is carried out using a multimeter or a 12-volt test lamp. If the battery works normally, but the unit still does not turn, the cause of the malfunction must be sought in the ignition switch. Otherwise, the cause of the malfunction will be the operation of the traction relay.
- When starting the power unit, the driver may hear a characteristic click, but still do not twist the unit. In this case, the cause of the malfunction may be a malfunction of the solenoid relay, sticking or wear of the brushes, or failure of the armature commutator. But at the same time, you also need to make sure that the battery is working normally, the ground is securely fastened, and the battery terminals are not oxidized. In addition, it would be a good idea to check whether the terminals on the starter itself are properly tightened; we are talking about a permanent plus, as well as the control contact of the relay.
- The engine starts, but the unit turns with great difficulty. In this case, the cause of the malfunction, as a rule, is wear of the mechanism bushings or contamination of the commutator; cleaning the latter or replacing the bushings will solve the problem. In addition, the problem may be a short circuit or breakage of the armature windings, as well as wear of the brushes. If necessary, the brushes can also be replaced.
- The unit rotates normally, but the flywheel does not turn. Such a malfunction may be due to incorrect operation of the bendix, in particular, the drive gear. The failure may also be caused by a broken drive fork.
- The mechanism turns, but the flywheel does not turn, and an uncharacteristic sound is heard from the engine compartment, in the area of the gearbox housing - a squealing or crackling sound. The reason in this case may lie in the inoperability of the bendix or wear of the teeth of the flywheel crown.
- The unit continues to function after starting the power unit or turns on randomly while driving. If you can start, but the starter does not work correctly, the solenoid relay may have failed. In this case, the drive gear may also not disengage with the flywheel, or it may simply jam on the splines of the so-called anchor. Therefore, first of all, you need to spend time diagnosing these components. If everything is fine with them, then perhaps the cause of the malfunction lies in the contact group. If the starter itself turns weakly, you can find out more about options for solving the problem here.
The main symptoms of a malfunction of the ignition switch contact group
The main signs by which you can understand that the contact group is burnt out and does not work or will soon break. You can touch it, the contact group gets very hot, turning on the low beam, heater, windshield wipers, radio - at this moment there is a colossal load on the contact group, the contacts get very hot and the plastic begins to melt. The contact group will work for some time, but due to the fact that the plastic has melted, the contact has become even worse - a breakdown is not far off.
So the first sign is strong heating of the contact group. The second and main sign is the smell of burnt wires or plastic. If you remove the steering column casing, you will smell a burning smell and see a picture - blackened, burnt wires and a corrected contact group. Consider this article your salvation, you just need to read it to the end.
There is also a situation when you turn the key, but the car does not react. Nexia has a standard problem. This means 99 percent that your contact group has received a hitch. But don’t despair, if you don’t have a contact group at hand, you can drive normally by starting the engine with wires (see How to start a Nexia engine with wires without keys). If when you turn the key, the car does not start, then the contact group is to blame. It also happens that the starter simply does not turn when you turn the key - this is the same trouble.
replacing the starter — logbook Daewoo Nexia 2008 on DRIVE2
More than a year ago, a problem appeared: sometimes, when trying to start the car, only one click was heard under the hood. helped to put the car into gear and push it.
This sometimes arose almost on every trip, or it could not appear for weeks.
In order not to bother with the problem of selecting the right bendix or retractor relay when the car is already on a lift, I decided to replace the starter assembly with a GM original.
As a result of searching, I found and ordered in emex by article number 96 469 960
suitable option for 4745 rub.
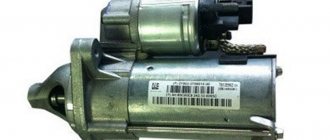
The starter came in a cardboard box. On the box itself there is a GM sticker with a number. The starter itself did not have a sticker with a number inside. There is only a sticker "Remy Korea"
The replacement was carried out at an auto repair shop (Ishimbay). Replacing the starter took 1.5 hours. They took it out from below.
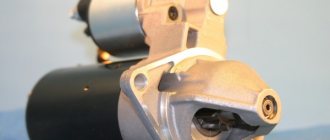
- Old and new starters:
- It can be seen that the new starter is thicker and shorter than the old one.
- Article number of the starter removed from the car: 96952006
8E236 is also stamped (I don’t know what this means. Probably the batch number)
The new starter starts with a lower whirring sound. Before this, when I cranked the starter, something rumbled there. When you shake the old, dismantled starter, you can hear something rolling around inside. (the new one does not have such a sound).
Since I ended up at the service center, I changed the engine oil. Once again I filled up with Lukoil Lux 5w40 207465
for their 920r.
and frequent replacement will do. 4t.km or 5 months have passed since the previous replacement. Filter Mahle OC 4053
for 203 rubles.
Mileage photo for statistics.
Oil is leaking from the valve cover. He's running. This is clearly visible on the lift. But the part to solve this problem is on the way!
- On the lift, we finally managed to take good photos of the rear wheel lift.
- I noticed that the shock absorber spacer was touching the shock absorber a little, even though I made a cutout there.
- Asked for a larger neckline
Zoom
With shock absorber spacer removed
In the end it turned out like this. On both sides.
- Now nothing will come into contact under any conditions.
- I found another place of friction: the handbrake cable and the back of the gas tank:
- I'll need to glue something on for the next race.
I asked him to carry out a visual diagnosis of the front suspension: the struts continue to leak (they’ve been leaking for a year now, they’ll put up with it for another six months). everything else is normal. I paid 1000 rubles for the work, which is quite inexpensive. I'm happy with the service. This, in my opinion, is the only service in Ishimbay that has ski lifts.
Thank you for your attention!
Price tag: 7,000 ₽ Mileage: 149075 km
Source: https://www.drive2.com/l/454147231612666096/
Where is the starter located on Daewoo Nexia
What should the driver behind the wheel know about the operation of the Daewoo Nexia starter?
The electrical equipment of the DAEWOO NEXIA car has its own characteristics that every driver sitting behind the wheel of this car needs to know. The fact is that electrical equipment is used here, the constant voltage of which has a nominal voltage of 12 V.
All equipment as a whole is a single-wire circuit. Answers@Mail.Ru: question to the owners of Daewoo Nexia where it is located. As they say about the secrets of the old Daewoo Nexia ignition switch, try to remove the lock.
is running) takes responsibility for the power supply itself
As for the starter, its functions are as follows: when you turn the ignition key, immediately at its command from the battery, electronic current begins to flow to the starter. The latter will be affected by a magnet and it will connect to the engine. The engine begins to turn, the fuel ignites in it and it starts.
Daewoo Nexia Starter
Thus, the starter of any car (including the Daewoo Nexia ) turns out to be an important element on the way to starting its engine.
What is this part?
Let's take a look at the starter . A visual inspection of this part from Daewoo shows that it looks like a four-pole, four-brush electric motor. The procedure for replacing the timing belt on a Daewoo Nexia with a 1.5 liter 8 valve engine, with a detailed description, photographs and video. It is also combined with a planetary gearbox and an electromagnetic two-winding traction relay.
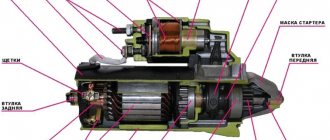
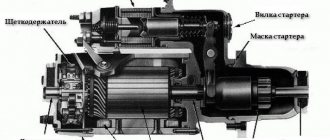
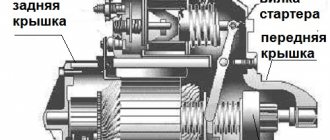
If you disassemble the Daewoo starter into parts, you can identify the following components:
- Drive side cover;
- Screws securing the traction relay to the cover on the drive side;
- Drive clutch retaining ring ;
- Drive coupling thrust ring ;
- Drive coupling;
- Drive lever;
- Ring gear;
- Drive lever support;
- Drive shaft;
- Traction relay;
- Satellites;
- Planetary gear seal ring;
- Cover mounting bolts on the manifold side;
- Pinch bolts;
- Collector side cover;
- Brush unit;
- Stator;
- Rotor;
- Planetary gear cover.
Daewoo Nexia — Removing and disassembling the starter (replacing the bendix)
Removing and disassembling the starter
Bendix replacement. Fog lights on Daewoo Nexia N150 - how. Subscribe to my channel.
The main symptoms of a malfunction of the ignition switch contact group
The main signs by which you can understand that the contact group is burnt out and does not work or will soon break.
You can touch it, the contact group gets very hot, turning on the low beam, heater, windshield wipers, radio - at this moment there is a colossal load on the contact group, the contacts get very hot and the plastic begins to melt. The contact group will work for some time, but due to the fact that the plastic has melted, the contact has become even worse - a breakdown is not far off. So the first sign is strong heating of the contact group. The second and main sign is the smell of burnt wires or plastic. If you remove the steering column casing, you will smell a burning smell and see a picture - blackened, burnt wires and a corrected contact group. Consider this article your salvation, you just need to read it to the end.
There is also a situation when you turn the key, but the car does not react. Nexia has a standard problem. This means 99 percent that your contact group has received a hitch. But don’t despair, if you don’t have a contact group at hand, you can drive normally by starting the engine with wires (see How to start a Nexia engine with wires without keys). If when you turn the key, the car does not start, then the contact group is to blame. It also happens that the starter simply does not turn when you turn the key - this is the same trouble.
How to Remove the Starter on a Nexia ~ AUTOINTERLINE.RU
Removing the starter
Because a powerful diesel starter must develop significant torque, it is provided with an additional fastening (3) in the cover on the manifold side.
- Disconnect the ground wire from the battery terminal. Raise the car from the front and secure it.
- Tag the main electrical wire and disconnect it from the starter.
- Disconnect the wire (tag) from the magnetic switch .
- Unscrew the starter wire holders.
- Type C motor: If equipped, remove the thermal protection plate.
- Unscrew the starter mount (3 bolts), while marking the location of the centering sleeve.
- If installed, remove the rear starter support.
- Remove the starter from the engine and remove it from under the car from the engine compartment.
- Engine type "F": Remove the air filter housing.
- Remove the 3 starter mounting bolts. At the same time, mark the location of the centering sleeve.
- Remove the starter cover (if installed).
- Remove the rear starter support.
- Remove the starter from the bottom of the engine compartment.
- 16-valve engine: remove the exhaust thermal protection (2 bolts).
- Remove the 3 starter mounting bolts. At the same time, mark the location of the centering sleeve.
- Remove the right front wheel.
- Remove the muffler exhaust manifold reinforcement from the engine housing (2 bolts).
- Remove the rear starter mount (3 bolts) and remove the starter from the engine.
- Remove the starter from the engine compartment on the right side above the steering linkage rod.
Removing the Magnetic Switch
Daewoo Nexia — Removing and disassembling the starter (replacing the bendix)
Removal
and disassembling
the starter
and replacing the bendix. Subscribe to my channel...