Question how to check parking sensor, occurs for car owners in the event of a failure of the parking assistance system. Self-checking of the parking sensors is carried out using tactile inspection, a multimeter or a smartphone. We'll look at how to find out if the parking sensors are working properly in this article.
| Which sensor parameter is being checked? | What is needed for verification |
| Vibration | Tactile check |
| Another parking sensor with LEDs soldered to it | |
| Audible clicks | Hearing test |
| Voice recorder application on a smartphone with the ability to create a diagram of sound waves | |
| Winding resistance | Electronic multimeter in ohmmeter mode |
When should parking sensors be checked?
First, let us briefly outline the operating principle of the parking radar. This is a system equipped with sensors and a signal indicator that reacts to dangerous proximity of a car to obstacles (fences, curbs, poles, other cars, etc.). Most cars today have ultrasonic sensors. They generate short pulses, and, if objects are detected within the radius of the sensitivity zone, they catch the signals reflected from the latter. Well, the computer, taking as a basis the time between sending and returning the impulse, as well as the constant speed of sound in the air, calculates the distance.
If at least one of the parking sensors fails, the entire set will not work correctly. Firstly, a “blind” area will appear in its coverage area. Secondly, the entire wiring of the parking radar may fail. Thirdly, if the system has a self-diagnosis option, after it starts and detects a problem, it can block the entire mechanism.
Signs of failure of one of the locators:
- The parking radar does not turn on when reversing;
- False positives have become more frequent;
- The device is unstable or incorrect (misses objects to which it previously responded normally);
- After self-diagnosis, an error message appears on the display. For example, Park Assist Service Requ 106 or E1.
If all the signs indicate a sensor failure, you will have to check the functionality of each one.
Purpose and principle of operation
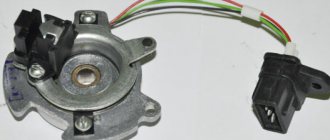
The main purpose of the parking sensor is to determine the distance to nearby objects. There are 2 varieties of this device:
- Ultrasonic. The sensor creates an ultrasonic pulse, which, when reflected from a nearby object, returns back. The electronic unit reads the return speed and, based on this data, determines the distance;
- Electromagnetic. They work on the same principle. It differs in that instead of ultrasound, the sensor creates a magnetic field that interacts with the object and is reflected from it. Such sensors are most often tape sensors.
Also, devices can be wired or wireless. Depending on the method of connecting the emitter, the sensors may have several different malfunctions, which will be described below.
How to check parking sensors
It is easy to check the parking sensor for serviceability. There are several ways:
- Parking sensor click test;
- Diagnostics for the presence of characteristic vibration;
- Checking parking sensors with a multimeter at home.
Each of these methods will allow you not only to verify that the sensor system is faulty, but to find out which one is not working.
For high-quality diagnostics, you will need an assistant, a smartphone, a multimeter and tools for dismantling the bumper and sensors.
How to check for clicks?
An active and correctly functioning locator emits faint clicks when foreign objects approach it. Ask a friend to help you:
- To check the rear sensors, you should start the car and put the gearbox lever in reverse mode (no need to move away);
- If you don’t know how to determine which parking sensors are not working in front, turn on first gear on a manual transmission or mode “D” (drive) on an automatic transmission;
- At this time, you should sit next to the locators and, alternately raising your palm to each of them, listen carefully;
- Working sensors should emit weak, frequent clicks, approximately 3-6 per second;
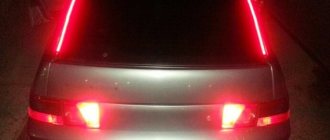
- The assistant in the cabin must monitor the display system: is the buzzer working, what does the graphic scale display?
How to check for vibration?
Another tactile check is carried out in the same way, together with an assistant:
- Start the car and activate the parking radar;
- Working sensors vibrate slightly during operation. This can be easily checked with your finger by gently running it over the surface of the sensor;
- Test each mark on the bumper one at a time.
How to check for clicks and vibrations using a smartphone?
Please note that some parking sensors are very quiet and can sometimes be difficult to hear when they click or check for vibration. To avoid drawing false conclusions, we recommend checking these parameters using a special application on your smartphone:
- Download the audio spectrum analyzer utility (can build a diagram of the received sound);
- Activate the application and turn on the engine, move the gearbox lever to the desired position (to start the parking sensors);
- Apply the microphone to each sensor in turn. During the test, shake the gadget slightly from side to side (with an amplitude of no more than 2 cm);
- Each sensor should be recorded for 30 seconds
- Afterwards, all that remains is to check the records. Vibration signals will definitely appear in the sound diagram. And clicks, even weak ones, will be heard if you turn up the volume.
GUGG › Blog › Self-diagnosis of parking sensors without using Vida+Dice
Hello dears. In view of the fact that very often problems arise with parking sensors, and also due to the fact that most do not understand the method for diagnosing them, and also do not have Dice in use - this is what prompted me to write this post. I’ll say right away that I specifically chose the most complex breakdown in order to show that the problem is not always in the sensors (as many here believe), and also so that you can clearly follow the entire chain of steps that will allow you to independently diagnose and identify the problem in this system of any complexity. For diagnostics, you will need a partner and a multimeter (I think every car enthusiast should have one). And also a little theory about the operation of this system, which I will try to explain to you at an understandable level. So let's get started. The car is a Volvo S 60 2007. But the principle of operation of the system is the same on other models and years (meaning the standard system).
So, one fine day, now they are becoming increasingly sunny, you get into your car, turn on the ignition, and suddenly you see this unpleasant message
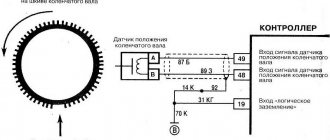
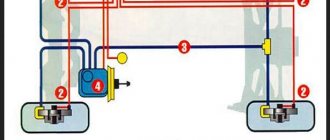
Don’t be alarmed, this just means that you have a problem with the parking assistance system. Let's figure out what kind of system this is, how it functions, and what components it consists of. Here is the electrical diagram for the car indicated at the beginning of the post
You don't need to understand everything exactly because you don't have to be an electrician just because you own a car. You need to understand one thing - in this system, the following elements can be the subject of a malfunction 1. REM unit - rear electronic module 2. PAM unit - the parking sensors unit itself 3. Parking sensors, there can be four or eight of them (if there are also front sensors), and failure of any of them will entail a failure of the ENTIRE system 4. Wires through which power is supplied and all elements of the system are connected. 5. System fuses There are a lot of elements, how can we determine where exactly the fault is hidden? Let's start in order.
Quite often, parking sensors fail. This can be either a permanent effect or a temporary phenomenon due to icing, moisture, and other road and weather factors. How to determine which sensor has failed? To do this, we call a partner, ask him to start the car, put it in R gear and ask him to hold the brake so that the car does not drive towards you. Why on you? To check, you must be behind the car and listen to the operation of the sensors. A working sensor makes a characteristic clicking sound, while a non-working sensor is silent. You can even determine which sensor has failed
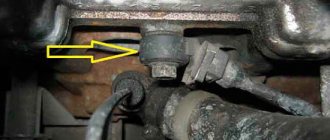
Remember that the sensor may not work due to oxide or destruction of the wires going to it (this happens especially often on front sensors due to their location and reagents on the road). How to determine this? Just swap the sensors and see if the problem appears in this case.
In my case, all 4 sensors do not work. This may indicate the following. It is possible, but unlikely, for all the sensors to fail at once. Since the sensors have a common power supply and ground, there may be a problem with the wires - possible, but also unlikely for sensors located at the rear. But it’s worth keeping this version in mind. Let's check it now from the other end.
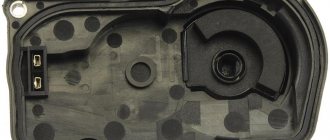
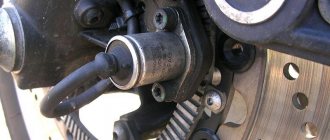
Let's check if there is power to the parking sensors unit (PAM unit). If everything is in order there, then the localization is narrowed down, and we will suspect either the parking sensors unit or the wires going from it to the sensors.
To check, we open the trunk, look to the left
Source
How to check with a multimeter?
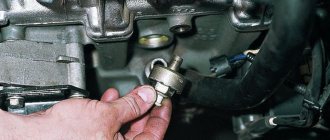
The most reliable and effective method of checking a 3-pin or 2-pin parking sensor is using a multimeter. This is a simple electrical measuring device that allows you to check the resistance, current and voltage of any device.
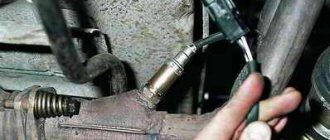
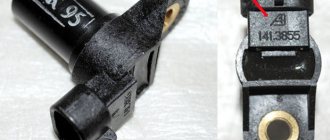
The parking sensors will have to be removed. Removing them from the bumper is not difficult. In this job, it is actually more difficult to remove the body part itself (unless the sensors are pushed out). We have an article with instructions on this topic.
After dismantling, you should check the power supply to each ultrasonic tag. Let's look at how to test the parking sensor with a multimeter:
- Switch the device to the electrical resistance test mode at the limit of 2 kOhm;
- Connect the tester probes to the sensor contacts;
- Sensors come in 3-pin and 2-pin types. In the second case, one of them is “plus”, the other, respectively, “minus”. In the first, between “+” and “-” there is a signal contact. To check a three-pin parking sensor with a tester, simply move the probes to the desired outputs;
- The voltage between “+” and “-” should be from 400 to 700 Ohms. If the tester shows a lower value, or even displays “0”, the locator is inoperative.
Now you know how to check each parking sensor for serviceability with a multimeter. If the procedure does not reveal any problems, then the sensors are working properly; the problem will have to be looked for in the receiving unit.
Diagnostics
Testing the car parking sensor is required when problems and errors occur:
Diagnosis of parking sensors can be performed in several ways. The first of them is checking for clicks produced by the touch controller included in the design. You can also detect malfunctions of the parking assistant sensors by vibration when touched or using a multimeter.
Click test
To check the parking sensors for functionality, you must first turn the key in the ignition and engage reverse to activate the system. Then you need to go to the bumper on which the touch controller is located. If it is working properly, you will hear a click. It is best to perform this operation in a garage or quiet place.
If you cannot hear the click, you can record it on a voice recorder or video camera with a sensitive microphone. If the click is clearly audible in the recording, then the sensor is working. You can also record the warning sound produced by the parking sensors inside the car. If there are no clicks or sounds, in both cases the rear parking sensor is faulty. It needs a more detailed check or replacement.
Vibration test
Some parking sensors can be tested for serviceability by vibration. In this case, you need to start the car engine by turning on neutral gear. After this, you should touch the controller housings. If they are working properly they should vibrate. It is worth considering that not all parking sensors can be checked in this way.
Using a multimeter
The condition of the car parking system sensors can be determined by resistance using a multimeter. Checking two-contact sensors using a measuring device is carried out as follows:
If the resistance is in the range of 100-900 Ohms, then the sensor is considered to be working. If the meter reads 0, a short circuit has been detected.
If the resistance is infinitely large, a break is suspected due to the failure of the semiconductor components of the sensors.
You can test the parking system wiring with a multimeter to ensure its integrity.
Is it possible to do the repairs yourself?
Parking radar, if you noticed, is a simple device. Most of its problems are, indeed, easy to fix with your own hands. What reasons can lead to failure of parking sensors?
- Banal wear and tear;
- Mechanical damage (for example, after hitting an obstacle);
- Broken wiring;
- Incorrect installation (weak fastening, tilt);
- Penetration of moisture, dust, dirt, which could cause contacts to oxidize and insulation to be damaged;
- Short circuit in the processor (damage to the electronic unit);
- The display unit (buzzer or display) is broken;
- Manufacturing defects.
It is better to entrust repairs to signal or hardware units to professionals. A gadget with a manufacturing defect should be exchanged under warranty. To prevent water or dirt from penetrating inside the sensor, ensure that the fasteners are tight and clean the sensors in a timely manner. Keep all radar elements clean and free from moisture. Check the wiring regularly. Parking sensors should be mounted level, without tilting, otherwise they will react to the asphalt, mistaking it for an obstacle. To prevent unnecessary vibration, attach the sensors tightly and firmly. Failure due to wear or mechanical damage can only be treated by replacing the sensors. The only plus in this situation is the opportunity to choose a more modern option, which is included in the rating of the best parking sensors.
How to replace parking sensors?
So, we figured out how to check the parking sensors to find out which one is not working. Let's say you find a faulty element. To replace it, you need to remove it from the bumper, disconnect it from the wiring and connect a new one. In some cases, unfortunately, you will need to replace the entire set of tags.
Stages of replacing parking sensors (briefly):
- Dismantling the car body;
- Disconnecting the non-working sensor wire from the general wiring;
- Removing the sensor from the hole in the bumper;
- Installation of a new ultrasonic or other type of locator (it is advisable to use sealant);
- Inclusion of a new cable into the general radar power system;
- Insulation of the common harness (insulating tape or special tube);
- Installing the bumper in place;
- Ready.
Well, now you know how to check the parking sensors for functionality using a tester or tactilely, and even, if necessary, you can replace the faulty sensor. To reduce the risk of damage and extend the life of your radar, handle the device with care. Keep it clean, perform regular diagnostics, and practice safe driving!
Replacement
If the parking sensor malfunction cannot be resolved independently, it must be replaced. If it is mounted on a sealant, then during dismantling you should be careful not to damage the bumper and adjacent parts. After this, a set of new parking sensors is purchased.
When installing them on the bumper, it is necessary to provide adequate protection from negative influences. To do this, new sensors sit on the sealant. It should be applied with care so that it does not get on working parts. Otherwise, the parking sensors will not work correctly. After this, the harness block coming from the main block of the parking system is connected to the sensors.
Source