01/19/2022 5,500 Ignition system
Author: Ivan Baranov
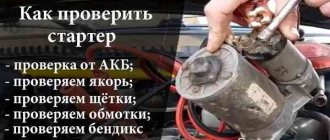
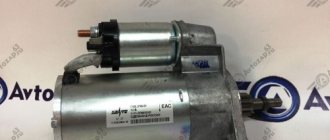
The starter is a component that no vehicle can do without, since this element is one of the main ones in the ignition system. As you know, there are no parts that last forever, and from time to time the starter unit tends to fail. You can learn more about what malfunctions are typical for this element and how to check the car starter armature on your own at home from this material.
[Hide]
How to check the starter armature with a multimeter
Some men can find problems and malfunctions with their own hands, repair and replace the necessary parts. This article with instructions will be useful for those who are ready to repair their car themselves. And for those who value their time and want to save money, we recommend turning to professionals. Our company works seven days a week, and our prices will please you. We offer starter armature testing services in Minsk efficiently and quickly at any time. We have modern equipment installed, with the help of which our professionals will quickly and accurately identify the problems and malfunctions of your car. We work with almost all brands of cars such as: BMW, Toyota, Mitsubishi, Audi, Volksvagen, Mazda, Nissan, Opel and many others.
Starter diagnostics and testing
If you find yourself on a highway far from a service center, you should know how to remove the starter and diagnose problems yourself. Diagnostics can be carried out visually and using a multimeter. A visual inspection will help you identify any chips or cracks – they need to be repaired. Next you need to check the starter armature.
We will tell you how to ring the starter armature with a multimeter in this article. If you do not have the opportunity to ring it yourself, we will help you check the starter armature with a multimeter.
Starter repair begins with disassembling the electric motor armature. The causes of the malfunction may be:
- Loss of contacts at the terminals.
- Wear and breakage of brushes.
- High temperatures for commutator plates.
- Poor insulation.
- Short circuit between plates.
- Interturn closure.
- Anchor jamming in the snout.
The first signs of a starter malfunction:
- characteristic hum sound;
- vibration during starter operation;
- the appearance of sparks;
- strong heating of the case and the appearance of an unpleasant smell of burnt plastic;
- change in armature rotation.
How to diagnose the problem and repair the starter
If you were unable to visually determine the place where the wiring was broken, you can short it with a wire at the junction of all the lamellas and apply voltage. In the place where it burns out there is a breakdown. You also need to pay attention to the condition of the lamellas. If they are damaged and repair is possible, then the lamellas must be restored.
The starter rotor winding is also checked with a light bulb. We apply the lamp starter to the collector plate and see whether the lamp lights up or not. If it lights up, it is necessary to replace the winding or completely replace the rotor. If it does not light up, check the resistance with an ohmmeter. The resistance should be small, approximately 10 kOhm.
If there is an interturn short circuit, a device for checking the starter armature will help determine it. The solution to the problem is to correct and align all the wires and clear them of debris.
If the above methods do not help, rewinding the anchor will help you.
To repair the anchor yourself, start by removing the short circuit; be sure to clean the location of the short circuit and check whether it appears again.
When unsoldering the collector terminals, we remove the rotor and thoroughly clean the surfaces using a drill, solder them and check for interturn short circuits.
To determine a burnt anchor, you need to use a battery.
NOTE
The windings of the traction relay are installed in a non-separable housing, so if they are damaged, replace the traction relay assembly.
Clean all starter parts from dirt.
Check the condition of the stator winding. To do this, turn on the test lamp in the 220 V AC circuit and connect the wire to one of the terminals of the stator winding, and connect the other end of the circuit to the housing. If the lamp is on, it means the winding insulation is damaged. Replace winding or stator. Check the second winding in the same way.
Starter diagnostic frequency
Depending on the load on the starter, its wear will depend; accordingly, the greater the load, the more often the starter needs to be diagnosed. Do not forget to diagnose and repair vehicle problems in a timely manner.
Now you know step by step how to check the starter at home. You can order diagnostics and repair of your car starter from our company Modnikov. Good luck on the roads!
Diagnostics and repair of the starter armature in a garage
Starter
is a unit that no vehicle can do without, since this element is one of the main ones in the ignition system.
As is clear, there are no endless parts and at times the starter unit tends to fail. How to check and repair the battery in the key in a Toyota Corolla Verso. If you decide to replace the battery in the key of a Toyota Corolla Verso with your own hands, then it is better to do everything in one of these. more about what malfunctions are typical for this element and how to check the
car starter armature on your own at home from this material.
What's the result?
As you can see, the information above allows you to figure out how to check the starter yourself in a garage. There is no need to have special equipment. Often, a test lamp, a multimeter and a charged battery are enough.
This means that it is better to give the starter to trusted specialists, who will separately conduct in-depth diagnostics, after which they will eliminate the existing faults and return the starter to full functionality.
The starter clicks and/or buzzes, but the engine does not turn over. The main causes of starter failures, diagnosing and troubleshooting them yourself.
Why the starter may not work after turning the key in the ignition. The main causes of starter malfunctions: bendix, traction relay, brushes, winding.
The device of a car engine starter, the principle of operation. Common malfunctions: the starter does not turn, does not turn off after starting the engine, etc.
Why does the starter turn normally, but the engine does not catch and does not start? Main causes of malfunction, checking fuel supply and ignition systems. Adviсe.
What to do if the starter turns, but the engine does not crank. Checking the power supply system, ignition, electronic control of the internal combustion engine, etc. Recommendations.
Attachments for an automobile internal combustion engine: what is included in the list of this equipment, and also what it means to have an “engine without attachments.”
Possible armature malfunctions
Malfunctions associated with the starter unit, in one way or another, affect the entire ignition system. How to remove the headlight on a Volkswagen Touareg 1 at home, how to remove the tail light of a Lada Kalina station wagon?. You will immediately know about the failure of the unit, since it is impossible to start the engine without it.
The main faults corresponding to this device:
See:
- collector wear, which may be uneven;
- short circuit between the turns of the windings of the unit;
- an insulation breakdown to ground has occurred;
- collector contacts are unsoldered;
- The studded elements under the bushings are worn out.
So that you can solve problems of this kind on your own, it will be useful for you to know how to check the armature
starter. We will tell you more about diagnostics and repair below.
Checking the starter unit with a tester
When assembling the starter, do the following:
Securely solder the winding terminals to the contacts of the traction relay.
Lubricate the splines and pins of the armature shaft with engine oil...
...back cover and intermediate support bushings...
...the armature tip of the traction relay...
...and the splines of the overrunning clutch.
By selecting adjusting washers, adjust the axial clearance of the starter armature shaft. The gap should be no more than 0.5 mm.
Place the support on the lever with its protrusion facing the anchor.
The tie rods must pass through the insulating tubes.
Anchor repair
One of the most common problems in the operation of the starter armature is a short circuit.
, namely, we are talking about windings located on the housing. In order to solve this problem, it will be necessary to carry out a visual diagnosis of the outputs of the unit, as well as the wiring of the element. By doing this, you can find the place where the breakdown occurred. After it is found, you need to clean the contacts and diagnose the resistance; for this, a multimeter is used. The video will talk about how to replace the silent block of a crab on front-wheel drive VAZ cars at home using improvised means. After that, you should insulate the broken area, why you can use super glue with asbestos.
If a visual inspection does not allow you to find the location of the breakdown, another method can be used for diagnosis. To test the generator at home, you will need a multimeter. You can independently check the belt tension, charging relay, diode bridge, stator, bearings and brushes. It consists of connecting all the lamellas of the device together, but for this you need to use a special stripped wire. When the lamellas are closed, it will be necessary to apply voltage to the device (to the commutator and ground), and since it must be very high, this may require a welding machine. How to charge a gel scooter battery at home. In fact, this is precisely where the complexity of the method lies. The place where there is a breakdown will burn out (video author - Konstantin Petrakov).
NOTE
At the same time as checking the winding resistance, check whether the contact plate closes the contact bolts of the traction relay. If the ohmmeter shows infinity, then either there is a break in the winding, or the plate does not close the contact bolts. In the first case, the traction relay must be replaced.
Inspect the contact bolts. Clean the burnt bolt heads with fine sandpaper. If the heads are severely burned out, you can rotate the bolts 180° so that they are pressed against the contact plate with the unburnt side. If the surface of the contact plate is heavily worn, it can be turned with the other side towards the contact bolts.
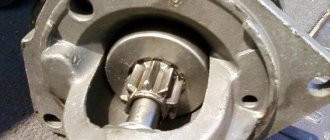
Checking the starter armature.
Anchor check
for interturn short circuit. The video shows how to repair a headlight hydraulic booster in the field. Let’s make a reservation right away: our device is homemade, since in Russia it’s similar.
In the event that an interturn short circuit occurs in the operation of the unit, such a problem can be determined using a special device. That’s what it’s called - PPYA - a device for checking the anchor. As practice shows, short circuits are often caused by the use of bent or crumpled wires or the presence of conductive particles between them. Don't know how to check the starter armature at home? Nothing could be simpler. Use a tester or other testing equipment. If this is the case, then it is necessary to correct all the problems (align the wires and clean them of debris), and then apply a layer of varnish on top, this will protect the device. If this method does not help you find the problem, you can rewind the armature yourself.
As for a short circuit, it usually affects the functioning of the collector. How to charge a gel battery for a scooter and at home, both inside. Subsequently, this can lead to burnout of the plates, as a result of which this element can completely collapse. If you have to solder, remember that before soldering the working surfaces must be thoroughly cleaned; you can use a drill for this. Using this device, you can perform a good cleaning of contacts, as well as lead wires. I’ll show you how to replace a car CV joint yourself at home. Starter conditions and how to check the armature at home" how. I'm not a master, but I hope my video will help someone. checked using an armature diagnostic device
.
MZHZ
Interturn short circuit or IFZ is the number one fault of the armature. It is determined using a special apparatus that is designed specifically for these purposes. It's called PYA. It is a transformer that effectively detects faults.
MFZ accounts for almost half of all malfunctions associated with electric motors (which, in fact, is the starter). The reasons for the occurrence of MZHZ should be sought in overloading of the device, erroneous operation and initial standard defects.
It is noteworthy that improper operation of the starting device threatens the penetration of water into the windings.
How to find MZHZ? Determining it is not so difficult if you use available tools and the apparatus described above.
Here are several other ways to determine the MFZ of an anchor:
- When the starter is operating, the device heats up unevenly; some part, if you touch it, is very hot;
- Measuring the load on each phase with current clamps (obviously, if there is more current in one of the phases than in the others, this is a problem);
- Ringing the windings with a tester, which implies that a separate ringing is required (each winding separately, which makes it possible to verify the obtained resistance values);
- Check with a megger, which will allow you to determine a short to the housing (one terminal of the device is applied to the starter housing, the other to the output of the windings).
PPY for checking the anchor
The best and most accurate test of the anchor on the MZHZ is the use of Grover Tester (American name) or in our opinion - PPY. True, the anchor must already be removed and the starter disassembled.
A PYA is a transformer that has only a primary winding, and a gap is cut out in the core where the armature is placed.
The check is carried out like this:
- The anchor is placed in this gap;
- The PPP is connected to the 220V network;
- Any piece of metal strip is anchored;
- If a piece of metal begins to vibrate or become magnetized, it means that there is an MFZ in the armature.
Don't forget to rotate the armature around the entire circle, since the MFZ may not be in one plane, but present in another.
Why do you need a starter and its design features?
A starter (from the English word start - to begin) is a mandatory unit for starting the engine, which forcibly rotates the crankshaft flywheel to the speed necessary for independent operation.
It is a 4-pole DC electric motor that takes energy from a battery. The starter is necessary to start the engine of any vehicle and receives power from the battery when the key is turned in the ignition.
Main components of the starter:
- housing - a cylinder-shaped steel part in which the winding and cores are located;
- anchor - has the shape of an axis and is made of high-strength steel, collector plates and windings are fixed in it;
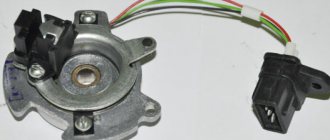
- a solenoid relay that supplies power to the starter when the key is turned in the ignition and pushes out the bendix;
- brushes and brush holders - supply the necessary voltage to the armature commutator unit, increasing the motor power when the engine spins up;
- drive gear and bendix (overrunning clutch).
Despite the huge range of electric motors, there are only two types, distinguished by the presence of a gearbox.
The most modern version of an electromagnetic motor is a gear motor , the main advantages of which include the ability to operate even with a low battery charge and the presence of permanent magnets that reduce problems with the winding.
The main disadvantages of such a unit are the low strength of the gear and the impossibility of repair, which leads to an expensive purchase in the event of a breakdown.
Starters that do not contain a gearbox in their design directly act on the rotating gear.
The main advantages of this type of starter are:
- simultaneous engagement of the flywheel with the gear, allowing you to start the internal combustion engine as quickly as possible;
- durability and long-term operation;
- the ability to independently repair breakdowns and the availability of necessary spare parts in almost any auto shop;
- practically independent of the influence of electric current, which reduces the possibility of breakdowns.
The disadvantages of gearless starters include:
- difficulty starting in extreme cold;
- significant mass of the unit;
- high energy consumption, leading in some cases (if there are faults in the starting system or other components) to a strong discharge of the battery and the impossibility of starting the internal combustion engine without recharging;
- quite high prices for spare parts.
Main signs of starter malfunction
Despite the fact that the starter is a fairly reliable device, it can also break. Some breakdowns may have symptoms identical to other faults, but there is still something in common when the electric motor malfunctions.
The main symptoms of starter malfunctions:
The solenoid relay does not click (does not operate) and the armature does not rotate.
- Battery discharge (complete or partial) or failure;
- Oxidation of battery terminals and tips connected to it;
- The terminals or tips connected to both the starter itself and the battery have come loose;
- Lack of contact on the terminal bolts, caused by a break in the wires connecting the ignition switch and starter;
- Short circuit, break or breakdown of the solenoid relay windings to ground.
When the electric motor starts and the solenoid relay is operational, the armature rotates slowly or does not rotate at all.
- The contact on the terminal bolts of the solenoid relay is broken;
- High wear of brushes or their jamming;
- Burning or overheating of the collector plates;
- Breakdown of the stator winding caused by insulation failure or interturn short circuit;
- Damage to the insulating layer of the positive brush holder;
- Short circuit of collector plates caused by insulation failure;
The armature of a running starter rotates, but the crankshaft does not spin.
- Overrunning clutch slipping;
- Mechanical damage to the freewheel (buffer spring, underwater ring);
- The starter drive fork is flying out or damaged;
- Difficulty in moving the drive along the thread on the anchor shaft.
After starting the engine, the starter continues to operate.
- Drive fork jamming;
- Damage to the ignition switch spring;
- Jamming of the solenoid relay or starter drive contacts on the anchor shaft;
- Damage or stretching of the springs that return the solenoid relay or overrunning clutch;
- Solenoid relay jammed;
- Warping of the electromagnetic motor caused by unscrewing its fastenings to the internal combustion engine.
Third stage
- Screw the nut onto the upper power bolt
- We connect the plus from the battery to it
- At the same time, we close the control contact for turning on the solenoid relay with the positive wire
At this moment, the relay should operate, the bendix should jump out and the power bolts should close, and the electric motor should start. If all this happened and the armature spins with high frequency, everything is fine, the starter is working.
Advertising:
Malfunctions
The circuit of the retractor windings is broken - the bendix will move frantically in both directions, the relay will “buzz”.
The armature of the electric motor does not rotate - there is no contact on the “nickels” of the power bolts or the power plate of the moving contact of the retractor is damaged. Possible causes of malfunctions in the electrical part of the engine, discussed in the second stage.
Video tutorial on how to diagnose a starter removed from a car:
Advertising:
Checking the starter using the battery
Before contacting a car service center, buying a new unit or spare parts for it, you should try to check its performance yourself. With the right approach, it is possible to independently identify problems.
First of all, if you suspect a malfunction of the starting device, you need to check the contacts on the battery and starter terminals, their tightness and the presence of oxidation, the battery charge, since in many cases the problem in starting the internal combustion engine is the above factors.
A simple way to check that the electrical network is working is to close the terminal bolts of the electric motor with a screwdriver; before this procedure, you need to put the car in neutral speed (or move the selector lever to park or neutral mode).
If the starter starts the engine, you should look for a fault in the electrical circuit. Otherwise, remove the unit by disconnecting all fasteners from the engine and removing terminals and other wires.
How to check Bendix
After removing the electric motor, it is necessary to inspect the bendix (the gear at the very end); if there is increased wear of the teeth or cracks in it, it should be replaced.
The Bendix should only turn in one direction, otherwise it will have to be replaced. By connecting the unit to the battery, it is unlikely to be able to diagnose the serviceability of the Bendix, since it can spin, but with insufficient force to start the internal combustion engine.
How to check Solenoid relay
When you turn the ignition key, you should hear a click, indicating that the armature is retracted and the bendix is engaged.
Before checking the serviceability of the starter, it is necessary to firmly secure it (either in a vice, having previously wrapped it with a thick layer of fabric, or with the help of a strong assistant who will hold the unit), since a very strong jerk may occur when starting it.
It is necessary to connect the positive from the battery to the positive on the starter, and the negative from the battery to the body of the unit. If the unit is working properly, then there should be a quick and sharp click and the bendix will extend and begin to spin.
If there is no click or movement of the overrunning clutch, it is necessary to replace the solenoid relay. When the power from the battery is disconnected, the bendix should retract.
How to check the Anchor and Brushes
To check the brushes and armature, you will need a multimeter or a 12-volt light bulb. Checking with a light bulb involves connecting its contacts to ground and the brush holder with the starter connected to the battery. When the light comes on, it indicates high brush wear.
When checking with a multimeter, the contacts are connected identically, only the results of measuring the resistance should tend to infinity, otherwise there is a short to ground.
The armature can only be checked by disassembling the electric motor. In addition to carrying out a visual inspection for the presence of oxidation, traces of short circuits, and increased wear, to check the armature you will need a special device PPYA (armature testing device) to check the interturn closure.
The difficulty of diagnosing armature malfunctions, as well as its repair, will require contacting specialized specialists, but in order to avoid unnecessary costs, it is necessary to check all other parts of the unit.
Starter performance monitoring sequence
If, when turning the ignition key to the “Start” position, the starter does not show any signs of life, you must perform the following sequence of actions:
1. Measure the voltage at the battery terminals with a multimeter. There must be at least 12 volts to start the engine. If less, you should charge the battery.
2. Next, you need to measure the quality of the vehicle's ground tire. You should check the contacts of the “minus battery” bus - the car body and the “minus battery” bus - the engine body, actually the starter. This is best done by turning on the ignition and measuring the voltage between the battery negative, the metal elements of the engine body and the stripped elements of the engine body. Voltages must be strictly 0.0 Volts. If more, the connection contacts may be broken.
3. Before carrying out further actions, it is better to perform computer diagnostics. In many cars, the engine may be blocked by the immobilizer, which may require key binding. A malfunction of the automatic gearbox components can also introduce a prohibition mode for starting the car.
4. For further diagnostics of the starter, an electrical diagram of the vehicle and a diagram of the location of relays and fuses are required. The car's starting system can be organized in one of two ways. In cars of earlier years of production, voltage was supplied to the starter solenoid relay directly from the ignition switch contact group. A malfunction of the contact group leads to a lack of voltage supplied to the solenoid relay. In this case, it is necessary to check the presence of contacts according to the ignition switch connection diagram. Modern vehicles control starter activation using a starter relay, usually located in the relay and fuse box under the hood. It is necessary to check the serviceability of the relay, the presence of +12 Volts at its input contact. You can force the starter to turn on by closing the relay contacts.
5. Next, proceed directly to work with the starter. It is usually located in the flywheel area. A more convenient location is between the engine and the radiator of the cooling system. In this case, access to it is simplified. It is worse if the starter is located behind the engine under the exhaust manifold. In any case, it is necessary to trace the path of the wires coming from the starter. Two conductors extend from it: one thick (cross-section of at least 25 sq.mm.) for starting the electric motor and a thin one for controlling the solenoid relay.
6. First of all, it is necessary to strip the thin conductor in a convenient place and connect a wire with a cross-section of at least 2 sq. mm to it. and insulate the connection point. Then move the gearbox to neutral. After this, connect the connected conductor to the positive terminal of the charged battery. If there is no action from the starter, the following options are possible:
- malfunction of the solenoid relay winding (break);
- wear of the starter motor brushes;
- failure of the collector lamellas;
- armature winding break;
- lack of contact on the connector of a thin wire (often occurs when a thin wire comes into the connector “under the chip”, sometimes it’s enough just to move it);
- lack of grounding on the car engine body (to be more sure, you can connect the engine body to the battery negative with a powerful wire).
7. If the solenoid relay works reliably, but the starter motor does not rotate, you should check the presence of + 12 Volts at the output of the thick conductor. It usually has a “nut” connection, sometimes the contacts burn and char. In this case, the contact areas should be removed and cleaned. You should also check the connection of the thick conductor in the area of the positive terminal of the battery.
8. Using a multimeter, you can check the resistance of the coil of the solenoid relay (between the connected conductor and the motor housing, it should be in the range from 3 to 20 Ohms for different types of starters).
9. If the previous actions did not lead to a positive result, it is necessary to begin diagnosing the malfunction on the starter removed from the vehicle.
Video - how to close the starter directly if it does not turn: