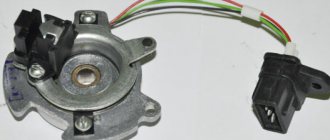
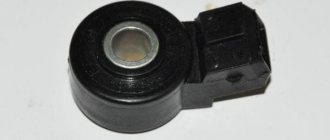
An engine knock sensor is necessary to detect improper combustion of the air-fuel mixture (FA). In the event of a malfunction, the ECM (Engine Control Module) puts the engine into emergency mode, limiting the power and speed of response to the gas pedal. Let's look at the signs of a sensor malfunction, its design and diagnostic methods.
Why is detonation dangerous for an engine?
To effectively convert the reciprocating motion of the piston into rotational motion of the crankshaft, the maximum pressure in the combustion chamber during the power stroke must be reached approximately 15-20° after top dead center (TDC). In this case, the fuel-air mixture is ignited by an arc discharge of the ignition spark, and the speed of propagation of the flame front does not exceed 30-40 m/s.
In the event of excessive heating of the air at the end of the compression stroke, particles with an excessively high temperature appear in the combustion chamber, the fuel mixture self-ignites. The speed of propagation of the flame front reaches 2000 m/s. This explosive nature of detonation leads to increased load on the parts of the crank mechanism (CPM) and cylinder-piston group (CPG). Consequences of detonation:
- burnout of valves and piston;
- destruction of piston partitions;
- burnout of the cylinder head gasket;
- local overheating of the pistons, cylinder walls and the associated loss of elasticity of the piston rings;
- accelerated wear of CPG parts. Explosive combustion destroys the oil film, causing dry friction;
- melting of the spark plug electrode.
Video on the topic
In a gasoline internal combustion engine, under certain circumstances, a metallic knock occurs. “Fingers are knocking,” some drivers say. In fact, this phenomenon is called detonation and its occurrence is extremely undesirable, since it can lead to engine failure due to the enormous speed of propagation of the flame front (more than 2000 m/s) and high shock loads on the cylinder walls, piston and block head. To monitor the level of danger, a knock sensor is installed on the cylinder block.
It is an accelerometer, that is, a device that perceives and converts the energy of mechanical vibrations of the cylinder block into electrical impulses. The knock sensor continuously sends signals to the electronic engine control unit, and the electronics respond by changing the qualitative composition of the working mixture and the ignition timing. This device also helps to achieve more economical operation and develop maximum engine power.
What determines the likelihood of detonation? How often this phenomenon can occur depends on three main factors.
First of all, the likelihood of occurrence is affected by the chemical composition of gasoline, or more precisely, its octane number. The higher it is, the more resistant it is to this phenomenon. The second factor, which influences no less, is the design features of the engine, namely the compression ratio, the shape of the combustion chamber, the location of the spark plugs, the shape of the piston crown, etc. For example, an engine with a higher compression ratio is more prone to detonation and requires high-octane gasoline. Otherwise, why do manufacturers write the minimum permissible octane number on the gas tank hatch? The third factor is the operating conditions of the motor. The likelihood of detonation is affected by the composition of the working mixture, load, selected gear, and carbon deposits. How does a knock sensor work? The operating principle of the sensor is based on the piezoelectric effect. This device is a piezoelectric plate placed in a housing, at the ends of which, in the event of detonation, voltage appears. With increasing amplitude and frequency of mechanical vibrations of the engine, the voltage increases.
knock sensor device
There is a certain safety threshold; if the voltage exceeds it, the electronic control unit will give a command to reduce the ignition timing.
Failure of the knock sensor If a malfunction of the knock sensor occurs, the control indicator on the dashboard lights up. The engine is still running and you can drive the car. To the logical question “why is this sensor needed then?” the answer is as follows.
On older cars not equipped with an electronic control unit, the ignition timing was adjusted manually by turning the ignition distributor cap. This made it possible to adjust the operation of the ignition system depending on the octane number of gasoline, which can vary greatly at different gas stations. A modern engine has a different distributor design; its cover is fixed, so this function is performed by the ECU. Accordingly, if the knock sensor fails, the ignition timing cannot be adjusted.
A failed knock sensor affects the dynamics and efficiency of the engine. The operating principle of the electronic control unit is such that if a sensor malfunction occurs, it sets the ignition deliberately later for safety purposes in order to eliminate the possibility of engine destruction. As a result, the power unit works, but begins to consume much more fuel, and the dynamics of the car deteriorate. The second is especially noticeable at increased loads.
Checking the knock sensor The main symptoms indicating that this device has failed:
power drop; deterioration in acceleration characteristics and a sharp increase in the “appetite” of the engine; smoky exhaust. At the same time, the engine malfunction indicator on the panel lights up. Moreover, it can either burn constantly or light up briefly when the load increases.
how to check the sensor
It is not always possible to have a scanner at hand that can read and decipher the fault code. Getting to the service station is also not always possible. The question arises: how to check the knock sensor yourself? The tools you need are a digital multimeter.
First of all, it is necessary to find out what resistance a working sensor should have on a specific car or engine model, since this value is different for all manufacturers. If it is different from normal, a replacement is needed.
You can also check the voltage at the sensor's electrical contacts by disconnecting the sensor's electrical power connector and removing it from the engine. After this, the multimeter is switched to the voltage measurement mode in millivolts, its positive probe is connected to the signal contact, and the negative probe is connected to the sensor ground (the hole through which the engine mounting bolt passes).
Checking the knock sensor involves holding the sensor with the attached probes in the palm of your hand, which you then need to lightly tap on some surface. When impacted, the multimeter should detect the appearance of voltage (usually it is about 30-40 mV). The principle is simple: the stronger the impact, the greater the potential difference will arise between the electrodes. Since the voltage is low, not every device is capable of measuring it, so you must first make sure that the measuring device at hand is designed for such measurements. A complete absence of potential difference indicates that the knock sensor is faulty.
The occurrence of metallic knocking in Zhiguli engines running on gasoline is considered a common occurrence. Inexperienced drivers think that the problem is related to the “fingers”. However, almost always the cause lies in detonation. Such signs can become harbingers of big problems, which do not exclude engine failures. Everything is easily explained - the engine is not able to withstand the loads that begin to act on the pistons and cylinders.
Content:
Causes of fuel detonation
- Mismatch between the octane number of gasoline and the compression ratio in the engine.
- Low heat number of spark plugs. Self-ignition of fuel assemblies occurs from contact with a hot electrode.
- Early ignition timing.
- Deposits in the combustion chamber. With a large accumulation of carbon deposits on the pistons and valves, the area of the combustion chamber decreases, which naturally leads to an increase in the compression ratio. Detonation can also occur due to contact of fuel assemblies with overheated particles of oil deposits.
- Mixture too lean. Excess air accelerates the oxidation reaction of the fuel with oxygen and increases the risk of spontaneous combustion of the mixture.
Dismantling
First you need to find the sensor. It is located on the left side of the engine, where the line is half of the cylinder block. Next to it is the air filter.
To determine the malfunction or its absence, it is necessary to remove it in the following sequence:
- Disconnect the car from power by removing the negative terminal from the battery;
- Disconnect the block with wires from the contacts of the knock sensor. To do this, press the latch;
- Unscrew the nut securing the device and remove it from the mounting stud.
Please note that during further installation or replacement you will need a torque wrench (tightening force should be 20 Nm).
Operating principle of the knock sensor
Video: Knock sensor. Why is it needed? How does it work. How to diagnose.
The operation of the sensor is based on the characteristic of piezoelectrics to convert the mechanical pressure energy acting on them into a potential difference on their opposite sides. The shock wave generated during detonation leads to vibrations of the engine walls and deformation of the piezoelectric element. A change in the shape of the latter provokes the appearance of voltage, which is used as the output signal of the knock sensor. The magnitude of the voltage is directly proportional to the strength of the vibrations affecting the sensitive element.
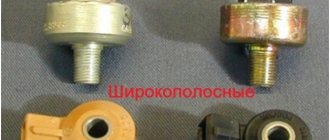
Depending on the type of electronic circuit used to amplify and convert the signal, resonant and broadband sensors are distinguished. The first type of meter assumes that the threshold level is exceeded at only one (resonant) detonation frequency. Such sensors were installed on early versions of VAZ engines with an injection power system. In wideband meters, the amplitude of the output voltage exceeds the threshold level in a certain frequency range that occurs in the engine during detonation.
Self-replacement of sensor 21120385501001 on a VAZ 2110
Replacement of the resonance sensor is carried out according to the instructions below
- Install a new sensor, tightening to a torque of 20 Nm.
- Connect the connector.
Knock sensor device
Wideband knock sensor design:
- Contact washers, which are terminals for recording voltage.
- Piezo element.
- An inertial mass that acts on a sensitive element during vibration.
- A disc spring that ensures the inertial mass adheres to the sensing element.
- Fastening bolt.
- Frame.
- Electrical connector.
Resonant type DD device:
- threaded body;
- piezoelectric crystal;
- spring;
- shunt resistor;
- electrical connector;
- movable support;
- resistor.
The engine knock sensor is located directly in the block, near one of the cylinders. On V-shaped engines there will be at least 2 sensors - one for each cylinder head, respectively.
Why did it happen so?
Perhaps the automatic requests do not belong to you, but to another user accessing the network from the same IP address as you. You need to enter the characters into the form once, after which we will remember you and be able to distinguish you from other users exiting from this IP. In this case, the page with the captcha will not bother you for quite a long time.
You may have add-ons installed in your browser that can make automatic search requests. In this case, we recommend that you disable them.
It is also possible that your computer is infected with a virus program that is using it to collect information. Maybe you should check your system for viruses.
If you have any problems or would like our support team, please use the feedback form.
1. Check the presence and reliability of the connection of the harness socket to the sensor plug.
2. If the connection is normal, then disconnect the socket of the wiring harness from the sensor, remove its rubber cover and inspect the condition of the socket contacts and the wires connected to it. If necessary, straighten the connector contacts or replace them.
3. To check the malfunction of the harness circuit, disconnect the sensor and the unit from the wiring harness and, with the ignition off, check the integrity of circuit “11” of the harness with an ohmmeter: from contact “2” of the sensor socket to contact “11” of the block socket. If necessary, restore the indicated circuit.
4. After eliminating the malfunction, turn on the ignition and check that there is no fault code “041”.
Broken shield braid of the knock sensor wire
1. Check the presence and reliability of the connection of the harness socket to the sensor plug.
2. If the connection is normal, then disconnect the socket of the wiring harness from the sensor, remove its rubber cover and inspect the condition of the socket contacts and the wires connected to it. If necessary, straighten the connector contacts or replace them.
Precautionary measures
The signal from the sensor is sent to the ECM. Detonation in the engine is the reason for a sharp rollback of the ignition timing towards the retard. During subsequent cycles of engine operation, the angle decreases stepwise until detonation combustion is detected again. Often, when an engine detonates, not only does the ignition timing rollback (ignition timing), but also the air-fuel mixture becomes richer. In this way, it is possible to adapt to changing operating parameters, keeping the engine in the zone of greatest efficiency.
Symptoms of malfunction
You can find out that the meter is not working by a number of the most common symptoms. There is clearly expressed instability in the operation of the motor, jerking is felt, and a sign of tripping appears. The car stops obeying the accelerator pedal, and the dynamics when accelerating drops. After the engine starts, the malfunction indicator light comes on. In such a situation, you should not only check the sensor, but also diagnose other systems. You may need urgent replacement of failed elements. Information about a failure of the meter can be transmitted by the machine's on-board computer.
Self-diagnosis system
Since the knock sensor affects the health of the engine, the ECM of modern cars has an advanced self-diagnosis system. The engine ECU not only detects detonation combustion, but also “listens” to the background noise of the running engine. If the noise level from the knock sensor is below the threshold value for 10 s or more, a sensor error is recorded in the non-volatile memory of the ECU. Each type of registered fault is assigned a specific code, which can be read by the diagnostic tool.
Thanks to a resistor built into the control circuit, the ECM is able to detect open circuits and short circuits to ground. In this case, it is possible that there is either a malfunction of the knock sensor or a problem with the wiring. Since the sensor signal is important not only for maintaining the engine, but also for monitoring the level of toxicity of exhaust gases, errors in it are accompanied by the Check Engine lamp lighting up on the dashboard.
Measurements
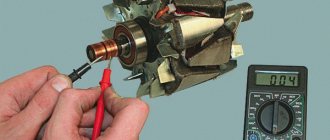
Now you can check with a multimeter set to the minimum value. If the sensor is single-contact, then the negative wire of the multimeter (it is usually black) is connected to the place where the mounting bolt is installed, and the positive wire (usually red) is connected to the signal contact in the connector.
Checking the two-contact sensor is carried out by connecting the multimeter wire to the corresponding contact “-” to “-”, “+” to “+”. Further actions are identical. To activate the sensor, you need to tap it with something not very hard (for example, a screwdriver).
If there are no faults, voltage surges will be observed. Approximately 40 to 200 mV. In addition, it would not hurt to check the internal resistance, which should tend to zero. If you find that the sensor is fine, then look for an open circuit. In this case, the best advice is to replace the entire block with wires.
If the resistance is different, or there are no voltage surges, it means that there is something wrong with the sensor itself and it needs to be replaced. The new one is installed in the reverse order of removal.
Checking the knock sensor
The DD signal is a sinusoid with a certain frequency and amplitude.
The sensor does not require power and does not pass current through itself, so you can only check it with a conventional multimeter for a break in the built-in shunt resistor (protects the circuit from short circuits). Adequate testing of the knock sensor is only possible using an oscilloscope. You can diagnose the sensors without removing them from the car. To do this, connect to the signal output and apply 3 precise blows with a metal object near the sensor. The signal should be without dips and with clearly defined damped oscillations. Loss of signal indicates bouncing of contacts inside the meter.
Video: DD knock sensor Check without removing from the car
Check using a multimeter or pointer tester
First of all, you should establish the characteristic resistance of a sensor that is working properly in your car model, since this indicator differs from one manufacturer to another.
The resistance indicator may be the most unexpected. For example, VAZ cars equipped with an injection engine have almost imperceptible resistance, which is caused by too high values. In Nissan and Subaru the figure reaches approximately 550 kOhm, and Hyundai has 5 MOhm.
To carry out the test, you need to stock up on a multimeter, which will be highly sensitive. Also useful in the test is a socket wrench with a size of “22” or “13”, which depends on the dimensions of the sensor on the car. To check the resistance, the multimeter should be switched to the “resistance kOhm” mode and a sensor should be connected to it. In the case when we are talking about a two-contact sensor, then the connection should be made to the terminals, but if the model is single-contact, then the connection is made to the body and contact.
After this, lightly tap the sensor with a metal object. A screwdriver or bolt is perfect for this. In this case, you need to monitor the multimeter readings. If there is a deviation from the value specified in the instructions, the sensor fails.
Tapping the sensor on a metal object should affect the change in multimeter readings
Tapping can also be replaced by squeezing the sensor in your hand. This technique produces large fluctuations in the multimeter, and, therefore, is more convenient. Below in the video you can clearly study the process of checking the sensor with a multimeter.
Video on how to check the mechanism
There are no significant differences in testing each type of knock sensor.
In addition to a multimeter, a pointer tester is also perfect for testing. This method is no different from the previous one and has the same verification algorithm.
Features of V-shaped internal combustion engines
In the event of an error on one of the knock sensors, their connectors must be swapped. If the sensors are difficult to access, study the electrical diagram. It is likely that the wires from the sensors come to a common connector. By disconnecting the connector, you can fool the engine ECU by installing appropriate jumpers between male and female.
Clear errors from the ECM memory, start and warm up the engine. Perform a test drive to see if the DTC returns (the Check Engine light will illuminate on the dashboard).
If the error from Bank 1 changes to Bank 2 and vice versa, it means that there are no problems with the wiring from the meter to the control unit, but the fault is in the sensor itself. If the error persists for the same cylinder head, you should check the wiring for a break. To do this, use a multimeter in ohmmeter mode. Connect one of the probes to the connector wire on the sensor side, and the second to its counterpart coming to the ECU. Check to see if the signal wire is shorted to ground. To test, connect one of the probes to the signal terminal of the sensor connector, and touch the battery ground terminal with the other. The resistance of the open wire must be greater than 20 mOhm.
Repair or replacement?
You decide. The cost of the product depends on the car model and the manufacturer of the component - for a replacement you will need to pay an amount approximately equal to its price. You can change the device yourself; for this you will need a room with a pit. Self-repair is also possible: if you are well versed in cars, it will take no more than an hour.
Checking the knock sensor is an easy task that doesn't require expensive tools. Of course, a computer check at a service station will be more accurate, but if you don’t want to spend money, you can do it yourself.
- Author: Dmitry Buimistrov
Hello! My name is Dmitry, I am a journalist by training. I specialize in automotive topics - I started my career in an online store of automotive components, and I myself am a car enthusiast. Rate this article:
- 5
- 4
- 3
- 2
- 1
(23 votes, average: 3.9 out of 5)
Share with your friends!
How to check
If a component breaks down, the car will continue to function as before. There may not be any obvious symptoms of a malfunction. If a breakdown occurs, it will be considered electronic, since the device is part of the car’s electronics.
Device failure can occur for a variety of reasons - for example, due to a malfunction of the device itself, a short circuit in the system, or a break in the signal wire. To conduct self-diagnosis, you need to determine where the sensor is located. The car's owner's manual has information about this.
Next we begin to remove the mount. Unscrew the nut on the stud. Disconnect the electrical connector and put it aside. The body of the device is removed from the pin. The knock sensor is checked using two wires - signal and ground. Remember that there is a fragile piezoelectric crystal inside the device. Of course, the system provides certain protection in the form of compensators, but it will not save you from strong mechanical impact. It is not worth disassembling the sensor, since the seal of the housing must not be violated.
It's better to check with a multimeter. There should be no twists on its wires. It is better to use a device with short wires. The minus probe is connected to the sensor hole located in the center, and the positive probe is connected to the control connector. If the device is working properly, the multimeter indicator will show a jump in electricity of 40-150 mV.
If the device is faulty, there will be no activity. You can check with several devices - then there will be no doubt that the procedure was carried out correctly. After diagnosis, the defective sensor is replaced.
If the sensor does not work, it must be replaced - there are no other options here. The device is inexpensive and can be found in any specialized store. Of course, the price depends on the make and model of the car, but in general it is low. You can replace the device yourself, but if you lack the skills and experience, it is better to turn to a specialist. They will charge 2-3 thousand rubles for the work.
Before replacing, you need to let the engine cool down and turn off the power to the car by disconnecting the negative terminal of the battery. On some cars, the device is located in such a way that it can be removed without effort.
To dismantle the device, you will need a 12mm wrench - you use it to unscrew the mounting bolt. Then the device is turned off and removed. A new sensor is installed in its place. Assembly occurs in reverse order.
When buying a new sensor, make sure that its catalog number matches the number of the old component. Then the ECU will work completely correctly. Do not buy devices from Chinese manufacturers - they are, of course, cheaper, but the savings will certainly come at a cost.
The knock sensor is a very important and at the same time simple device that can be replaced without much effort
It is important to identify the malfunction in time so as not to damage the car by driving with a faulty sensor.
