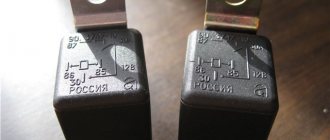
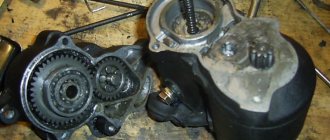
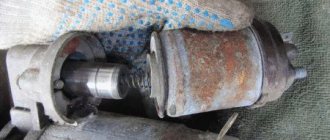
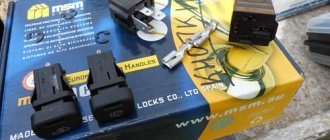
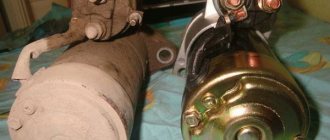
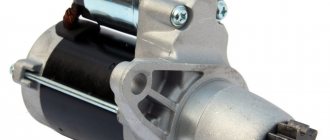
A faulty starter relay is often the reason why the car refuses to start when the key is turned in the ignition. Perhaps these are not the most pleasant moments in the life of any driver. Therefore, in such cases, it is important to know how to check the starter solenoid relay, and how to start the car if it does not work.
We will tell you about the purpose of the starter solenoid relay and its structure, how you can check it and perform simple repairs yourself.
At the end of this article, watch the video that shows how to start your car if the starter solenoid relay is not working.
Also on our website you can find information about other common causes of starter malfunction with step-by-step instructions on what to do if the starter does not work.
When, when you turn the key in the ignition switch, you can clearly hear that the starter is idling, then the cause of this malfunction may be the solenoid relay. But before you start diagnosing it, you should know the purpose of this electrical unit.
Purpose and principle of operation of the solenoid relay
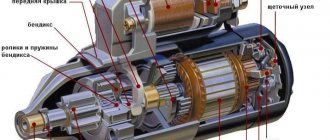
On most vehicles, the retractor is mounted in the same unit with the starter, and is designed to control the freewheel. At the end of the clutch there is a gear that rotates the engine flywheel at the time of starting, but during its operation such rotation is not allowed, as it leads to breakdown of the starter or on-board electrical network if the starter starts working in generator mode.
To do this, the retractor extends the clutch only when it is necessary to start the engine, after which it returns to its original position, removing the gear from engagement with the flywheel. The peculiarity of the solenoid relay is that the starter can only operate when it is activated. This is done to prevent tooth fractures when the rotating gears of the clutch and flywheel meet.
Inside the relay there is a coil with an armature, which is acted upon by current after the circuit is closed. The magnetic field that arises around the coil moves the armature towards it, compressing the return spring and pushing the lever, which moves the freewheel. When the engine starts, the electrical circuit of the coil opens, the magnetic field force disappears, and the return spring pushes the armature with the clutch to its original position.
Principle of operation
It all works like this: when the engine is not running, the armature of the retractor relay is pulled out of the housing due to the action of the spring on it. The same spring holds the Bendix and gear through the fork in a position where there is no engagement.
When the ignition key is turned to the start position, the solenoid relay is first activated.
The electrical energy supplied to the coils of the solenoid relay ensures the appearance of a magnetic field inside the housing.
This field acts on the armature, and it, overcoming the force of the spring, enters the body, after which the retracting coil is turned off and ceases to create a magnetic field, but in the retracted position the armature is held by the holding coil with its magnetic field.
In this case, the armature pulls the fork, which in turn moves the bendix forward along the rotor shaft, and its gear engages with the flywheel ring.
The armature, entering the housing, pushes the starter relay rod, and, moving, closes the contact plates of the positive terminals with each other.
Electricity from the battery is supplied to the brushes of the starter motor, and its rotor begins to rotate. And since the gear has already engaged, the rotor begins to rotate the flywheel.
After starting the power plant and turning the ignition key back, the power to the holding coil stops, its magnetic field disappears and the armature comes out of the housing under the influence of a spring.
At the same time, it disengages the bendix through the fork and stops acting on the relay rod. He, in turn, moving away, opens the contact plates, and the starter is completely turned off.
Signs of a malfunctioning retractor
The following signs may indicate a retractor failure:
- After starting the engine, the starter does not turn off; it rotates at high speed and has a characteristic buzzing sound.
- After turning the key in the ignition switch, a click occurs, indicating that the device is activated, but no rotation of the starter is observed. Sometimes, if there is a break in the coil, the armature is stuck in a certain position, or there is no power, there may be no click.
- After turning the key in the lock, the starter begins to idle without affecting the engine flywheel.
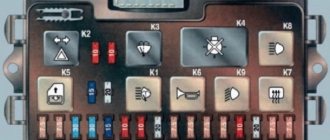
Relay location in the Priora mounting block
| Relay | "Norm" | "Norma" with air conditioning | "Lux" |
| K1 | relay for turning on the electric radiator fan of the engine cooling system | Reserve | Relay for turning on the low beam and side lights of the headlights (automatic lighting control system) |
| K2 | rear window heating relay | ||
| K3 | starter activation relay Priora | ||
| K4 | additional relay (ignition relay) | ||
| K5 | space for backup relay | ||
| K6 | windshield washer and wiper relay | ||
| K7 | headlight high beam relay | ||
| K8 | horn relay | ||
| K9 | alarm relay | ||
| K10 | Reserve | Fog light relay | |
| K11 | Reserve | Front seat heating relay | |
| K12 | Reserve | ||
Checking the solenoid relay
It is possible to determine the functionality of the retractor without removing it from the car starter in the following way:
- Check the wiring going to the relay for a break.
- If the wiring is in good condition, the operation of the traction relay is checked. To do this, turn the ignition key and listen for the click; its absence indicates a malfunction of the relay.
- If the activation click is heard, but the starter does not rotate, a possible cause of the malfunction is burnt contact plates. To check the assumption on the relay, disconnect the terminal coming from the lock, after which, using a screwdriver, connect the terminal coming from the battery with the terminal that goes to the starter. The result will be the supply of electricity to its engine, bypassing the relay. If rotation begins, the retractor is faulty.
- Checking the voltage going to the starter will allow you to determine what the problem is - in the wiring, battery or starter. The multimeter is connected to the positive terminal of the relay, where the battery voltage is suitable, and the negative terminal of the device is connected to ground. When the ignition is turned on at this moment, the voltage should be 12 V. If the value is lower, the battery energy is most likely not enough to start the engine, but it is enough for the relay to operate.
How to find a relay
The starter itself is a fairly reliable element with which problems very rarely occur. Usually problems occur with the traction relay.
You should know that it itself is located in the Priora in the fuse box. It, in turn, is located directly in the cabin, on the left side of the driver’s seat, near the light control module (LCM).
This information, by the way, will be useful in case you have to replace a blown fuse - such a malfunction occurs quite often in Priora. In general, the electrical system of this machine, unfortunately, is not very reliable. Many owners of this model complain about its poor performance.
To access the relay, you will need to remove the panel hiding the unit. It is held in place by five clips. Be careful not to damage them.
Repair of a collapsible solenoid relay
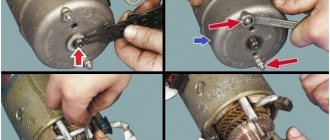
The manufacturer equips starters with a non-separable or collapsible retractor device. If a non-separable relay breaks down, it must be replaced, but a dismountable relay can be repaired. The described method allows you to check the solenoid relay of all VAZ models: 2101, 2102, 2103, 2104, 2105, 2106, 2107, 2108, 2109, 21099, 2110, 2111, 2112, 2113, 2114, Niva, Lada Priora, Kalina, Granta, Vesta and most foreign cars. Disassembly and repair of the relay is carried out in the following order:
- Unscrew the nuts securing the housing cover.
- If necessary, the ends of the windings are additionally soldered.
- After removing the cover, inspect the power contacts:
- If they burn, the damaged part is cleaned with sandpaper;
- When worn out, replace.
- The device is assembled in the reverse order and tested for functionality.
- The repaired relay is installed back on the starter.
Source
Life hack: Lada Priora car starter - malfunctions, price
The car starter starts the engine. The Priora will not start without his participation. Without it, starting a movement is simply impossible. Sometimes the Lada Priora does not start because the fuse has blown, or the starter relay has malfunctioned; it is marked K3. Sometimes it clicks but doesn't turn. The reasons are in the details. The starter on a Priora consists of the following parts: bendex, retractor relay, armature and others - for a complete list of how many parts the starter of a Priora car contains, see the article below. It is advisable for car owners to know where this mechanism is located on a Lada Priora car - it is located immediately under the air filter. The price of the part is a starter for a Priora engine (16 valves): from 2750 to 4500 rubles. When a breakdown occurs, the device on the Priora stops turning.
There is nothing to be done - you will have to get it out and figure out the problem. Despite the rather “brute” force that the starter unit “applies” to start the engine, its structure is quite complex and consists of several fairly small parts. So, you will have to understand the relay mechanism in detail, because problems may also arise in it. Photo of the detail below.
Fuse power
All fuses are color coded depending on the power for which their fuse links are designed:
- The fuses for the cooling system fan (F1), heated rear window (F2), and the interior heater motor (F9) are designed for a current of 25 A;
- fusible elements of the high beam headlight fuses (F3, F4), sound signal (F5), hazard lights (F8), 15th terminal of ABS (F16), fog lights (F17, F18) protect circuits designed for a rated current of up to 10 A ;
- 7.5 A fuses protect the circuits of low beam lamps (F6, F7), instrument panel, interior lighting, brake lamps (all F10) and rear fog lamp (F21);
- side lights (F14, F15), immobilizer (F20) – 5 A fuses;
- wiper motor (F11) – 20 A fuse element;
- heated seats (F19) – protected by a 15 A fuse;
- the most powerful fuse is 30 A - protection of electrical circuits (F31 or F27).
Replacing fuses of a higher rating with a smaller one, as well as the reverse replacement, is not allowed. If a fuse protecting the light signal or active safety circuits of the vehicle blows, it is allowed to replace it with a similar one removed from the socket of the circuit responsible for comfort or others that do not affect the safety of the vehicle when it is moving. If possible, the protection of electronic circuits must be restored in accordance with the requirements of the vehicle manufacturer.
The mounting box installed in the interior of the Lada Priora contains not only fuses, but also electromagnetic relays, the switching circuit of which provides for connecting a high-power load. By using such relays, the manufacturer has achieved a reduction in the current load on the switch contacts. This prevents burning of the contact pairs installed in them. Therefore, if a certain circuit malfunctions, it is necessary to check not only the integrity of the fuse, but also the serviceability of the relay installed in the Priora fuse box and responsible for the device switching circuit.
Standard starter and analogues - article number and price
Unfortunately, if the mechanism does not work, the problem can only be solved by replacing it. Neither installing new parts under the body, nor any cleaning will save the situation. The standard starter for a Priora with 16 valves goes under catalog number 2111.3708010-01, its cost is about 4,000 rubles. As analogues we can consider:
- "Baker." Article 5702370800010, costs 3,700 rubles;
- "Starvolt." Article lst0190, price - 3,200 rubles;
- Valeo. Article 438285, costs from 3,700 rubles;
- For automatic transmission, article number 219002370801000, costs from 3,900 rubles;
- "BATE". Article 51323708000, costs from 2,750 rubles;
- Gearbox – 51213708000bate, costs from 2950 rubles;
- "Kzate." Article 5702370800, costs from 3,300 rubles;
- Pramo (Eltra). Article TS12E901, price – 3,800 rubles;
- Fenox gearbox. Article 2110-3708010, price – 4,500 rubles.
Lada Priora starter: device and principle of operation
As mentioned earlier, this part can be installed on the Priora of two types: geared and gearless. Sometimes it may be necessary to remove the starter, note that it is located under the engine, on the right - closer to the space under the air filter.
To ensure that the starter unit does not wear out so quickly, it has a special mechanism that disengages the gear from the crankshaft flywheel - the Priora starter retractor relay. If it were not there, the service life of the unit would be greatly reduced, or repairs would be required.
Geared
This mechanism is small in size. It turns out this way because the gearbox allows you to increase or decrease the torque. The planetary gearbox itself in the car in question is located between the armature and the bendix; it serves as a “buffer” and an intermediate part between them. Thus, it does not take up so much space in the case, under which there are:
Its main difference is that the bendix is fixed on its own shaft, and it interacts with the Priora engine through a gearbox.
Gearless
A gearless starter is much larger than its counterpart, but it does the same job of receiving electrical energy from the battery and sending it to the crankshaft to start the engine. It consists of the following components:
- relay;
- an electric motor containing the traction relay cores and winding;
- brushes and holders, “brush assembly”;
- solenoid relay;
- stator;
- fork;
- contact bolts;
- anchor;
- starter mask;
- retaining ring;
- freewheel;
- front bushing and rear bushing;
- starter bendix Priora;
- gear.
The gearbox operates according to the following algorithm:
- Power is supplied from the battery through the wiring harness.
- The anchor is retracted.
- The Bendix is attached to the gear, “thrown out”, the pin contacts are closed, and voltage is applied to them.
- The armature rotates, the torque is transmitted to the bendix, through it to the gear, and it is already in contact with the engine flywheel.
- As soon as the ignition key is released, the retractor relay disconnects the bendix and the gear.
Why does the starter relay fail?
The starter relay can fail for a variety of reasons. This occurs due to burnout of the electrical winding , physical wear and destruction of individual elements, and burnt contacts . In most cases, the following breakdowns :
- Failure of a magnet with an electric winding;
- Broken or burnt winding;
- Hull deformation;
- Problem with contacts: “sticking”, burnout of contact plates;
- Spring wear;
- Faulty or damaged armature.
It is possible that the relay is working properly, and the reason lies in the bendix . Then you will have to remove the overrunning clutch . To do this, remove the starter and pull out the retaining ring. Perhaps a centrifugal weight and needs to be put back in place.
Basic faults
Externally, a breakdown of the Priora starter can be recognized by the following signs:
- “turns” and at the same time starts the engine;
- does not “twist”;
- continues to “twist” after the key is released;
- creaks, clicks are heard;
- It spins, but for too long.
The reason may lie in a faulty battery, in the starter itself and fuses. The most common are those that are most likely to disable
the car – it’s worth taking a closer look.
Doesn't turn on
If the engine does not start, the problem may be:
- discharged or broken battery;
- no closure of contacts 50 and 30;
- terminals or tips are oxidized;
- interturn closure;
- short circuit to ground;
- open circuit “starter - traction relay”;
- the ignition module is faulty;
- break in the traction relay winding;
- brush wear;
- the anchor jams;
- the additional relay or the control circuit connected to it is damaged.
Clicks won't start
If the starter clicks but does not turn, there may be several reasons:
- the gear working with the bendix does not engage with the engine flywheel;
- the bearing of the armature shaft bushings is worn out;
- the starter mount or housing is broken;
- gear or flywheel teeth are damaged.
Doesn't turn off
When the Priora starter unit does not turn on, the problem may lie in the following:
- the freewheel slips;
- the battery is discharged or broken;
- sudden and severe voltage drop in the circuit;
- oxidation of contacts.
Starter rotates slowly
Reasons for slow performance may include:
- the battery is discharged or broken;
- terminals or tips are oxidized;
- the connection of wires from the power unit to the body is very weak;
- the contact bolts on the traction relay are loose or oxidized;
- brush wear;
- a short circuit or break has occurred in the armature winding.
Assignment of contacts of the instrument cluster block
1 To the electric power steering2 To the hazard warning lamp3 To the emergency oil pressure sensor4 To the parking brake switch5 To the immobilizer control unit6 To the airbag control unit7 To the exterior lighting switch8 To the turn signal switch (starboard side)
9 To the turn signal switch (left side)10 To the fuel injection system control unit11 To the front passenger airbag deactivation sensor12 To the seat belt sensor13 To the control unit of the electronic brake force distributor14 To the “RESET” button on the steering column switch (-)
15 To the brake fluid level sensor16 To the anti-lock brake system control sensor17 To the headlight high beam switch18 To the instrument cluster lighting switch19 Housing20 To terminal “30” of the battery21 To terminal “15” of the ignition switch22 To the fuel consumption sensor23 To the mode key for switching the functions of the trip computer along the ring forward and convert minutes (-)
24 To the mode key for switching the trip computer functions in a circle back and setting the clock (-)25 To the outside temperature sensor (-)26 To the outside temperature sensor ( )27 To the fuel level sensor28 To the speed sensor29 To the coolant temperature sensor30 Low-voltage tachometer input31 Diagnostics when production of instrument cluster32 To terminal “L” of the generator relay regulator
Starter diagnostics to determine the cause of the malfunction
In order to determine which part of the Priora starter mechanism is failing, you need to check absolutely everything - the problem could even be with a fuse that is located far from the part. Perform diagnostics in the following order:
- Turn off the ignition and secure the car with the handbrake. Remove the negative from the battery.
- Remove the air filter and intake hose.
- Disconnect the current-carrying cable from the part that is connected to the battery positive. In order to remove it, remove the upper stud of the solenoid relay with a 13 mm wrench.
- Place neutral on the gearshift lever.
- You will need a working car battery. If you are completely sure that the battery in your Priora is fully operational, use it. Connect the cable with alligator clips to the negative terminal of the battery, the other end to the bolt on the housing of the starter unit. Before doing this, make sure that the connection area is clean. If there is dust and dirt on it, clean it with a brush.
- Connect the second cable with the crocodile to the positive of the battery, its second end to the positive on the back of the starter. When you connect everything there should be a click. It will mean that you did everything right. If there is no click, you need to check the ground just in case.
- Disconnect the negative wire from the housing and connect it to the bottom screw of the solenoid relay. Connect the positive wire to the back of the relay. If a click is heard, it means the brush assembly has failed. If it doesn't work, you'll have to buy a new starter - the relay is broken.
- The negative wire must be reconnected to the body, the positive wire to the lower screw of the relay. When connected, the starter assembly should begin to rotate and you will hear a characteristic noise. The revolutions can rise to 11 thousand per minute. If the RPM is too low and the armature turns slowly, the problem is with the brush assembly or armature.
- If the armature does not spin at all, the problem is in the winding.
- Finally, you need to connect the plus to the top stud of the pull-out relay and close the contacts. If you hear extraneous sounds, you should check the bendix and gearbox.
Relay test
First, it’s worth studying the location of the Priora starter relay, which is located in the starter unit in a small housing. Checking its serviceability is carried out in two stages.
- First, you need to ask a friend to turn the ignition key and listen to the engine compartment. If there is a click, then everything is fine with the part. If there is no click, or the armature does not spin with a click, you will have to move on to the next step.
- Connect the terminals coming from the battery with the terminal that is connected to the starter assembly with a screwdriver. If the unit works, then the relay is faulty.
Fuse
The Priora fuse box is located above the driver's left knee. Remove the plastic cover by first unscrewing the three fastening screws. The Priora starter fuse is K3, that is, third from the left in the first “line”.
You can check the additional block, which is located under the floor tunnel lining. In this case, the 15 Ampere fuse F1 is checked - the one on the far left; sometimes it is enough to change it, since repair of this mechanism is not always required.
Relay and fuse blocks on a LADA Priora car
Where is the ignition relay located in a VAZ-2114 car?
The VAZ Priora passenger car, regardless of the type of engine installed, is equipped with several junction boxes. They are located under the hood and inside the car. The use of several boxes made it possible to separate circuits with high and low currents. In addition, separate small-sized mounting blocks were installed, introduced as the configuration expanded.
Main power fuse block
The vehicle's power circuits are protected by inserts installed on the positive terminal of the battery. The block is designed to protect circuits with maximum currents. To gain access to the fuses, you need to remove the plastic cover; this can be done without the help of tools.
Block diagram and its location in the car
The removal of the most powerful circuits on the Lada Priora into a separate unit located close to the battery ensured maximum protection of the car's electrical system from overloads.
The location and designation of the inserts is indicated in the photo. Depending on the year of manufacture and installed equipment, it is possible to install fuses of different ratings.
Priora power insert block
Explanation of fuse designations
Purpose and rating of the main block inserts.
The given fuse diagram for the Lada Priora is relevant for cars without an anti-lock brake system. The introduction of a hydroelectronic unit on the Priora-2 series car led to a change in the purpose of the inserts.
Purpose of fuses on the battery for Priora cars with ABS (starting from the one closest to the terminal):
- F1 - ECM protection (30 A);
- F2 - power steering (50 A);
- F3 - generator circuits (60 A);
- F4 - similar to F3;
- F5 - power supply to the ABS unit (40 A);
- F6 - similar to F5, but rated at 30 A.
Mounting block: relays and fuses in the passenger compartment
The unit includes fuses, several relays, and tweezers designed to simplify the procedure for replacing burnt out inserts. The content of the device depends on the vehicle configuration.
Block diagram and its location in the car
The unit is located in the plastic frame of the dashboard at the bottom of the driver's side. The outside of the box is closed with a removable cover installed around the steering column and secured with three locks located along the lower edge. To remove the cover, you need to turn the latches 90 degrees and remove the element from the latches by pulling it towards you.
The oval marks the location of the block installation
On cars, fuse ratings may differ depending on the year of manufacture of the car and the configuration. To determine the value of the fuse link, you should use the operating instructions for the Lada Priora.
When repairing fuses, it is necessary to take into account that the instructions for the Lada Priora car change several times a year. It is not recommended to use a manual from another car.
The “norm” option with the additional installation of an air conditioner has differences in the Priora’s fuse circuit. Elements that protect the device are placed in a separate engine compartment, discussed below. The mounting housing itself has not undergone any changes.
Block version “norm” with air conditioning
With the start of production of the modernized Priora-2, the contents of the body changed somewhat. In the interior units of cars, only one space for a relay and two cells for fuses are empty.
Block on Priora-2
Explanation of fuses and relays
Explanation of fuses in the “norm” version.
Questions and answers How to bleed shock absorbers before installation
Read more
Questions and answers How to adjust the carburetor on a trimmer
Read more
Questions and answers How to remove the window lifter handle on a Hyundai Accent
Read more
Questions and answers How to remove a dent on a car with your own hands
Read more
Questions and answers Which shock absorbers are better to install?
Read more
Questions and answers Which carburetor is better to put on a Ural motorcycle
Read more
Questions and answers What sandpaper should I use to matt a car before painting?
Read more
Questions and answers Car stalls at idle
Read more
Questions and answers When the engine is cold, it starts and immediately stalls
Read more
Great article 0
Replacement
In order to replace the starter of a Priora car, prepare the 13th and 15th keys. Before removing the mechanism, be sure to remove the negative from the battery - this little procedure is very important this time. Next follow the instructions:
- Remove the air filter, then its housing.
- On the starter assembly, unscrew the nut that secures the terminal.
- Remove the terminal from the contact bolt.
- Disconnect the wire and terminal.
- Remove the starter assembly mounting nuts (there are 2 or 3 of them, depending on the type).
- Remove the starter assembly. Install the new one in reverse order.
Source
The procedure for replacing the starter on a Priora with your own hands
This repair is very simple, so it won’t take more than 25-20 minutes. The ideal option is to work either in the inspection hole, or to remove the air filter housing from the cushions, after which very good access to the starter opens.
First of all, we disconnect the “-” terminal from the car’s battery, after which we disconnect all the wires from the starter, one of which is screwed on with a nut.
Then you need to unscrew the three starter mounting nuts, one on top:
And it’s more convenient to unscrew two from the bottom, as clearly shown in the photo below.
When they are unscrewed, you can easily remove it, since there are no more fasteners left.
Installation of a new one during a complete replacement occurs in the reverse order, and no difficulties will arise when performing this repair.
It is important to keep in mind that the starters on the Priora were installed with both three fasteners and two (old and new). Therefore, before buying a new one, make sure which one was on your car.
The price of a new 2170 can range from 3,500 to 4,000 rubles, although you can find Chinese options a little cheaper, but of relatively dubious quality. The most reliable and problem-free are KZATE factory production, which can easily cover over 200,000 km of a vehicle without repairs.
Source: https://priora-remont.ru/zamena-startera/
