Car external rear-view mirrors, according to the current standard GOST R 41.46-99 (UNECE Rules No. 46), during daylight hours must have a reflectivity of at least 40% (that is, reflect at least 40% of the light flux incident on them). However, in winter, under the influence of low temperatures and adverse weather conditions, mirrors can freeze and almost completely lose their reflective ability. This interferes with the driver, reduces the safety of the car and the comfort of driving it.
The problem can be solved using a simple remedy - electric heating built into the mirror. Heating defrosts the mirror element and, regardless of the ambient temperature, ensures the required level of its reflection coefficient. The use of heated side mirrors increases the comfort, convenience and safety of the vehicle, and this solution does not cost much.
Side mirror KAMAZ, MAZ main spherical with heating 24V 320x180 JSC MAZ-BELOG
Side mirror KAMAZ, PAZ, GAZ, URAL wide-angle spherical. without heating (additional) 212x161 TIMER
Side mirror KAMAZ, MAZ wide-angle spherical without heating (additional) 250x180 JSC MAZ-BELOG
Main spherical side mirror without heating 180x180mm ALL-round VIEW
Side mirror KAMAZ, PAZ, GAZ main spherical without heating 24V 343x163 with TIMER mount
Side mirror HYUNDAI HD65,72,78 heated OE
Side mirror KAMAZ,MAZ,K-700,702,744 main spherical without heating 443x215 JSC MAZ-BELOG
Side mirror VAZ-2110,2170 set electric drive, heated with u/p black AUTO COMPONENT
Side mirror KAMAZ, PAZ, GAZ main spherical heated 24V 343x163 with TIMER mount
Side mirror KAMAZ, MAZ main spherical without heating 320x180 OJSC MAZ-BELOG
We install heated mirrors. Advantages of using this method
During cold seasons and winter, side mirrors are often covered with ice and condensation.
To maintain good visibility, the driver has to constantly wipe them. Today, some car manufacturers install heated mirrors that include heating elements with an automatic defrost function. This pleasure is much more expensive than installing standard components. Therefore, in order to save your own finances, you can install heated mirrors yourself.
Heaters are not only installed by trained mechanics. Car enthusiasts can also cope with the task if they carefully study the information and follow the instructions.
Types of heating
The need for this function became clear quite a long time ago. Just a few decades ago, some cars were equipped with simple devices designed to defrost viewing structures.
Installation involved installing incandescent lamps inside, which heated the part from the inside and the ice melted. In modern devices, the heating method has changed, but the function remains the same.
The existing types of defrosters should be considered separately:
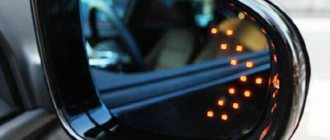
- Wire - how heated mirrors on a wire base works is explained by its very name. Tungsten filaments are used as a heating element, placed on an insulating and heat-resistant base. When an electric current passes through them, they heat up, which leads to melting of the ice.
- Printed conductors – heated car mirrors using printed conductors are the most modern. You can buy boards at the car market or at a spare parts store. They are not made independently.
- A film heater is a film-based product with heating elements included in it.
- Lamp heater - this type of heating element is a low-power (10 watt) incandescent lamp. This technology is best suited for making heated mirrors with your own hands and is often used by owners of outdated models of domestic cars.
What you need
To make a heater you only need:
- Nichrome wire;
- Double-sided and regular tape;
- Wires;
- Sealant;
- Soldering iron;
- Multimeter;
Having all this, you can start equipping the mirrors with heating. But first, let's deal with nichrome wire.
A wire with a cross section of 0.4-05 mm and a length of 1-1.3 m is suitable for the heater. For normal functioning of the heating system, the resistance of the piece of wire must be 12 Ohms. This is exactly what a multimeter is for. That is, we took a section of 1.5 meters and measured the resistance. If it exceeds the specified value, cut off 10 cm and measure again. Thus, we select the desired segment.
Procedure
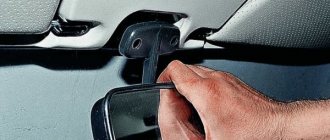
Now you can begin installing the heater. First, remove the holder with the mirror from the case. On most cars, it is enough to pry it with a screwdriver or something flat from below and pull it towards you.
Based on the characteristics of the holder, we choose the method of fastening the wire. If the inner surface of the holder is smooth (as in the photo), then stick double-sided tape on it.
Then we lay a piece of wire on this surface. This can be done arbitrarily, for example, in a zigzag or something else. The main thing is to place it so that the thread covers as much of the surface of the holder as possible. In this case, the wire should not intersect anywhere. Scotch tape will hold the nichrome thread well.
If the inner surface of the holder has any protrusions or fastening elements, then it will not be possible to stick the tape. In this case, a soldering iron will help to secure the wire. Everything is simple here - we apply a nichrome thread to the surface and press it with a heated soldering iron. The plastic will begin to melt and the wire will sink into it. Once cooled, the plastic will become hard and it will hold the thread
But here it is important not to overdo it with heating the plastic, so as not to “push” it to the mirror. It is enough just to “drown” the wire in it a little and that’s it.
In this way, we fasten the wire along the accessible surface of the holder without touching the fasteners.
When laying the wire, its ends should be placed towards the side of the holder that is closer to the door, and so that they do not touch each other. To these ends we solder terminals for connecting to the wiring or simply the ends of prepared wires. Then the resulting connections need to be insulated.
All that remains is to provide insulation. If the wire was secured with tape, then to insulate it you can simply stick several more layers of regular adhesive tape on top. This will provide thermal insulation and prevent the wire from peeling off and shorting.
As for the holder where the wire is secured with a soldering iron, you can simply fill the entire surface where the thread passes with sealant and wait until it dries. In this case, the fastening elements will not be affected, which will ensure ease of fastening, and the wire itself will be insulated.
Before installing the holder in place, we pull the wiring through the mirror body into the door, the wiring for powering the heaters. Only after this we assemble the mirror.
Exterior mirrors
Model selection
News
- [17.01.2019]
ATTENTION! From January 1, 2022, due to an increase in the VAT rate, prices for products of NPK Polytech have been changed. - [10.01.2019]
Sale of interior and additional mirrors produced by 3R! - [05.06.2017]
Since May 2022, the products of NPK Polytech have been labeled with EAN-13 barcodes.
Instructions for installing mirrors: Here you can download the passport and instructions for installing mirrors of NPK "Polytech".
Installation of heated mirrors.
Here are general recommendations for installing heated mirrors that apply to all car models. Detailed installation information is contained in the operating instructions for each specific mirror (see above).
First, you need to turn off the voltage of the vehicle's on-board network (remove the battery terminals). Then, remove the existing mirrors and install heated ones instead, after passing the heating wires inside the door. For ease of operation, you should first remove the inner door trim. Next, the wires are led out of the door under the dashboard of the car. It’s good if the car already has electrical wires entering the door - the heating wires can be routed through it. If there is no input, then you will have to drill two holes: in the body pillar and at the end of the door and lay the wires through them.
To avoid accidental damage to the wires when closing the door, it is useful to install protective rubber bushings from the VAZ-2106 or Oka into the holes. Any other dense rubber bushing will do, as long as it can be securely fastened to the body pillar.
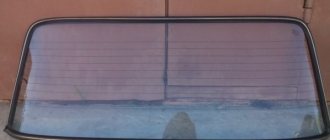
One of the wires is connected to the ground of the car in any convenient place. It is not recommended to connect to ground inside the door, since electrical contact in door hinges and other moving connections is not always reliable. The other wire connects to the power supply. It can be connected in parallel to the heated rear window or through a separate switch. The first method is the simplest. The connection is made by connecting the heated mirror wire to the output wire of the rear window heated relay.
Special clamps that have recently appeared on the market allow you to connect wires without preliminary stripping and subsequent insulation. As a result, the entire connection operation takes a few seconds. However, not all domestic cars are equipped with a heated rear window. In addition, in some cases, for example, when driving in fog, the mirrors may fog up, although the rear window remains clear. Therefore, connecting via a switch is more convenient and versatile. Standard switches from any car model will do. Just make sure that the current limit value through the switch (usually indicated on its body) is greater than the current consumed by the heating system. If the passport for heated mirrors only indicates the power of the heating system, then the amount of current consumed can be easily determined by dividing the power by the voltage of the on-board network. Connecting the heated mirror system with electric drive is carried out in the same way.
The bathroom belongs to the category of wet rooms. High humidity causes some discomfort, not to mention the formation of fungus. When planning renovation work in the bathroom, it is necessary to consider the following points:
1. Ventilation (natural or forced) 2. Room heating (warm floor; heated towel rail; radiator)
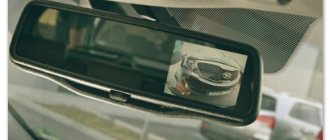
An indispensable attribute of the bathroom is a mirror, the surface of which is susceptible to fogging.
There are several ways to solve the problem of mirror fogging.
1. Wipe the surface of the mirror with your hand 2. Before taking a bath or shower, rub various gels (liquid soap, shampoo, special spray) into the surface of the mirror 3. You can install a car wiper on the mirror 4. You can install a fan with a humidity sensor 5. You can organize heating of the mirror using a special heating film.
Methods for connecting the heating film:
1. Combine with turning on the lighting above the mirror. 2. Install a separate switch for heating the mirror. 3. You can organize automatic activation of the mirror heating when the humidity in the room exceeds a preset value. For this, a signal from a fan with a humidity sensor is used (the fan circuitry requires modification)
A unique video course on apartment renovation:
My name is Alexander Smolin and for more than 17 years I have been renovating premises of any complexity. My channel on YouTube: https://www.youtube.com/user/remontkvpro is entirely devoted to such topics as high-quality do-it-yourself apartment renovation and high-quality do-it-yourself home renovation. With the help of my videos, you can quickly make repairs in your apartment with your own hands and without expensive professional tools, even if you are completely new to this matter.
At the moment, I have done QUALITY renovations in more than 50 apartments. Here are some of my works:
prev next On my channel you will find video lessons on topics such as planning an apartment renovation, electrical, plumbing, rough and fine finishing of walls and ceilings, bathroom renovation, toilet renovation, hallway renovation, living room renovation, kitchen renovation, working with different electrical tools, installation of ceilings and work with drywall.
In addition, on my channel there is a separate playlist, one might even say a whole video course, dedicated to interior and entrance doors. From the video in this playlist you will learn how to choose a door, how to install a door with your own hands, how to install extensions with your own hands (2 ways are discussed in the video), how to install platbands, how to simply and quickly install a lock and a lock mate without expensive tools, how to install door limiter and finally, you will learn about the features of interior and entrance doors.
In my master classes you will find answers to questions: how NOT to lay tiles, how NOT to flood your neighbors, how to make holes in tiles, how to make an arch from plasterboard with your own hands, how to properly hang wallpaper, how to save on materials, how to choose paint and wallpaper, how to seal cracks and cracks. You will learn how to make LED lighting with your own hands, find out what to do when the hot water is turned off, how to clean the seams between the tiles, how to choose a kitchen hood, how to repair faulty wiring, how to turn the lights on and off remotely, how to install a window sill with your own hands, and much more , much more. Don't forget to subscribe to my channel so you don't miss new videos: Keywords: diamond discs, disc review, how to choose a disc, diamond wheel, grinder disc, cutting disc, sharpening discs, grinder wheel, tile disc, tile cutting, discs for concrete, grinding diamond slides, flexible diamond slides, disc for concrete, apartment renovation, do-it-yourself, diamond tools
Other methods and connection diagram
The largest category of cars that do not have heated mirrors, of course, are all our domestic car models, so the most pressing question for the VAZ 2112 is how to connect heated mirrors, now we will tell you the answer. So:
- Installing heating is a very popular variety of tuning procedures, because it is not particularly difficult and is therefore available to every interested car owner, the connection diagram is shown in the photo below
Electrical diagram for connecting heating elements
- Of course, when it is urgently necessary to do heating, then the purchase and installation of new mirror elements with a built-in heater is the most popular and most often used option
After this comes the option of replacing or installing only the heating element, so let’s take a closer look at all the nuances of installing a heater on a car:
- In order to replace the mirror element itself, a VAZ car, the entire body in which it is located does not need to be removed, it will be enough to perform the following steps - we make some efforts to bend the body of our mirror in the direction against the movement of the car
- In the resulting gap you will see the pin (it is usually white) of the adjusting rod
- The pin will need to be removed, removed from the housing, then pull out the old mirror element in any direction to stick your fingers into the middle of this element
- We press on the center of the element, and with slight resistance it should come out of the latch to end up in your hands
- After this, all that remains is to insert a new heated element, proceeding in the reverse order, and bring the heating filament wiring into the interior
Turn on the heating
Usually only two wires come out of the heating element; when connecting them, you don’t have to observe the polarity, since your connection will still be parallel, and the polarity for the element does not matter:
- It is recommended to turn on the heated mirrors together with the heated rear window, then you can directly connect the heating elements to the system
- So that when you turn on the heated rear window, the heated mirror mode also turns on, the plus is that you don’t need an additional relay and a separate power button
- If there is no system for heating the rear window, or you want to make a connection separately from it, then you need to purchase a power button and an additional relay with a 10 Amp remote fuse.
- And if you use a ten-amp button during installation, then you can easily do without a relay, and you can connect the heating of the mirror elements directly, since their power consumption is low
We do it ourselves
When you need to make heating from improvised means, then, as already mentioned just above, the easiest way to do this is to use car light bulbs:
- This method is universal and suitable for absolutely all cars.
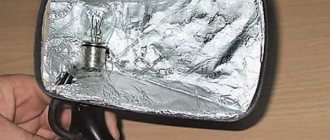
- First, you need to slightly modify the mirror body; you need to create a protective heat shield in it
- This is easy to do using foil; you can easily cover the inside of the case
- Then you need to place and secure in the housing a socket with a car light bulb screwed into it
- It will be important to ensure that the built-in light bulb does not come into contact with either the mirror itself or the housing (since the light bulb will heat up very much, contact can damage either the mirror element or melt the housing)
- In addition, it is possible to perform heating, with two different operating modes, the first is a powerful mode designed for quick defrosting and the second is weaker to protect against fogging.
- This desire can easily be realized by installing a two-pin power bulb (21\5) inside the rearview mirror housing, and connecting it accordingly
- Then 21 Watt will act for quick defrosting, and 5 Watt should be enough against fogging
A real case from practice: There are also situations when an owner who bought a used car contacted a service station with a request to install heated mirrors for him. The staff at the station calculated the amount for the installation and parts, then took the advance and then sent the owner home. And when disassembling it, it suddenly turned out that the heating was already installed, and from the factory. So, the owner, who did not want to read the technical data sheet and operating instructions and simply did not understand that the heating was already there, it was only important to know where it turned on, paid money for work that was not performed by anyone.
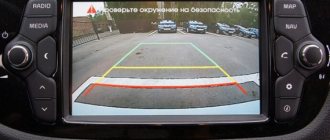
Checking the presence of standard heating
The presence of a heated rear view mirror cannot always be detected at first glance. The fact is that there is often no separate button to turn it on, and many car owners wonder how the heated exterior mirrors are turned on. The function is activated automatically when the rear window heating is turned on. To check if the mirror heater is present:
- Start the engine;
- Turn on the rear window heating;
- Spray the mirrors with water or blow on them;
- Touch it with your hand.
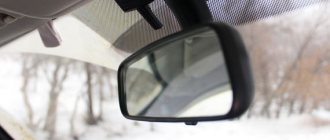
When the heating is running, the water drops dry within 1-2 minutes; when you breathe, the mirror does not fog up, and it is warm to the touch. In the cold season, you can verify the presence of heating by simply observing how long it takes for the mirror to thaw after being parked overnight. If a heating element is located underneath, the defrosting process takes only a few minutes.
Article on the topic: Car tuning: vinyl stickers
Choosing mirrors
We decided to purchase and install heated mirrors ourselves, but the choice is not an easy one, since today a huge number of different models are sold on the markets, which differ in appearance, price and technical characteristics. To help with the choice, we will not describe or list unnecessary details, but rather consider the points that will be important to pay attention to when purchasing.
Visual characteristics
An important characteristic is the reflection coefficient, in other words, reflectivity:
- You can see this value for your car in its passport
- According to the standard, the reflectance coefficient (reflectivity) for a car mirror must be more than 40 percent
- Otherwise, you run a high risk of not seeing what’s going on behind your car and getting into an accident.
The second equally important characteristic is the correctness of the transfer (without distortion) of the shape of objects:
- It is difficult to evaluate this characteristic
- All you have to do is look at your reflection in the sample being tested.
- And if your reflection resembles the reflections in the funhouse mirrors, then you should not purchase such a product
In addition, you should pay attention to the presence of an anti-reflective coating on the mirror element:
- Only high-quality “tinting” will protect your eyes from being blinded by reflected light.
- However, it is worth considering the fact that excessive darkening further reduces reflectivity and can lead to incorrect color rendering
Mechanical characteristics
When purchasing heated side mirrors, you need to pay close attention to the position adjustment present, as well as on what principle it is implemented:
- For example, if you take standard mirrors from a VAZ 2110, they have a lever adjustment mechanism, which has a number of disadvantages
- Therefore, a cable mechanism is more preferable, since it is smoother and has better adjustment accuracy compared to a lever mechanism.
- However, the ultimate dream of every car owner, without any doubt, is electrically controlled elements
- In this case, a joystick is located inside the car, with which you can easily set the location of the side mirrors as you prefer.
It is worth recalling a point that applies not only to the choice of mirrors. Rather, this is a general recommendation that everyone needs to remember when purchasing any spare part:
- Immediately pay attention to the quality of the mirror element, carefully inspect all the details of the case
- The parts must have cracks, scratches, chips, or other mechanical damage
- In addition, you should pay attention to the complete set and branded packaging.
- Any self-respecting manufacturer supplies its products exclusively in branded packaging, which usually indicates the address and telephone number, and also contains detailed information about the model
- Therefore, feel free to open the box to make sure there are instructions inside in your native Russian language, as well as an installation diagram
- In addition, an important factor is the presence in this kit of the necessary fasteners, a set of wires and seals
- This will allow you, if you install it yourself, to reduce additional costs, and also significantly reduce the time it takes to complete the work.
Heating efficiency
Another parameter that interests us, for the sake of which all the actions were done:
- Because ultimately you need a mirror that will be able to work effectively under adverse conditions
- We need to evaluate the heating rate and quality of the heating element and how quickly moisture, snow and icing will evaporate from the surface
- You won’t be able to evaluate such phenomena on your own without special sensors and a computer program, so all you have to do is connect and test in real conditions, observe visually and record the time
This concludes, additionally watch the video on this topic, good luck in installing the heating.
New style side mirrors with neutral anti-glare
The deterioration of standard mirrors and the reluctance to install freelance models in their place is worth considering a modified version in the usual plastic design.
The price for this variation is about 900 rubles. The modified model differs from the standard ones in the rounded corners of the body and a different plastic texture. The mounting and adjustment method are identical to the factory design. Keep in mind that popular versions of side mirrors of the VAZ 2114 must meet the technical indicators and requirements:
- A clear reflection without glare or abrasions should provide visibility around the machine;
- The folding function will avoid structural damage and reduce the level of injury in the event of a possible accident;
- The body should not stick out too much to the sides.
Otherwise, the choice depends on the owner and budget.
Kit for connecting heating and electrically adjustable mirrors on VAZ 2110, 2111, 2112.
The kit is designed to connect heating and electrical adjustment to the side mirrors of cars of the tenth family.
Equipment:
- 1 control unit, 1 wiring harness with chips, 2 corners.
Applicability:
- VAZ 2110;
- VAZ 2111;
- VAZ 2112.
It's easy to place an order on our website. Simply add the selected items to your cart, then go to the Cart page, check that the items you ordered are correct, and click the “Checkout” or “Quick Order” button.
The “Quick Order” function allows the buyer not to go through the entire ordering procedure on their own. You fill out the form, and after a short time the store manager will call you back. He will clarify all the conditions of the order, answer questions regarding the quality of the product and its features. It will also tell you about payment and delivery options.
Based on the results of the call, the user either, having received clarifications, places an order independently, completing it with the necessary items, or agrees to the order in the form in which it is now. Receives confirmation by email or mobile phone and waits for delivery.
Placing an order in standard mode
If you are confident in your choice, you can place your order yourself by filling out the entire form step by step.
Filling out the address
Select the name of your region and locality from the list. If you did not find your locality in the list, select “Other location” and enter the name of your locality in the “City” column. Enter the correct index.
The warranty period is 1 year.
Option 1: Russian Post (cash on delivery)
Delivery is carried out by Russian Post in accordance with Post tariffs. Payment is made by the recipient upon receipt of the order. The calculation will be made manually and announced when the manager contacts you.
Delivery cost: 0 RUR
Option 2: Russian Post (prepaid)
Single price for all shipments to all corners of Russia.
Delivery cost: 300 rub.
Option 3: SDEK (transport company)
Delivery is not free. Cost calculation is carried out in each specific case and depends on the distance.
Delivery cost: 0 RUR
Option 4: Pickup
Pickup is possible on weekdays from 9 to 18 at the address Sheinkmana, 7 or on weekends, Latviyskaya, 54. After placing your order, the manager will contact you and specify the time and place of pickup.
Delivery cost: 0 RUR
Option 5: International delivery by mail
For CIS countries and abroad.
Delivery cost: 500 rub.
Option 6: Transport company
Delivery is carried out by TK in accordance with TK tariffs. Payment for delivery is made by the recipient upon receipt of the order. You can choose which shipping company is more convenient for you to receive the cargo, or we will independently select the most convenient option for you. Packing and delivery to TK is free.
How to connect
Usually only two wires come out of the heater element; they can be connected without observing polarity; the connection will always be parallel and polarity does not matter. Since you can and should turn on the heated mirrors together with the rear window heater, you can connect directly to this system. That is, when you turn on the heated rear window, the heated mirrors will also turn on, the relay and button for heated mirrors are not needed in this case.
If you plan to connect separately from the heated rear window, then you need to stock up on a power button, a relay and a 10 A remote fuse (if you use a 10-amp power button, you can do without a relay, since you can connect heated mirrors directly, due to low power consumption).
If you still need to make heated mirrors from scrap materials, then, as mentioned above, the easiest way to do this is from a car light bulb. This method is universal and suitable for absolutely all cars.
First of all, the mirror body itself requires a little modification; it needs to create a heat shield. This can be done using foil by simply gluing the inside of the case. Then place and secure there the socket with the car light bulb, making sure that the lamp does not touch the mirror itself or the body (the lamp heats up quite strongly, and if touched, it can damage the mirror element or melt the mirror body).
You can also make a heated mirror on a car, with two operating modes, a powerful mode aimed at quickly defrosting the mirror and a weak one to protect against fogging. This can be achieved by installing, for example, a two-contact lamp (215). Into the mirror housing, and connecting it accordingly. In this case, 21 Watt will work for rapid defrosting, and 5 Watt will be enough to protect against fogging.
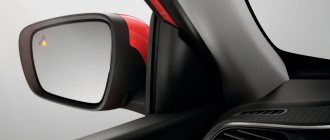
What is heated mirrors?
Heated mirrors are a system that can significantly improve the operating comfort of a car. The mirror will also remain clean during fog and rain, which will ensure traffic safety.
Result of installing heated mirrors in:
- no fogging of mirror surfaces even during fog;
- absence of excess moisture on the surface of the mirrors;
- absence of ice while driving, and after a long stop the coating on the mirror disappears in 3-5 minutes;
- You will no longer have to wipe your mirrors manually when it rains;
- improved visibility while driving.
Design of the mirror heating system
Before you begin installation, you need to understand the system design. You can install ready-made heated mirrors on your car. Then it is enough to connect new elements. Or you can do the tuning yourself. The second method is more labor-intensive and takes more time, but is the most attractive in price.
Heating scheme:
- button - usually located on the control panel or on the door on the driver's side, providing starting;
- electrical wiring - required for transmitting current, power;
- heating element - represented by film models, heaters based on wire or printed conductors.
- fuse – required for efficient power supply;
The system is connected to the on-board network via a separate button or connected to the heated rear window. When assembled correctly, the structure ensures rapid heating of the mirrors and removal of moisture from their surface when required.
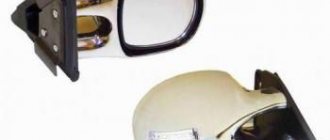
Installation of a new structure
The installation of new elements begins with the removal of old ones. There are several reasons for replacing factory mirrors:
- Mechanical failure of the fastening or adjustment mechanism;
- Desire to improve the appearance of the car body;
- The ability to equip the machine with electrical adjustment and heating options;
- Improved visibility around the car.
In addition to the above varieties, there are other options (convex, double, with a repeater function directly on the glass, etc.). The abundance of options for equipping the “four” allows owners to create a unique appearance for the car. The replacement of standard parts is due to the low level of assembly quality of domestic cars. Selecting from the list of non-standard review items simplifies the driver's orientation and decorates the appearance of the VAZ 2114 body. The ability to purchase goods online and an abundance of videos with detailed reviews and reviews from owners makes the selection process simple.
Varieties
There are several options for organizing heated exterior rear-view mirrors, which are conventionally divided into electrically dependent and independent of the on-board power supply at 12 V or 24 V.
The implementation of heating depends on the specific material you will use.
The following varieties are distinguished:
- Film heaters. Very easy to use, easy to install and at the same time quite effective. An option for the lazy, if you will;
- Heating from light bulbs. Initially, all motorists who did not have standard heating, but wanted to get it, used light bulbs. Today the technology is outdated, but still relevant;
- Conductor elements. It uses a special board that has heating elements. There is nothing difficult to install, and the range is extensive;
- Wire. A special wire is used as heating. It can also be implemented if you follow some rules.
To provide some clarity, I propose to now consider each option separately.
Based on the information received, you can decide what suits you and which idea is better to abandon.
You can organize homemade heating on any mirror. It all depends on your wishes, skills and financial capabilities.
Judging by publications on Drive2, homemade heating systems are most often found:
- for VAZ 2110;
- Daewoo Nexia;
- Daewoo Lanos;
- VAZ classic;
- Lada Kalina;
- Renault Logan;
- on Gazelle trucks;
- VAZ 2109;
- Renault Sandero;
- Chevrolet Aveo, etc.
If you want something similar for yourself, I suggest you get acquainted with short excursions into the issues of creating heating using one method or another.
Using light bulbs
This is the oldest method among all existing ones. But there is absolutely nothing surprising about the fact that incandescent lamps are used for heating.
In fact, such light bulbs are heating devices. They spend about 90% of electricity on heat, and only 10% goes to light emissions. To create a heating system, it is best to take a pair of low-power 10-watt light bulbs, or 1 double-filament light bulb, which will allow each spiral to be connected separately. Usually their size fits perfectly into the mirror body. It is only important to place the lamp so that it does not touch the internal surfaces of the mirror and the body itself.
The process of installing the heater itself is quite labor-intensive. But many cope on their own.
If you are interested in the details of the process, it can be divided into several stages. Think carefully before using lamps. However, the method is outdated and there are a number of alternative solutions.
But I will still describe the process step by step. It looks something like this:
- the mirror housing is removed;
- the body is disassembled;
- the front wall is treated with heat-resistant material;
- a layer of foil is applied on top of the insulation to reflect heat;
- the light bulb is fixed with wires using a socket or clamps;
- everything is carefully isolated;
- connect to power;
- display button;
- assemble everything in reverse order;
- check functionality;
- start heating.
- the mirror housing is removed and disassembled;
- the inner side is degreased;
- then the board is glued with Moment type glue;
- wires are connected to the side terminals on the heater;
- they are soldered and insulated;
- the wires are led to the car wiring;
- a control button is displayed on the panel;
- To improve efficiency, it is worth treating the inside of the body with thermal insulation and foil.
Usually there is a separate button to activate heating. When using 2 10-watt lamps, the mirror can warm up and get rid of ice in about 2-5 minutes.
But such lamps require a lot of energy and cannot be left on for a long time.
Printed circuit boards
This option is simpler and more effective than lamp heaters. They are not difficult to find on the market or order through Aliexpress.
In fact, here we are talking about 2 layers of polymer material, between which there are conductors made of nichrome or other material. Such products can be model-based, designed for mirrors of specific cars, or universal. If necessary, they are trimmed and adapted to any mirror.
The installation itself looks like this:
It is better to take such products as a kit, as is the case with Defogger DC12.
With your permission, I will not consider installing wire heaters. It is based on tungsten filaments, which provide high temperatures and require an extremely careful approach to organizing heating. There are too many risks when trying to assemble it yourself.
Side mirrors "Granta" style
Some design solutions in VAZ models can be called successful.
“Grant” mirrors look great not only on the “Grant” itself, but also on models from early years of production. The modified mount allows the model to be installed on the Samara family. The price of the version with mechanical adjustment is about 4,000 rubles. There are several advantages of the “Grant” style:
- Good review;
- Easy lever to adjust the tilt of the mirror element;
- Stylish appearance.
The heating and turn signal repeater function makes this variation even more interesting to buy. Installation is carried out without problems and unnecessary modifications. Strong fixation is ensured by a modified fastener design. If the listed varieties are not enough, then we will give a couple more examples of which mirrors are suitable for the VAZ 2114.