No sooner had winter arrived than something became wrong with the battery, which had been working well for the last couple of years.
You can feel him straining with all his strength, trying to revive the frozen car. And this is at ten to ten degrees below zero, or will it still be at twenty, as they promised this winter? How do you know if it’s time to do something with the battery so as not to be left alone with a cold car in winter? Many people looking under the hood ask the question: How to check if the battery is charged? There is an old grandfather’s method, which almost every issue of the magazine “Behind the Wheel” wrote about. We buy a hydrometer at the store. This is a glass tube with a bulb and a float that needs to be put into the battery and the float should show whether our friend is charged.
Hydrometers are different, the float should indicate the state of charge of the battery
The hydrometer operates on the principle of measuring the density of the electrolyte; we use a bulb to collect the electrolyte from the battery, and the float sinks or floats depending on the density. On the float there is a scale showing the density and the corresponding degree of charge. Somewhere there was also a table that made adjustments to the readings if the temperature at the time of measurement differed from 25 degrees Celsius. The most accurate way to determine capacity, and also the most correct.
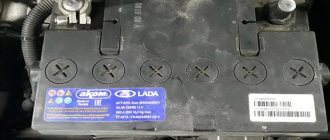
We carefully inspect the battery. To get a better look at it, I even brought the battery home. And so, we look and are surprised, and where is there something? By and large, most modern batteries are considered maintenance-free. (Maintenance-free means you don’t need to do anything with it for the first two or three years, and when you need it, it’s easier to throw it away and buy a new one) And there’s even a peephole to visually check the charge. For some reason I can't see anything through it.
With maintenance-free batteries, everything is considered to be sealed and sealed, but you and I understand that at the factory the electrolyte should have been poured into this standard acid battery somewhere. We look carefully and see that there are still holes, just unscrew them with a coin and you can check. But we will not test it with a hydrometer. Firstly, there is acid in the battery, and it will be very unpleasant if it gets, for example, on your finger. And secondly, you can understand the degree of charge of a 12-volt battery simply by measuring the voltage at its terminals and without getting dirty with acid. The method is of course less accurate, but there is no need to get dirty.
There are only two nuances here. The voltage should be measured a few hours after the last trip (charging) so that all chemical processes calm down. If you measure it right away, the battery will always show a very good result. You need to measure it with a digital voltmeter, which shows tenths, or even better, hundredths of a volt. Of course, if you are a big fan of car batteries, you can use the first option, with acid and pears, but I prefer the second. In addition, my alarm key fob shows the voltage on the battery, look in the instructions for your car, maybe you have something similar.
So: table of charged battery voltages
Voltage Volt
| State | |
| 12.6 or more | 100% |
| 12,5 | 90% |
| 12,42 | 80% |
| 12,32 | 70% |
| 12,20 | 60% |
| 12,06 | 50% |
| 11,9 | 40% |
| 11,75 | 30% |
| 11,58 | 20% |
| 11,31 | 10% |
| 10,5 | 0% |
The good thing is that air temperature has virtually no effect on voltage. Those. In cold weather the voltage will be a little less, but not much. However, negative temperatures greatly affect the battery’s ability to deliver its capacity. Let's look at the table.
Approximate dependence of battery capacity on ambient temperature
Air temperature in degrees Celsius
| Capacity | |
| 25 | 100% |
| 20 | 95% |
| 10 | 90% |
| 85% | |
| -10 | 70% |
| -20 | 50% |
| -30 | 40% |
If the battery is 100% charged at 25 degrees Celsius, then the lower the temperature, the less it can give up its capacity. But if the battery is discharged, say 50%, then when the temperature drops to -20, you can start the car only by calling a friend for help. And a discharged battery can simply freeze, turning into an ice barrel. Of course, you can thaw it and then try to charge it, but how it will all work later is unknown. It won't work well, if at all. So it’s better not to let this happen.
And at what voltage should the battery be charged? The answer comes from the car manufacturer. In some particularly advanced cars, if the battery voltage drops below 12 volts, for example to 11.9, which according to the first table is 40% of the capacity, then the car displays “Battery low” on the on-board computer. For me, for example, it starts making nasty noises every time I open the door, like, master, quickly charge me, my death will come soon. Of course, the manufacturer is playing it safe and you can still drive on such a discharged battery, but it’s still better to take the battery to a warm room for charging without waiting for a frost of 20 degrees.
We charge the battery using an automatic charger.
And in a warm time, so that the battery takes all the possible capacity, and not how much is indicated in the table. The charger must be fully automatic, so as not to carry around with hydrometers to determine the degree of charge/discharge. I still have it from the old days and it works great, it even charges a 70A battery, although the instructions say that it works for 55-60 amperes.
Is it possible to recharge the battery at idle so as not to carry these 15-19 kilograms? Of course you can give it a little extra charge, the question is how long you need to run the car at idle speed. This time depends on many factors. But besides empirical arguments, let's look at the numbers. A car generator produces up to 80 Amps at a maximum speed of about 5000 rpm. At idle, the generator will produce about 30-40 amps. Is it a lot or a little? It all depends on the consumers. If the ignition circuit takes about 20 amperes, the headlights another 20, the glass heating 15. Of course, a little less, since we look at the size of the fuses.
But we still see that even with consumers turned off, almost all the current generated by the generator will be spent on maintaining the operation of the machine, and there will be nothing left to charge the battery, good if there are 10 amperes. With this current, a discharged 60 ampere battery will be charged in about 6 hours, and even if the battery takes a charge, we remember that in the cold the battery capacity decreases sharply. Here is the answer. And if you remember that the starter immediately takes 150-200 amperes, and maybe up to 500 amperes in a very slow-frozen version, then it’s not worth starting the engine again to “recharge” the battery. It’s better to take the discharged battery to charge somewhere warm and it will be fine.
How to check the battery yourself
So, how can you check the health of your car battery?
Of all these methods, the most accessible to the average person is to use a tester to check the car battery and visually inspect it, and perhaps look inside (if the battery is serviceable) in order to see the color and electrolyte level. And to fully check the car battery for performance at home, you also need a densimeter and a load fork. Only in this way will the picture of the battery condition be as clear as possible.
Therefore, if there are no such devices, then the minimum actions that are available to everyone are to use a multimeter, a ruler and use regular consumers.
To test a battery without special equipment, you need to know its power (say, 60 Ampere/hour) and load it halfway with consumers. For example, by connecting several light bulbs in parallel. If after 5 minutes of operation they begin to glow dimly, it means the battery is not working as it should.
As you can see, such a home test is too primitive, so you can’t do without instructions on how to find out the real condition of a car battery. We will have to consider in detail the principles and all available testing methods, right down to measuring the density of the electrolyte and testing with a load simulating the operation of the starter.
Examination
Now directly about how to check your battery yourself with a load fork, reading the necessary data on the condition of the battery.
Not everyone knows the nuances of such a procedure. It is generally accepted that this is very difficult. But if you figure out how to use a load fork and follow the instructions, it turns out that you don’t need much to test your battery.
This operation is performed with or without a load.
Testing without load
First, let’s learn how to properly and independently test your car battery with a load fork without using a load.
Before testing the battery, you need to disconnect it from the charger or remove the car terminals. A minimum of 7 hours must have passed since the last trip.
Therefore, the most optimal time will be the morning, when the car has been parked overnight. Be sure to check the electrolyte level and add water if necessary.
The load forks are mobile, so it is not necessary to remove the battery from the car to check. It is optimal when the battery temperature is about 20 degrees or more. If it's cold outside, it's better to remove the battery, take it indoors, wait for it to warm up, and then start testing.
The diagnostics itself without load is performed according to the following scheme:
- connect the positive wire with the plug terminal to the battery positive;
- a metal pin or negative wire is connected to the negative of the battery (5-6 sec.);
- look at the readings indicated on the voltmeter.
If the device shows 12.6-12.9 V, this corresponds to 100% charge. When the range is 12.1-12.3 and 12.3-12.6 V, this is 50 and 75% charge respectively. At readings of about 11.5-11.8 V, the plug shows a full discharge.
Load testing
Having completed the first stage of verification, you can gradually move on to the next step. Namely, testing under load.
You can check the battery using an NV under load only if the battery is fully charged.
Now in more detail about how to properly test your car battery with a load fork under load conditions. The load should be connected based on the recommendations from the manual. Then the plug itself is switched.
Be careful, because when there is a load, a large current will flow through the negative terminal, which can cause a spark.
When testing under load, the main data is obtained at 5 seconds of testing. After this, the device turns off. You cannot keep the plug on for more than 5 seconds.
As for the results, they could be like this:
- when the voltage is above 10.2 V, everything is fine with the battery, the charge is full;
- if the device shows 9.6 V, the charge is approximately 75%, which is also good;
- a value of about 9.0 V is allowed, that is, 50% charge;
- 8.4 V is only 25%;
- if less than 7.8 V, a complete discharge is observed.
Upon completion of the load test, another test without load is carried out. Normally, the device should show 12.4-12.7 V. If the parameters have dropped, there are problems in one or several battery banks. It is necessary to check the electrolyte level, its condition, the tightness of the case, the presence of problems with contacts, etc. That is, a complete diagnosis is carried out. If the problem is in the battery itself, you will probably have to buy a new one.
Where to charge?
Many people do not give due importance to this aspect of the car battery charging process. And in vain, because under no circumstances should you charge the battery in a poorly ventilated area, especially if we are talking about an apartment. The fact is that during the charging process the battery emits sulfur dioxide, arsenic hydrogen (arsine), antimonous hydrogen (stibine), hydrogen chloride and other toxic substances. Their high concentration is harmful to humans, causing headaches, coughs and other symptoms of deterioration of health. Moreover, everything that the battery emits ends up on furniture, clothes, and carpets. Consequently, these poisons will have their negative impact on humans for a long time.
Do you think this is nonsense? In order to prove the opposite, we conducted a visual experiment, may Green Peace forgive us. Next to the battery, which is being charged in an unventilated room, we placed a small indoor tree. Lively, green and very pretty. After just a few hours, its leaves began to dry out and turn yellow, and after another two hours, only the trunk and branches remained of the tree. All the leaves have fallen. Draw your own conclusions.
However, that's not all. The hydrogen released by the battery combines with the oxygen contained in the air to become explosive. Sometimes all it takes is a small spark, a lit match or a cigarette. Therefore, the safest place to charge a car battery is outside or in a well-ventilated room, preferably with a draft.
In conclusion, we would like to wish that the battery in your car never runs out.
March 19, 2013. Artem Kiselev, especially for InfoCar.ua
Source: InfoCar.ua
Original taken from
lukilukii
in Car Battery. Charging correctly
A. LAVRENOV, Irkutsk
When a battery (or rechargeable battery) is charged, the charging current is set according to the readings of the ammeter. What does it show?
Electrochemical processes in a battery occur on the surface of its plates, which are in the electrolyte. To increase the battery capacity, the plates are made porous. In the thickness of the plate, in its pores, mixing of the electrolyte occurs much more slowly than on its surface and in the adjacent electrolyte layer.
It has been noticed that the higher the charging current, the more intense undesirable processes occur in the thickness of the plates, i.e., battery aging. Therefore, the charging current is limited, finding a compromise between charging speed and the rate of battery aging from high current. It is generally accepted to charge lead-acid starter batteries with a current equal in amperes to one-tenth of the ampere-hour capacity. And the operating instructions for these batteries [1] recommend, for example, for a 6ST55 battery the charging current is even less - 2.75 A, i.e. 0.05 capacity.
For many years, chargers have been manufactured according to the same structural diagram: mains transformer—full-wave rectifier (sometimes bridge)—rheostat—ammeter. Let's add a measuring resistor with a resistance of 0.1 Ohm to the charging circuit of the device, and instead of one ammeter we will connect three in series - a magnetoelectric (TL-4 avometer), an electromagnetic E421 and a M890F multimeter (see diagram in Fig. 1). We will set the avometer and multimeter to measure direct current.
Let's connect the battery to the charger and use the magnetoelectric ammeter PA1 to set the charging current with rheostat R1 to 1.9 A. Some may find it strange, but the electromagnetic ammeter PA2 will show 2.7 A, and the electronic ammeter will show 1.87 A. All devices tested and gave the same readings when measuring direct current.
The slight difference in the readings of ammeters PA1 and RAZ is explained only by the natural error of the instruments, but the reason for the significant difference in the readings of ammeter PA2 is that the current in the circuit is very different from constant. It is known that the ammeter of the electromagnetic system measures the effective value of alternating current, and the magnetoelectric and electronic ones measure the average. It is the average value of the charging current that determines the electrical charge transferred to the battery.
Let's apply the voltage dropped across the measuring resistor R2 to the Y input of the oscilloscope (sweep speed - 2 ms/div, sensitivity - 0.2 V/div) and take a series of oscillograms at current values of 1, 2 and 3 A, set using an ammeter TL-4.
The oscillograms (Fig. 2, a, b and c, respectively) strongly resemble in shape the voltage at the output of a half-wave rectifier, although each “half-sine wave” is somewhat distorted: its top is flattened at the top and inclined to the right. The charging current occurs at the moment when the voltage at the output of the rectifier exceeds the EMF of the battery being charged, while the electrochemical processes are nonlinear. Connecting a smoothing capacitor C1 with a capacity of 4700 μF to the output of the rectifier practically did not change the shape of the charging current. And here’s the most interesting thing: these “half-sine waves” on the oscillogram in Fig. 2b, for example, have a height at the maximum point of two divisions of the oscilloscope scale, and this corresponds to 4 A. Do you remember what the ammeters showed?
Let's now experiment with an SCR charger. Such devices are attractive because, due to the absence of a bulky, powerful rheostat, they are small in size and have significantly higher efficiency and reliability. For the experiment, I chose the device described in [2]. The voltage of the secondary winding is 27 V rms, the ammeter is left alone - TL-4, the measuring resistor with a resistance of 0.1 Ohm is the same.
Oscillogram in Fig. 3a corresponds to the ammeter reading of 1 A; the current amplitude reaches 3.2 divisions of the oscilloscope scale - 6.4 A. Oscillograms Fig. 3, b and 3, c - with ammeter readings also 2 and 3 A. Curves 2, c and 3, c are close to each other in amplitude, since the same transformer was used, the rheostat was in a position where the resistance was almost minimal, and the trinistor is open almost the entire half-cycle.
Common types and types of load forks
In specialized stores and markets you can find a large number of load forks, which differ in design, measurement range and level of measured current.
In addition, such measuring instruments are classified according to the type of battery being tested - for alkaline and acidic power sources.
The main feature is the difference in load (most often from 1 to 12 Amperes).
There are also plugs that allow you to test individual battery banks, if the product design allows this possibility.
The most popular types of load forks include:
- NV-B is a device that allows you to measure voltage in the range from 0 to 3 Volts. The maximum current load is 100 Amps. The device is used to test acid-type batteries (voltage 2 V) and alkaline batteries (1.2 Volts).
- E 107 UHL4 - type of load plug for testing 12-volt car batteries. The measurement limit in this device is from 0 to 20 Volts. Current load limit is 100 Amperes.
- BH-01 is a device that allows you to measure voltage in the range from 0 to 15 V. The operating temperature is from 1 to 35 degrees Celsius. The test should be repeated after 15 seconds.
- HB-01 is a device characterized by an accuracy of 2.5%, as well as a measurement range from 0 to 15 Volts. Load size - 100 or 200 Amperes. Temperature range from 30 degrees below zero to 60 degrees above zero.
- NV-03 is the most popular product among car owners, the distinctive feature of which is the presence of an electronic voltmeter with an LCD indicator. The kit comes with two loads that can be connected to the plug separately. The maximum current load is 200 A, the voltage is from 0 to 16 Volts, and the capacity of the tested batteries is from 15 to 240 A*h. The product is used to test batteries for a standard voltage of 12 Volts. If one load is connected, the current limit will be 100 Amperes. In this case, you can test batteries with a capacity of 15-100 Ah. If you install two loads, the maximum current increases to 200 Amperes. In this case, it is possible to check the battery for 100-240 Ah.
- HB-04 is a more powerful device that allows you to test 12 and 24 Volt batteries. In addition, using the device, you can test individual elements of a 2 V battery. Measurement accuracy is 0.5%, voltage range is 0-32 V. In addition, the product operates in a wide temperature range - from -20 to +60 degrees Celsius .
Signs and causes of battery failure
An experienced driver will quickly guess about problems with the power source. To do this, he only needs a few signs, including:
- Sluggish engine cranking, indicating a low charge level. His efforts are not enough to ignite the fuel mixture.
- The battery drains quickly. Usually this problem is detected in the cold season, when a seemingly full battery goes out after a couple of cranks.
- Energy consumers are unstable.
All these factors should not be ignored, since the final failure of the battery can occur at the most unexpected moment. To avoid consequences, it is necessary to diagnose the unit.
There are several reasons for the battery to malfunction. Among the main ones the following are considered:
- The absent-mindedness of the owner, when electrical appliances are left on when leaving the car, which leads to the rapid landing of the container.
- Low quality of equipment maintenance.
- Increasing service life beyond established standards.
- Technical problems in the electrical wiring system, which can result in oxidation and destruction of contact connections.
- Incorrect connection of consumers leads to increased electricity consumption and reduced battery life.
- The generator does not work well, disrupting the battery recharging cycle while driving.
The root causes of battery failure can be diagnosed and prevented. It is important that this be done by properly qualified specialists and using high-quality and reliable tools.
Using a Multimeter to Test
This device is in demand not only among motorists. It is used in any area related to electrical measurements, including using it to check the performance of the battery. The versatility of such a tool is explained by the fact that it combines a voltmeter, an ohmmeter, and an ammeter. The compact device does not take up much space in the car and is always ready to take the necessary measurements. The battery reserve lasts for a long time, if you remember to turn it off during a break in work.
When choosing an assistant to repair car electrical wiring at home, you need to take into account the following characteristics:
- DC voltage is measured in the range from 0 to 200 mV, 2 V, 20 V, 200 V, 1 thousand V, and alternating voltage is measured from 0 to 200 V, 750 V.
- Resistance testing parameters range from 0 to 200 ohms.
- The DC current run-up in most models is 2, 20, 200 mA.
Battery voltage measurement
This is the most important parameter of the battery’s suitability for operation. Many drivers test this indicator first. This is done with the engine running. If the device scale displays values from 13.5 to 14 V, then everything is in order with this characteristic. Increased numbers will indicate a low charge level and more energy being supplied from the generator to maintain operating mode. This case often occurs in winter, when a faulty battery runs out of power.
There is no need to worry about short-term exceeding the standard data. In a technically sound car, the level stabilizes within 10 minutes. If during the specified period the indicators have not been restored, you need to pay attention to the serviceability of the voltage regulator or the condition of its contacts. If they become oxidized, they need to be cleaned. If there is a decrease in potential below 13 volts, you should think about replacing the battery, as this is an indicator of a faulty element.
If you take measurements with the car not running, you should pay attention to the following nuances:
- A voltage lower than 12 volts will not allow the engine to start, especially in cold weather with thickened oil. The crankshaft will not turn due to insufficient force in such a situation. A normal level is considered to be no weaker than 13 V.
- All measurements should be taken before the start of the movement, and not immediately after its completion.
- A larger charge will keep the battery operating for a longer period. At a lower level, it will sit down faster. Therefore, a new battery or one in close to this condition remains operational longer.
Battery charge and capacity
To check a car battery using this method, you need to analyze the data from a multimeter. Measurements should be taken 5 hours after recharging or disconnecting the battery from the machine. The data in this case will be more accurate. They do not depend on the ambient temperature.
Considering such measurements, the following patterns should be noted:
- A potential difference of 12.8 V indicates a fully charged battery. A large excess hints at serious malfunctions.
- The 75% balance is indicated by the figure 12.6 V.
- The marking 12.2 is taken as half.
- 12 volts will indicate a quarter of the resource.
- Anything less than the last value indicates a minimum reserve.
Information about capacity is no less important than charge. You can test it in the following way:
- The battery must be fully ready for use.
- Apply load to the battery. You can connect several lighting fixtures in series.
- A weak glow at a voltage of 12.4 volts guarantees problems with starting the engine in winter.
- Reducing the data below 12 V requires replacing the battery.
Such a check of the car battery provides an opportunity to avoid problems during start and movement, as well as prolong the operation of the product.
In addition, you can test the capacity by checking the control charge:
- The battery must be completely full.
- Turn it on at deep load according to the passport.
- Connect the device to the circuit.
- Measure the time it takes for the current to decrease by half.
- If it matches what the manufacturer stated, then the battery is working.
Leakage current measurement
For any car, even a completely new one, this is an inevitable phenomenon. This is explained by the minimal electricity consumption of some consumers even when the engine is turned off. In reference books you can find numbers from 10 to 80 mA depending on the device. If this data is greater, then we can talk about a malfunction of the machine. The ideal value is 60 mA. The lack of daily recharging due to interruptions in operation has a more negative impact on the condition of the equipment.
Before you begin obtaining information, you need to prepare the vehicle for testing:
- Disconnect the interior lighting, radio and other consumers.
- Remove the keys from the ignition.
- Check the information received. Exceeding values of more than 60 mA gives rise to a search for the circuit that receives the maximum power consumption. This can be done by elimination, removing fuse blocks one by one.
This preliminary procedure will provide more accurate information about both the condition of the battery and the power supply circuits.
The procedure for checking leaks is as follows:
- Set the measuring range to 10 A or 20 A.
- Disconnect the minus battery.
- Connect the probe of the device to this place.
- Connect the second one to the removed wire.
- The result will be shown by an indicator board or arrow.
Problems with the generator
The battery does not charge from the generator due to a number of reasons. In order to quickly identify these problems, you need to know their characteristics.
Belt problems
If the generator does not charge, then the problem may lie in the integrity of the belt. Even an inexperienced car owner will detect serious damage. It is more difficult to determine its weakening. Indeed, in this case, the generators either provide charging or not.
To identify problems with the belt, look at the indicators and lights. They glow almost constantly. To eliminate this, tighten the belts or completely replace them.
Faulty diodes, regulators, brushes
The generator does not charge the battery if faulty diodes are included. Such elements are identified using multimeters or testers. It is possible to replace one diode or the entire bridge. Incorrectly functioning elements cause the battery to be poorly charged or recharged.
When the power supply is overcharged, the diodes, which are operating normally, heat up. Voltage surges result from the use of an ineffective regulator. It is replaced immediately.
Poor charge occurs because the brushes that make up the generator wear out. If the replacement is not made, the generator does not charge the power source.
Polarity reversal
If the battery of a laptop or vehicle is completely discharged, perform a polarity reversal. If done correctly, the power supply will charge. Polarity reversal can be performed if changes in the poles can be observed. Otherwise, the charging unit should not be connected.
When determining pole reversals, you should focus on the capacity of the cans that are included in lead-acid batteries, but not other sources. For recharging, use only those chargers that are equipped with protective elements.
Polarity reversal is not performed if:
- The electrolytic composition has become cloudy and the charged car battery is quickly discharged.
- The lead plates were destroyed.
- KZ banks, which is included in the composition.
- Low composition density.
Overload
Why does the battery receive a charge, but the voltage does not increase? The main reason is generator overload. This is caused by the connection of standard and non-standard electrical equipment, various gadgets and installations. In this case, the generator operates at the limit.
Such difficulties arise for new car enthusiasts. After all, they use a variety of units and devices, acoustic systems, and lighting equipment for tuning. Sometimes car batteries are upgraded by increasing the power level of the power sources. Therefore, the output voltage does not “cover” all costs.
Other reasons
Why won't the generator charge? This occurs due to rapid wear of the rotor, which does not perform rotational movements and gets stuck in the stator. The rotor stop frequency varies. The only way to cope with this problem is to dismantle the old installation and install a new unit that works normally.
A breakdown in the circuit is an equally common problem due to which the car battery does not take charge from the electric generator. It is problematic to independently identify why the generator stopped functioning. Car mechanics and workshop workers are involved in this event.
The generator does not produce rated voltage
When determining why the battery is not charging, specialists constantly disassemble the generator. These steps allow you to identify the following faults:
The damaged pulley is replaced. To identify such a defect, this element is periodically inspected. Abrasion of current collecting brushes. During active use of vehicles and car batteries, current collection brushes are periodically replaced. When selecting elements, they are guided by the manufacturers’ recommendations. Wear of slip rings. Copper components lose integrity and properties. This results in a reduction in the rated voltage. As a result, the generator does not produce a charge. Violation of the integrity of the diode bridge. Damaged diodes are soldered or pressed in
It is very important to carry out all processes correctly. Soldering irons and other tools are used for these purposes.
The car battery does not charge for various reasons. If the problems are related to current leakage, then elimination of them must be started immediately. After all, a malfunction of the electrical system leads to short circuits, fires, etc. You need to check not only the car battery, but also the generator. After all, it is not difficult to disable it. For example, such consequences result from the installation of non-standard equipment, untested units and installations.
Electrolyte condition
You can understand how stable the serviceability of the power source is by looking at the state of the electrolyte. It should also be checked in cases where voltage and current readings cannot be measured.
To check, you will need a Phillips screwdriver - you will need to unscrew the caps on the jars in which the electrolyte is poured.
Some batteries have a charge indicator that helps determine the condition of the electrolyte - level, density, charge - and give a general idea of the health of the battery in this regard.
In other cases, you can simply check the electrolyte level with a flashlight; you just need to direct the beam into each of the cans. A signal that the battery will soon lose serviceability is exposed plates.
The liquid must always be above the critical level, since otherwise it will lead to the destruction of the grating filler, which, in turn, can cause a short circuit.
If the electrolyte is at an acceptable level, the next step is to measure its density. For this you will need a hydrometer. If the battery is 100% charged, the density will be ≥ 1.27 g/cm³.
The type of electrolyte also matters. A brown tint may be a sign of destruction of the plates. In this situation, you must carefully use a bulb to remove all the liquid that you can, and then replace it with the same volume of new electrolyte.
Why is there an ammeter in a car?
Those who are older remember that some kind of ammeter was installed on domestic cars. That device worked “in both directions”, and primitively showed where the current was flowing relative to the battery - from it, or to it. In fact, the ammeter served only to monitor whether the battery was charging or, conversely, discharging.
Modern ammeters allow you to learn much more information about currents in automobile circuits. This is possible due to the fact that the devices are now digital and can show not only the direction of the current. Based on their readings, you can find out the load accurate to tenths of an ampere. And this significantly expands the capabilities of the device.
This article is not about those devices that are an analogue of Soviet pointer “ammeters”. Today they are sold in the form of a plastic box with several LEDs of different colors. Such devices do not measure current. They are only suitable for roughly understanding whether the battery is charging or discharging.
Using a digital ammeter in the car, you can constantly monitor the following parameters of the on-board network:
- Battery charge current . Gives a clear picture of how the battery charges at different states of charge, depending on the temperature outside, at idle, and so on.
- Battery discharge current . When the motor (and generator, respectively) is not turned off, the actual current consumption from the battery makes it possible to calculate the battery life.
- Generator performance . Does it charge the battery or power the on-board network while driving?
- Adequacy of generator power . Is the generator capable of powering a powerful load, for example, heating something, emergency acoustics, a 220 V inverter, etc.
- Current consumption of electrical equipment . The ammeter always shows how much current is consumed by the consumers.
- Relationship between current consumption and switched on load . For example, you can find out how the current consumption changes when you turn on particularly “gluttonous” equipment, whether the battery is “deprived” in this case, and so on.
- The real power of this or that equipment . Using an accurate ammeter, you can easily calculate how much current any particular powerful appliance consumes. Then, knowing the voltage of the on-board network at the current moment, you can calculate the real power in watts.
This is not the entire list of capabilities of the ammeter built into the on-board network. For example, if an accurate device is installed, then even leakage currents can be assessed when the car is parked.
Checking the remaining battery capacity
If you notice some deterioration in parameters, you can check the remaining battery capacity. Such measurements can be made with the Lancol Micro-200 device. It calculates an estimate of battery wear and displays the main indicators on the screen. In the photo below:
Lancol Micro-200 battery performance tester
- SOH - battery performance as a percentage of maximum capacity.
- SOC - battery charge.
- R is the internal resistance of the battery.
You can calculate the residual capacity yourself using the formulas.
The internal resistance of the battery indicated in the passport
Let's say there is a battery with a cold cranking current of 420 amperes, a capacity of 60 ampere/hour and an internal resistance of 4.2 mOhm (0.0042 Ohm). Resistance data can be found in the battery data sheet.
First you need to calculate the actual resistance. Before starting, we measure the voltage on the battery, for example it was 12.69 volts. We take a 50 W light bulb from a headlight and connect it to the battery via an ammeter. The current was 3.65 amperes. The voltage when the light bulb is connected is 12.5 V.
We substitute the values into the formula: R (actual) = (12.69 (for example, without load) – 12.5 (under load))/3.65 A (bulb current). We get R (actual) = 0.052 Ohm.
Since the resistance also depends on the external temperature. At 25 degrees it is 100%, and at minus 20, for example, 40% of the norm. It is necessary to calculate the reference resistance: Ret = 0.0042*100 = 0.042 Ohm.
From here we get C residual = 60*0.042/0.052 = 48.46 A/h. Now let's calculate as a percentage: 48.46/60*100%= 80%. The remaining battery capacity is 80 percent, which is still not bad.
The feasibility of checking the battery amperage with a tester
Many motorists also ask whether it is possible to check the battery current. It is safe to say that the voltage and capacity level of the battery are more than enough to correctly assess the performance of the battery and the possibility of its safe operation in the near future.
It is important to remember that it is not practical to check the current indicator on the battery; moreover, with such tests there is a real danger of an accidental short circuit.
Car charger
Device diagram
All motorists have found themselves in such an unpleasant situation. There are two options: start the car with a charged battery from a neighbor’s car (if the neighbor doesn’t mind), in the jargon of car enthusiasts this sounds like “lighting a cigarette.” Well, the second way out is to charge the battery.
When I found myself in this situation for the first time, I realized that I urgently needed a charger. But I didn’t have an extra thousand rubles to buy a charger. I found a very simple circuit on the Internet and decided to assemble the charger on my own.
I simplified the transformer circuit. Windings from the second column are indicated with a stroke.
F1 and F2 are fuses. F2 is needed to protect against short circuits at the output of the circuit, and F1 – against excess voltage in the network.
Description of the assembled device
Here's what I got. It looks so-so, but most importantly it works.
Transformer
Now let's talk about everything in order. A power transformer of the TS-160 or TS-180 brand can be obtained from old black-and-white Record TVs, but I didn’t find one and went to a radio store. Let's take a closer look.
Reinstalling the battery
After cleaning the case, terminals and tray, reinstall the battery.
- Carefully place it on the tray.
- Attach to tray using clamping mechanism.
- Connect the terminals. This time, start with the positive terminal and connect the negative or ground terminal last.
- After connecting the terminals, spread a thin layer of Vaseline around the top of the terminals and terminal posts. This prevents corrosion from accumulating around the terminals.
Life time
Typically, the battery life with proper care is 4-5 years. If maintenance is carried out in a timely manner, it will serve faithfully for these years. But sometimes, with proper maintenance, it can work for 6–7 years.
This period can be influenced by many factors:
- Workmanship. As you know, expensive brands still work longer even with less care.
- Temperature operating conditions. Both low and high temperatures have a negative impact on battery life. Summer high temperatures under the hood further provoke sulfation.
- Generator operation. Proper operation of the voltage relay will extend its service life.
- Terms of Use. Short trips are detrimental to the battery.
- Regular maintenance.
Batteries work better in cold weather if they are in good condition and fully charged.
How to care for your battery
To avoid unnecessary troubles, you should regularly check the battery and give it the necessary care. To do this, the battery and its terminals must be kept clean and discharged/charged during long periods of inactivity. In severe frosts, it is better to take the battery from under the hood to a warmer place.
Some manufacturers recommend charging the battery once every 1-2 weeks, arguing that sometimes the consumption exceeds the self-charging of the battery. Thus, checking the battery is a completely feasible task and necessary for the proper operation of the car.
How to clean a car battery
Cleaning the battery case
You can use a simple procedure to clean the battery case. To do this, you need to prepare a mixture of 8 ounces of warm water and one tablespoon of baking soda. This neutralizes the acid and helps remove dirt from the battery case and terminals.
Wear safety glasses and rubber gloves and, using a soft brush, apply the solution to the top of the battery and the sides of the case. If your battery uses compartment caps (serviceable batteries), do not allow the mixture to seep under the caps and mix with the electrolyte inside.
Wipe with the solution and a clean rag. Continue applying the cleaning solution until you see no signs of buildup.
Cleaning the Battery Terminals
As with the battery, remove dirt and corrosion from the terminals using baking soda and a water solution.
To make your task easier, pour the mixture into a Styrofoam or similar disposable cup and submerge the battery terminal in it for a minute or two. Next, use a battery compartment cleaning tool to finish removing corrosion from the terminals. Repeat the procedure until you see that both cables are free of corrosion.
Cleaning the battery compartment
Check the condition of the battery compartment. Make sure there are no screws, cracks, pieces of dirt or signs of corrosion. If necessary, use the same solution to remove dirt and corrosion from the pan.
Built-in indicator
Most imported batteries have a built-in indicator that can be used to check the charge. For the first time such batteries appeared in Japan. Then European manufacturers began to practice a similar trick.
What is its essence? There is a transparent window on the battery cover (a kind of peephole). If you look at it, you can see that it is colored green. But this doesn't always happen. The green tint in the window will only appear if the battery is fully charged. If the window is transparent or white, it means the battery has lost part of its charge. The worst case is a black window. In this case, the battery has run down and needs to be charged urgently.
How to make your own battery fork
Motorists make many attributes from improvised materials in the garage. Since you can make a load fork yourself, we will consider its most popular option.
The load is a coil from a burnt-out heating device of a couple of kilowatts. This will be a nichrome wire with high resistance. Using the formula U=I*R, we calculate that in practice the spiral will give R=0.12 Ohm. A dozen parallel-connected heater wires will give the required parameters of 1.2 Ohms.
Switch the multimeter to Ohmmeter mode and measure the required length of wire, not forgetting about a margin of a couple of centimeters. We twist everything into a tight bundle and put ceramic insulation on top. For the body we use a U-shaped building profile. We solder the connecting insulated copper stranded wire to the crocodile.
The load output probe should be copper with a diameter of 5–6 mm. We select a digital voltmeter with a button. We put it on the sealant and put a window under it. It is advisable to insulate the handle.
How to make a device with your own hands
When the necessary equipment is not available, you can make the device yourself by watching the video. It is necessary to take a voltmeter from ready-made instruments, and the remaining parts are constructed from improvised means. Difficulties will arise when calculating and creating internal resistance, which requires current.
A suitable material is nichrome wire, used to create heating coils in electric stoves. Nichrome elements can be replaced with a metal strip from other heating devices.
For a voltage of 12 V, the current indicator should be within 80-120 Amperes, and the resistance should be 0.1-0.15 Ohms. A device for measuring such resistance is difficult to find. For this reason, the length of one element is selected and the current that it passes is measured. After this, several similar parts are combined.
A homemade device is made sequentially:
- Select a nichrome wire or heating strip and measure the current up to 15 A with a multimeter. The element should pass 10-12 A.
- 10 such parts are connected, receiving a load of 100-120 A. The wire must be twisted securely.
- The resulting element is placed in a suitable housing and fixed in it. If the box is small, then the wire is bent several times so that the turns do not touch each other. The parallel connection must be reliable, which is ensured by insulating cylinders that are installed on the bends.
- The ends of the twist are soldered to the output contacts, and from the outside to the connecting wires.
- Connect a voltmeter.
- Clamps are attached to the ends of the connecting cable, which are then connected to the battery.
When the device is ready, you can take measurements at home.
A little theory about the ammeter
If you have a good idea of how an ammeter works, then you can skip this section. For those who are not well versed in this topic, brief information is offered that will help them understand the material presented below and avoid some dangerous mistakes.
An ammeter for a car consists of two main components, namely a calibrated current shunt and the device itself with electronic filling and a display. A current shunt is a short conductor of strictly defined resistance. This is achieved by selecting the material, length and cross-section. To calibrate the shunt, cuts are made on it, due to which the cross-section gradually decreases, which means the resistance increases.
The ammeter itself for a car is nothing more than a regular voltmeter, which is calibrated for a specific shunt. That is, the ammeter does not measure amperes (current), as many believe, but volts (voltage). The device only displays the current strength on the display, obtaining data about it through simple mathematical calculations, which the electronic filling “does.”
It all works as follows. The shunt is installed in a wire break through which we want to measure the current flowing. Since the shunt has some kind of resistance (albeit very small - fractions of one ohm), a certain voltage drops across it. This means that there is a potential difference (voltage) at its ends when current flows. The ammeter measures this voltage and, “knowing” the exact resistance of the shunt, uses Ohm’s law to calculate the current in real time. The result of these calculations is displayed on the display in amperes and its fractions (tenths or hundredths, depending on the accuracy of the ammeter).
The ammeter in today's popular multimeters works in exactly the same way. Inside it there is a shunt (thick wire), at the ends of which the device measures the voltage, converting the resulting values into amperes.
Purely theoretically, the current in any wire we are interested in can be measured without an ammeter. To do this, while the wire is de-energized, we need to find out its exact electrical resistance in ohms. Then, as current flows through it, the voltage at the ends is measured. Knowing the resistance of a section of the circuit and the voltage drop across it, it is easy to calculate the current. To do this, the voltage must be divided by the resistance.
But the problem is that the resistance of the wire is very small, and it is almost impossible to measure it accurately with ordinary household multimeters. The same goes for tension. It is so small there that the accuracy of inexpensive voltmeters is simply not enough. Automotive ammeters are very sensitive milli- or even micro-voltmeters that can determine this voltage drop with high accuracy.
Interesting measurements
If there are leaks of electrolyte on the car battery, then the following interesting experiment will demonstrate the current leakage. It is necessary to put the multimeter in voltage measurement mode: place one probe against the car terminal, and the other against the surface of the electrolyte spot. The performance of the device will surprise you.
Electrolyte stains, as well as other liquids, are removed from the surface of the battery with an alkaline 6% soda solution (about a tablespoon per glass of water). Use a rag soaked in this solution. Avoid flooding the entire battery case, terminals, and car wires with water.
Ultimately, using an ordinary multimeter, you can study a large number of characteristics of a standard battery and more. That is why even the simplest such device is an extremely important thing in the household.
Moreover, such simple home diagnostics will allow you to avoid many unpleasant situations, and will also help you carry out timely maintenance and repair of your car.
Methods for connecting an ammeter in a car
There are only three main ways to connect an ammeter in a car. These schemes have variations that can be studied separately if desired. The choice of the three described methods depends on what goals you are pursuing and what device you managed to find for reasonable money.
Ammeter in the generator-battery circuit
For such a connection, an ammeter is suitable, which can measure current only in one direction, and also designed for connection to the positive section of the circuit. With this connection, it will be possible to control the current supplied by the generator to charge the battery and power electrical equipment. The discharge current (with the engine off) cannot be determined, even if the ammeter is double-sided.
The connection is made according to the following algorithm:
- The wire going to the positive terminal of the battery is disconnected from the generator.
- A current shunt is installed into the resulting gap, observing the polarity (according to the instructions and markings).
- Wires going to the ammeter itself are connected to the low-current terminals of the shunt.
- The ammeter is supplied with 12 V power from the on-board network.
- The desired gap for installing a shunt can also be created directly near the battery.
Since the plus of the on-board network will pass through the shunt, in order to avoid a short circuit, it is highly recommended to carefully insulate the created node.
Ammeter in the battery-consumer circuit
This connection method is not much more complicated than the previous one, but the functionality expands significantly. Especially if you purchase an ammeter that can measure current in two directions. Such a device will allow you to see not only the current from the generator, but also the discharge current and the exact current consumed by the vehicle's electrical equipment. Accordingly, the ammeter shunt for this connection method should be designed to be installed on the positive line.
Algorithm for connecting an ammeter to a car:
- At the positive terminal of the battery, all wires are disconnected, except for the one that goes to the starter (this is extremely important).
- A current shunt is installed into the resulting gap, observing the polarity according to the diagram and markings.
- Low-current wires are connected to the shunt to the ammeter according to the instructions.
- The ammeter itself is supplied with power from the on-board network.
- The created node is carefully isolated.
If you use a one-way ammeter with this connection method, it will only display the current consumed by the vehicle's electrical equipment. Double-sided devices will allow you to see both the charge current and the discharge current.
This method is the most common, as it most fully reveals the capabilities of the installed ammeter.
Other ways to connect an ammeter (to “minus”)
There are also situations when an ammeter designed for connection to the positive line cannot be found for reasonable money. In such cases, you can purchase a “negative” device, but connecting it involves two difficulties at once. Firstly, the negative from the battery can be connected to the ground of the car with several wires, but only one is needed, through which all the current flows. Secondly, when the engine starts, a starting current flows through this very negative wire, which can burn out the ammeter. Thirdly, such an ammeter requires a separate power supply.
Therefore, to connect such ammeters, the following method is used:
- Disconnect the negative terminal from the battery.
- Install an ammeter current shunt into the resulting gap.
- Install a breaker parallel to the shunt, which will allow the shunt to be unloaded while the engine is starting.
- Connect the measuring leads to the ammeter to the low-current terminals of the shunt according to the instructions.
- To power the shunt, use a DC-DC voltage converter 12 V -12 V with galvanic isolation.
- Carefully insulate the created nodes.
As a breaker in point No. 3, you can use a classic power switch with a separate button, which is located in the car interior. The voltage converter from point No. 5 is sold in abundance from the Chinese. When choosing it, it is important to pay attention to the voltage characteristics, as well as the presence of galvanic isolation (if you supply power to such an ammeter directly, it will instantly fail).