Any car enthusiast monitors the condition and appearance of his vehicle. Often, over time, a car's bumpers become damaged. For this reason, motorists strive to purchase a new car, or try to find another radical method.
Today, it is popular to do bumper tuning yourself. At the same time, some car enthusiasts prefer to create new bumpers using various available means.
A unique bumper will transform your vehicle for many years. To do this, you should learn how to make bumper tuning yourself.
Tuning a car bumper using building materials
At the very beginning of the work, you need to clearly understand the technique of its implementation.
To make the body kit look unique, you are allowed to tune the front or rear bumper yourself or make changes to the factory model.
For understanding, we will describe both of the above versions.
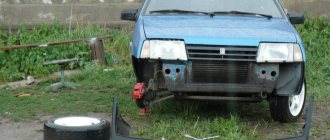
Initially, it is necessary to remove the body kit from the vehicle for its subsequent cleaning. Do-it-yourself tuning of the rear and front bumpers is no different from each other.
In those areas where the product will be transformed, it is necessary to attach the cut pieces of foam. The middle of the bumper needs to be taped with masking tape.
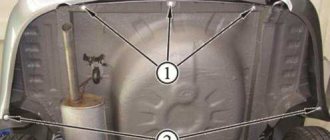
It is necessary to fix thick cardboard on the right and left edges, so that the mounting foam will be concentrated in one place.
When using foam, you need to take into account that when drying, it expands and becomes voluminous. After filling the product with this mounting agent, let the foam dry, and then make the desired shape of the body kit.
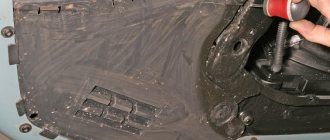
To work you will need a knife and sandpaper. The body kit should then be properly treated with fiberglass and epoxy resin. After applying the putty, the layer is re-treated with sandpaper.
The final step will be priming and painting the finished product.
The hardest thing is to make the body kit yourself. Let's take a closer look at the bumper manufacturing process.
Foam bumper
Based on the experience of specialists, the easiest way to process polystyrene foam.
Compared to it, polyurethane foam requires more effort to work with. First, draw the product on a piece of paper, or look for a ready-made sketch on the Internet. Based on the external data of the drawing, it will become much easier to complete the task.
Nail 6-8 sheets of foam together using liquid nails. Mark with a felt-tip pen according to the existing drawing. Cut off any excess foam with a knife.
The completed product should be covered with putty, making several layers. Afterwards the product is processed with sandpaper.
The next layer is the application of resin and fiberglass. When all the layers are dry, you can start priming and applying paint to the bumper.
Despite the fragility of foam, the material has excellent shock-absorbing properties. Thanks to this, the bumper will serve you for a long period of time. At the same time, its technical characteristics will be at the highest level.
Installation methods
Installation can be done in one of 2 ways.
The first option involves the use of self-tapping screws that will hold the protective strip on the surface of the bumper. In the second case, double-sided tape is used.
If you have chosen a fairly heavy design, then it is better to use fasteners and securely fix the product to the machine. But in general, the pads weigh little, which is why motorists prefer to use adhesive tape.
Foam bumper
You can make a homemade bumper using polyurethane foam in the same way as using polystyrene foam.
First of all, a box is made. It will serve as a frame that holds the polyurethane foam sealant. Remember, foam has the ability to expand in volume after drying. After the installation material has completely dried, start marking the bumper. Now you can cut out the product.
When preparing the model, do not forget about the fasteners; they will be identical on the bumper and the car.
Next, the bumper is processed with sandpaper, as well as the use of resin and fiberglass. Finally, the bumper is primed and painted in the desired color.
Final processing
The edges of the workpiece are processed. Be careful not to get any fiberglass chips or dust on your skin or inhalation. If you modified the “original” bumper, then secure the workpiece to it with glue, screws, bolts, self-tapping screws, and additional fragments of fiberglass overlapped onto the base.
After fitting on the car and mechanical adjustment, you can proceed to standard cosmetic operations: puttying, sanding, priming, selecting paint in the desired color, painting with intermediate drying, applying a protective layer of varnish, final polishing.
Making your own bumper, although it requires experience and time, is quite possible. This is a good way to spend time in the garage, increase your self-esteem, and give your car an original look.
Features of bumper tuning
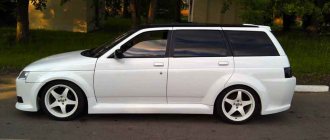
All cars undergo changes in surface form, and the VAZ is no exception. For example, the 2105 and 2107 series are distinguished by some characteristic tuning features, while the more modern 2108 and 2109 are distinguished by others.
Tuning the bumper of the VAZ 2107 and other classic models is done in the same way with your own hands. The work consists of purchasing and installing a converted body kit. Also, trims and fog lights are installed on the hood. The bumper on the VAZ 2106 is modified in the same way.
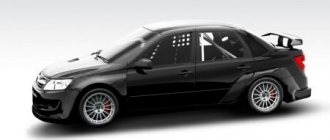
Tuning the current VAZ 2108-99 consists of replacing the bumpers from the VAZ 2114 model. The disadvantage of this approach is the non-matching of the mounting zones and the incorrect alignment of the body and body kit of the car.Car enthusiasts can do the dismantling of the body kit themselves. In this case, you will need to remove the body element along with the bracket fastenings.
Seat belt protectors
Let's start with a description of the material. They are mainly made from soft fleece (for children's models) or wear-resistant polyester. Some options may also have a pocket, which is very convenient. In it you can transport your phone, player or other gadget. Most children's models also provide a special mount for blankets, toys, and even sunglasses. There are special protective pads on sale. They are slightly larger and softer than standard ones due to the mini-pillow inside and allow the passenger to take a nap by resting his head on it during a long journey.
Children's model of seat belt overlay
It is very easy to attach such an accessory; even a child can cope with this task. The seat belt pads are secured using Velcro. They are easy to care for and to remove dirt, simply wash the accessory in the washing machine. But just choose gentle modes. The cost of overlays ranges from a couple of dollars to several tens of dollars. Of course, preference should be given only to high-quality things that will not be cheap.
Changing the external data of the gazelle bumper
It will not be superfluous to know how to make tuning of a gazelle bumper with your own hands. The easiest way is to manually replace the old bumper with a new model.
Replacing the bumper may be necessary in the following situations:
- for better air entry into the radiator cooling system;
- if necessary, add fog lights to the front of the car;
- to make changes to the aerodynamic resistance of the machine;
- change in appearance.
The price of a bumper made of good plastic varies between 2-5 thousand rubles. The bumper can be chosen without painting, or in an identical color to the body.
Initially, Gazelle car owners get a new body kit. In this case, the front bumper is installed independently.
The product consists of plastic and also has holes for fog lights. In auto stores you could purchase a bumper that fits the original mounts. And installing it yourself won’t take much effort.
In this case, you will need to disconnect the fasteners on both sides, remove the existing bumper and replace it with a new one. The video shows the process of tuning a bumper with your own hands.You can choose a shade of the product that is similar to the body color.
It will not be difficult for the car owner to install plastic linings on the body part. At the same time, the car can be transformed by placing decorative plastic thresholds.
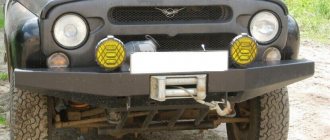
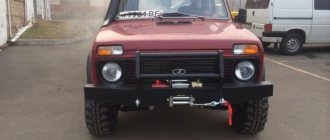
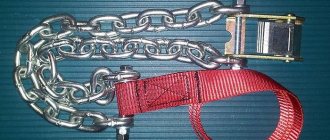
To decorate the Gazelle, as well as its ability to easily move off-road, car enthusiasts can place protective metal arches on the sides of the bumper.
So, any vehicle is subject to wear and tear over time. However, the car can be tuned at your discretion. Thus, car enthusiasts will be able to maintain the appearance of the car at the highest level.
Advantages and disadvantages
The main advantage for any buffer that needs to be repaired is the possibility of thermal or other instrumental processing of the material.
Plastic bumpers have a low price. Silicone models are ergonomic, they have less rigidity and are easy to repair. Plastic with a high degree of rigidity can crack, its repair is more difficult and expensive. Therefore, it is better to choose silicone material than plastic.
Metal power buffers are reliable. Basically, such parts are installed on SUVs or by extreme driving enthusiasts. However, bulky body kits are not popular and are unreasonably heavy to install on a passenger car.